The Reinebringen Hike in Norway: Complete Guide to the Best Hike in the Lofoten Islands
Are you looking for the most iconic views in the Lofoten Islands? Then you’ll definitely want to put the Reinebringen hike in Norway on the top of your list! In this guide, learn everything you need to know to hike to Reinebringen on the Lofoten Islands, including how to get there and where to park, what the trail is like and how hard it is, and get all our best tips so that you can get those postcard-worthy views from the summit!

You’ve likely seen the iconic view of the Lofoten Islands, the one taken from the top of Reinebringen. It’s a view that’s attracted tons of people to these small islands sitting above the Arctic Circle, and one that certainly put the Lofoten Islands on my radar when I first saw it a long time ago.
Reinebringen is a summit that sits just above the small fishing town of Reine on the Lofoten Islands in Norway, and the climb to the top has become sort of a rite of passage for those traveling through. The views from the top of Reinebringen are postcard-worthy and truly unique, and yes- they are much better in real life than in all the pictures you may have seen!
The good news is that the hike to Reinebringen is pretty short and quick, and it’s very accessible from the nearby town of Reine, however, this plus the stunning views from the top means it is an insanely popular trail, and you won’t find yourself alone by any means on the way up or at the summit. On top of that, the Reinebringen “hike” is really more like a giant staircase rather than a true hiking trail. With all that said, you might be wondering, is the hike to Reinebringen really worth it?
Our quick answer here is yes! The views from the top are stunning and it’s such a short hike that it’s pretty easy to squeeze into any Lofoten Islands itinerary. While you shouldn’t miss out on other Lofoten Islands hikes such as Ryten and Munken, the Reinebringen hike should absolutely still be on your to-do list. We think the views are worth the hype and make up for the semi- lackluster stair climb of a trail to get to the top, but feel free to read through this guide to decide for yourself!
In this Reinebringen guide, we’ll go over everything you need to know to hike to Reinebringen in the Lofoten Islands- where to park, how long and hard the hike is, what to expect on the trail, and more. So, let’s get to it!
In this Reinebringen trail guide:
Where is the Reinebringen Hike?
The famous Reinebringen hike is located on the island of Moskenesoya on the Lofoten Islands in Norway, with the summit towering over the popular fishing town of Reine.

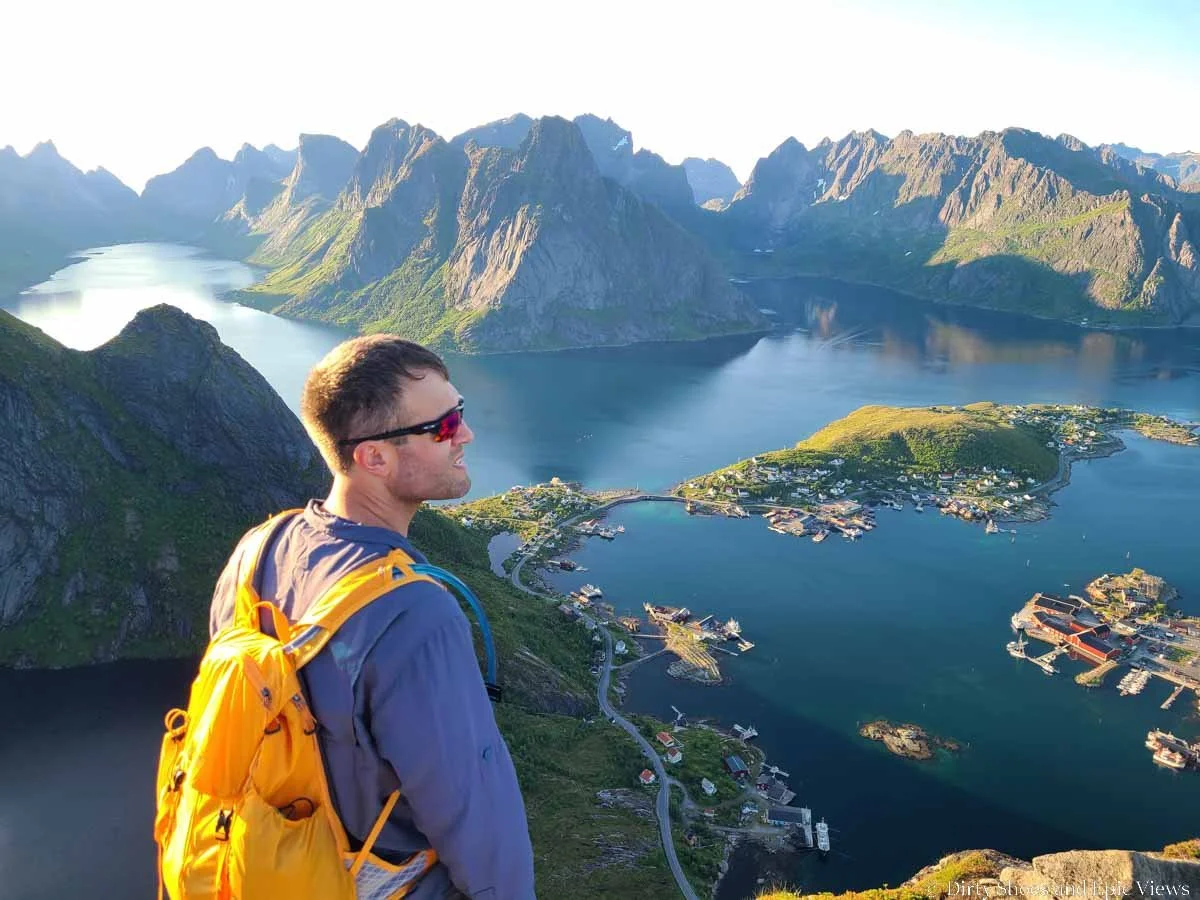
The view of Reine from the top of Reinebringen
The summit of Reinebringen can be seen towering above the ocean from the small connecting nearby towns of Reine, Sakrisoy, and Hamnoy, and if you look closely, you’ll probably see all the little ants along the ridge at the top all throughout the day (and throughout the night in early and mid- summer when there’s 24 hours of daylight!).
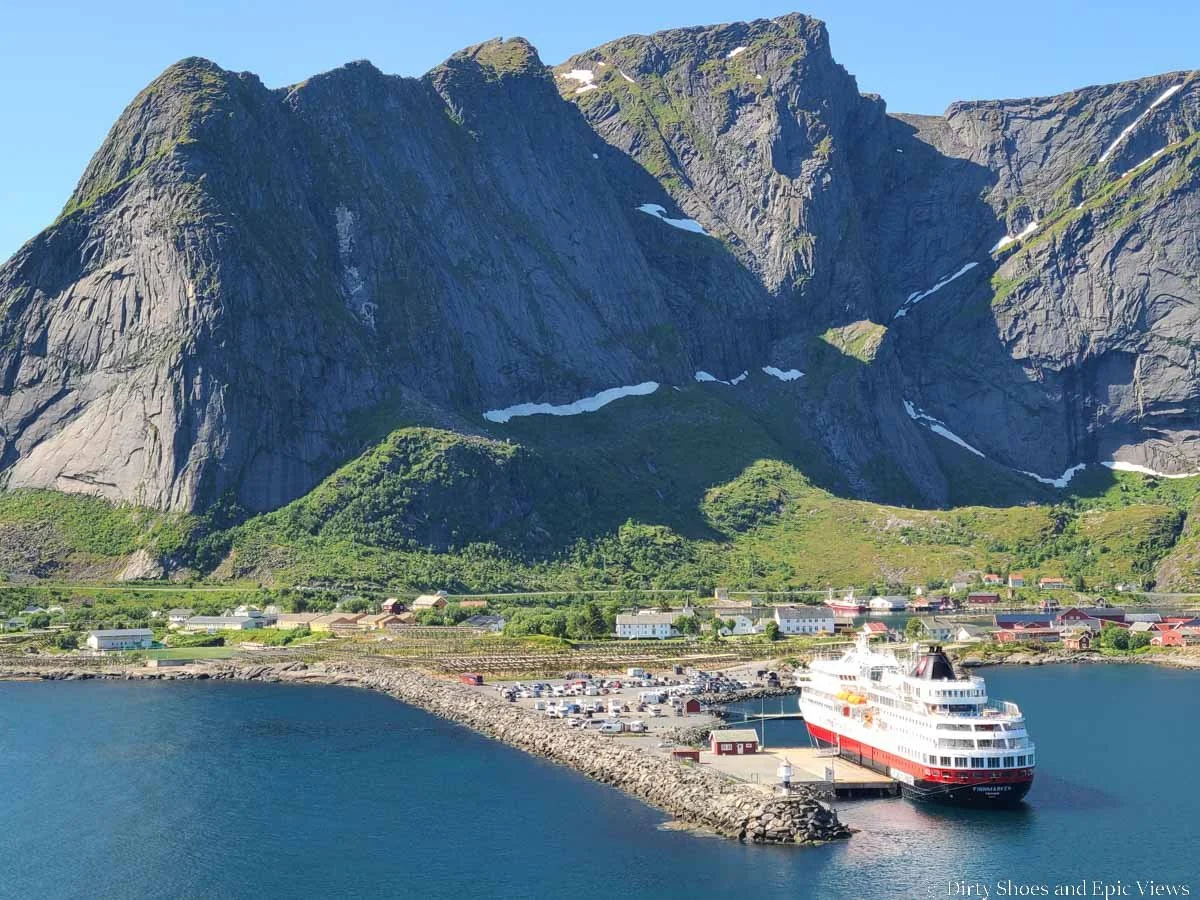
This photo shows the village of Reine, with Reinebringen rising above it in the background. The main summit is the second small peak from the left along the mountain ridge.
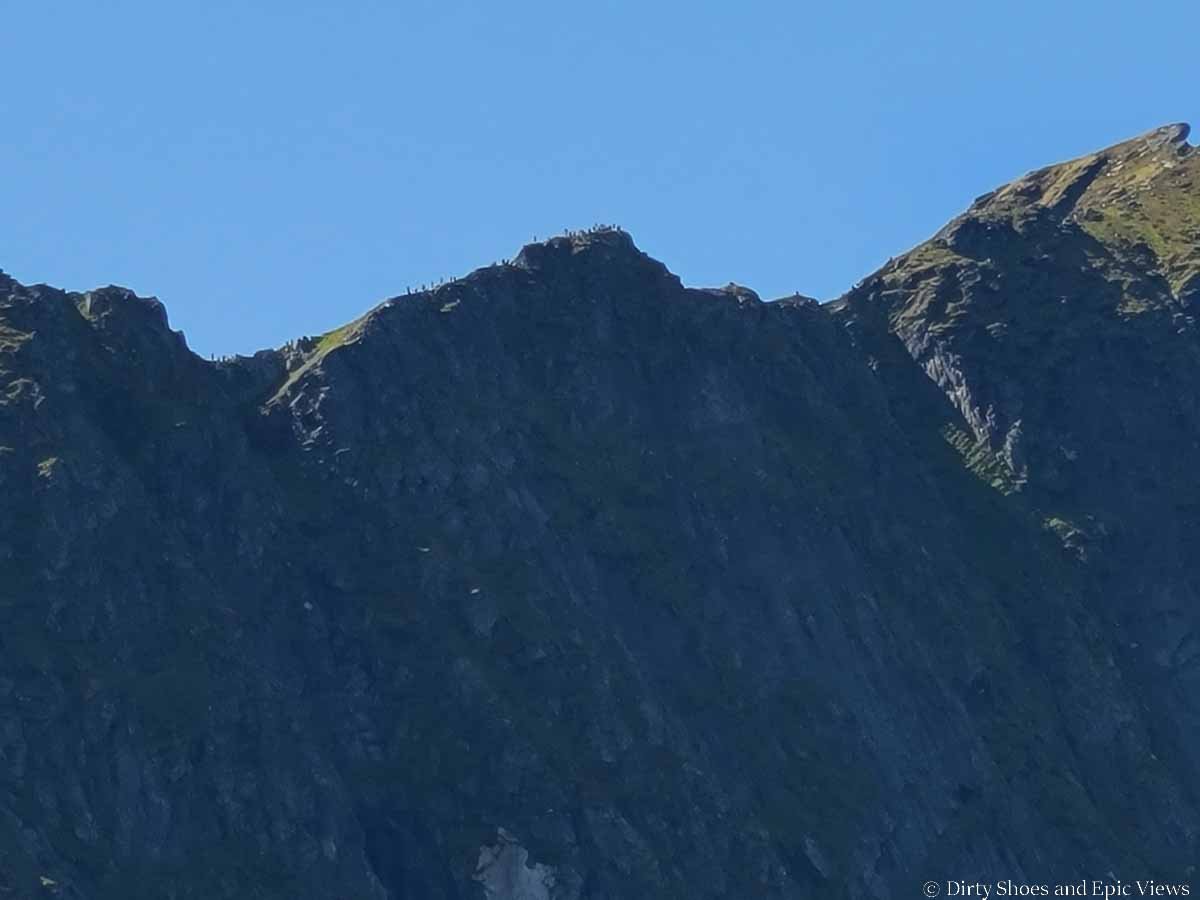
You can see the crowds on top of Reinebringen throughout the day!
The Reinebringen hike starts right off the E10 (the main road running through the Lofoten Islands) just south of Reine, at this trailhead on Google Maps.
Where to park for the Reinebringen hike
Since the Reinebringen hike starts right along a main route with no parking lot in sight, you might be wondering where you park to hike to Reinebringen. And that is indeed a great question!
It is actually illegal to park along this main highway and along any of the side streets in the neighboring town of Reine due to all the congestion and chaos that this would cause, so you only have a few options for parking for Reinebringen, and each adds on a bit of an additional (but easy) walk to even just get to the Reinebringen trailhead- so be prepared for that! As you drive along the E10 near Reine, you’ll likely see the constant pilgrimage of people coming to and from the start of the hike from these parking lots.
Hikers heading to the Reinebringen trailhead from distant parking lots
Here are the currently available and closest parking options for the Reinebringen hike from when we last visited (but if you want to see if anything has changed since, be sure to check in with the Reine Cultural Center in town before you plan to hike Reinebringen- they will happy to give you all the info you need about where it’s okay to park).
The Reine Kultursenter: The Reine Cultural Center near Reine’s center has a small parking lot where you can pay to park for up to 24 hours. The fees for a car were as follows:
1 hour for 75 NOK
3 hours for 200 NOK
5 hours for 250 NOK
Up to 24 hours for 450 NOK
For a camper van, prices are slightly higher, at 75 NOK, 230 NOK, and 300 NOK, respectively. If you have an electric car, you can also pay higher prices to have it charging there while you hike.
For the Reinebringen hike, we think 3 hours should be sufficient, though we paid for 5 just to be safe (but we ended up not utilizing all that time we paid for). You can pay inside at the desk with cash or card.

The Reine Visitor Center is a good option to park for the Reinebringen hike
We came through here often at different times of day, and despite the lot being relatively small, there were always at least a few spots available. We liked this lot because you can reach it before getting to the heavily congested downtown area of Reine.
This is also one of the closest lots to the Reinebringen trailhead, at just 1.4 km away (it took us about 15 minutes to walk). You’ll walk up the main road back out to the E10. At this intersection, take some time to admire the views of Reine from a large old pull-off area.

Walking out of Reine back to the E10 to get to the Reinebringen trailhead

You’ll catch these awesome views of Reine on your walk to the Reinebringen trailhead
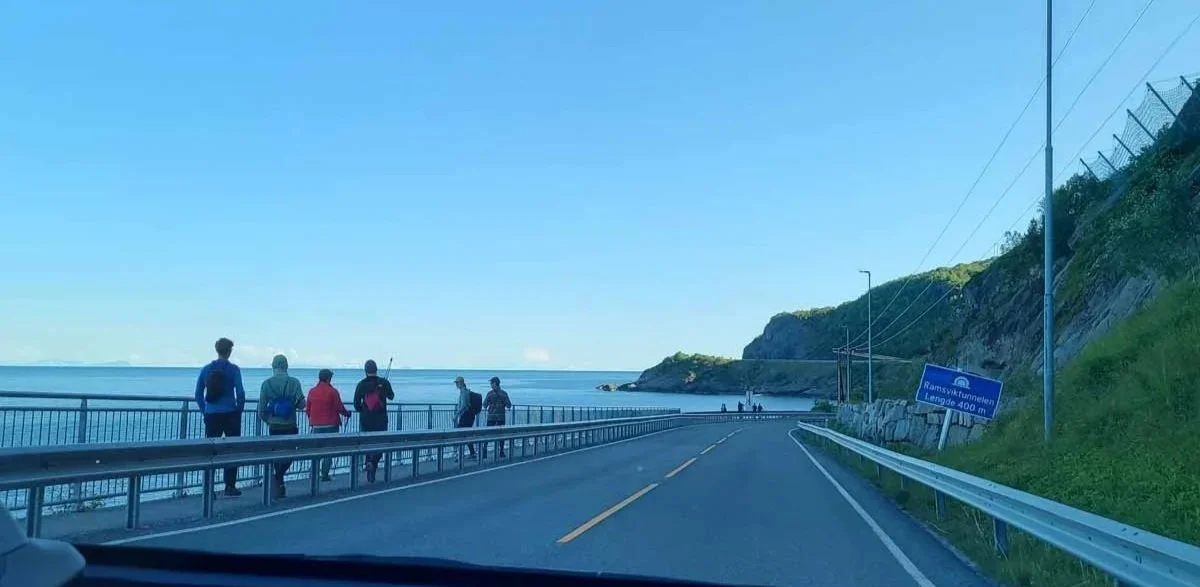
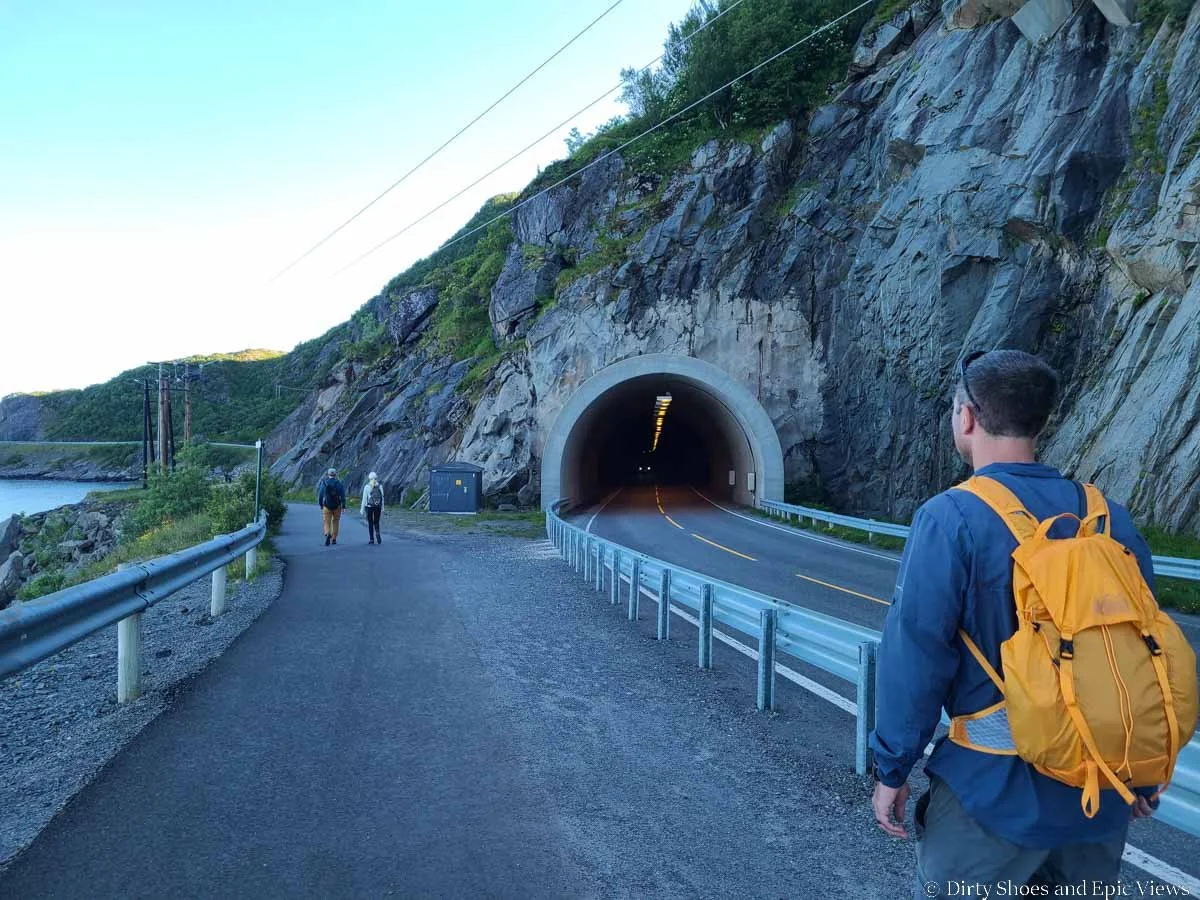
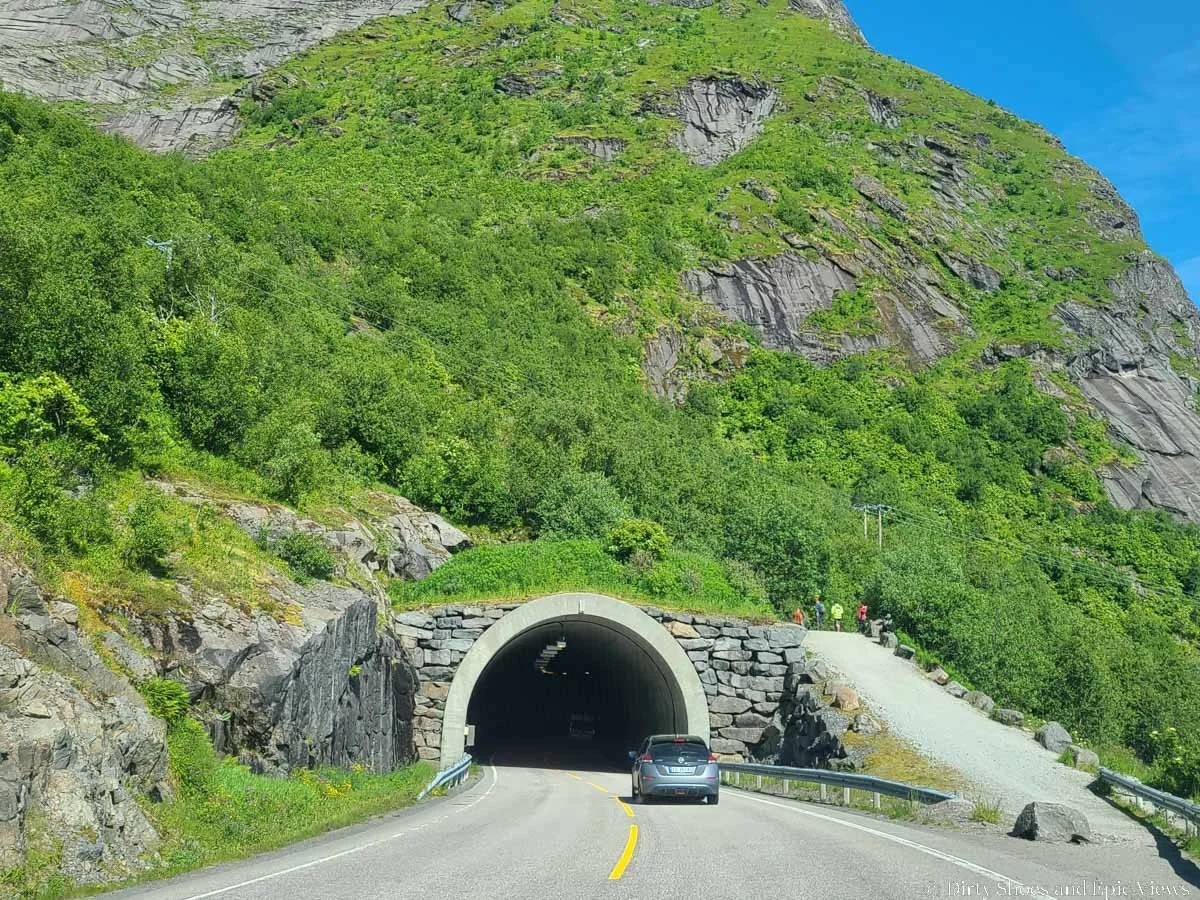
Head left on E10 along the paved pedestrian path that goes around the left side of the Ramsvik Tunnel. Along this path, you’ll find the clearly marked and signed trailhead for the Reinebringen hike and the start of the stairs.
Walking along the E10 to get to the Reinebringen trailhead
You can’t miss the Reinebringen trailhead- look for this sign at the start!
Reine harbor: There is a large parking lot along the harbor in Reine which seems to always have lots of availability. We don’t have experience parking here but it does not get good reviews on Google Maps (at least around the time we visited), primarily for its payment options. It seems to be about 35 NOK per hour, and there are meters that take credit cards, or you can use the Easy Park app (which some say is not reliable), but some people say that rental cars that come with AutoPass tags get automatically charged. We would recommend visiting the Reine Cultural Center’s tourist information desk to double check how to best pay for this lot before heading there.
From here, it’s a 1.9 km walk through Reine and down the E10 to the Reinebringen trailhead.
The Steffenakken parking area: This small pull-off along the E10 provides a free parking area for the Reinebringen hike…if you can score a spot. We drove by this lot so many times, all at different times of day, and it was always jam-packed (except for one time randomly at around 2 pm one day when I think I did see one spot available- but it’s entirely luck and I would not count on parking here at all).
This free lot is found just past the bridge across Djupfjordbrua, and is a 1.3 km walk to the Reinebringen trailhead.

The Steffenakken parking lot for the Reinebringen hike
If walking from the Steffenakken lot, you’ll head up the path to the right of the tunnel on the E10 and the trailhead will be shortly past this
So, no matter where you park for the Reinebringen hike, expect to add on at least an additional 2.6 km (or 1.6 miles) of walking to your hike.
Reinebringen hike map
Here is a map of the Reinebringen hike and the possible parking areas nearby to orient you to the area.

Parking lots for the Reinebringen hike on the Lofoten Islands
How Long is the Reinebringen Hike?
These are our hiking stats for the roundtrip Reinebringen hike, starting from the bottom of the stairs right at the trailhead.
Distance: 2.65 km / 1.65 mi roundtrip
Elevation: 440 m / 1,446 ft
Time: About 2 hours of hiking, plus any time you spend enjoying the views from the top
Reinebringen elevation profile

An out-and-back elevation profile for the Reinebringen hike
Reinebringen hike map

A satellite view of our hike to Reinebringen
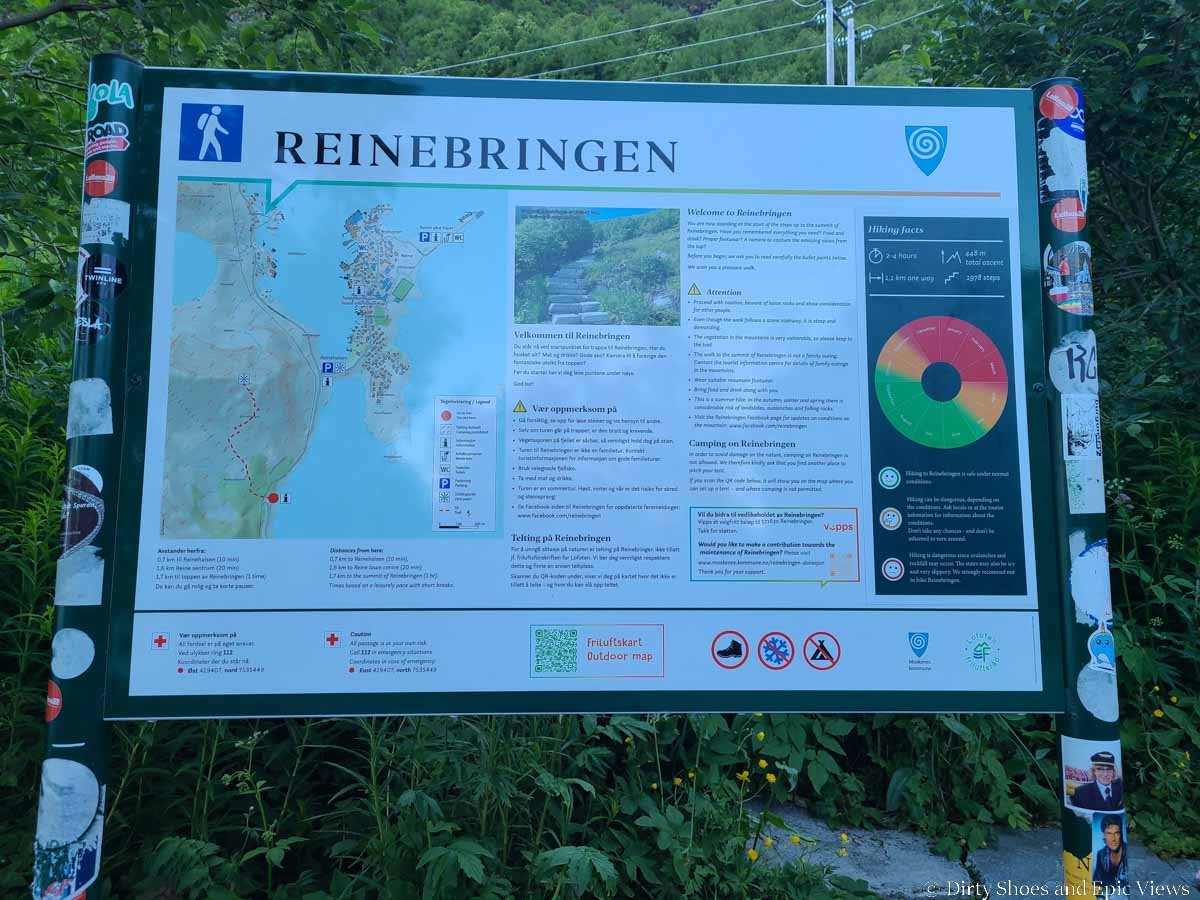
How Hard is the Reinebringen Hike?
The Reinebringen hike is essentially one long staircase- 1,978 stairs to be exact. The stairs were finished in 2021 in order to protect the trail from erosion and rockfall and help make the trail safer. And after climbing these steps up the steep mountainside, I couldn’t imagine what the old eroded dirt trail used to look like! So, even though it’s not your typical hike, and rather more of a stair master workout at the gym, I am really glad they took the effort to build these steps to make it a much safer, straightforward, and more accessible trail.

This is a view of Reinebringen from the E10 highway. If you look closely, you can see the path of the staircase heading steeply up the mountain face.
With that in mind, the Reinebringen hike is relatively straightforward and easy given it’s just walking up stairs, but it’s pretty challenging nonetheless in that it’s quite a cardio workout. It’s steep, climbing right up the side of the mountainside, and can definitely feel exhausting. You’ll likely need to take several breaks on the way to the top.
Often, the steps are pretty wide and actually not too tall. We’re both fairly short and we didn’t have an issue with them. There’s just a lot of them. To hike to Reinebringen, you just have to be physically (and mentally) prepared to walk up a staircase for basically an hour. And then of course, you have to go all the way back down them, which can be a killer on the knees.
The staircase up to Reinebringen on the Lofoten Islands
Once at the top of the stair climb, you’ll be on the summit ridge of Reinebringen. Up here, there’s a narrow and sometimes steep trail that’s a mix of dirt and rock with some serious exposure on either side. There is plenty of room to walk the ridge, though, and lots of safe spots to enjoy the view and take pictures, but obviously you’ll want to use extra caution through here and not get too close to the edges. You can take plenty of amazing pictures without the need for that.

This is looking back down the ridge on top of Reinebringen. To the left is a pretty sheer cliff with lots of exposure.

Standing along the ridge at the top of the Reinebringen hike
If the exposure makes you uncomfortable or scared, you can hang out at the small saddle at the top of the staircase, right at the start of the ridge and where the first views over Reine and the fjords are found. There’s a small flat area here with a stone bench so it’s a little safer and less scary. We’ll go over these different parts of the ridge in our Reinebringen trail description below.
The Reinebringen Hike on the Lofoten Islands: Trail Description and Our Experience
Wondering what it’s like to hike Reinebringen? Here’s our experience!
The trail for Reinebringen starts right from the pedestrian path on the side of the Ramsvik Tunnel on the E10, just south of Reine.
It’s hard to miss, with a bench and large trail sign right at the start…and, the dreaded stairs.
That’s right, the stairs start right from the very beginning, and don’t let up until you’re at the top, so you might want to have your legs warmed up a little bit before starting up.


To be honest, there isn’t too much to say about the Reinebringen hike, other than it’s just a solid staircase up with really no breaks. The stair climb starts off steeply at first and then gets a bit more gradual with longer steps as it heads closer towards the mountain, but then once it starts the actual climb up to the summit, the stairs stay consistently steep as they wind and switchback their way up. The steps themselves are never really high (and this is coming from a short person!), so they were certainly manageable…there’s just a lot of them!

Climbing the never-ending stairs to Reinebringen!
To survive the climb, I just kept doing small bursts of climbing with quick microbreaks in between. If you need them, there are occasional rock benches alongside the staircase as you ascend that make good resting points where you can admire the ocean views.

Scenic stone benchs are found periodically along the Reinebringen hike
We hiked to Reinebringen in the evening, and even at this time (around 8 pm), there was still a surprising number of people on the Reinebringen hike, but for us, it didn’t take away from the experience. We went in knowing that this would be a crowded trail and considered it more of a pilgrimage to a well-known tourist viewpoint rather than a true hike, and that mindset certainly helped. Even so, it wasn’t like it was a train to the summit, and everyone actually kind of spaced out well. We never experienced any waiting or bottlenecks. The stairs are wide enough that people can easily pass eachother when needed, and if you need a rest, it’s easy to just step over to the side and give others plenty of room to continue past you.
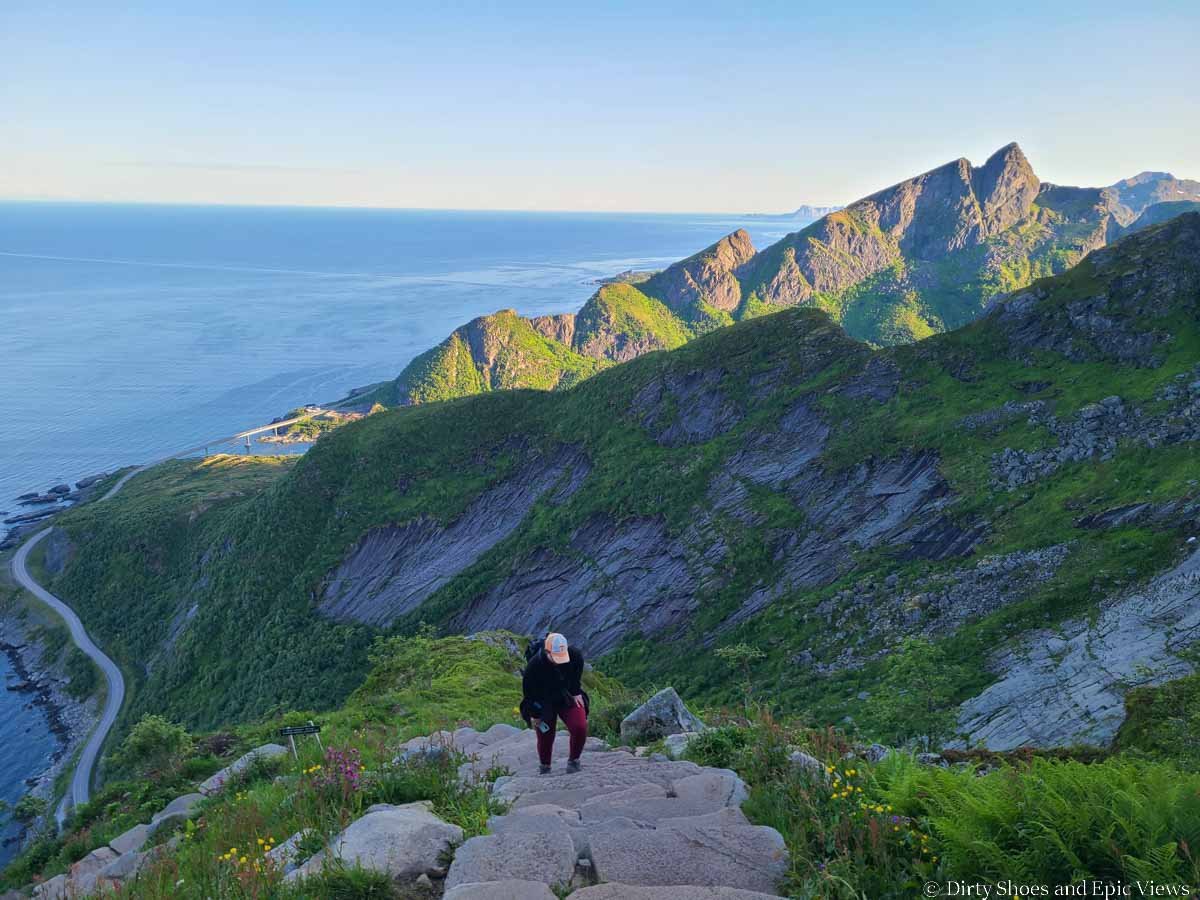
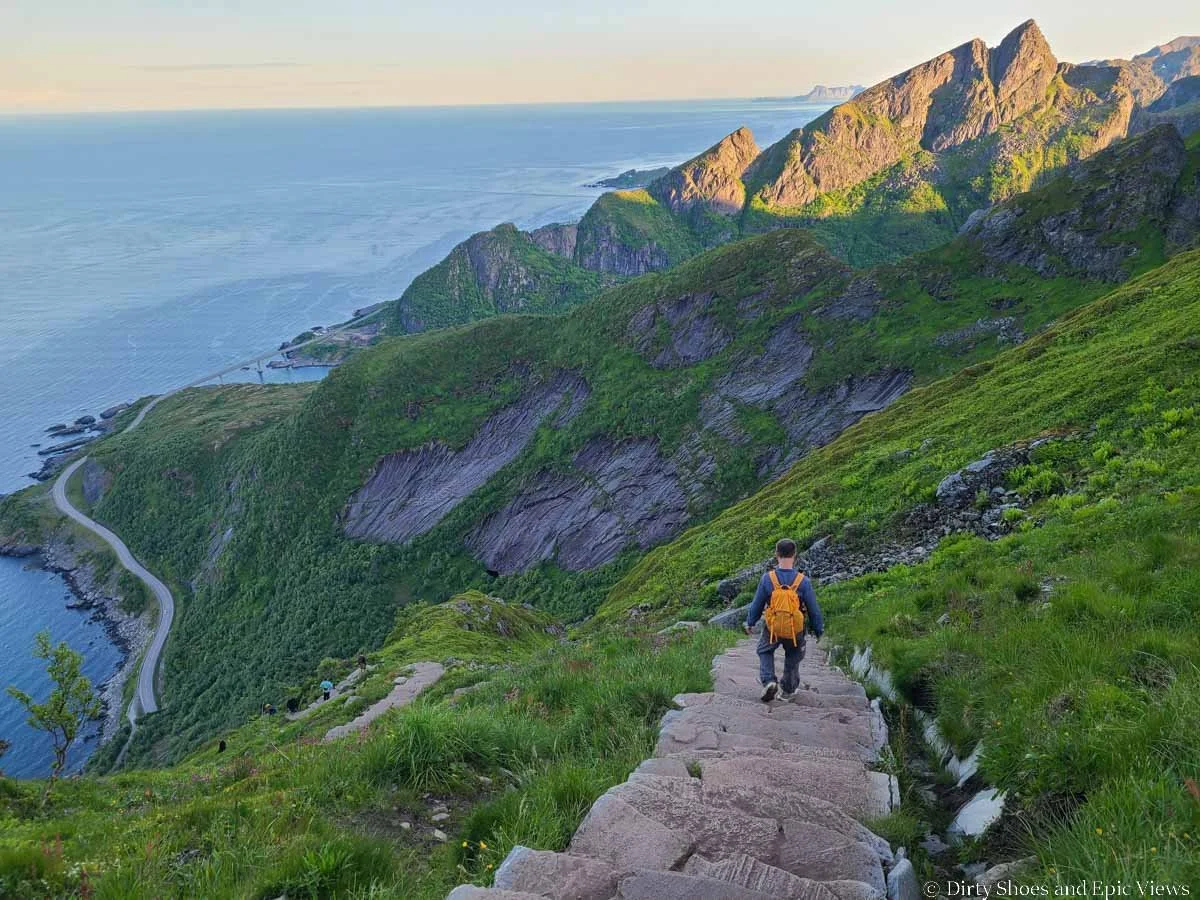
As you climb higher and higher, the views do open up behind you. They are nothing like what you’ll see at the top, but they are nice views looking over the coastal mountains, the ocean, and the E10 now far below. It’s also cool to look back down the staircase itself and see how it winds its way up the mountainside in a rather photogenic way.


Views from near the top of the Reinebringen hike
One thing that I do like about the Reinebringen hike is that you don’t actually see that famous view over Reine and the fjords until you reach the top. It’s kind of like the motivating grand finale of the hike, and it makes the staircase climb that much more worth it. There’s no point along the hike where you can go, “Ok, well, I kind of see the view already, let’s just turn around here”. Nope- it forces you to get all the way to the top!
And trust us, when you get there, the view is jaw-dropping.
For us, the top came faster than we were expecting, after roughly an hour of climbing.
First, the stairs bring you to a wide flat area with a nice stone bench and the first look at the famous view. You’ll see the towns of Reine, Sakrisoy, and Hamnoy stretched out across the water, and the dramatic Lofoten mountains rising up from Reinefjorden. It’s exactly like what you see in the pictures, but better.

This is the small flat saddle where you’ll see your first epic views over Reine and the fjords

The view from Reinebringen over Reine, Sakrisoy, Hamnoy, and the fjords!
If you’re uncomfortable with exposure and the ridge looks iffy to you, then you can simply stop here and enjoy the view before heading back down. We will say that from here, you can’t see the view of Reinevatnet, the small deep blue lake that sits in a basin above Reine and the E10. This lake was one of my favorite things about the view from Reinebringen, but it’s a small part of the view so if it doesn’t matter to you, then the view from this small saddle is totally sufficient.
From this saddle, a small rocky peak sits to the right. I believe people used to climb to the top of this peak, and we could still see herd paths along the top of it, but it requires some sketchy- looking scrambling to get up there. When we were on Reinebringen, there was a sign warning people not to continue up there, and we didn’t see the need to anyway.
Instead, we continued left up the ridge on Reinebringen. From the saddle, the stairs continue just a little bit more up this ridge until they meld into a steep path of dirt and rock that continues up. It can get a little rugged through here with rock and mud.

The stone stairs continue up from the small saddle along the ridge on Reinebringen

The ridge on Reinebringen gets pretty rugged near the top

We had to do a touch of scrambling to get back down the ridge
Along this path, there is a gentler grassy slope to the left and a rocky cliffside to the right, so there’s certainly some exposure, but for us we felt the ridge was wide enough to feel comfortable, and there were several flatter safe areas to sit and enjoy the view from, we were just sure to stay back from the edge.

This is just to give you an idea of the exposure along the ridge on Reinebringen

This is looking back down the ridge. Below, you can see the small saddle at the start of the ridge where the first views begin.
A large pole marked the true summit of the Reinebringen hike, and this is where most people were congregated, but even though it’s a ridge, there was still quite a bit of space to spread out and find your own little spot (it might be more crowded midday than what we experienced in the late evening, though).

Looking up at the summit of Reinebringen (where the pole is)
It seems that you might be able to continue past this summit, but it looked like it got to be more of a scramble and just not necessary…the views from this first part of the ridge are perfect!
We spent about an hour at the top of Reinebringen enjoying the picture-perfect views of Reine, Reinefjorden, and the dramatic sea of peaks, and we could now see the view of Reinevatnet, too, sitting in a basin below. On a clear day like we had, you can also see out to the peaks on the mainland sitting on the distant horizon.
Enjoying the epic views from Reinebringen!

Yup- this was definitely worth the hike!

Looking down over the small villages of Reine, Hamnoy, and Sakrisoy
We were up here between about 9 and 10 pm at night. At this time, there was a nice evening glow across the landscape which we really liked, though the sun was directly in view, making it kind of hard to take pictures. So just keep that in mind if you decide to hike up here at night to see the midnight sun- it will likely be right in the view…super pretty, just harsher lighting!
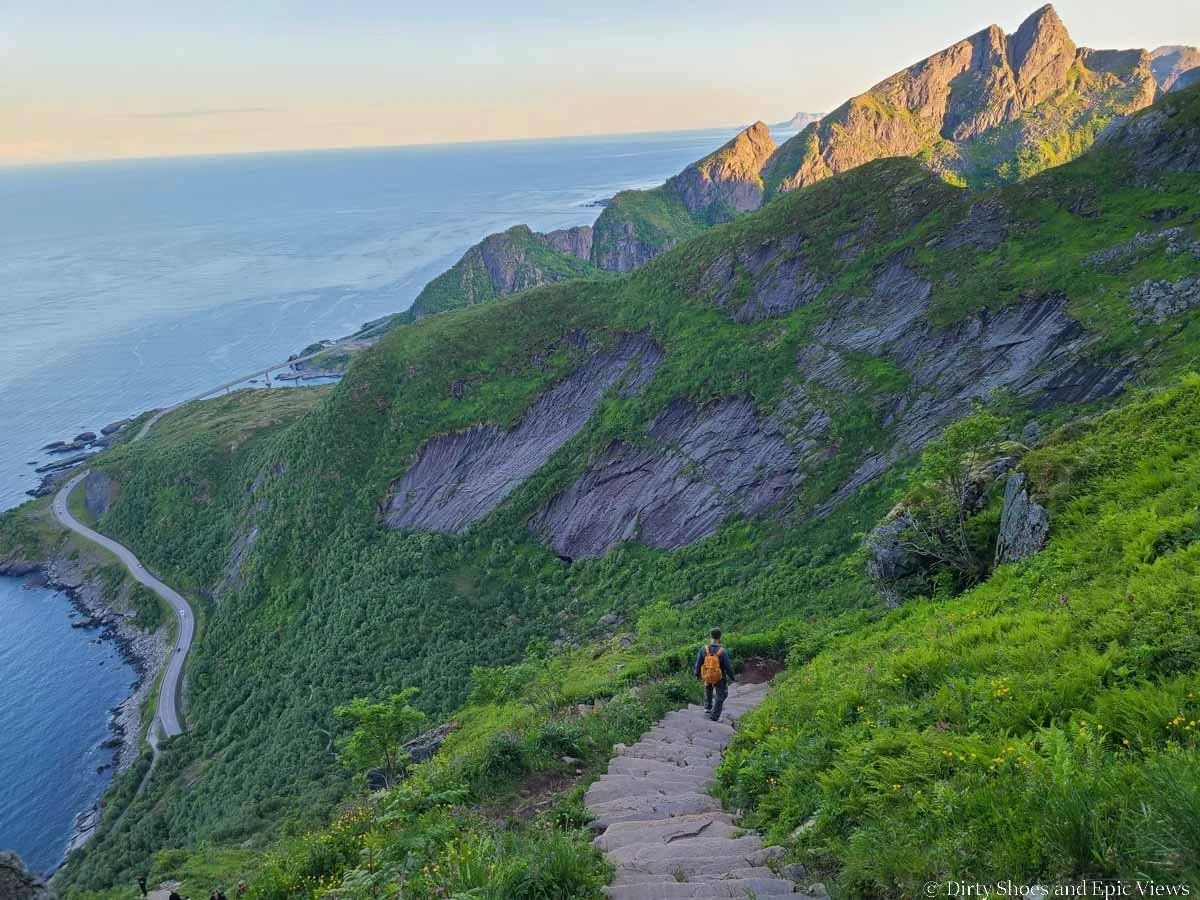
The hike down from Reinebringen was super fast. It’s just as steep down as it was going up, so it can be hard on the knees. We luckily don’t have issues (yet!) with our knees so we were really able to huff it down pretty fast and just let our momentum carry us through. The desire to just be off the stairs as quickly as possible was my main motivation! We were able to get down in just over a half hour. But we did see quite a few people taking it slow and struggling a bit, understandably, as it’s a steep descent, so just take your time and go at your own pace.

Hiking down from Reinebringen
Is the Reinebringen Hike Worth It?
We think so! The views from Reinebringen are awesome, and it’s a short (albeit exhausting) hike that’s easy to sneak into any Lofoten Islands itinerary. It can be crowded, but this is one of those views that’s worth braving the crowds for.

Trust us- the view from Reinebringen is even better in person!
Best Time to Hike Reinebringen
The best time to hike Reinebringen is between May through September. If you want to hike it in more of the shoulder months of that timeframe (May to mid-June and September), be sure to check recent trail conditions (we like using recent reviews on AllTrails for this, as well as the Reinebringen facebook page) to make sure there is no snow or other obstacles on the trail.
Mid- June through August are great times to hike Reinebringen, with warmer temperatures, stable weather, and long days. So, it will be crowded. We hiked Reinebringen in early July and had perfect weather (in fact, the entire summer had a really beautiful forecast), but still come to Lofoten Islands prepared for any kind of weather (bring rain gear and layers).
Late May through mid-July in particular is when you can see the midnight sun, and Reinebringen is a popular hike for viewing it, so you will see people on this hike during all hours of the day and night.
Hiking Reinebringen in winter is pretty much a no-go, as it becomes too dangerous with its steepeness, exposure, and avalanche potential.
A late evening Reinebringen hike in July
As far as the time of day, the Reinebringen hike is usually most crowded from mid-morning to late afternoon (typical for most hikes). If you come during the midnight sun, though, all bets are off and there will be people hiking this trail at all times of the day (and night!). We hiked Reinebringen in the evening (from about 8 to 11 pm), in part to try and hopefully avoid some of the crowds, and there was still a surprising number of people on the trail, many of them out to view the midnight sun from the top. I do think there were definitely less people in the evening than there were during midday crowds (especially because there was a cruise ship docked in Reine the next day!), but there were still a lot of people, so no matter what, expect the crowds to be making the trek with you.
To avoid crowds on Reinebringen, the best time to hike is probably in the very early morning hours, after the midnight sun crowds have left but before the midday crowds start to appear.
Another thing to keep in mind when deciding when to hike Reinebringen is the position of the sun. In the evening and midnight hours, the sun will be coming right into the main view as you are looking out from the summit. So taking pictures during the late evening and midnight sun hours might be hard and the lighting might be harsher. But we did really love the soft evening glow across the landscape at this time.
Honestly, though, no matter when you hike Reinebringen, as long as it’s a clear day, the views will be stunning.
Where to Stay Near Reinebringen
The closest place to stay near Reinebringen is right in the town of Reine. This is ideal so that you can simply walk from your accommodation to the trailhead without worrying about finding and paying for parking, however, accommodation here is pricey.
Other nearby towns include Sakrisoy, Hamnoy, Sorvagen, and A. These are all within a 10 to 15 minute drive from the town of Reine where you can then find parking for the Reinebringen hike.
You can stay in other towns further down the Lofoten Islands- it really just depends on how much driving you want to do and where else you plan to visit on your Lofoten Islands itinerary. We preferred to stay closer in case we had to work around weather and make quick decisions about when to hike.
A note on camping on the Lofoten Islands
Lots of people love camping in Norway because of the freedom to move around, be flexible, spend more time in nature, and wake up to stunning Norwegian scenery. Camping is also pretty convenient in Norway because they follow a principle called Allemannsretten, or the Right to Roam, meaning that in general, hiking and camping is allowed in most undeveloped places, not just in designated and paid areas. But with increased tourism and use in the country, limits and restrictions have understandably come into play- these are much needed to protect the landscape as well as cultivated land and local’s property.
Check out this website for more information about the do’s and don’ts of where to camp on the Lofoten Islands, proper camping etiquette, and to find more information on designated campsites (which are recommended over wild camping at road pull-offs and one-off spots to help protect the area). If you do choose to wild camp, please be sure to not set up within 150 meters of any building or cultivated land, respect any signs, and please leave no trace! Following these rules will help keep camping and the Right to Roam accessible to everyone in the future.
Can you camp near Reinebringen?
While it used to be allowed, camping on Reinebringen is no longer allowed and it does not fall under the jurisdiction of the Right to Roam principles.
Tips for Hiking Reinebringen on the Lofoten Islands

Here are some of our final tips for the Reinebringen hike on the Lofoten Islands.
Check the forecast- Don’t hike Reinebringen in bad, rainy weather or in overly wet conditions. If it has rained a lot in the past, use extra caution on the ridge at the top and don’t take chances exploring the ridge too much, as it can be slippery and dangerous. We thought YR had the most reliable forecast for the Lofoten Islands.
Wear good walking or hiking shoes- While you don’t necessarily need hiking shoes/boots for the Reinebringen hike, you do at least need a good pair of walking or running shoes, and some with good tread if planning on exploring the ridge at the top, which can get steep and rugged.
Bring layers- Expect any kind of weather in the Lofoten Islands. It can get cool and windy on the ridge at the top of Reinebringen.
Lighting- The midnight sun is super cool to capture from Reinebringen, but just know that during the evening, the sun will be in your face when looking over Reinefjorden, making it trickier to take pictures.
Bug spray and sun protection- The bugs were pretty vicious at the bottom of the Reinebringen hike and made tacking the never-ending stairs that much more annoying! Bug spray would probably help. And for most of the hike, you’ll be totally exposed to the sun, so make sure to have sunscreen at the very least.
More Lofoten Islands Guides
Are you looking for more things to do on the Lofoten Islands after your hike to Reinebringen? Be sure to check out all our other Lofoten Islands guides for some inspiration!
The Complete Guide to the Lofoten Islands: How to Visit and Things to Do!
The Ryten Hike on the Lofoten Islands: Complete Guide and Tips
How to Hike to Munkebu Hut and Munken on the Lofoten Islands
Are you also planning a trip to the southern fjords of Norway? We have lots of tips and guides on that, too!
Are you planning to hike to Reinebringen on the Lofoten Islands? Let us know if you have any questions in the comments below, and let us know what you thought of the hike when you come back!