How to Hike to Trolltunga: Norway’s Most Famous Hike
The hike to Trolltunga is one of Norway’s best and most popular hikes, and for good reason- the views from the trail are breathtaking, and getting to stand on the famous rocky outcropping at the end of hike is exhilarating. Despite its popularity, though, the Trolltunga hike is not to be underestimated. In this guide, we’ll share everything you need to know to hike to Trolltunga- how to get there, where to park, costs, the best time to hike to Trolltunga, what to expect on the trail, how to avoid the crowds on Trolltunga, and more!
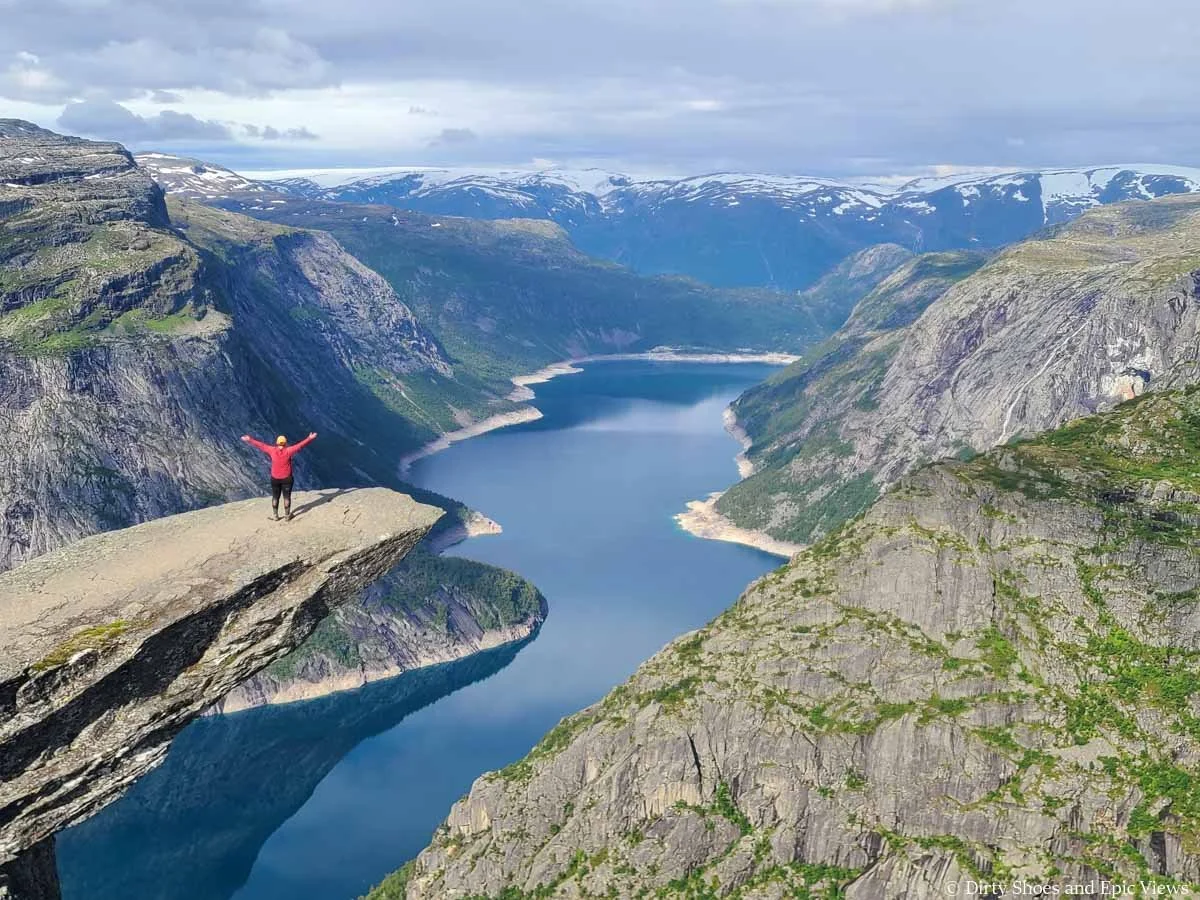
If you’re planning a trip to Norway, chances are you’ve seen the famous picture of hikers posing on a narrow rocky outcrop thousands of feet above a scenic blue lake. This famous rock is known as Trolltunga, or the Troll’s Tongue, and it’s one of the most popular (and best!) hikes in Norway!
Found in the southern fjords of Norway, the hike to Trolltunga draws tons of hikers every year who are looking to get that picture-perfect view over Lake Ringedalsvatnet and the surrounding peaks. It’s so popular that during peak times people can be found waiting up to an hour or more in line just to get that famous photo-op!
We had been drawn to that famous view from the Trolltunga hike for a while before finally planning a trip to Norway, but we’re always a bit wary of super crowded and overly popular hikes. But we can honestly say that the Trolltunga hike is absolutely worth the hype. The view of Trolltunga is so much better in person than in any pictures you might see of it. And even though it’s what makes the hike famous, Trolltunga isn’t the only good view of the hike- the entire Trolltunga trail is packed with beautiful views from start to finish. We were so glad we made time for this hike during our Norway itinerary despite the crowds.
Although it’s a popular and well-traveled trail, the Trolltunga hike shouldn’t be underestimated. It’s quite long with some big climbs, and you’ll need to be well-prepared for a full day of hiking, and come with the proper gear for any sudden weather changes. On top of that, the logistics for the Trolltunga hike can be a bit confusing (there are three different parking lots and potential starting points!), so this is one hike you definitely need to start planning for well in advance.
But that’s where we come in! We’re here to help make planning for your hike to Trolltunga stress-free and easy-peasy. In this guide, we’ll cover everything you need to know about hiking to Trolltunga in Norway, including how to get there, the different trailheads and parking lots for the Trolltunga hike, costs, the best time to hike to Trolltunga, what to bring, and what to expect on the trail, plus- our best tips on how to avoid the crowds!
Ready to hike the best trail in Norway?
Let’s get to it!
In this Trolltunga guide:
Where is Trolltunga?
The Trolltunga hike is found in Norway’s famous southern fjords, sitting about 20 minutes outside the town of Odda along a branch of Hardangerfjord.
Odda is the closest major town to the Trolltunga hike and we recommend that you use this as a base for your hike. Odda is about 2.5 hours from the popular town of Bergen along the west coast, and about 5 hours from Oslo.
We landed in Oslo in the morning, picked up a rental car, and drove directly to Odda that same day. It’s a long drive, but it didn’t feel too long since the drive is so scenic once you get away from the city limits.
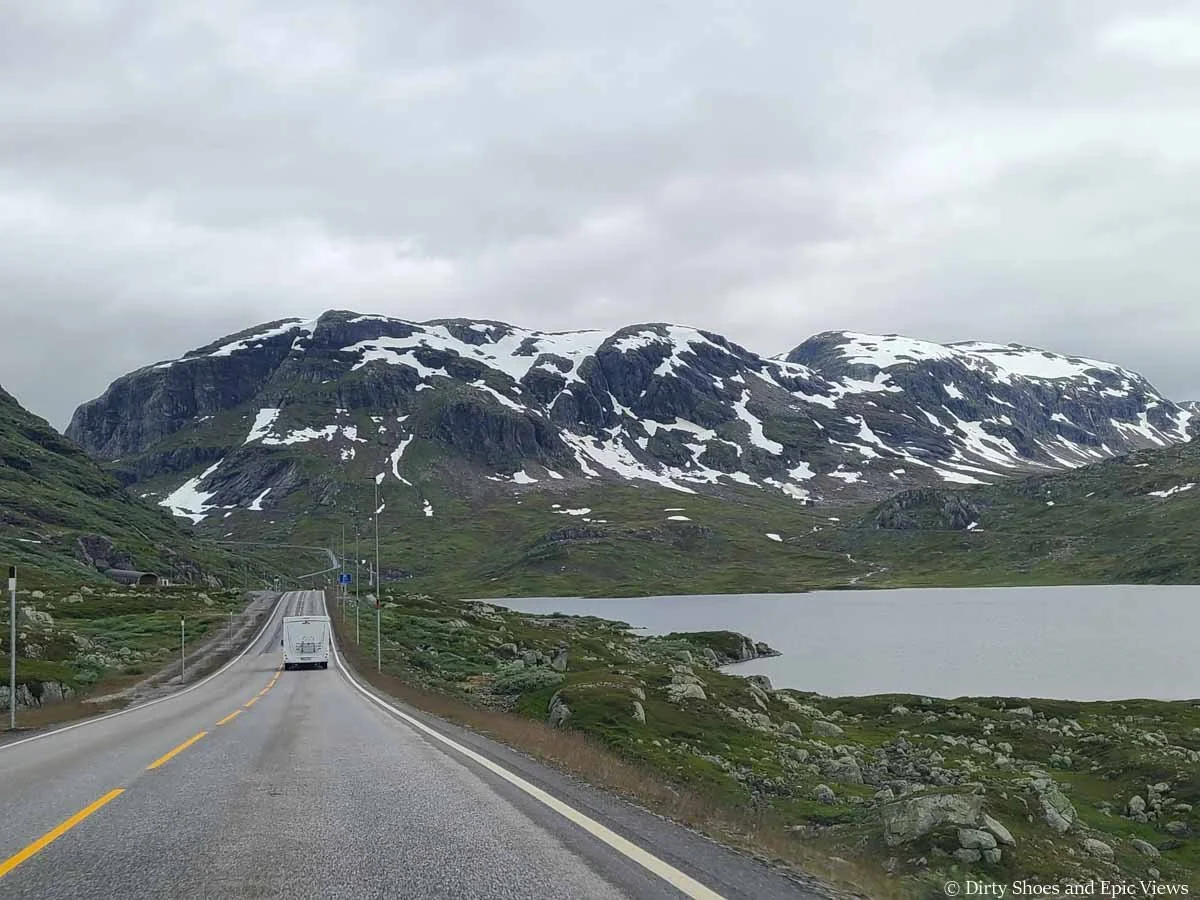
The scenery between Oslo and Odda
Trolltunga Trailhead and Parking
The trailhead and parking situation is what makes the logistics of the Trolltunga hike seem a bit complicated, but we promise it’s not too bad! We’ll break it down for you here…
Essentially, there are three parking lots for the Trolltunga hike (and therefore three potential starting points for your hike): P1, P2, and P3. Each of these are found successively higher up the mountain road to the Trolltunga trailhead, and each allows for a successively shorter hike to Trolltunga.
The start of the official trail to Trolltunga starts just near the P3 parking lot at the top of the road, so if you start here, your hike will be the shortest possible. However, this lot is very small and hard to secure a spot in, so odds are you won’t be parking here.
Parking at either P2 or P1 means a longer hike to get to Trolltunga. But the good news? There are shuttles that you can pay for that bring you up to the Trolltunga trailhead near P3.
Let’s get into all the details now for each Trolltunga parking lot…
P1 (Tyssedal) parking lot for Trolltunga
This parking lot is the first you’ll encounter, with 227 spaces. It’s found in the small village of Tyssedal, about 10 minutes outside of downtown Odda (off of route 13) at the start of the mountain road that leads to the official Trolltunga trailhead.
Though it’s large and the closest lot to Odda, we wouldn’t recommend parking here unless you have to. It doesn’t make sense to start the hike to Trolltunga from here since it’s still so far away, so we suggest using this lot primarily as an overflow lot for when the other two lots are full. Then, you can take a shuttle up to P2 and beyond from here.
P1 parking cost
It costs 300 NOK to park for the day in P1 (this expires at midnight). You don’t have to reserve a parking spot here- it’s first- come first- served. You can pay with cash or a credit card at the parking machine in the lot (and then display your receipt on your dash before you head further up the road by hiking or by shuttle bus).
The hike from P1 to Trolltunga
Hiking to Trolltunga from P1 is not recommended, because as you can see below, it’s quite long (and it’s estimated would take 15 hours or more). Below are the hiking stats from the official Trolltunga website.
Distance: 38 km / 23.6 miles roundtrip
Elevation gain: 2000 meters / 6561 feet
We don’t have any experience doing this but it’s essentially just following the long mountain road up to the official trailhead.
Shuttle from P1
If you need to park in P1, you can thankfully take a shuttle up the road to the next lot (P2). There is a shuttle service that runs between Odda, P1, and P2 (the two companies that run this are Odda Buss and Odda Taxi.
These shuttles run between Odda (with various pick- up locations around town), P1, and P2 several times daily. The earliest you can get to the P2 lot via the shuttle is 6:15 am, and the latest the shuttles leave the P2 lot to head back down to P1 and Odda is 7:15 pm, so be mindful of the time when hiking to Trolltunga to make sure you don’t miss the last shuttle down. You can see the full schedule for the Trolltunga shuttle here.
Cost of the Trolltunga shuttle
Odda to P2 costs 350 NOK round trip (or 200 NOK one-way).
P1 to P2 costs 200 NOK round trip (or 100 NOK one-way).
You can show up and buy tickets on board the bus, however we would recommend buying a ticket in advance online at the links above just to be on the safe side.
P2 (Skjeggedal) parking lot for Trolltunga
The P2 lot is about ten minutes further up the road in the small village of Skjeggedal and is the main parking lot for the Trolltunga hike, with 229 spots. The road between P1 and P2 is a pretty narrow mountain road, so go slow and use caution when driving it, and be prepared for quick stops and to use designated pull-offs for oncoming traffic. We drove up to P2 very early in the morning, so had no issues with anyone coming down as we were going up and it was a very smooth drive.
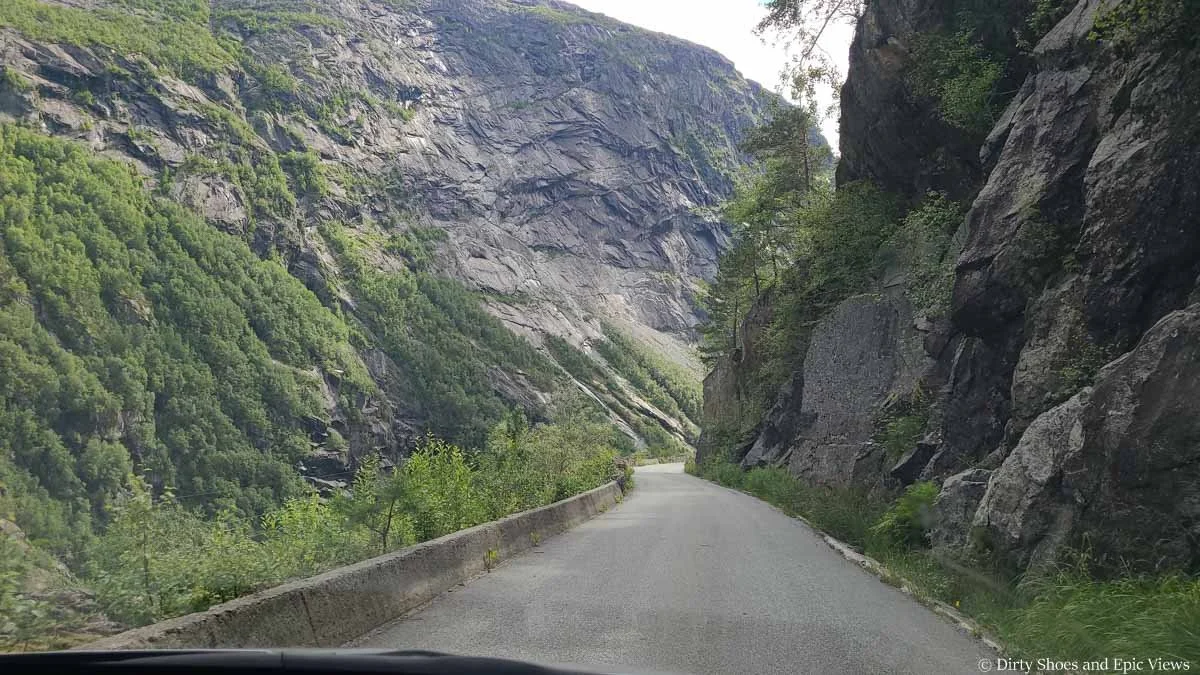
The narrow road to the P2 parking lot for Trolltunga. Be wary of blind turns and oncoming traffic and be prepared to stop quick, pullover, or back up to let others pass.
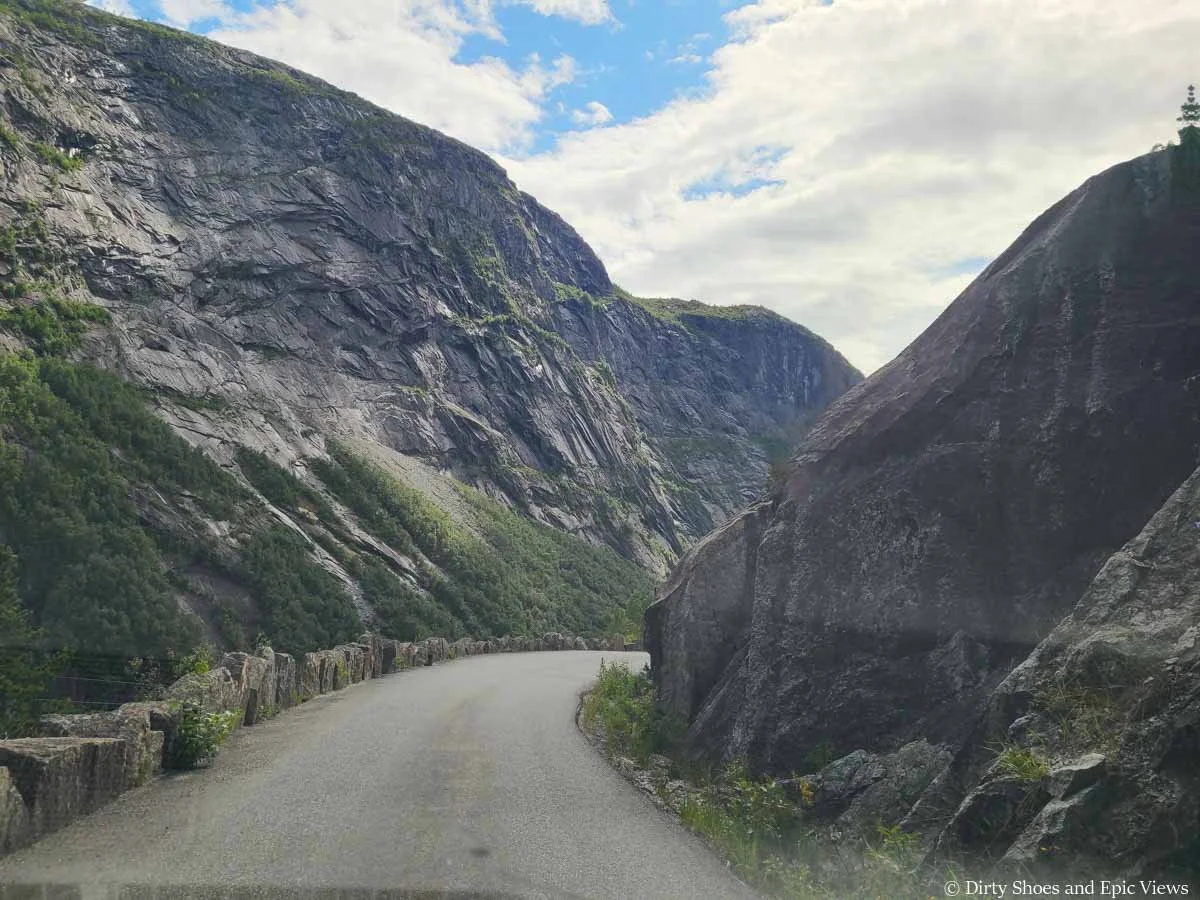
One of several blind turns on the drive to Trolltunga
There is a toll to drive the road between P1 and P2 of 200 NOK, and the fee to park here is 300 NOK. Once you park, head to the parking machine in the lot to pay by cash or card (you can pay for both the toll and the parking fee in one 500 NOK transaction- it’s very quick and easy), and display the receipt on your dash before your Trolltunga hike.
We did notice there was a sign at the base of the road just after the P1 lot indicating the status of P2 (whether it was full or not), so that you don’t have to waste the time and money driving up if there are no spots available.
The P2 lot is the main parking lot for Trolltunga. Here, you’ll find the Trolltunga Active store with information and gear for sale, as well as bathrooms.
From here, you can start the hike to Trolltunga or you can take a shuttle even further up to P3 to start the hike.
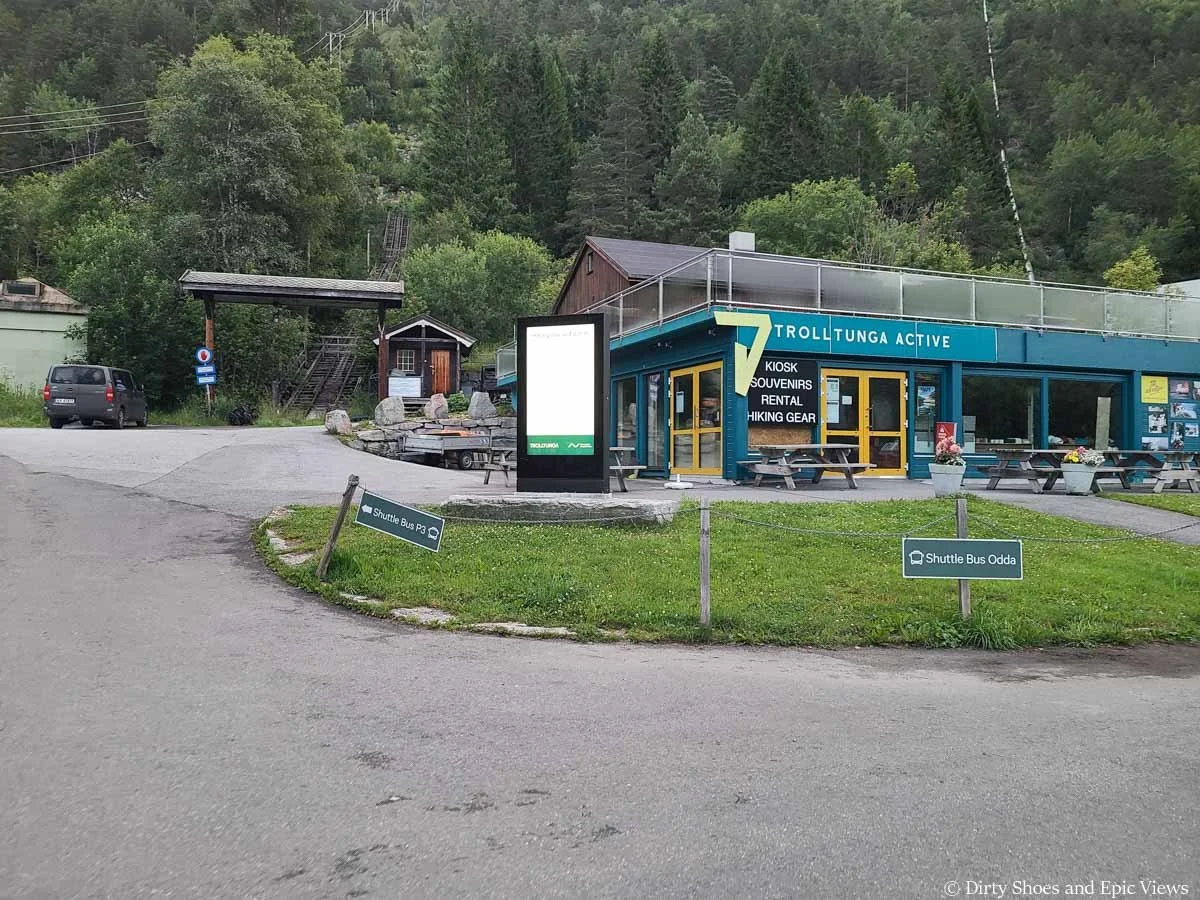
At the P2 Trolltunga lot you’ll find the Trolltunga Active gear store. Just in front of this store is the pick up and drop off point for the Shuttle Bus to P1 and Odda (denoted by the sign above). The sign on the left points towards the shuttle to P3, which is just a short walk further up the road.
P2 parking cost
It is 500 NOK for the combined toll and parking fees to park in P2. Again, there is no reserving spaces for this lot- it’s all first- come first- served.
The hike from P2 to Trolltunga
The hike to Trolltunga from P2 is significantly shorter than from P1, but it’s still a trek. It adds roughly 2 miles and 1200 feet of climbing to the day versus if you start your hike from P3.
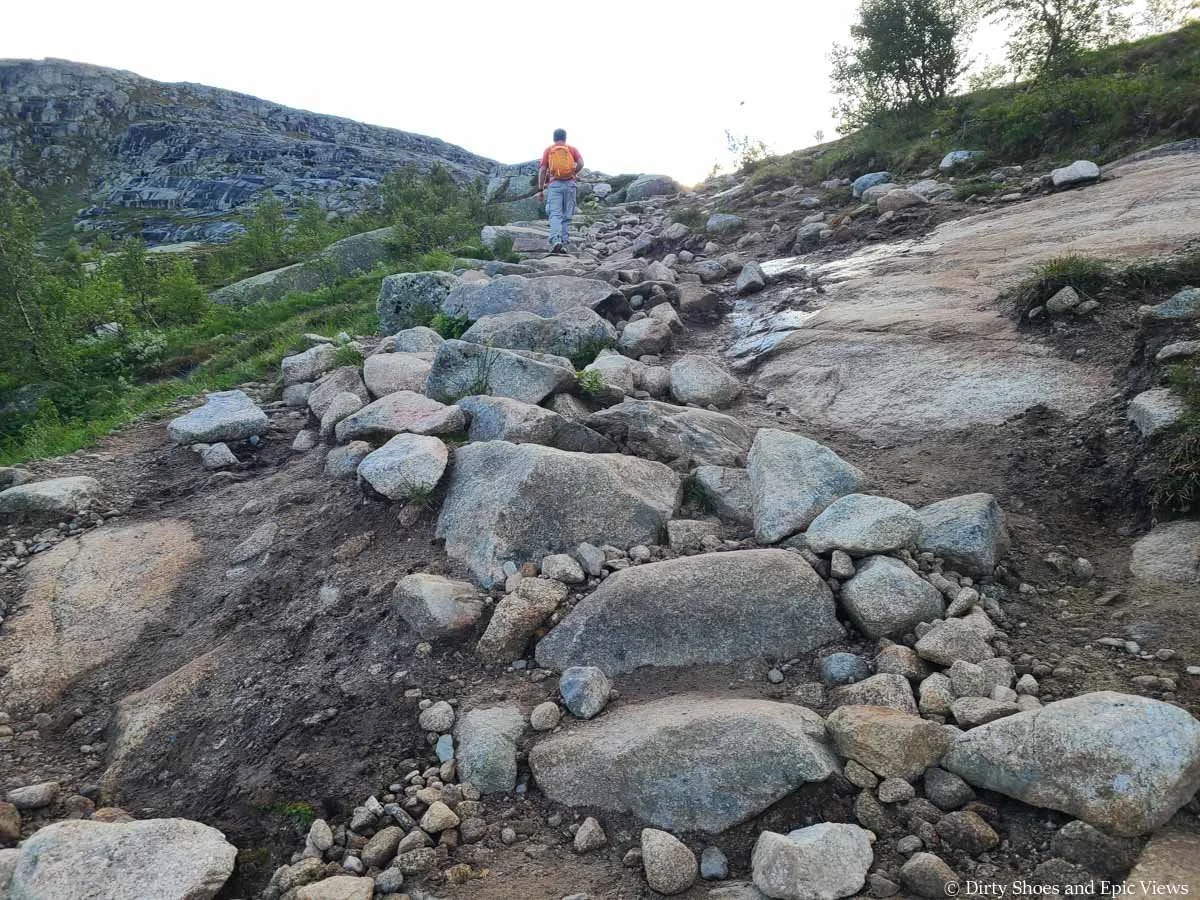
From the parking lot, you have two options. The first is a rugged and steep trail that climbs directly up the mountainside to the trailhead near P3.
The second option is to walk up the shuttle road that goes to P3. This is a paved road that steeply switchbacks up the mountain. It’s longer in distance than the direct trail, but it’s less steep and easier to walk up (though the climb is certainly a steady one!). We chose to hike the road up because we figured it would be easier and faster overall, and a better way to ease our legs into the hike ahead.
As you hike up the road, just be aware of the shuttle buses that use this road- they aren’t too frequent but you will see some.
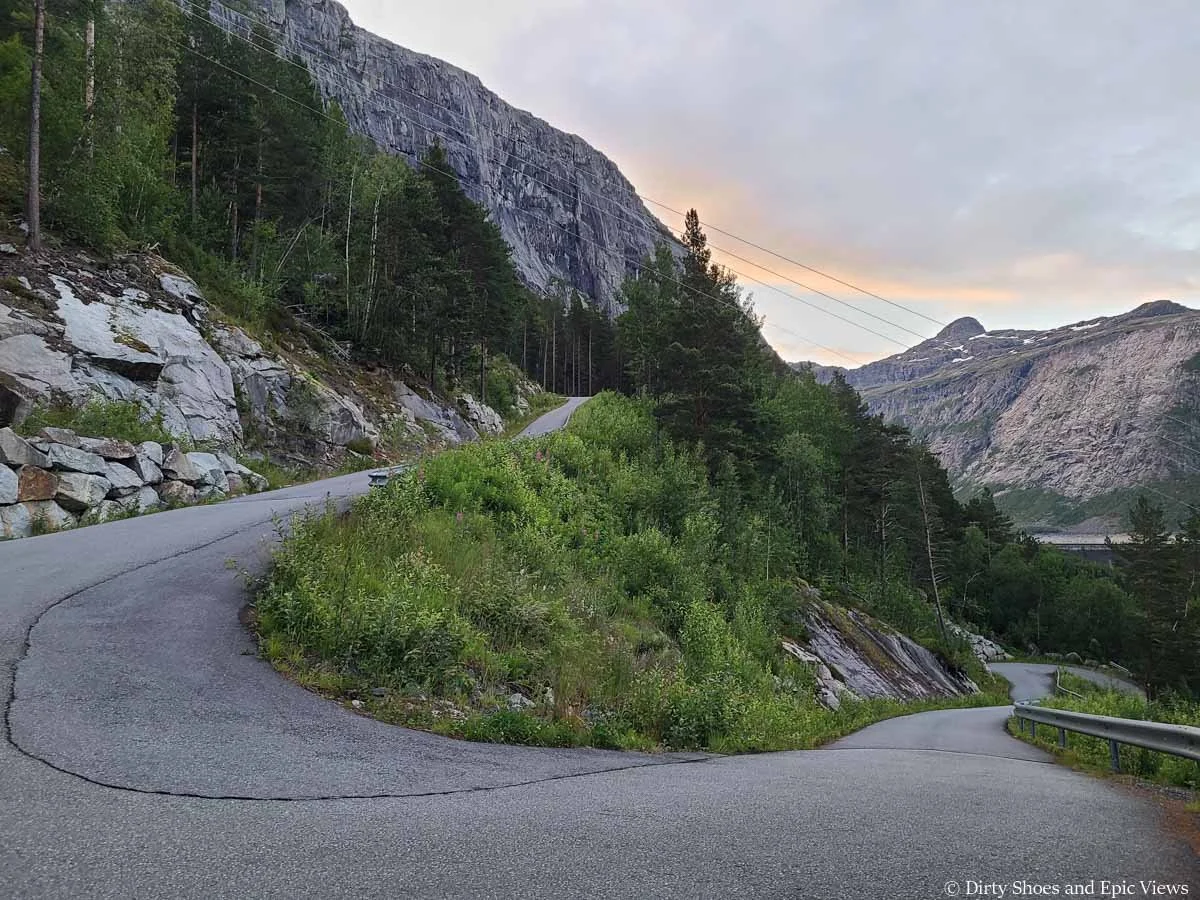
The steep road between P2 and P3 parking lots for Trolltunga
Hiking the road from P2 to P3 to the Trolltunga trailhead
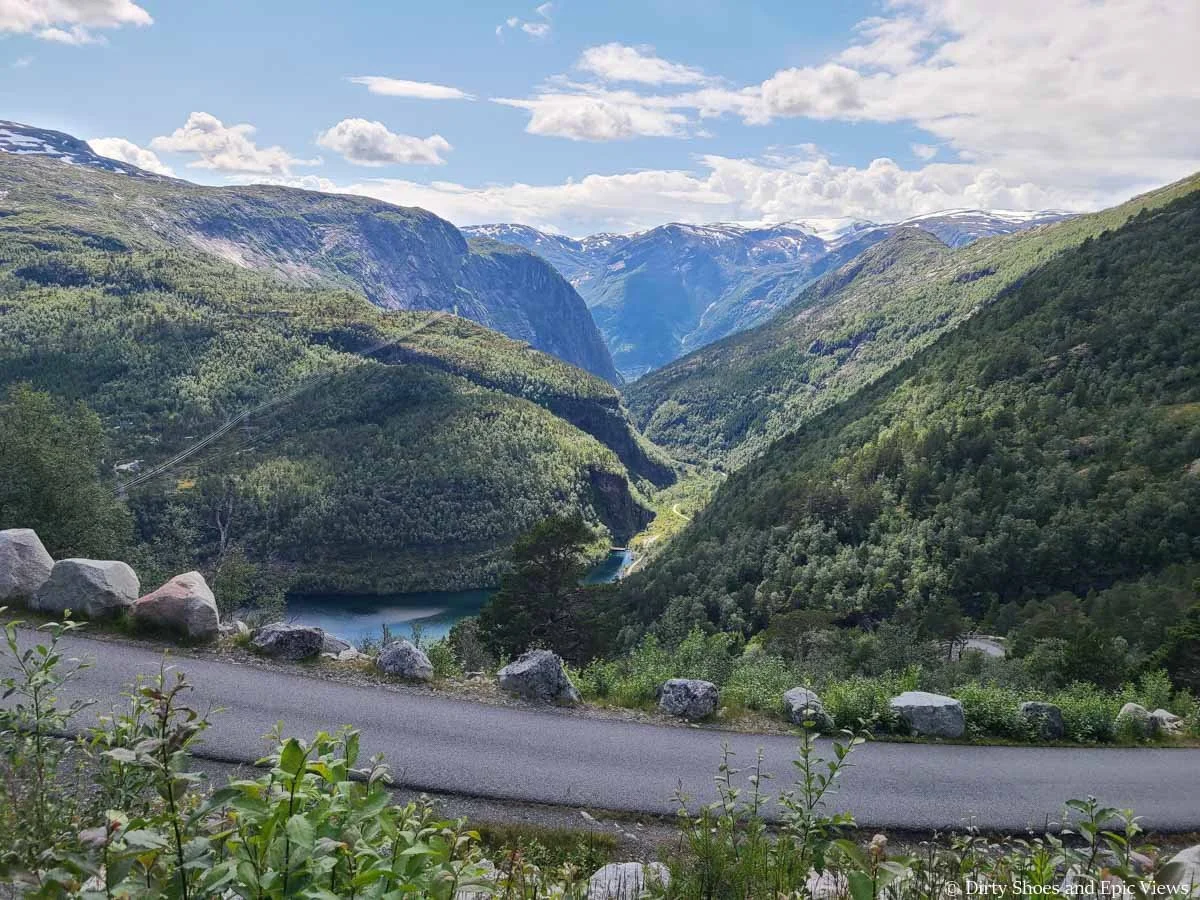
Awesome views from the road to the P3 parking lot!
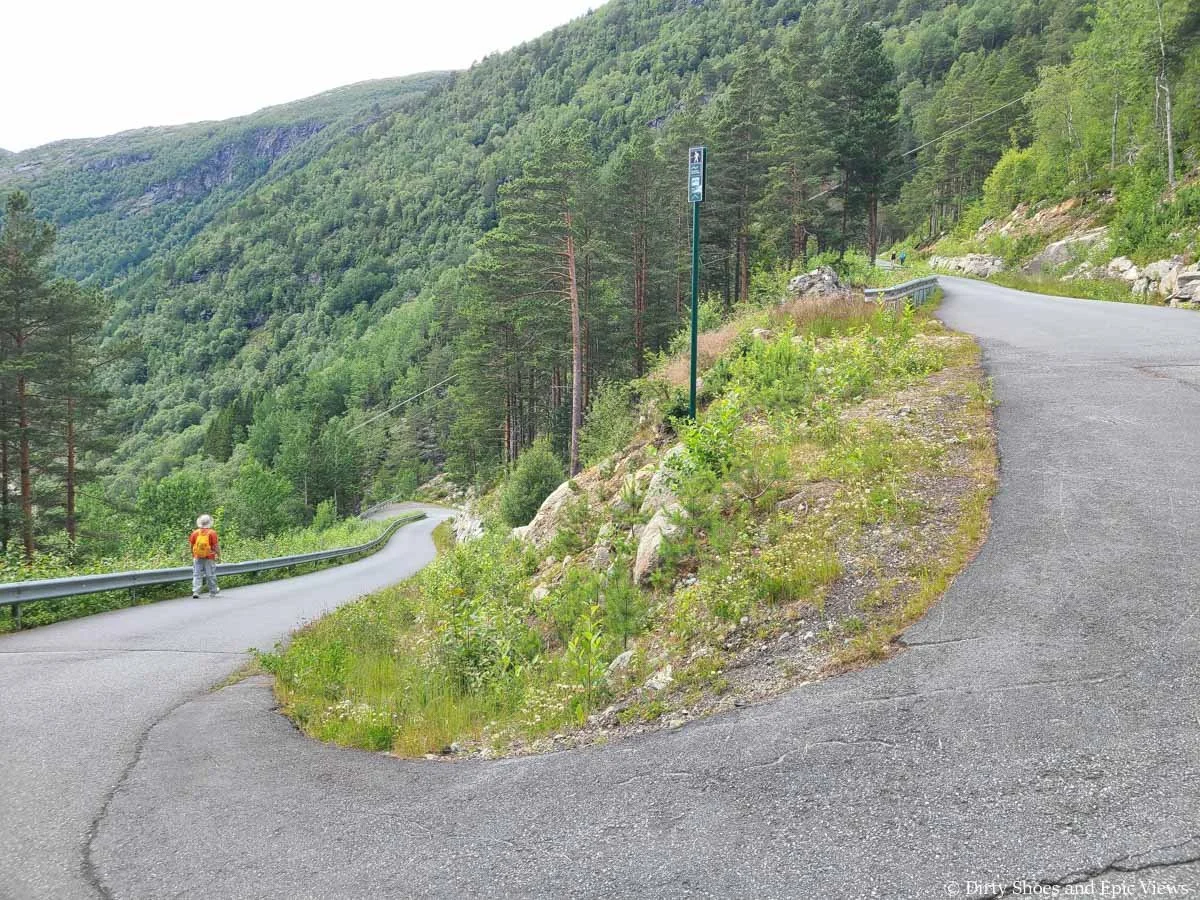
The Trolltunga trailhead is found at the turn of the very last switchback of the road. It’s very well-signed, and you can’t miss it. The hiking stats below are from our personal tracking device when we hiked to Trolltunga from P2 (which differ slightly from the official Trolltunga website stats).
Distance: 27.8 km / 17.3 miles roundtrip
Elevation gain: 1,294 meters / 4,245 feet
It’s estimated that it will take anywhere from 8 to 12 hours to hike to Trolltunga from P2.
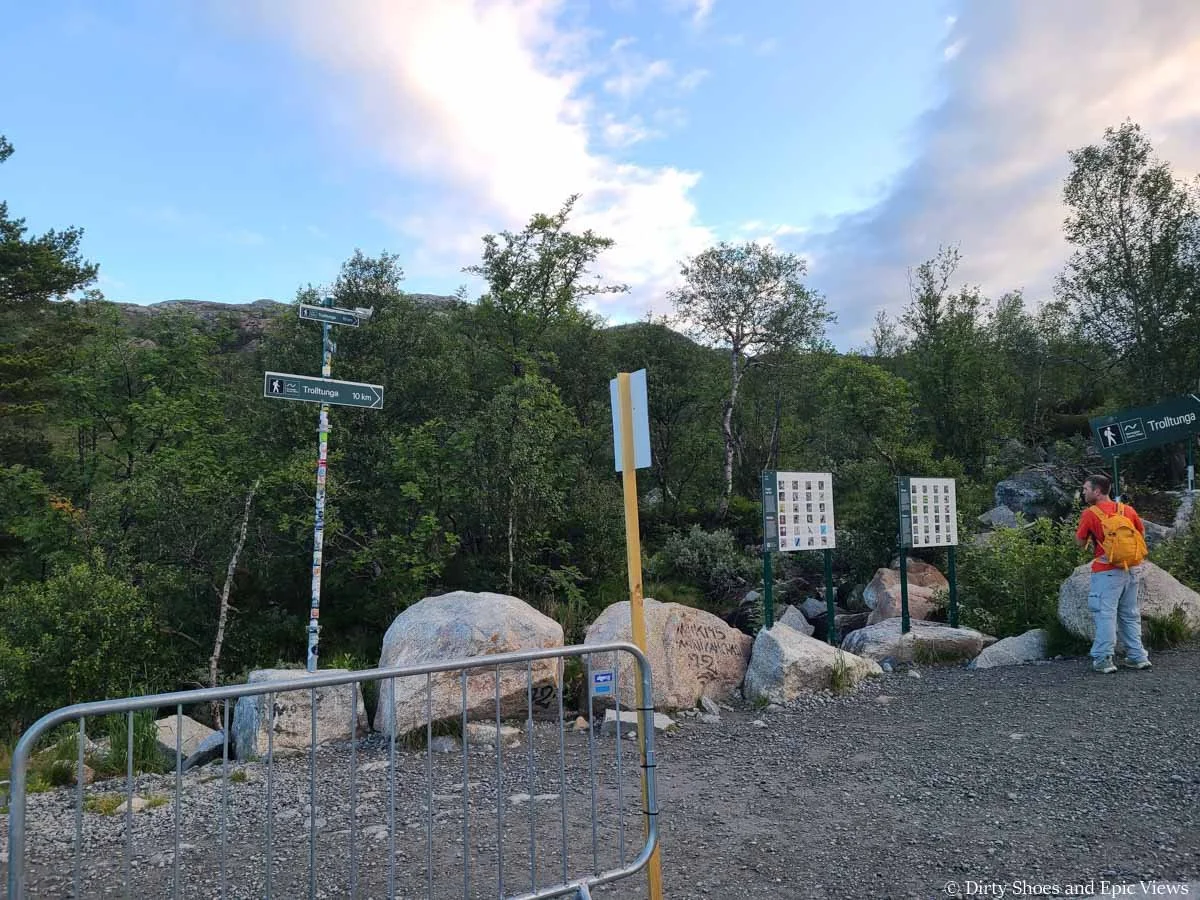
Signs mark the start of the official Trolltunga trail at the last bend of the road to P3
As tempting as it may be to skip this initial uphill hike in favor of simply taking the shuttle, there are some benefits.
For one, you’ll save some money by not taking the shuttle (up to 250 NOK per person!).
You also won’t have to be as conscious of the time on your hike since you won’t need to worry about making the last shuttle down from the hike if you plan on walking. This means you can start later if you want, and you’ll avoid waiting in lines for the buses.
This benefit is the biggest, and the main reason that we chose to hike to Trolltunga from P2: By choosing to hike, you can beat the crowds to Trolltunga! Yes, it will require a very early wake-up call, but if you get to P2 early enough and start the hike well before the shuttle runs, you can get to Trolltunga before the huge crowds. This was absolutely the best decision we made on our trip to Norway- we’ll talk more about this below when we talk about the best time to hike to Trolltunga and avoiding the crowds.
Shuttle from P2 to P3
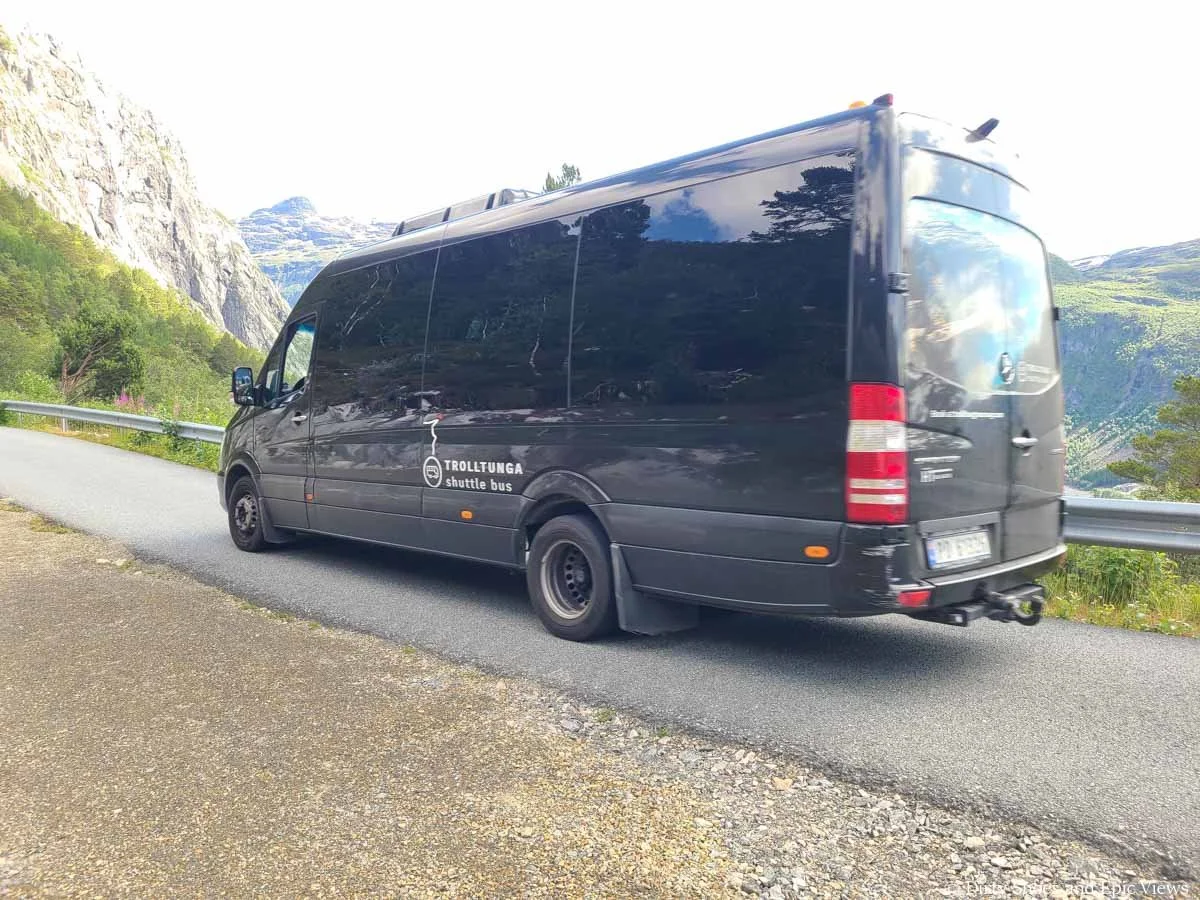
The Trolltunga shuttle from P2 to P3
Though you can hike to Trolltunga from P2, most people will still opt to take a shuttle even further up the road to the Trolltunga trailhead at P3…and I don’t blame them! Taking the shuttle avoids a 2 mile / 1200 foot climb right at the beginning of an already long hike.
The shuttle runs from May 29th to September 30th, starting at 6:30 am (or 7 am in September) and running uphill to P3 every 10-30 minutes. The last shuttle leaves P3 and heads back down to P2 at 7 pm, so again, watch your time while hiking, and be sure to start early so that you don’t miss the last shuttle back down. If you do miss it, you can always walk the road down (about 2 miles of steep downhill that takes under an hour). See the exact P3 shuttle schedule here.
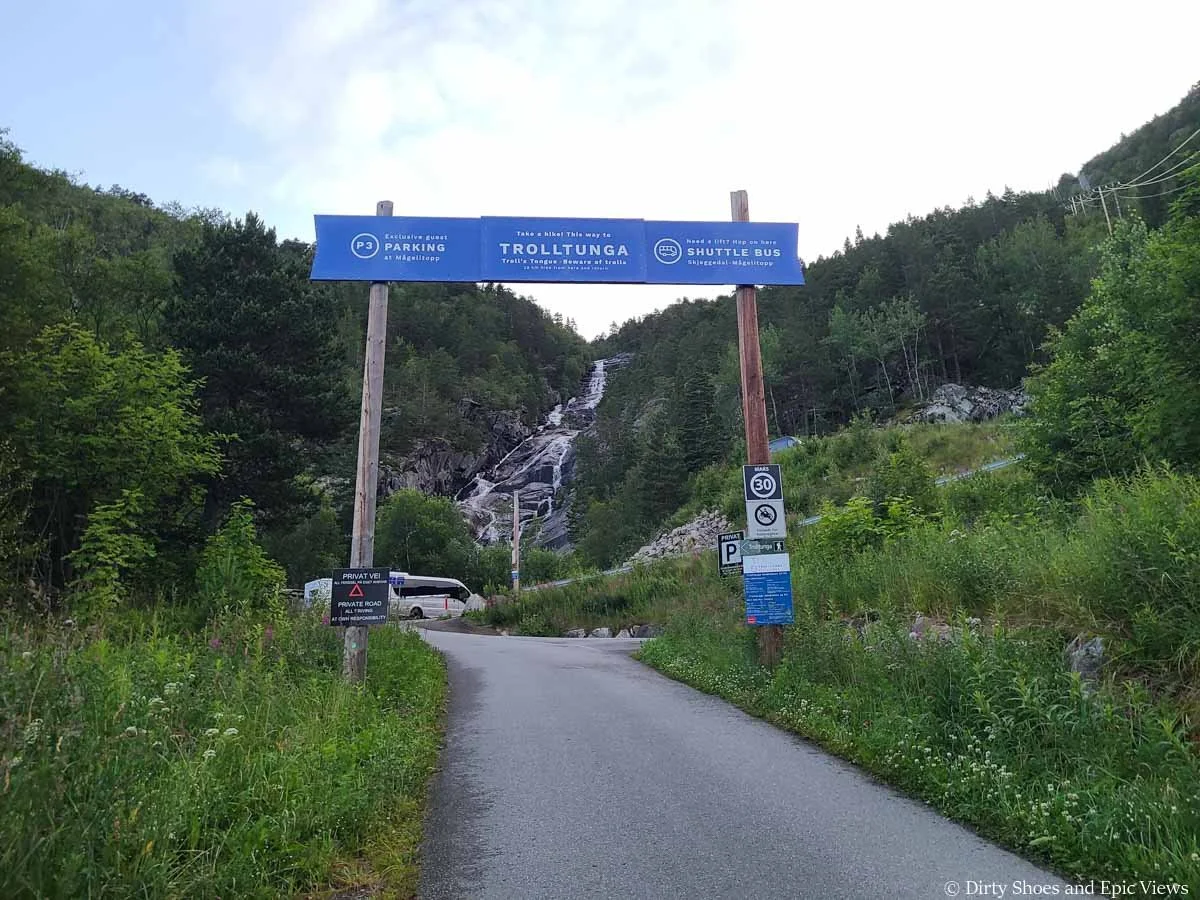
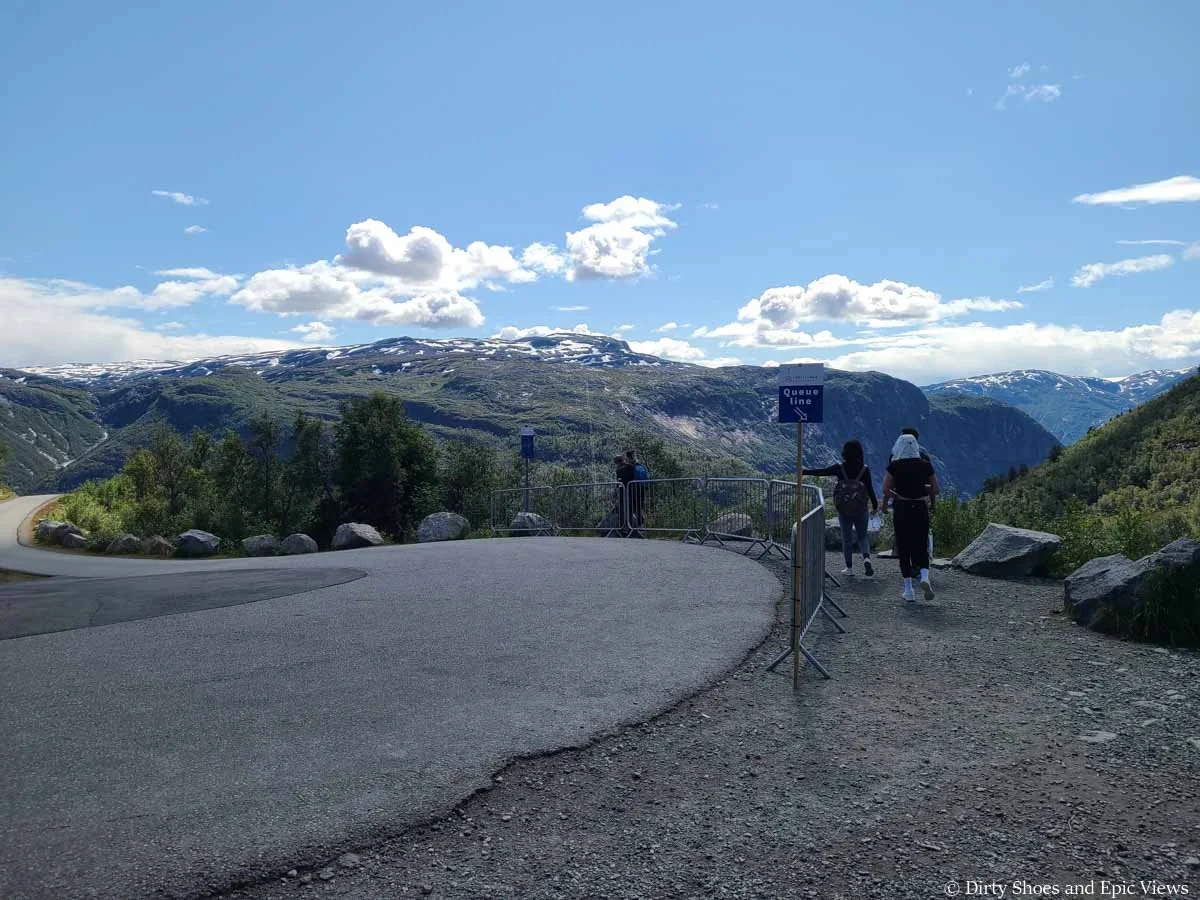
Finding the shuttle: After arriving in the P2 lot, you’ll notice a road continuing uphill past the Trolltunga Active store. Walk just a short way up this road and you’ll spot the shuttle ticketing office and the queues for the shuttle.
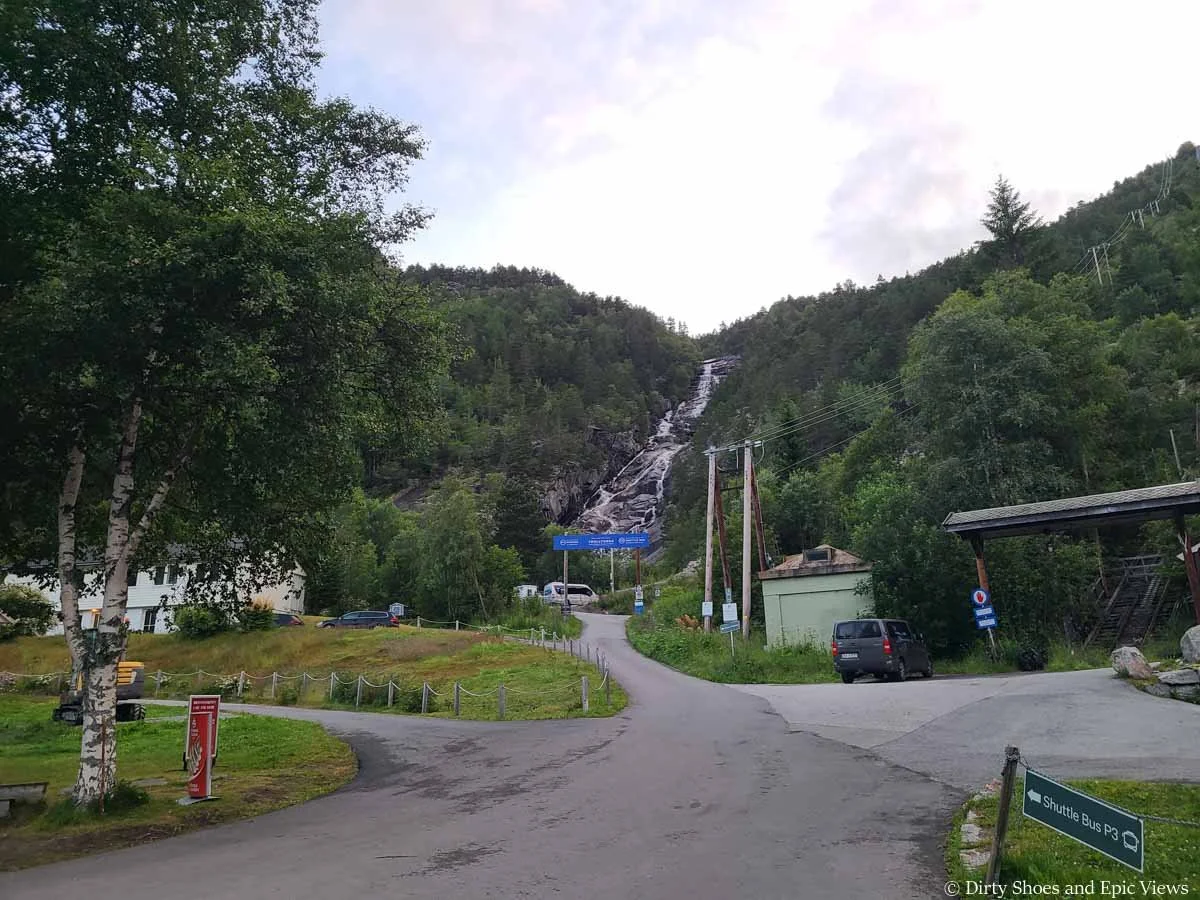
Follow the paved road past the Trolltunga Active store to the blue sign ahead- this marks the start of the queues for the P3 Trolltunga shuttle.
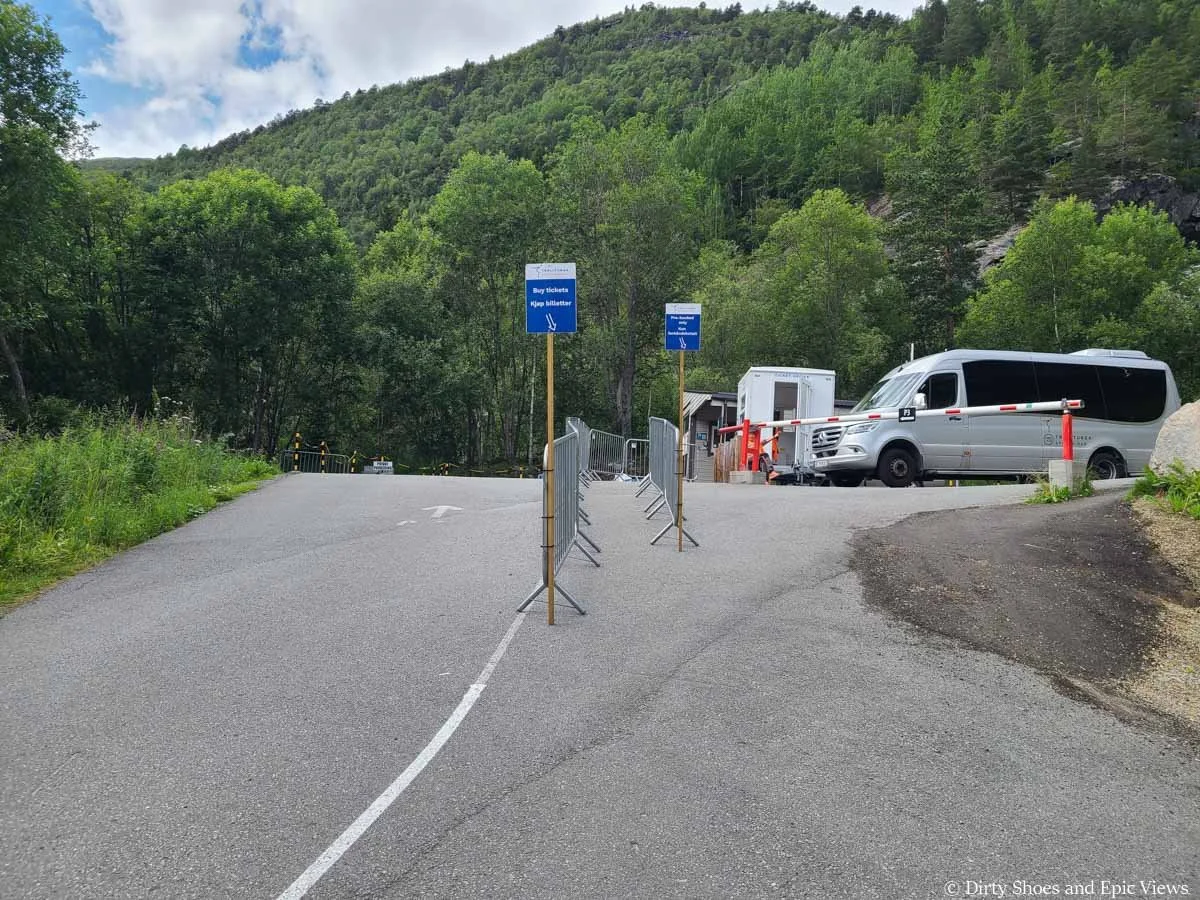
Signs mark queues for those needing to purchase tickets for the Trolltunga shuttle and for those who prepurchased them online
Cost of the P3 Trolltunga shuttle
Uphill shuttle from P2 to P3: 150 NOK one-way
Downhill shuttle from P3 to P2: 100 NOK one-way
Booking the P3 Trolltunga shuttle tickets
Half of the uphill shuttle tickets (from P2 to P3) are reservable in advance online. However, there is also a ticket office at P2 where you can buy your ticket once there (you might just have to wait in longer lines to get tickets and then get a seat on the bus).
Booking a ticket in advance for the downhill ride back to P2 is not possible. You’ll just hop on the next available bus at P3 and then pay for the ride once back at P2 at the ticket office.
P3 (Magelitopp) parking lot for Trolltunga
The final parking lot for the Trolltunga hike is at the top of the mountain road, in the small village of Magelitopp (about ten minutes from P2). It sits just beyond the official starting point for the trail to Trolltunga, so of course, this is the ideal place to park for the hike.
But, there’s a catch…
There are only 30 parking spaces at P3, and you have to reserve them in advance. So, as you can imagine for such a popular hike, a coveted spot at P3 is pretty hard to snag.
You can book a spot at P3 here. We were seeing that dates can sell out weeks in advance (especially weekend dates).
The road to P3 is only open between May 31st and September 30th, and can be driven up between 6:30 am and 11 am (except in September, when it opens at 7 am instead). The road between P2 and P3 is quite narrow and steep, with sharp turns up a series of switchbacks, so again, use caution when driving and keep your eye for oncoming traffic (like shuttle buses) and designated pull-off areas.
P3 parking cost
The parking cost is 600 NOK, however, you also have to pay the road toll for the P1 to P2 drive. Before heading up to P3, stop at the P2 lot and pay the 200 NOK road toll and keep the receipt on your dash. So really, the total cost to park at P3 is 800 NOK.
The hike from P3 to Trolltunga
The P3 lot is at the very top of the mountain road. To get to the Trolltunga trailhead, walk just a few minutes back down the road to find the well-signed trail start.
From here, this is the shortest hike to Trolltunga you can do, with an estimated 7 to 10 hour hiking time. These are our personal hiking stats from our hike to Trolltunga (again, differing slightly from the official Trolltunga website stats):
Distance: 19.3 km / 12 miles roundtrip
Elevation gain: 1,086 meters / 3,564 ft
Map of the Trolltunga hike and parking lots
Okay, we know that was a lot of information and it might be a bit confusing at first, but hopefully this map helps to clear it all up. We took this picture on a sign along the trail (and you can find it on Trolltunga website) which shows a great map of the Trolltunga trail itself and the three different parking areas. Use this map to help orient you to all the info we shared above!
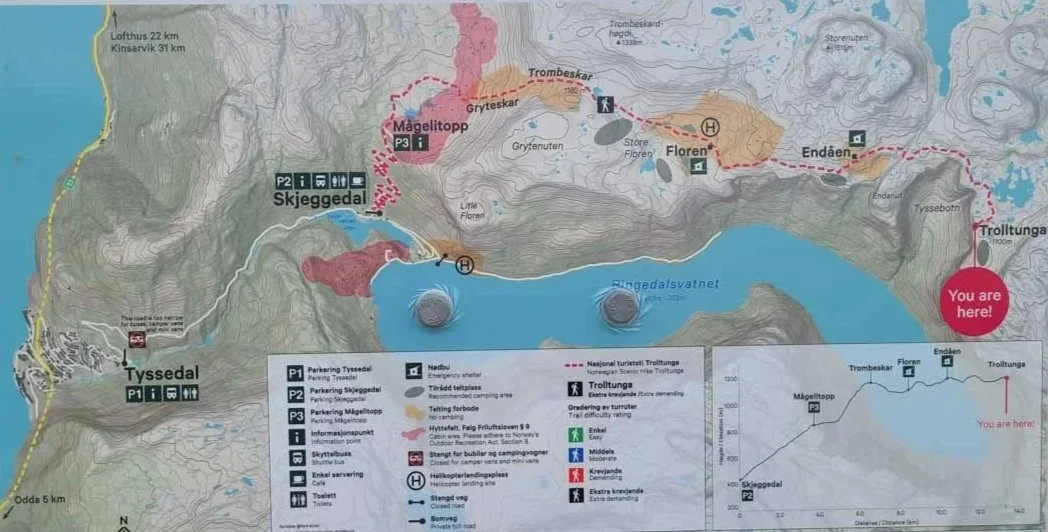
A map showing the location of P1, P2, and P3 parking lots for Trolltunga
Where should I park for the hike to Trolltunga?
At this point, you’re probably just wondering where the best place is to park for Trolltunga.
We would say to plan to park at P2. It’s slightly cheaper than parking at P3, but the main reason we would suggest P2 is because you don’t have to book anything in advance.
Weather in Norway, especially in the mountains and fjords, can be pretty unpredictable, and you can’t really be certain of the forecast until a day or two in advance. Pre-booking things, such as P3 parking, is definitely a gamble and locks you into a date that you may not be able to keep due to poor weather.
Planning to park at P2 allows for more flexibility since you don’t have to reserve a space in the lot or even a shuttle ticket. Plus, the shuttle to P3 starts running at the same time that the road opens to pre-booked cars at P3, so there is no time-advantage to starting at either one.
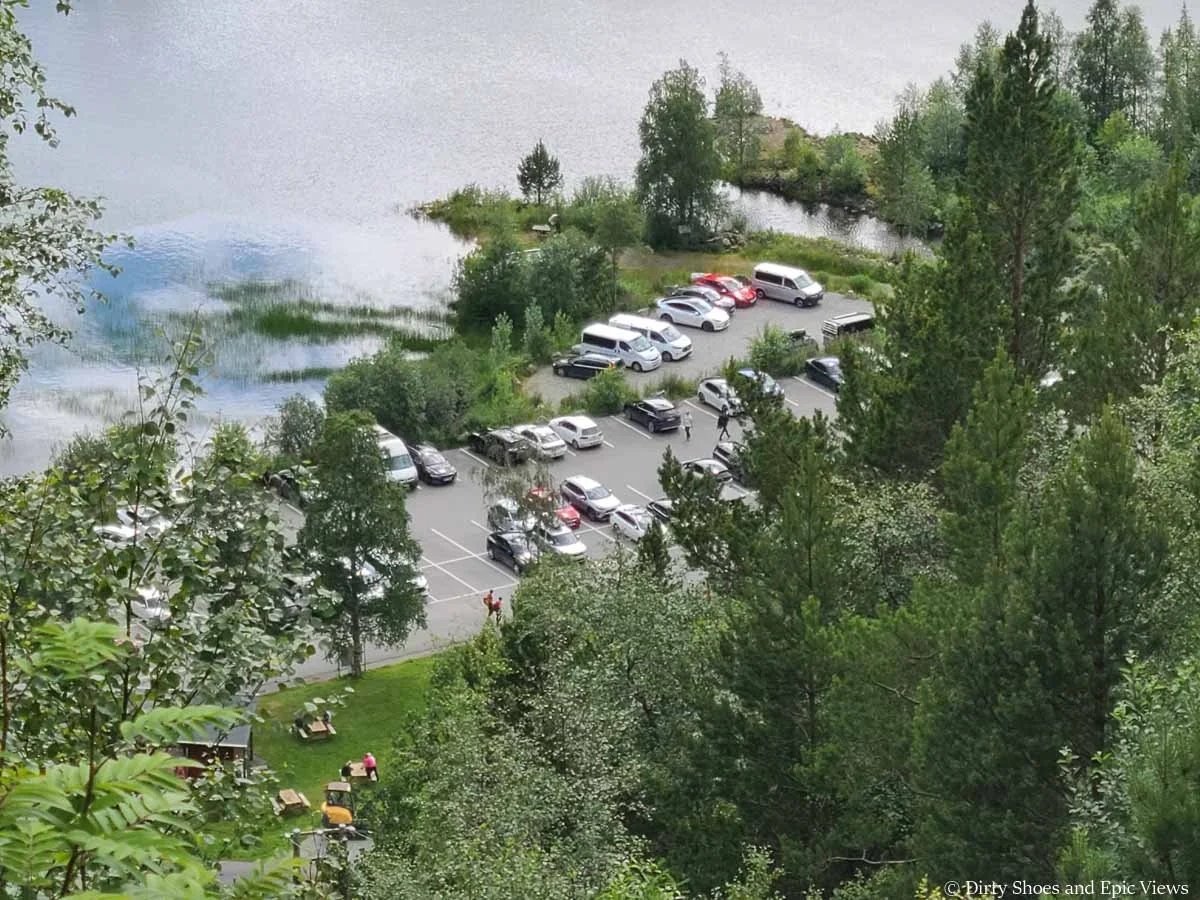
A view of the P2 parking lot for Trolltunga
Cost to Hike to Trolltunga
As you might have gathered by now, hiking to Trolltunga is not free…or cheap. It’s one of the most expensive hikes we’ve done (and yes- it was worth it!). There are no permits or fees to hike to Trolltunga itself, but the cost of getting there and parking really adds up.
Here are estimated costs to hike to Trolltunga for one person, based on where you park for the hike:
Park at P1 and shuttle to P3 and back: 750 NOK
Park at P2 and shuttle to P3 and back: 750 NOK
Park at P3: 800 NOK
You can save money on the Trolltunga hike by:
Splitting parking fees with more people per car
You can also opt to not take the shuttle. We saved some money by doing the full Trolltunga hike from P2 (saving 250 NOK per person), but you could also opt for just a one-way shuttle ride up to P3 to avoid the large initial uphill climb, and then at the end of the hike skip the shuttle and walk down to P2 (saving 100 NOK per person).
How Long is the Hike to Trolltunga?
As we’ve said above, where you park really determines how long your hike to Trolltunga will be.
The majority of people start the Trolltunga hike from the trailhead near P3, but a good number of people start from P2 as well.
We hiked to Trolltunga as an out-and back hike from P2, so we’ll give you our stats for doing just that, as well as our stats for the section of hiking from P3 to Trolltunga as well.
The hike to Trolltunga from P2
Distance: 27.8 km / 17.3 miles roundtrip
Elevation gain: 1,294 meters / 4,245 feet
Time: Our total time on the hike was 11 hours, but this included nearly 2 hours at the top taking pictures, relaxing, and enjoying the views. It took us about 4.5 hours for both the hike in and out from P2. Of that, the road hike from P2 to P3 took exactly one hour up and about 50 minutes down.
The hike to Trolltunga from P3
Distance: 19.3 km / 12 miles roundtrip
Elevation gain: 1,086 meters / 3,564 feet (about two-thirds of this gain is on the hike in and the rest is on the hike out)
Time: It took us about 9 hours to hike to Trolltunga from P3 (this includes about 2 hours of enjoying the views from the top, so really it was about 7 hours of hiking time).
Trolltunga elevation profile
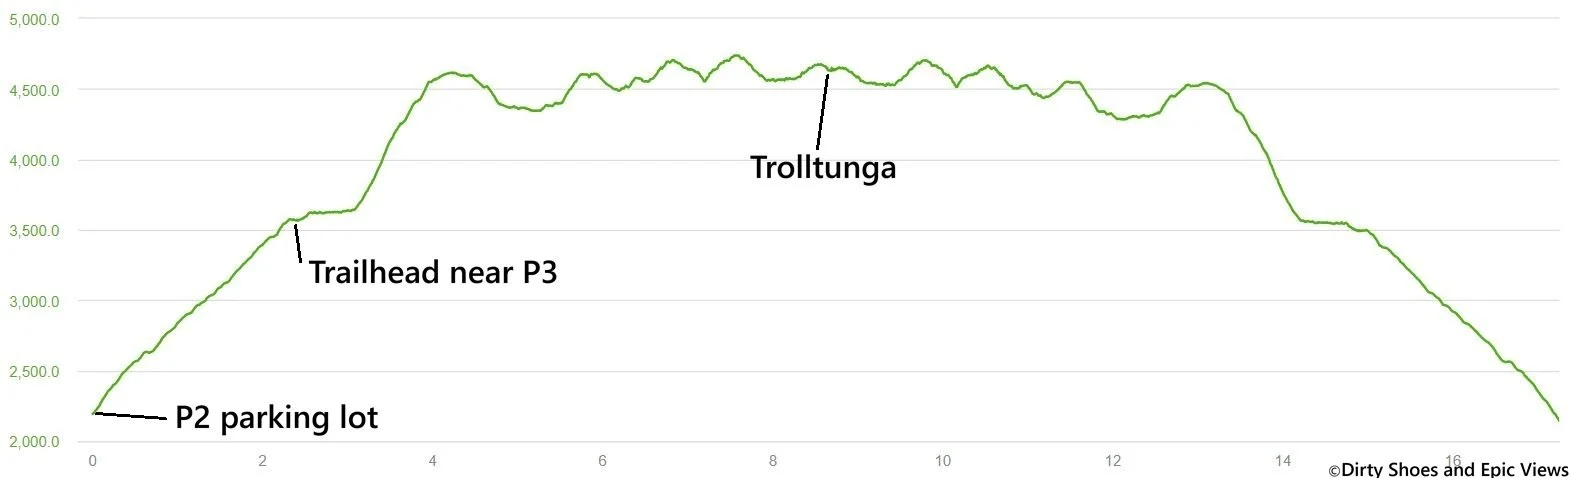
Elevation profile of Trolltunga
Trolltunga trail map
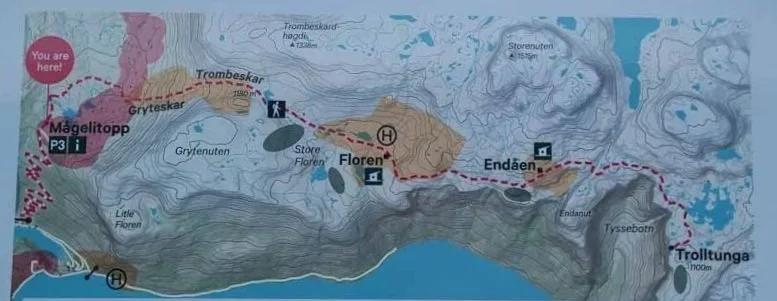
This trail map is at the beginning of the Trolltunga hike and shows all the important waypoints. You can also find a copy of this map with more information on it on the Trolltunga website.
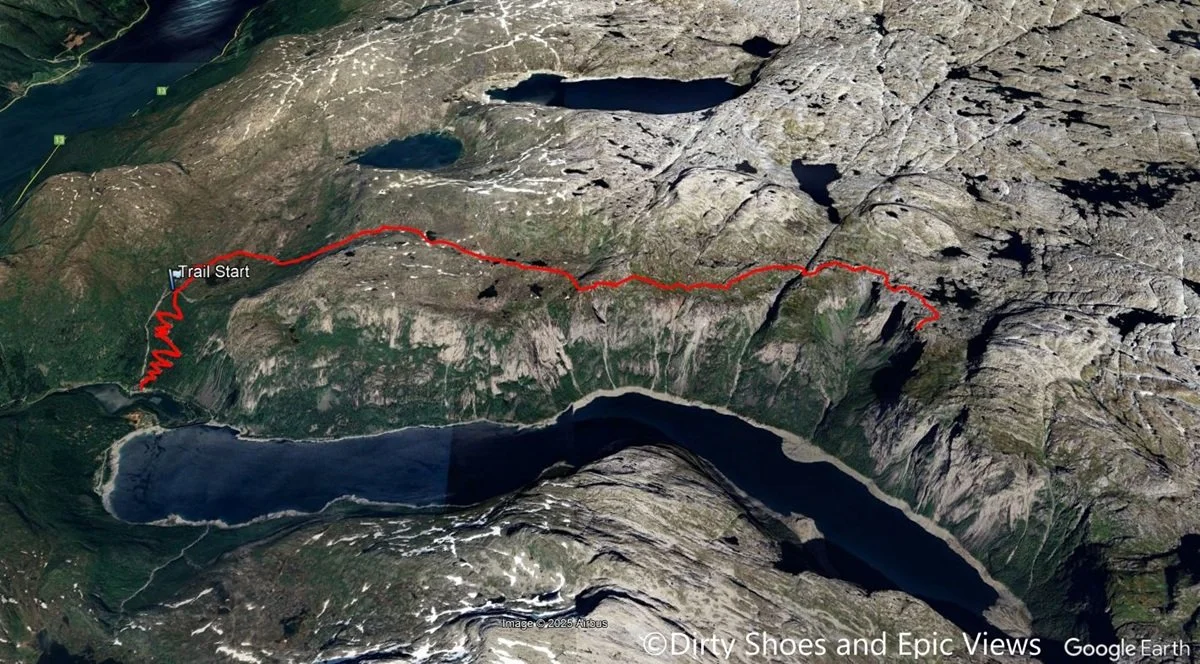
A satellite view of our hike to Trolltunga. The Trail Start designation is where the official Trolltunga trail starts just before the P3 lot. The switchbacks before that are the hike up the road between P2 and P3.
How Hard is the Trolltunga Hike?
We would say the hike to Trolltunga is moderate to hard. Really, what makes the hike to Trolltunga hard is the sheer distance.
No matter where you start the hike, it will be a double-digit day on the trail, and you definitely should be used to hiking for a full day.
The Trolltunga trail itself is very well-maintained, with no overly rugged or challenging spots. And it’s easy to follow using red “T”s marked on rocks throughout the hike as well as a series of tall poles.
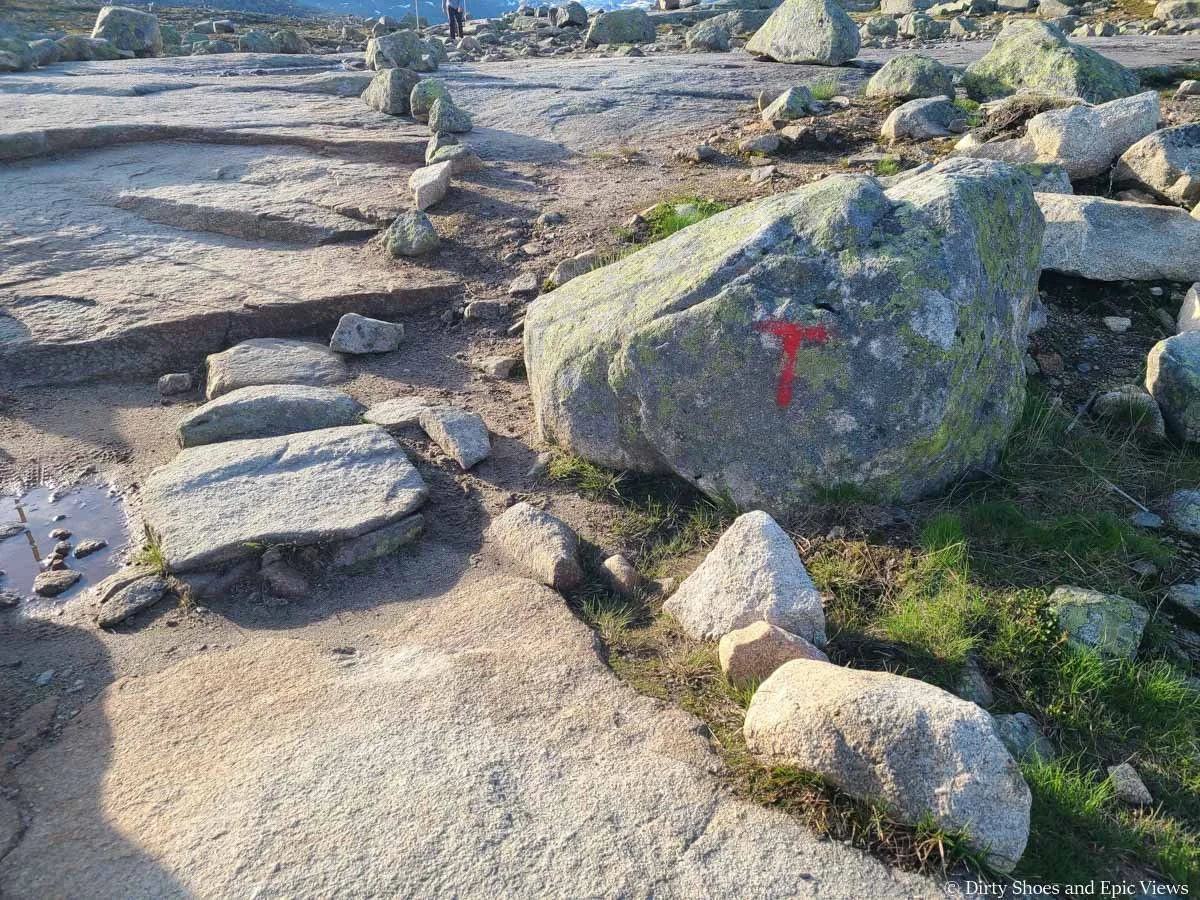
Following these red T’s along the rocks to stay on track on the hike to Trolltunga
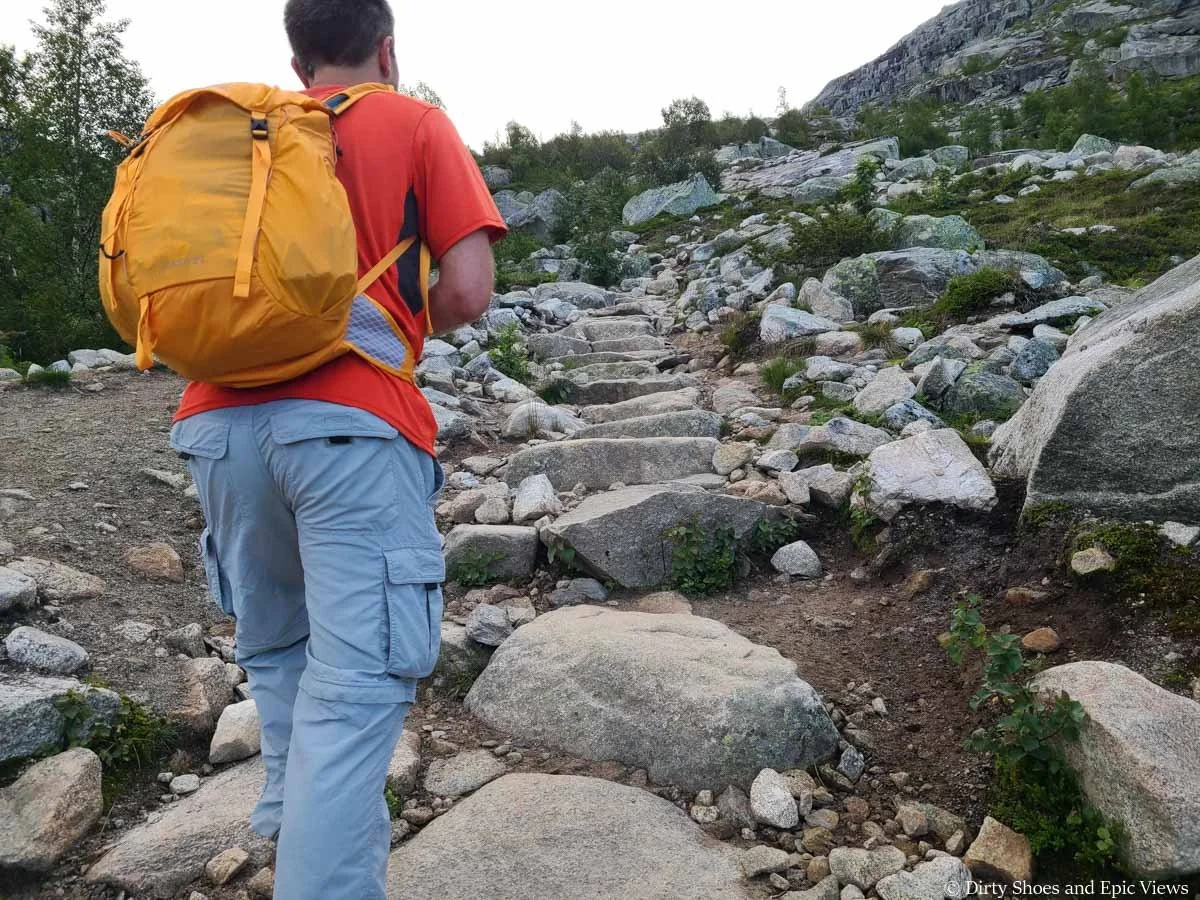
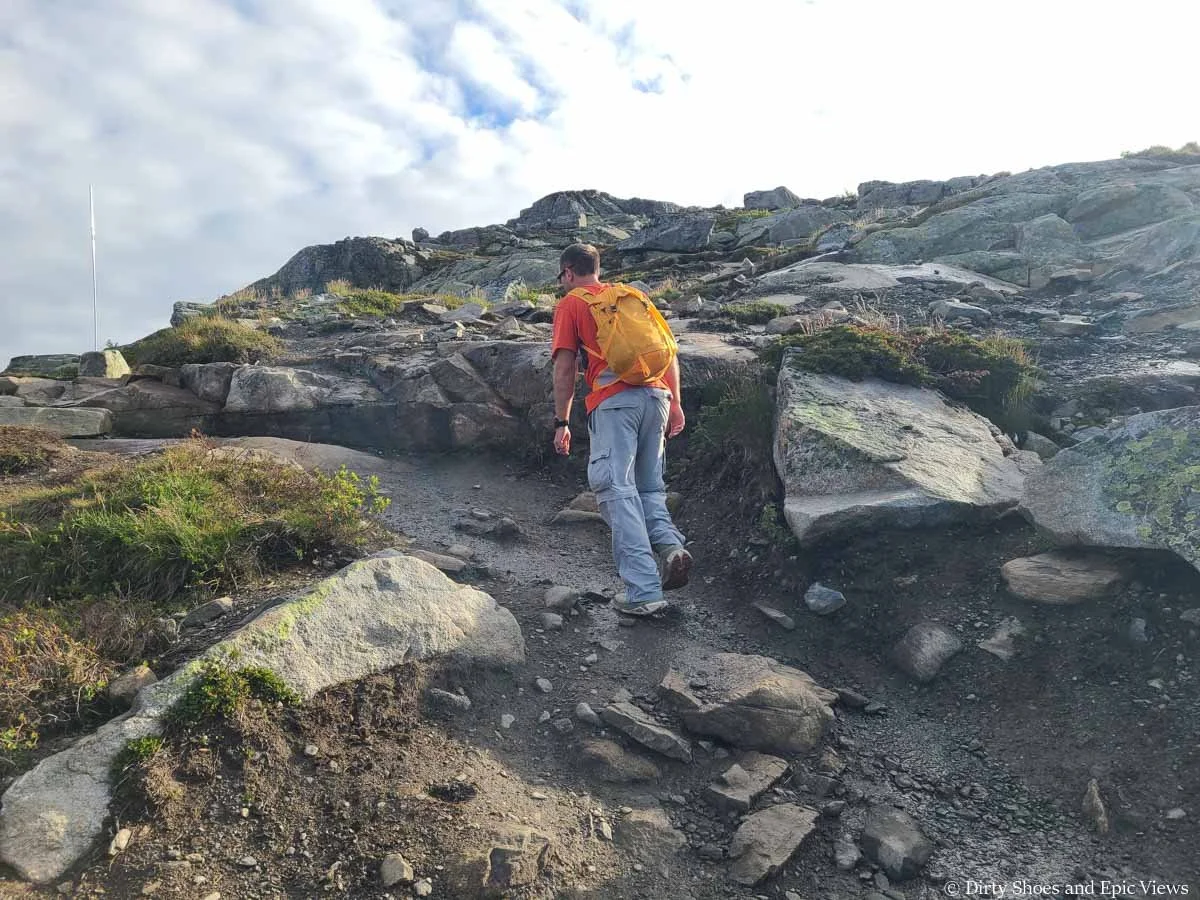
There is a lot of climbing to get to Trolltunga, but for the length of the trail, it really isn’t too bad and the gains spread out nicely with a lot of flat sections in between. If you start from the trailhead near P3, your biggest climb will be after about a half hour into the hike. It’s a steep and steady ascent up a rocky mountain pass, but the first part has primarily stone steps that make navigating the trail simple.
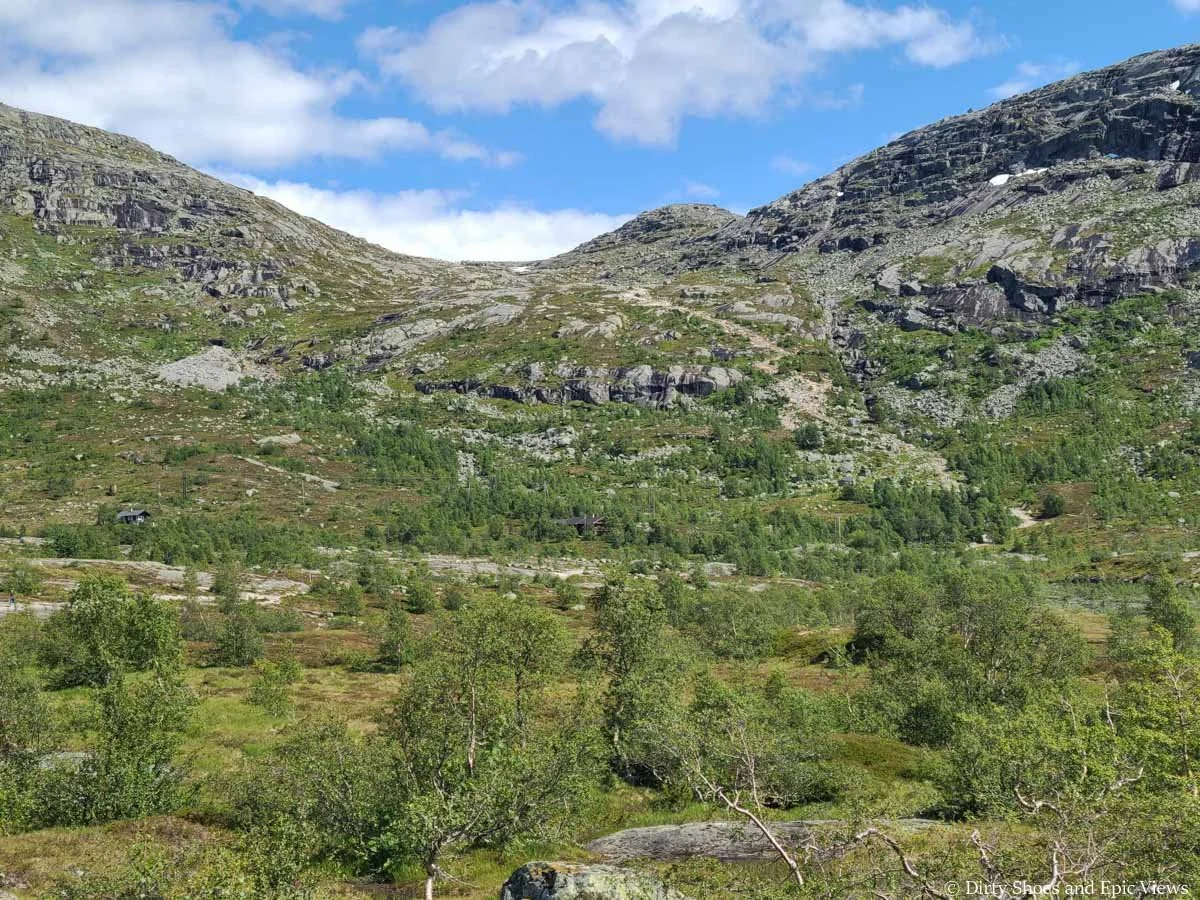
The pass at the beginning of the Trolltunga hike- this is the biggest climb of the hike
Climbing up the pass on steep stone steps
Once over the pass, the trail to Trolltunga actually feels relatively easy after this. There are some more small climbs but they are sandwiched between long flat and easy sections, so it doesn’t seem too bad. Really, it’s just long and by the end, we were definitely ready to be off our feet.
After the pass, much of the Trolltunga trail is relatively easy, with a few quick climbs along the way
If you hike to Trolltunga from P2, the day will definitely be a bit more strenuous and exhausting. You’ll start the hike right off the bat with a 1200 foot climb up a steep and steady road to get to the trailhead near P3. There’s no warm up to ease your legs into it either- it starts climbing right from the parking lot.
So, this initial big climb might zap some energy from you, and certainly makes the hike feel much longer. As a result, I struggled a bit going up the first big pass of the hike, but if I hadn’t done the first climb up from P2, I think it would have felt much easier. It’s a lot of work to do before the true start of the hike!
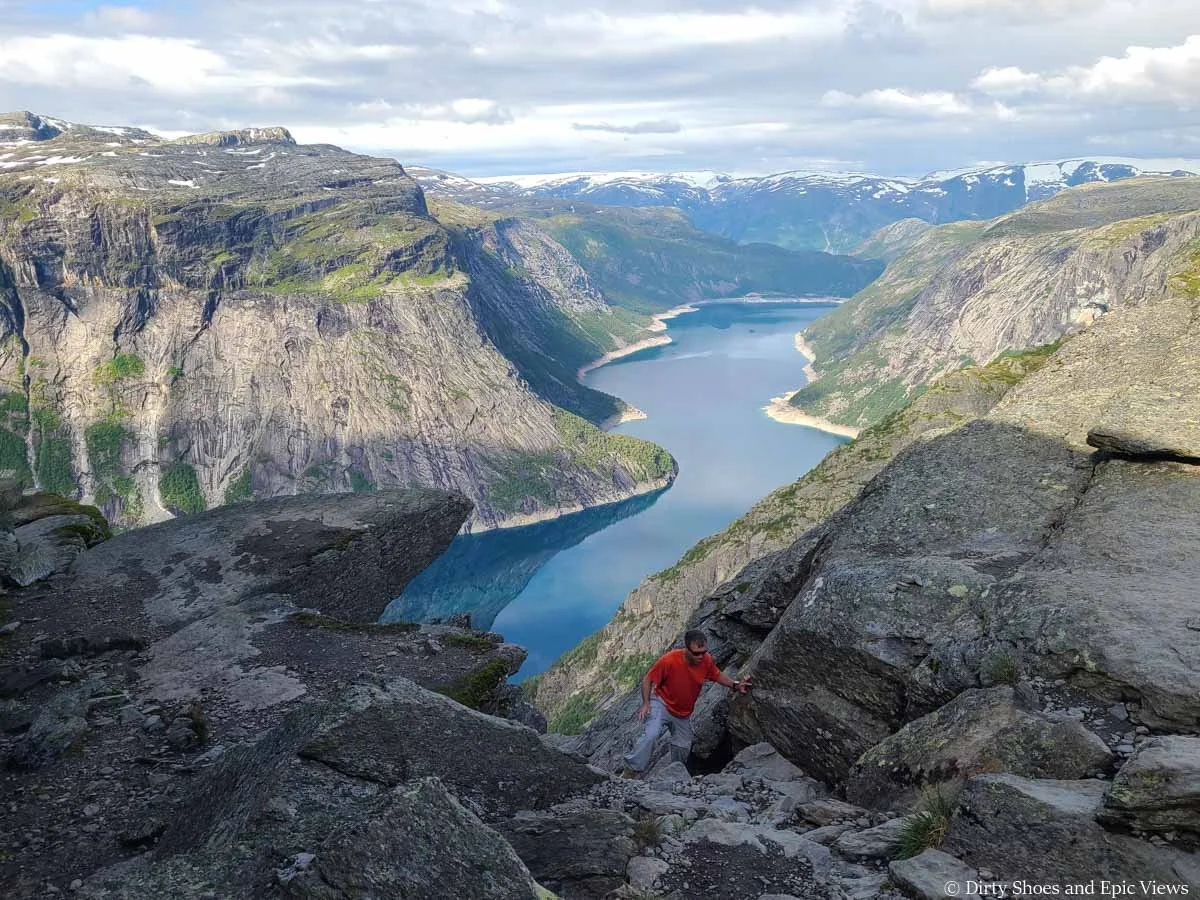
Once you get to Trolltunga, you’ll be standing right along a sheer cliff edge, so just use caution up here, especially if it’s windy or wet. To get down to the point where you can actually walk out on Trolltunga requires a quick climb down metal rungs. There’s a rope there to assist you and it’s not too bad.
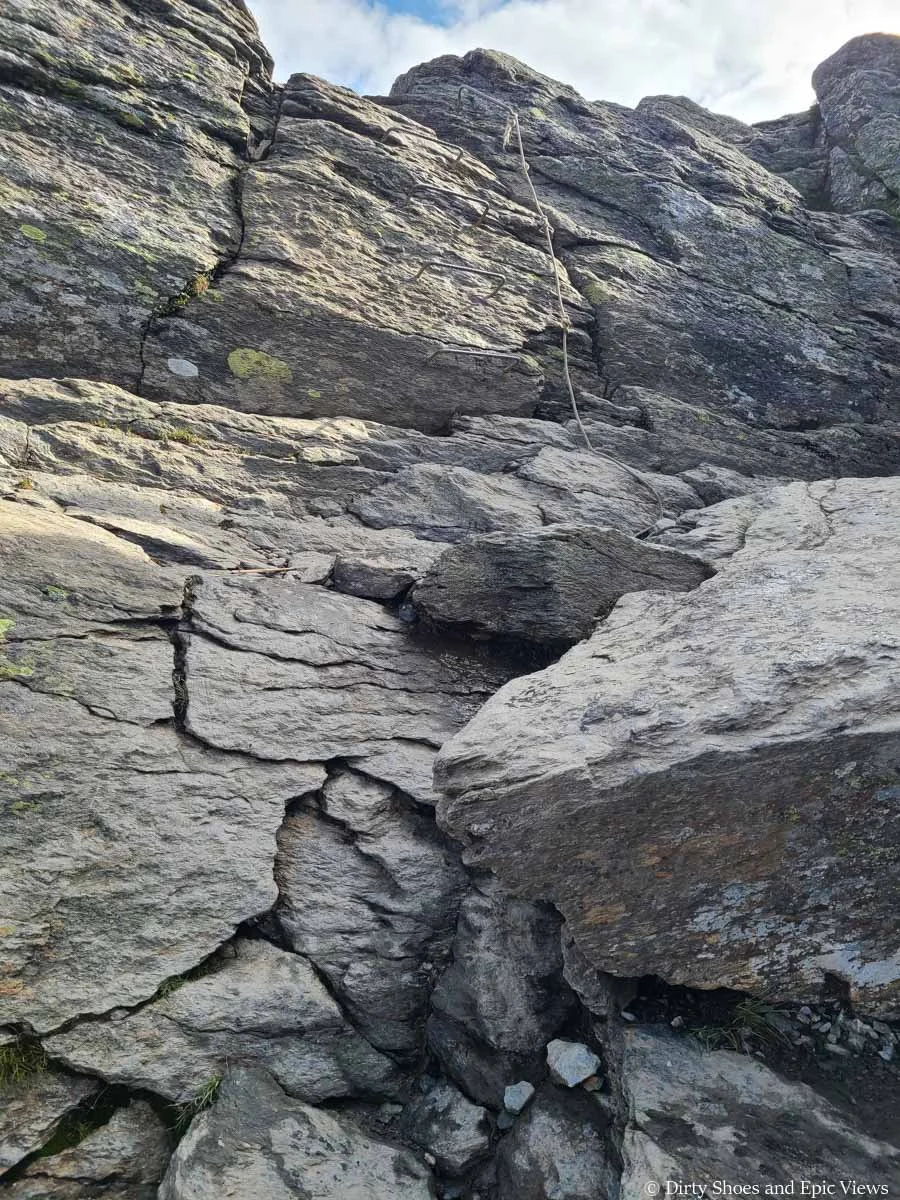
The rungs and short scramble that leads down to the base of Trolltunga
You don’t have to downclimb this section to actually get the iconic Trolltunga photo, it’s just if you want to stand out on it, so it’s easily skippable if needed.
Best Time to Hike to Trolltunga
The time of year and the time of day are two things to consider when planning your hike to Trolltunga.
Best time of year to hike Trolltunga
As far as time of year goes, summer is definitely the best time to hike to Trolltunga, specifically between June and September. In fact, the only time you can hike to Trolltunga on your own and without a guide is June 1st to September 30th. Outside this window, a guide is required to hike to Trolltunga.
Even still, snow can often still be covering lots of the Trolltunga hike well into June, and even into early July depending on the year. And snow can start up again towards the beginning of October. Usually it’s passable at these times with caution, but we recommend checking recent trail conditions (we like using AllTrails for this!) to get an idea of what the status is and if special gear is needed or recommended.
We hiked to Trolltunga in early July and didn’t have to pass any snow, but they did have a pretty light winter that year in terms of snow.
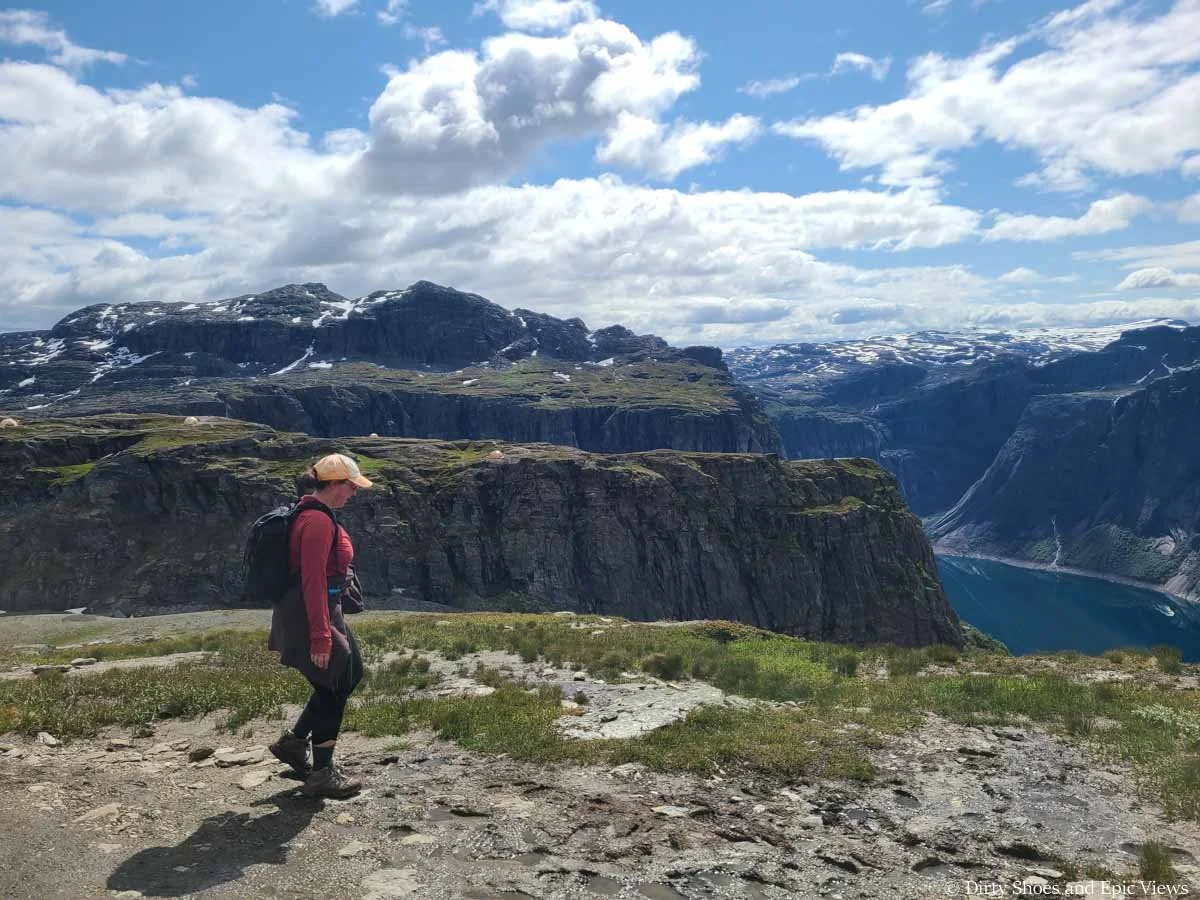
Views from Trolltunga in July
May and June are usually the driest months of the year in Norway, but because snow will still be on the trail, July and August are more ideal for the Trolltunga hike. We hiked to Trolltunga in early July, and we were a bit worried because we had read and heard that the weather in the Norwegian fjords can be pretty unstable and unpredictable, and we were prepared for about half of our days to be rainy and gloomy. However, we were pleasantly surprised that our July weather was actually pretty perfect. It was clear, sunny, and warm most days, with just some small and very infrequent spurts of rain moving through mountains. We asked a few locals if this was unusual, but they told us that it wasn’t and that this has been the norm recently.
With that said, we would still say to plan for anything, as weather throughout the years can vary substantially. But we will say that summer between June through August will be your best shot at the most stable and clear weather for hiking to Trolltunga.
Another benefit of hiking to Trolltunga in the summer is the long daylight hours, particularly from mid-June to mid-July. During this stretch, the midnight sun phenomenon is taking place above the Arctic Circle (in places like the Lofoten Islands of Norway). While Trolltunga itself does not experience the midnight sun, it does sit close enough to the Arctic Circle where essentially there is still light 24/7- the night hours are just more of a twilight glow than a pure daylight. Because the Trolltunga hike is a long one, having long daylight hours is great. You can check the official sunrise, sunset, and twilight hours on this useful website to help you plan for your hike to Trolltunga.
Of course, because of the ideal conditions, the Trolltunga hike will be the most crowded at this time, so don’t expect to have the trail to yourself!
By September, the weather can start to get a bit more unstable and stormy, and you’ll have less daylight. However, there will also be smaller crowds. Weather-wise it’s a bit of a gamble, however if you give yourself enough time and flexibility to be in Odda and check the weather daily, you’ll likely find a good day for the hike. Be sure to get a very early start to get back before dark!
Best time of day to hike Trolltunga
Now for the best time of day…
A very early start is always recommended for the Trolltunga hike. It’s a long one, and you want to give yourself plenty of time for it, especially if you are relying on shuttles to bring you back to your car at the end of the hike. The earliest shuttle heads up to P3 at 6:30 am, so trying to get on one of the first ones of the day is ideal.
If you know you’re a faster hiker, or you’re hiking to Trolltunga in the peak summer when there’s a lot of daylight, getting a bit of a later start is okay. But you’ll also want to be mindful of the parking situation. It’s a busy and popular hike, so if you want to guarantee parking at the P2 lot especially, you’ll need to get there pretty early. If P2 is full, you’ll likely still get a spot at P1, but you’ll have to be really mindful of your hiking time so that you get the last shuttle back down- you don’t want to be stuck hiking all the way back to P1 at the end of the day!
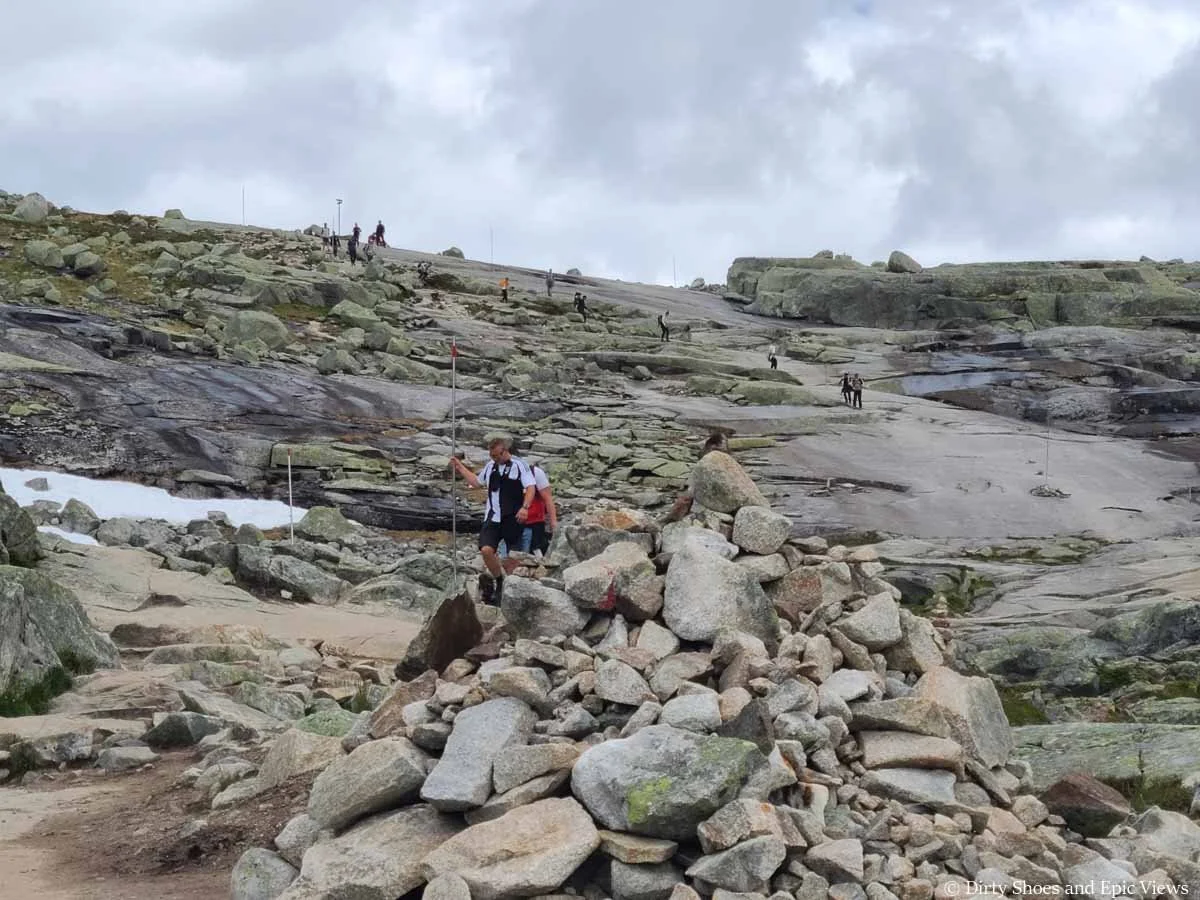
Just keep in mind that because it’s such a long hike, most Trolltunga hikers will heed this advice and start early, so you’ll likely be hiking with the crowds on this one. If you take the shuttles up to the trailhead, you’ll be starting with a bolus of other hikers. During really busy days- especially nice summer weekends- it might even feel like you’re in a train of people along the way.
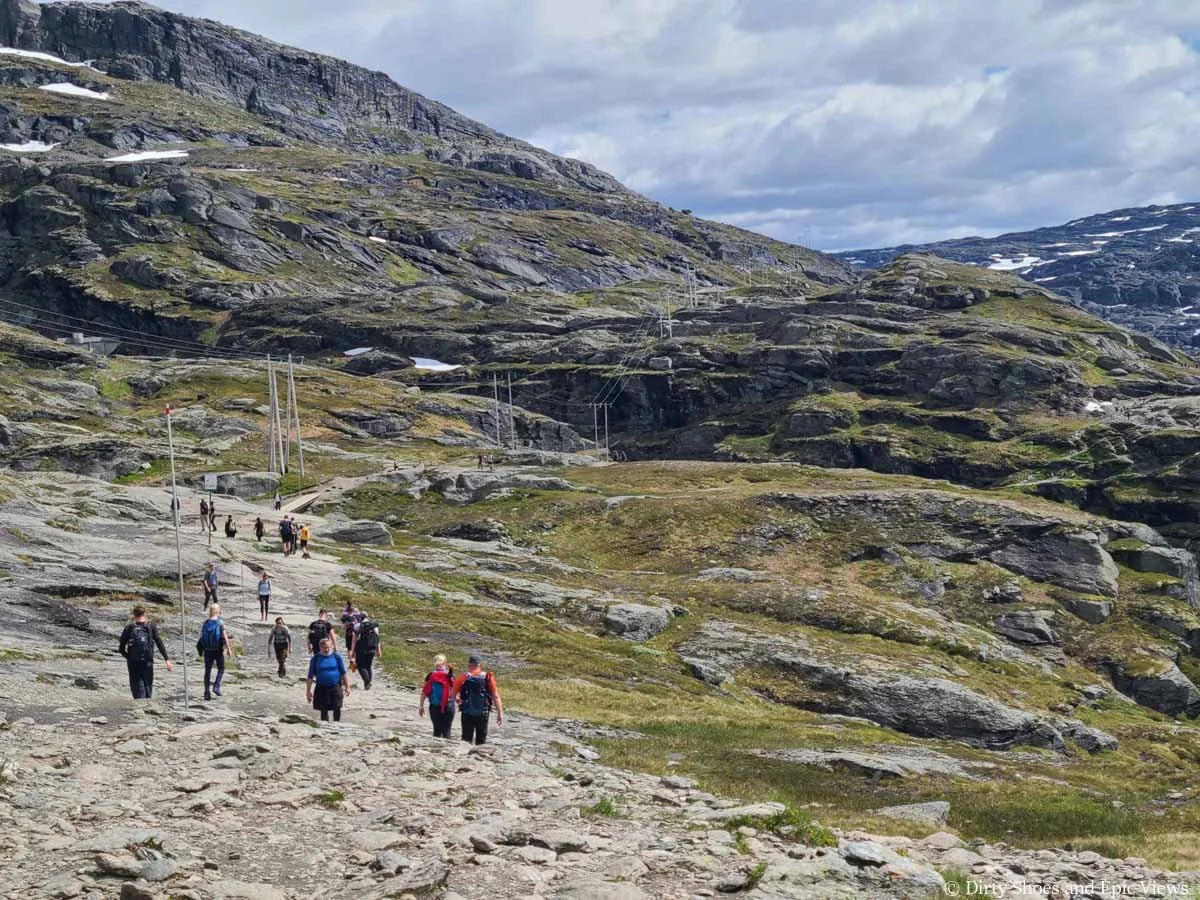
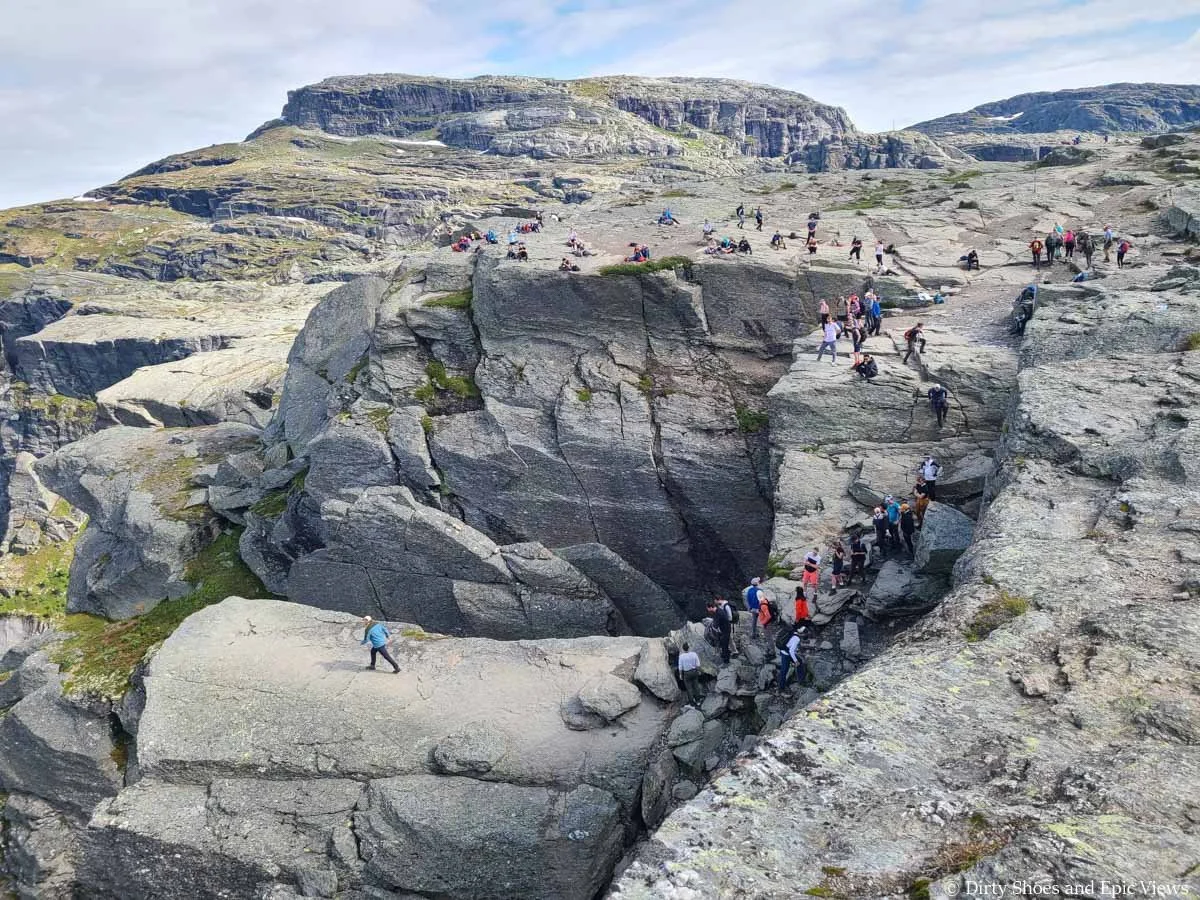
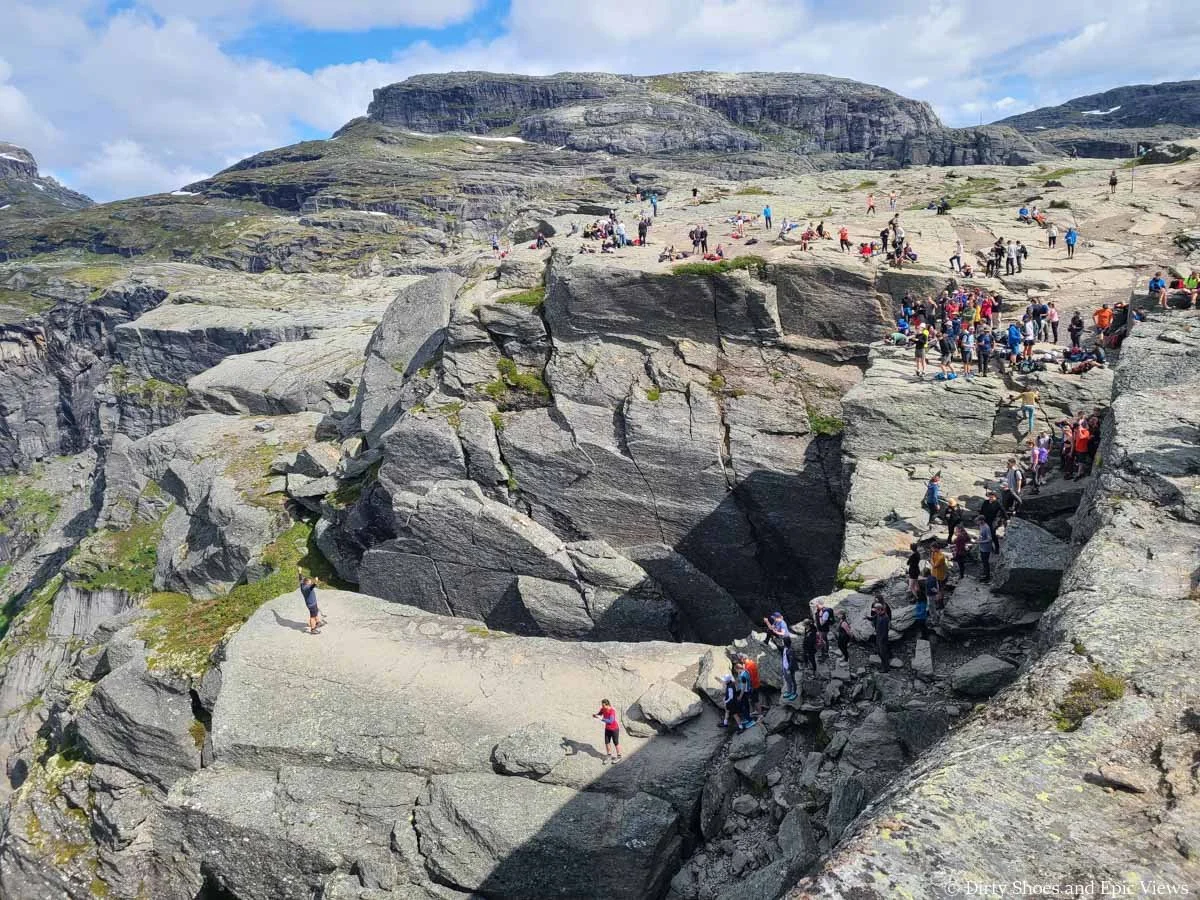
Midday crowds on the Trolltunga trail
Can you see the line of hikers on the trail in the distance?
And of course, Trolltunga itself can get quite busy. Midday, between about 10 or 11 am to about 2 to 3 pm is when the crowds really form. During this time, you can expect to wait in line for the chance to stand out on the famous tongue and get that Instagram-worthy shot. At less busy times, it can be as little as a half hour wait, but at peak times, you might have to wait for over an hour!
Midday crowds at Trolltunga
To be fair, it’s really not a bad place to have to wait in a line. The views are truly stunning from here, and you’ll meet lots of nice people who are all sharing in your excitement of completing the trek and being in such a special place.
But, if crowded trails and long lines aren’t your idea of a hike (we hear you!), you might be wondering if there is a way to avoid the crowds on Trolltunga.
Well, we have some thoughts on this…
Is it possible to avoid the crowds on Trolltunga?
Ok, first things first, our disclaimer here is that this is a really hard thing to do. Trolltunga is such a popular hike (and for good reason!) that no matter how hard you try, you’re going to run into the crowds at some point or another on your trek.
So our biggest piece of advice to you? Just embrace it. Go in mentally prepared for it and you’ll enjoy it more!
With that said, there are some ways that you can escape the crowds of Trolltunga for just a little bit and maybe find some peace and solitude along the trail and even at Trolltunga itself. We thought about all the options for a long time because we really wanted to try our best to escape the crowds, and we came up with a few solutions which we’ll share below. And just a head’s up…we personally did the last one and were sooooo glad we did!
Get the first shuttle up to the Trolltunga trailhead
Set your alarm clock early and get to the P2 lot so that you can hop on the very first shuttle to P3 at 6:30 am. This way, you’ll be in the first bolus of hikers to hit the trail, and will likely get to Trolltunga before the crowds have had time to build up. If you are a very fast hiker, you can definitely break away from the crowds here and be among the first to Trolltunga, not have to wait in lines, and enjoy the views before the rest of the shuttle crowds catch up.
Clear morning trails to Trolltunga
Of course, eventually those crowds will start to build up as the morning goes on, so the hike back will be pretty busy, but you’ll at least get to enjoy the first half of the hike in relative solitude.
For me personally, I know I am not the fastest hiker out there (Kevin on the other hand is a mountain goat on the trails…) so I knew this strategy probably wouldn’t entirely pay off for me, though I’m sure we still would have reached Trolltunga before the biggest crowds of the day formed had we done this.
Start the hike later
Ok, I know this goes against all the standard Trolltunga advice, but hear me out…
Since most people start the hike to Trolltunga super early, with crowds at their peak midday, why not plan to get to Trolltunga after midday when most of the day hikers have started their hike back out?
If you start the hike by mid-morning, around 11 am or noon, you’ll likely experience a busy trail on the way in as many people hike out, but by the time you get to Trolltunga, the crowds will have died down, and you’ll have a quieter hike out as well.
The caveat to this strategy to avoid the Trolltunga crowds is that you really only should even consider this if it’s peak summer time between mid-June to mid-July when there is maximum daylight, and also only if you’re a reasonably fast and strong hiker. Also consider that while you may be able to use the shuttle for the start of the hike, you’ll need to be prepared to walk back down to your car (likely at P2) since you’ll likely be finishing after the shuttles have stopped running for the day.
I really wanted to opt for this strategy but there was one big reason we ultimately didn’t do it, and that is because of parking…
We were worried that by midmorning, the P2 lot would already be full since most people get there pretty early, and we didn’t want to risk not being able to hike because of no parking. Sure, we may have been able to find a spot down in P1, but we certainly did not want to have to hike all the way back to P1 at the end of our hike!
We will say that when we finished our Trolltunga hike by midafternoon and arrived back at P2, we were actually surprised at how much parking was still available at that point. Overnighters and fast/early hikers were starting to leave by this point, however, in our opinion, this would be too late to start a day hike to Trolltunga, and for us, getting there midmorning would still be a gamble. If we had guaranteed parking at P3, we might have considered this strategy more.
Backpack to Trolltunga
If you want to break up the long hike to Trolltunga into two days, backpacking is certainly an option, and by doing so, you can also avoid the Trolltunga crowds.
On your first day, you can get a later start on the trail after most of the day hikers have already started. You can also set up camp closer to Trolltunga and visit it early in the morning or later in the evening before or after the day hikers have visited. We’ll talk more about backpacking to Trolltunga below.
Start your hike SUPER early
This is our last tip for avoiding the crowds at Trolltunga. It’s the strategy we used and I must say that it was the best decision we made throughout our entire Norway trip.
And the strategy was…to start the hike to Trolltunga super early. I know, probably not the grand revelation you were expecting.
But hear me out…
A great way to avoid the crowds on Trolltunga is to start your hike before the shuttles start running for the day! Now, I am not a morning person in the slightest, so that early of a wake-up call is never my preference, but it was so worth it.
We got everything set the night before, set our alarm for 4 am, leapt out of bed the next morning and just headed on up to P2.
We got to the lot at 5 am sharp, and it was surprisingly calm, peaceful, and quiet. There was quite literally no one else around, and at that point we knew the early morning wake-up call was worth it. There was still a surprising number of cars already in the lot, which we assumed were from backpackers that had spent the night, but there was plenty of parking still available for the impending bolus of day hikers that would be coming soon.
Of course, this strategy requires that you make the hike from P2 up to P3- a two mile and 1200 foot slog up that paved switchbacking road. It was a very quiet and peaceful walk up, where we met just two others who had the same idea as us as we climbed. It took us one hour, and we reached the official Trolltunga trail by 6 am.
Since the shuttles started at 6:30 am, we estimated we had about a 40-minute head start by the time the shuttle started and made its way to the top of the road, so off we went.
We had the first hour or so of the trail completely to ourselves before the first of the fastest shuttle hikers started catching up to us. And even though people would catch up to us and pass us here and there, the entire hike into Trolltunga was such a peaceful experience. We enjoyed the views mostly in solitude, and anyone we did encounter were just solo hikers and pairs who quickly passed. We actually couldn’t believe we were getting such a nice experience on one of the most popular and busiest trails in Norway!
Once at Trolltunga, there were definitely people there (overnighters and all the fast shuttle hikers that had passed us earlier), but they had all already taken their pictures and were now just enjoying the views, so there was essentially no line at the tongue!
In a span of about 20 minutes, I got to step out onto Trolltunga four different times (and the wait to do so was never more than a couple of minutes and a few people deep). It was an amazing experience.
By 10 am, as we were off to the side eating an early lunch and enjoying the views, the crowds were quickly starting to build, and the line for Trolltunga got quite long- we wouldn’t be surprised if it was about a 45-minute wait by the time we left. And the hike back out during midday was certainly a totally different experience. There were trains of people hiking in, as well as a steady stream now hiking out. So we were certainly happy to have had that early morning experience that we got!
Hiking to Trolltunga: Trail Description and Our Experience
After an early 4 am wake-up call, we drove up the narrow mountain road to a very quiet P2 parking lot by 5 am. It was blissfully peaceful this early in the morning as we paid for our parking and got ready for the long hike ahead.
For the hike up to P3, we opted for the road walk rather than the direct trail. The road walk is longer in distance, but not as steep, and for us, it was a better way to ease into the hike. It’s a smoother walk up a paved road, which I felt would be easier and faster-going than a steep and rugged trail.
From the P2 lot, you’ll see the Trolltunga Active store, and a paved road continues uphill past this. We simply followed this road, past the shuttle stop and ticket office, and immediately started the uphill climb.
Just past the Trolltunga Active store, this hard-to-miss blue sign marks the start of the switchbacks to P3 and the Trolltunga trailhead!
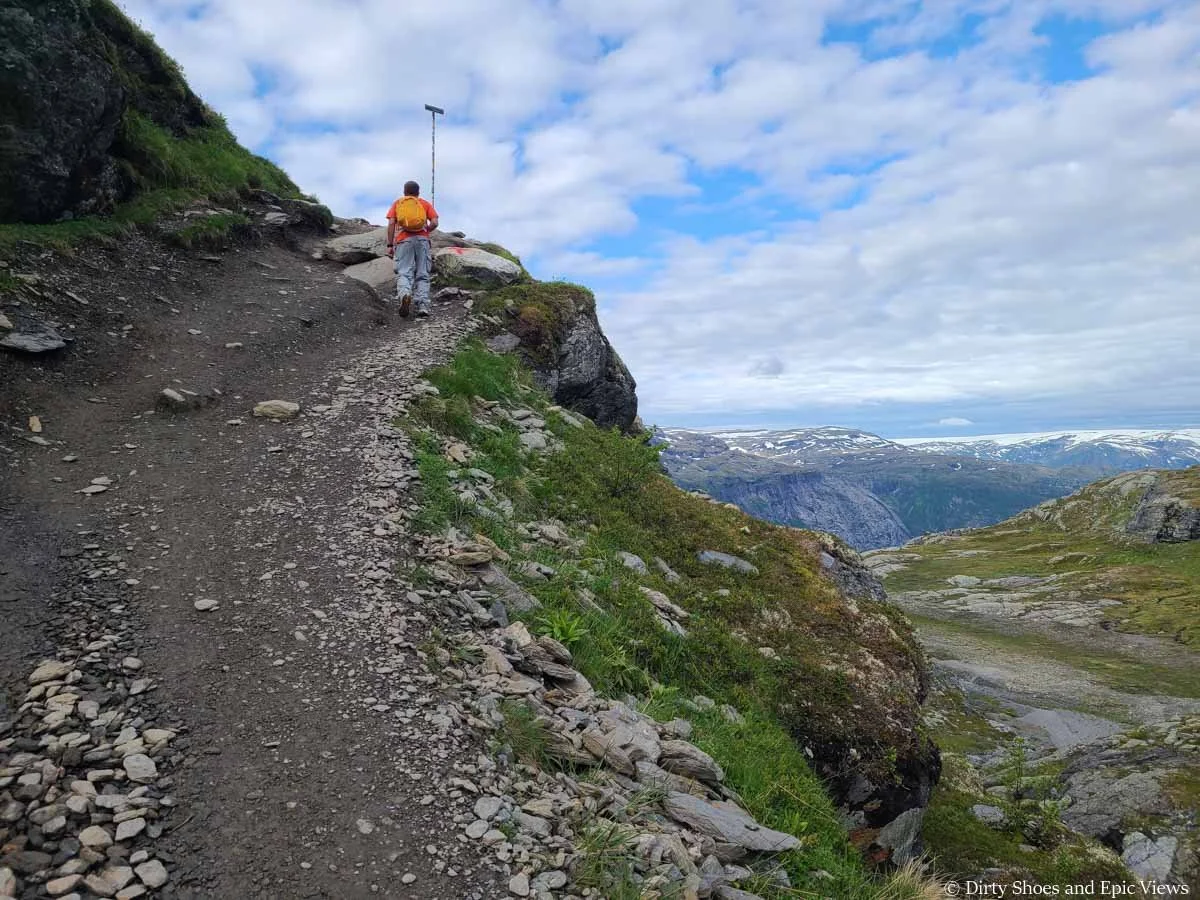
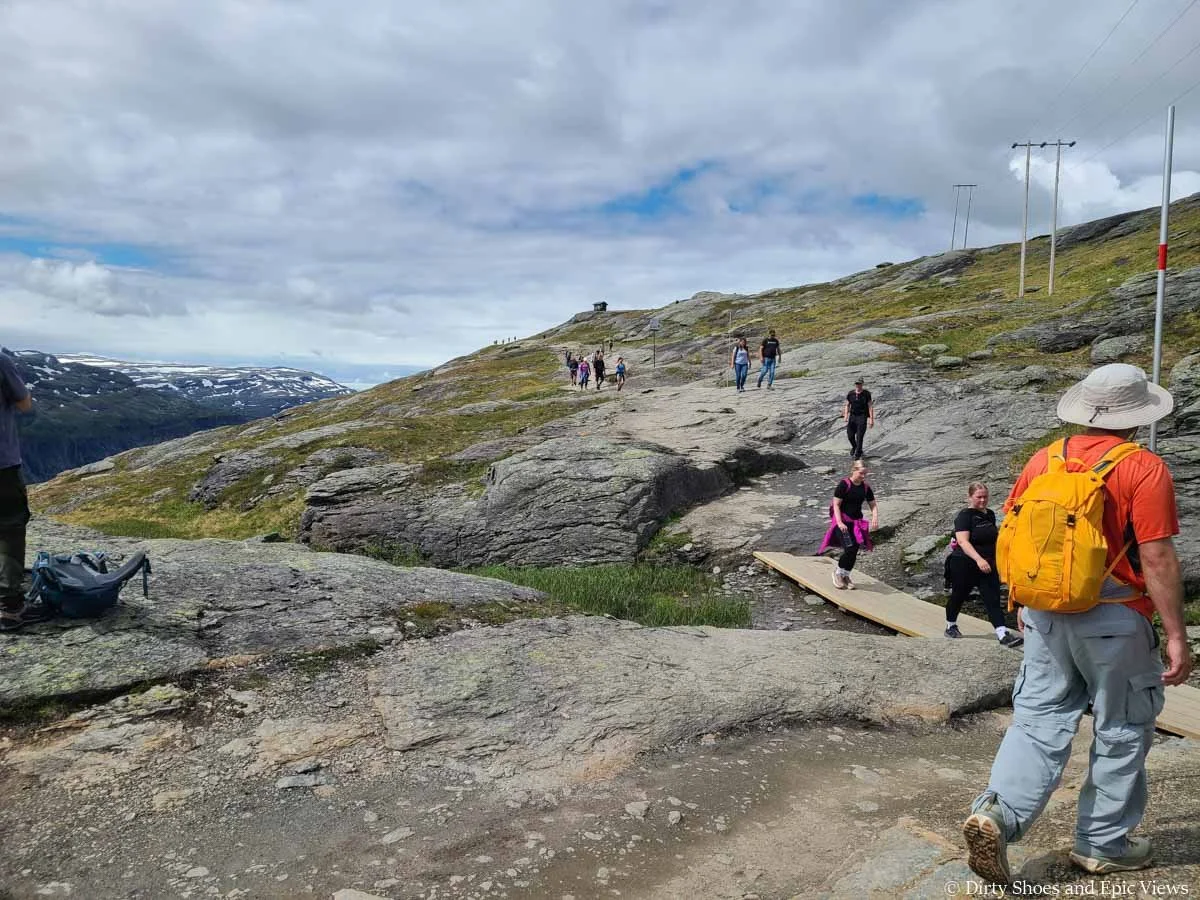
The road walk up from P2 to P3 on the Trolltunga hike is just a steady climb up a series of paved switchbacks. It’s a bit steep, climbing steady for 1200 feet over about 2 miles. I was able to hold a pretty consistent pace without breaks and it took me exactly an hour to reach the official Trolltunga trailhead at the top.
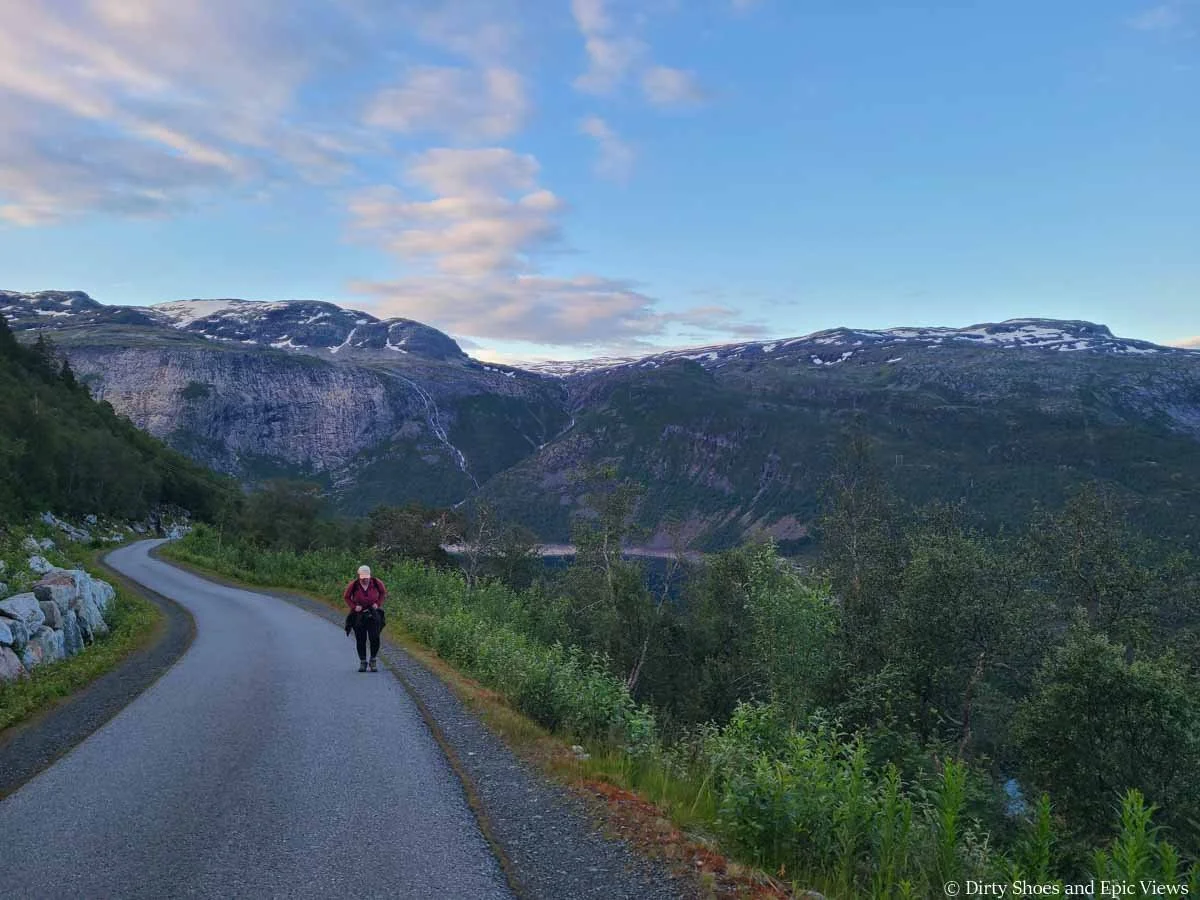
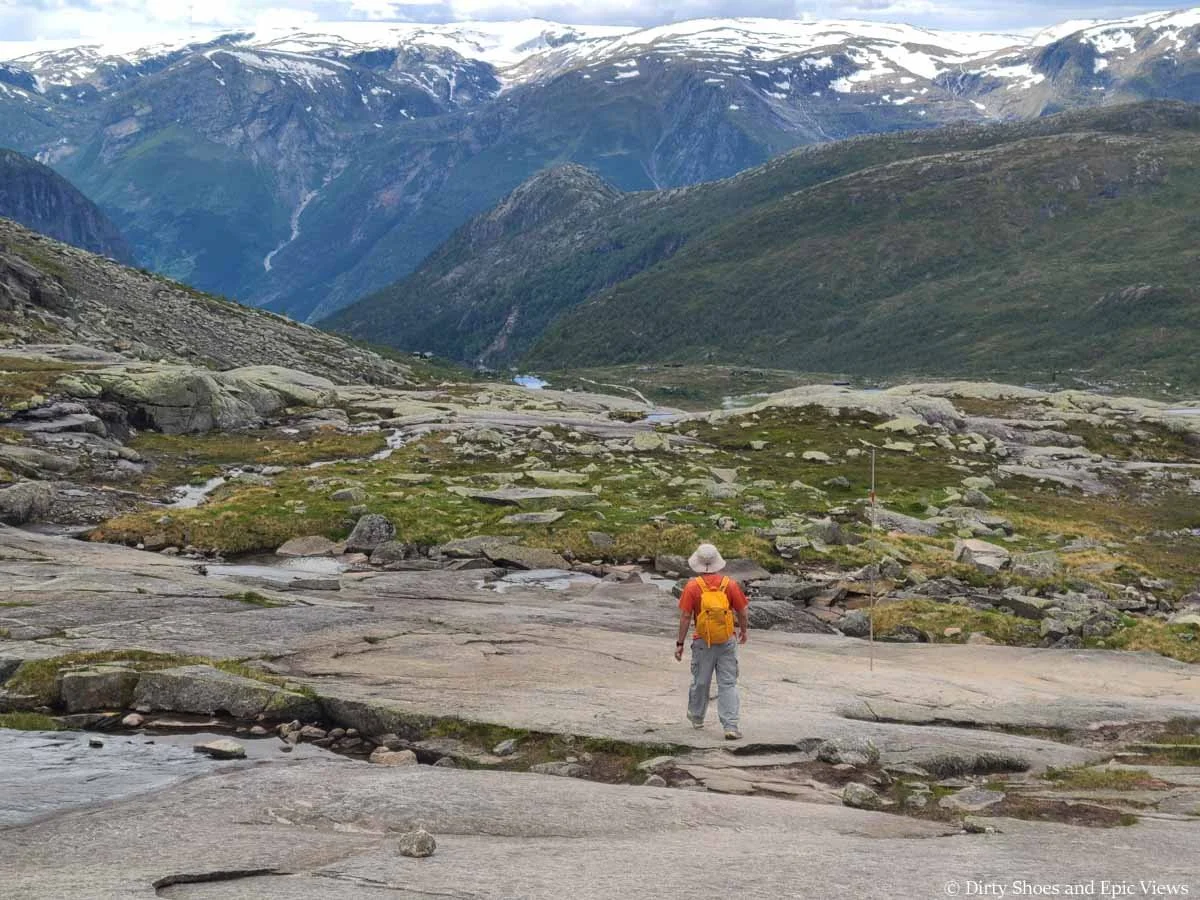
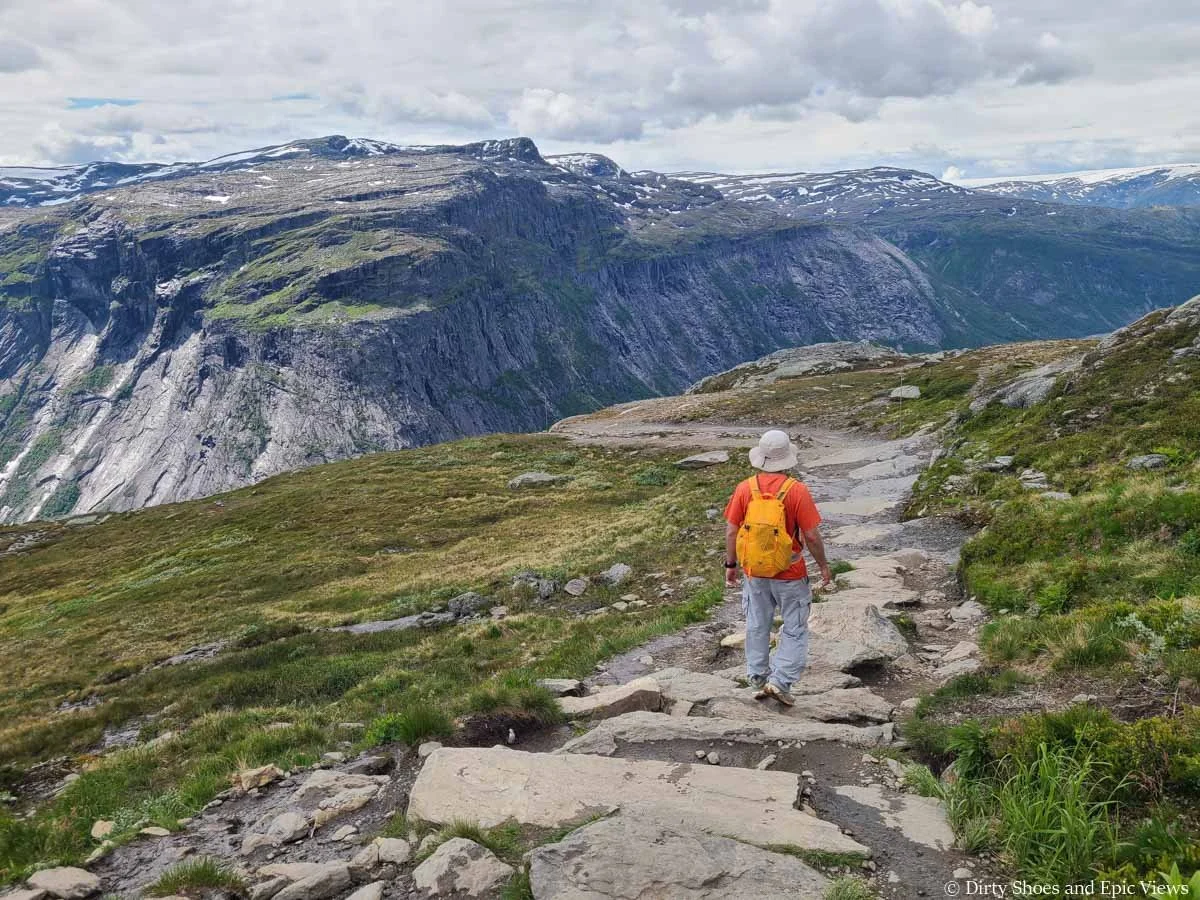
Hiking from P2 to P3 to the Trolltunga trailhead
The steady ascent up to the Trolltunga trailhead
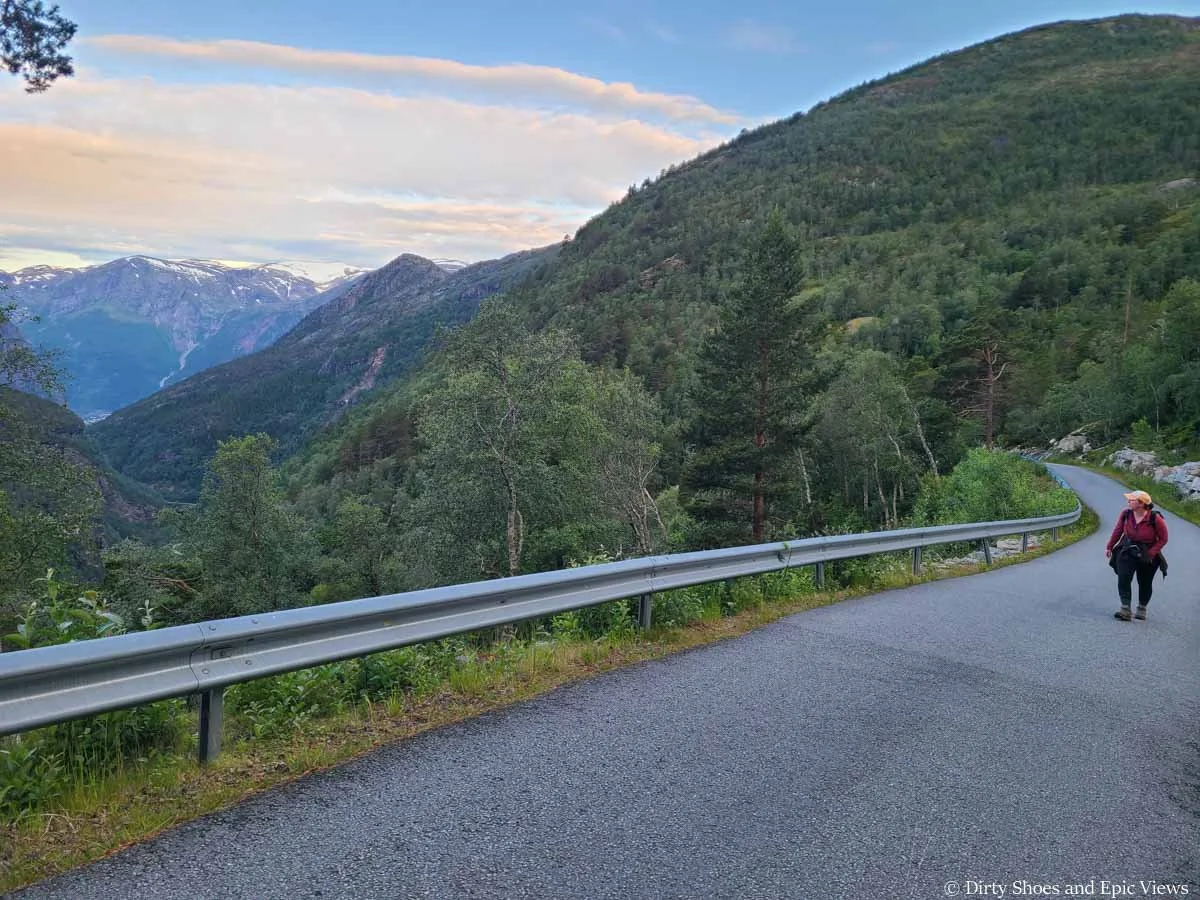
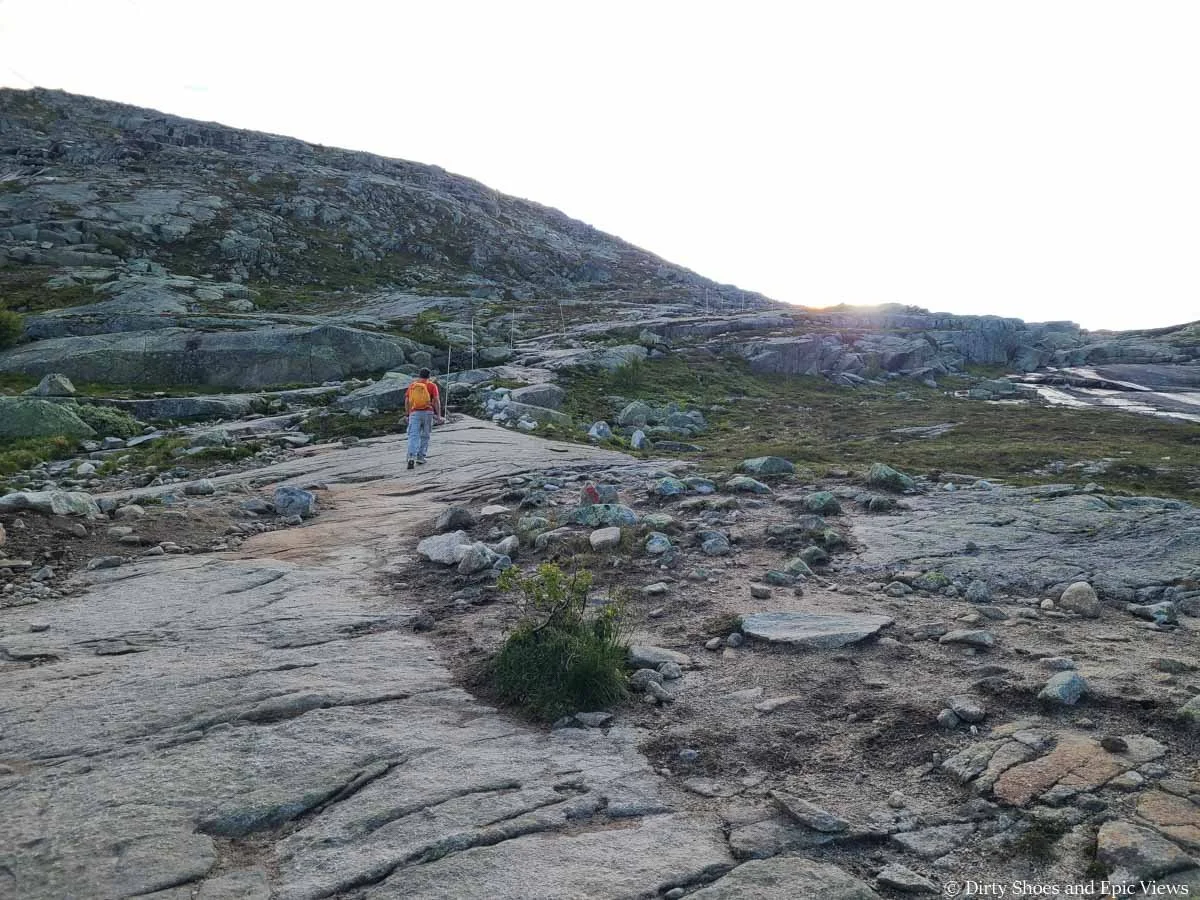
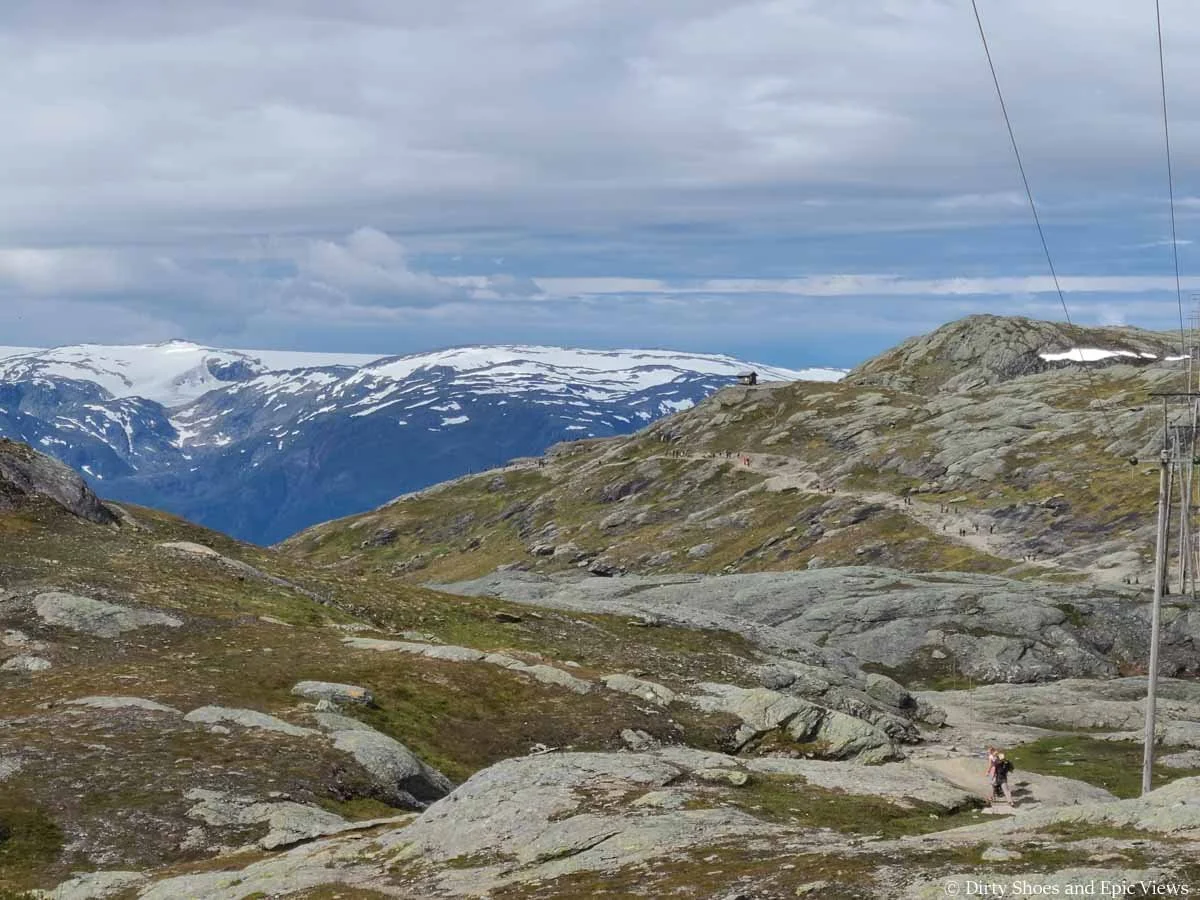
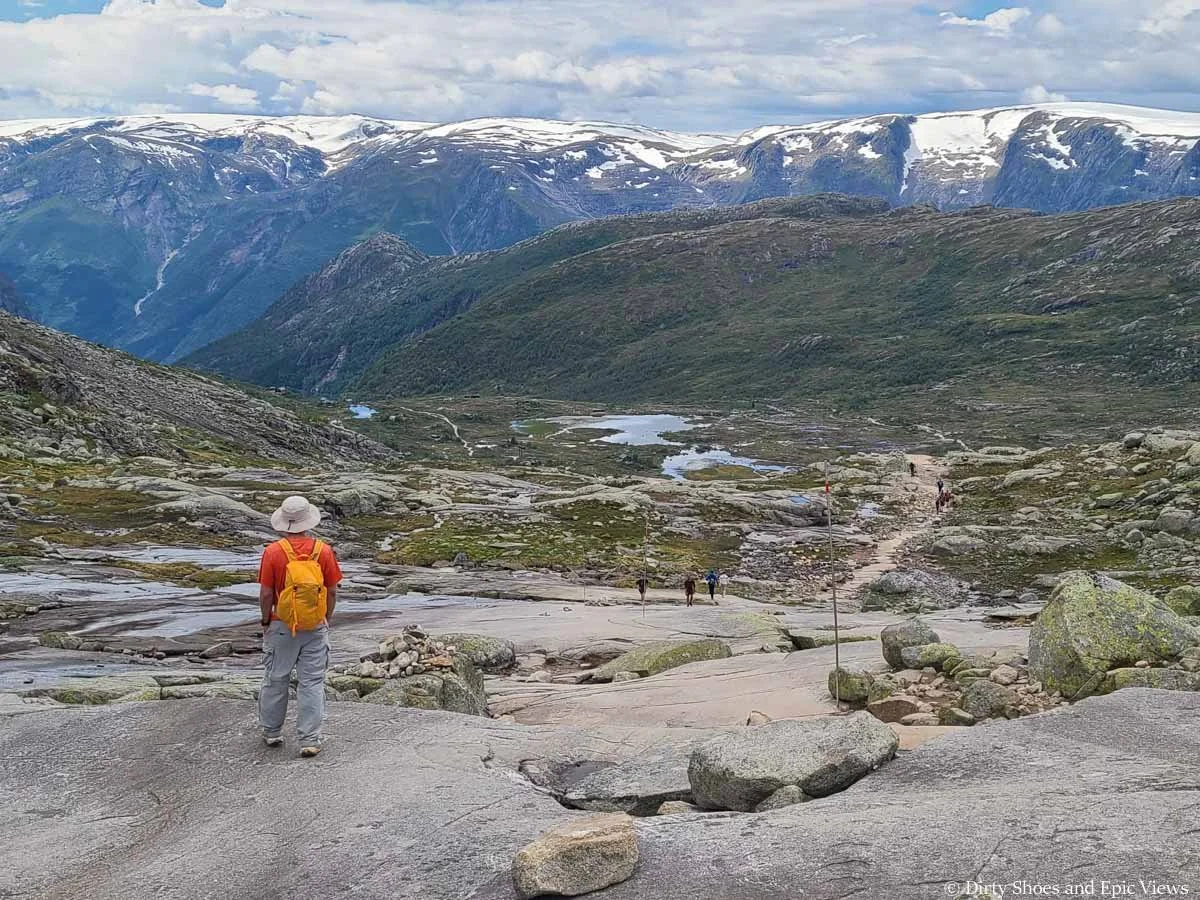
It was a nice quiet walk- we only saw two other friendly (and much faster!) hikers who passed us along the way up. And this early in the morning, there were no buses or cars to watch out for as the road had not yet opened. As we got higher and higher, views were already starting to open up over waterfall-laden granite cliffs, distance snow-capped peaks, and Vetlavatnet Lake below.

Views from the road to P3 and the Trolltunga trailhead
At the turn of the very last switchback is the well-signed official start of the Trolltunga hike. We got there right at 6 am, which was our goal, and we estimated we had about a 40-minute or so head start before the first shuttle dropped off its first bolus of hikers.
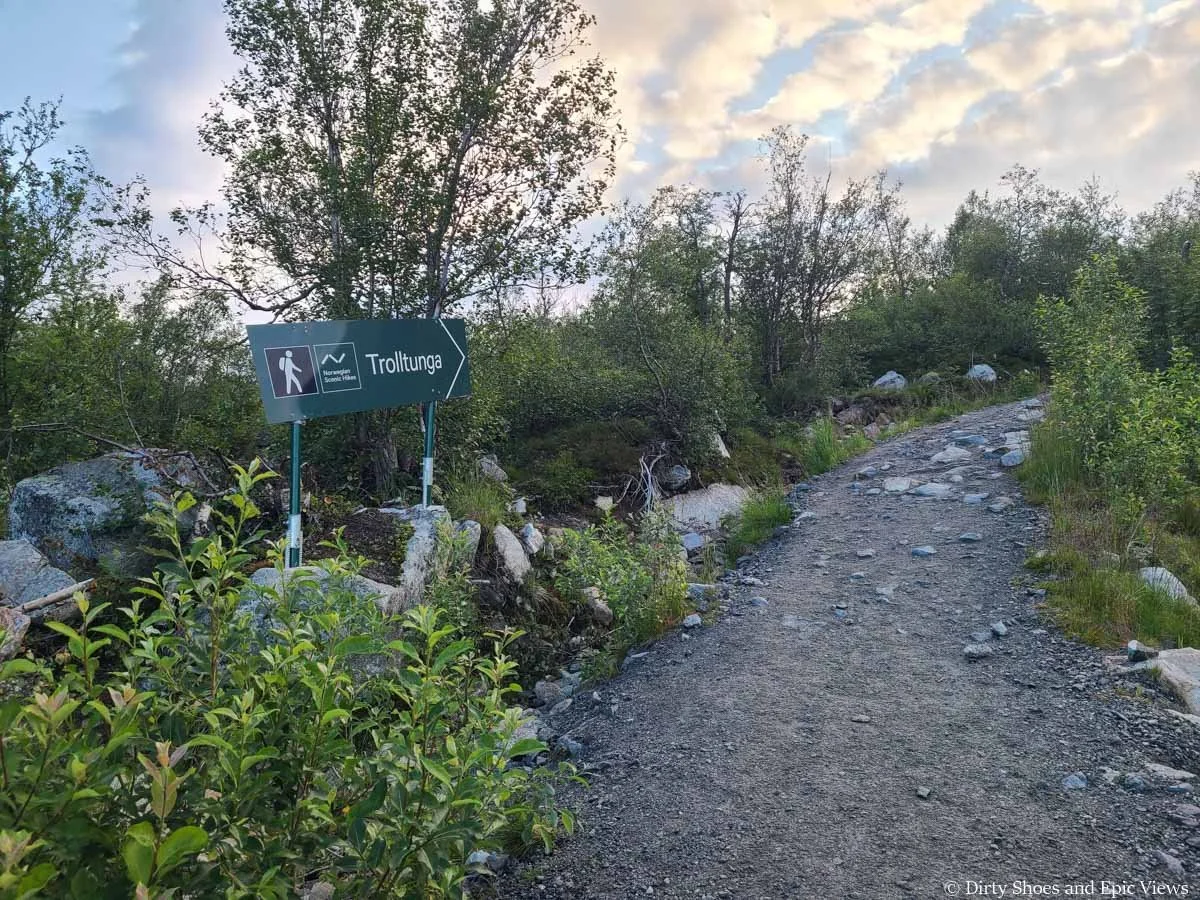
The official start of the Trolltunga hike found along the last switchback to the P3 lot
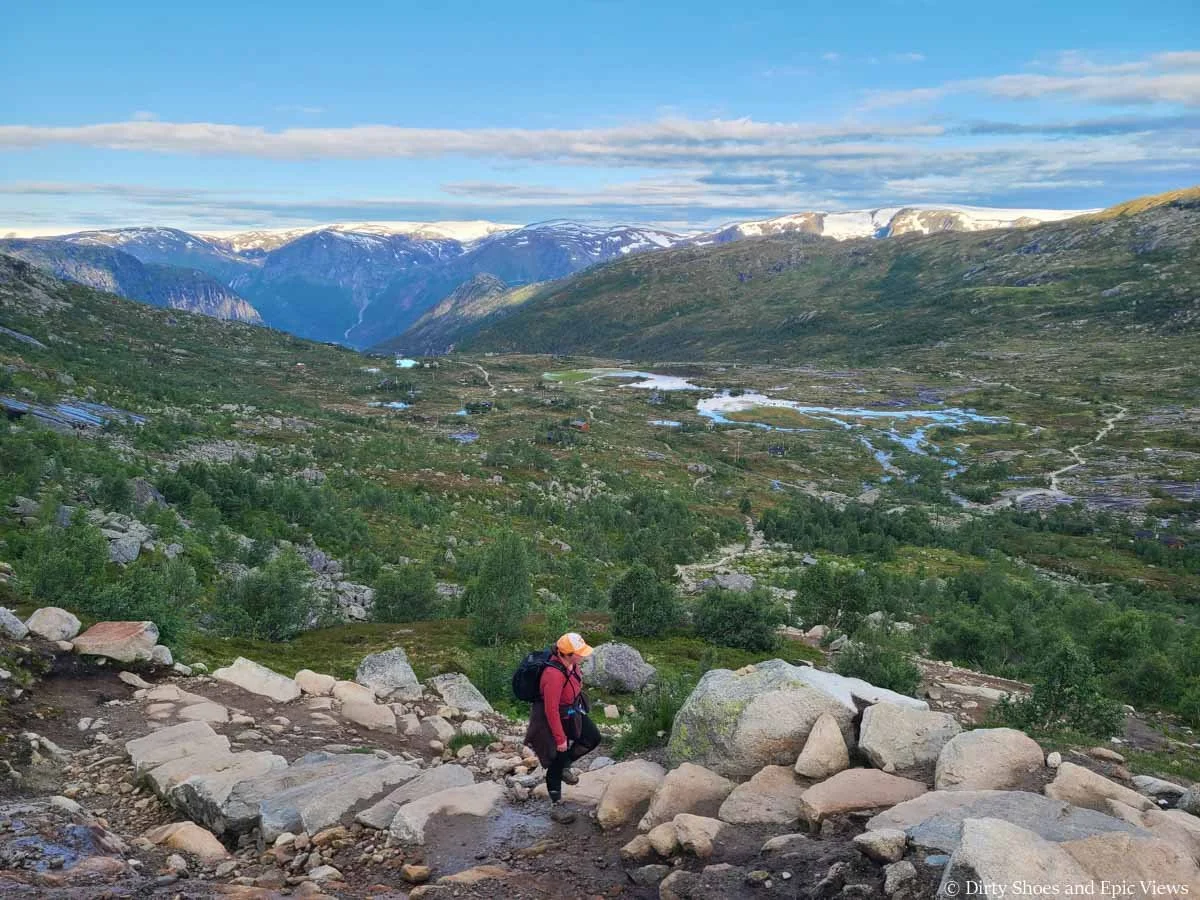
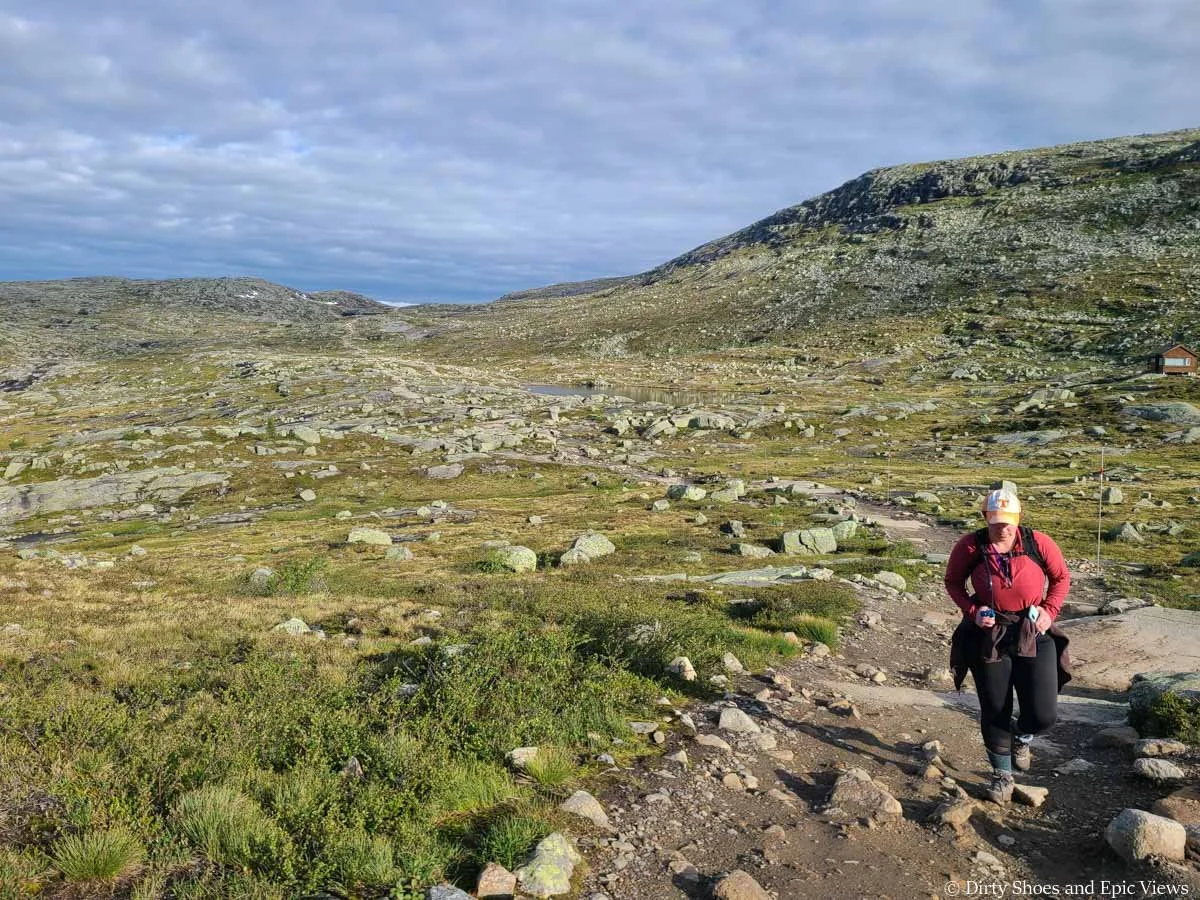
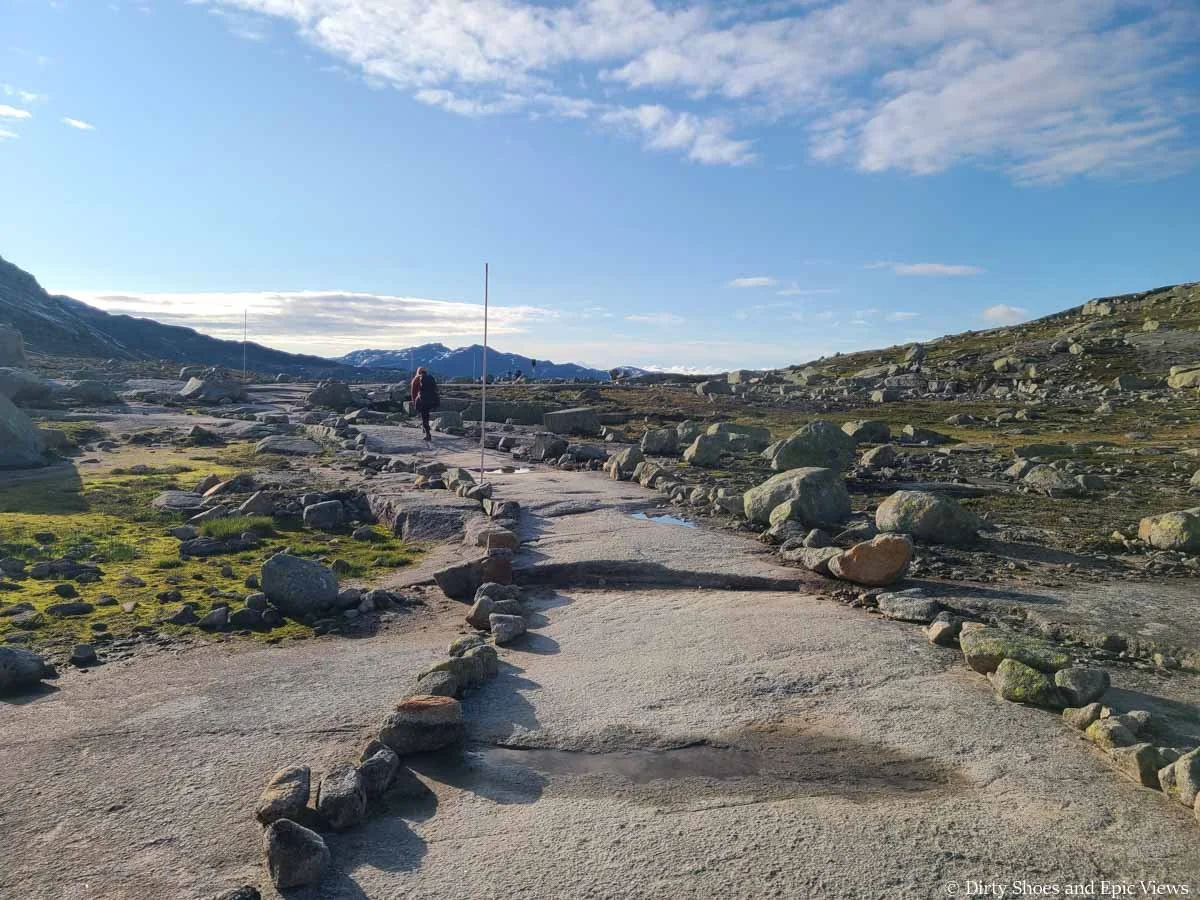
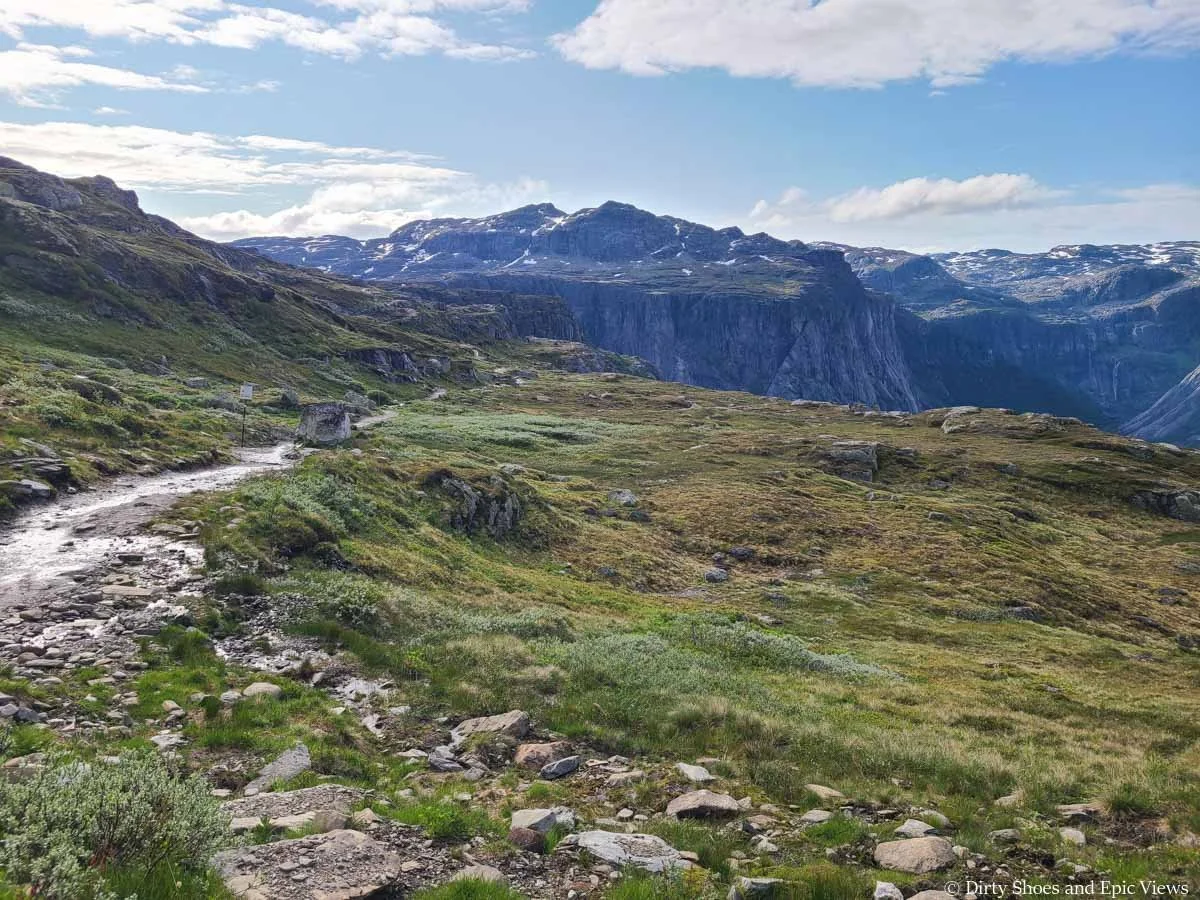
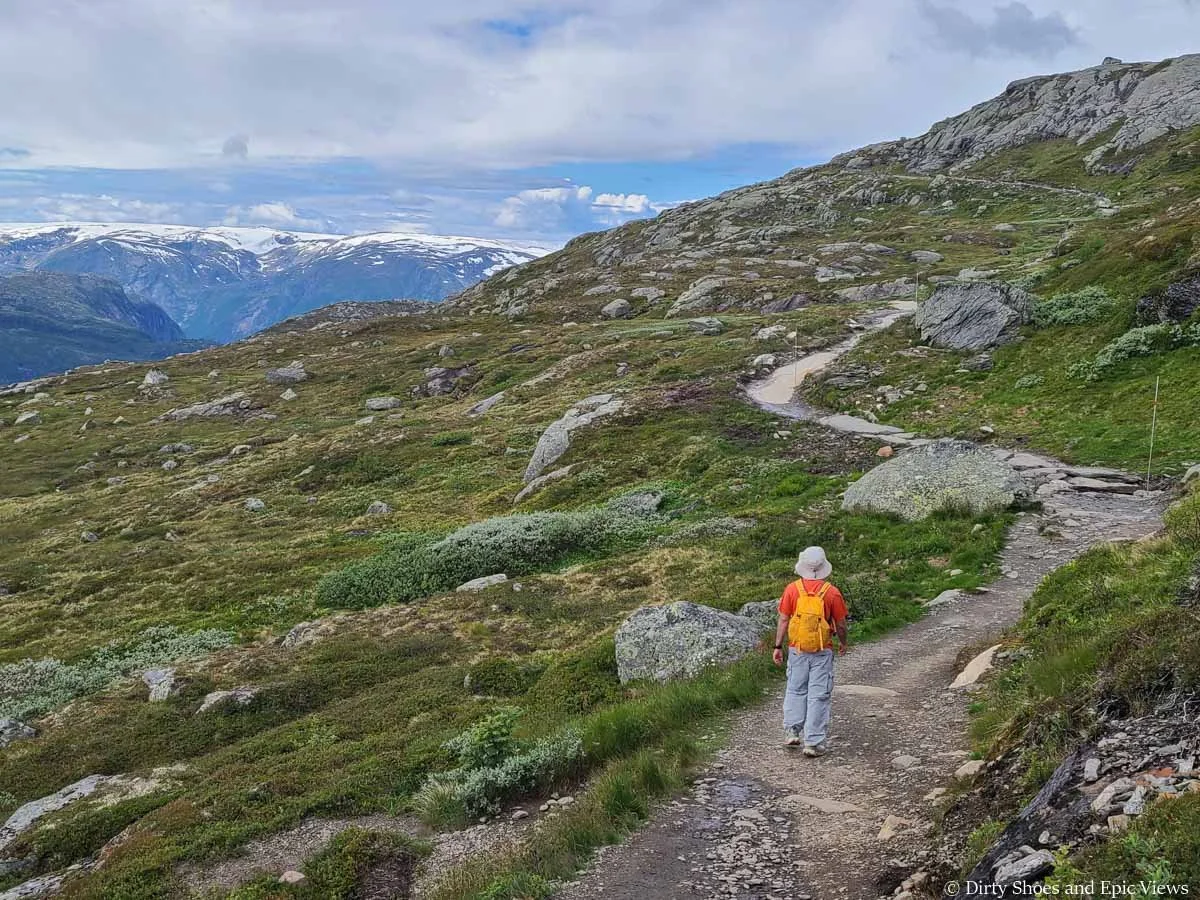
At the trailhead, there is an initial short climb up off the road that will spill you out onto a relatively flat valley walk. For about 20 minutes or so, you’ll have an easy traverse across a flat mix of rock and dirt trail as you head towards the pass that looms ahead in the distance, using tall poles to guide you across the landscape. Enjoy this part before the first big climb begins! Throughout this part of the Trolltunga hike, you’ll have nice views of the surrounding hills and mountains, but they are nothing compared to what’s to come!
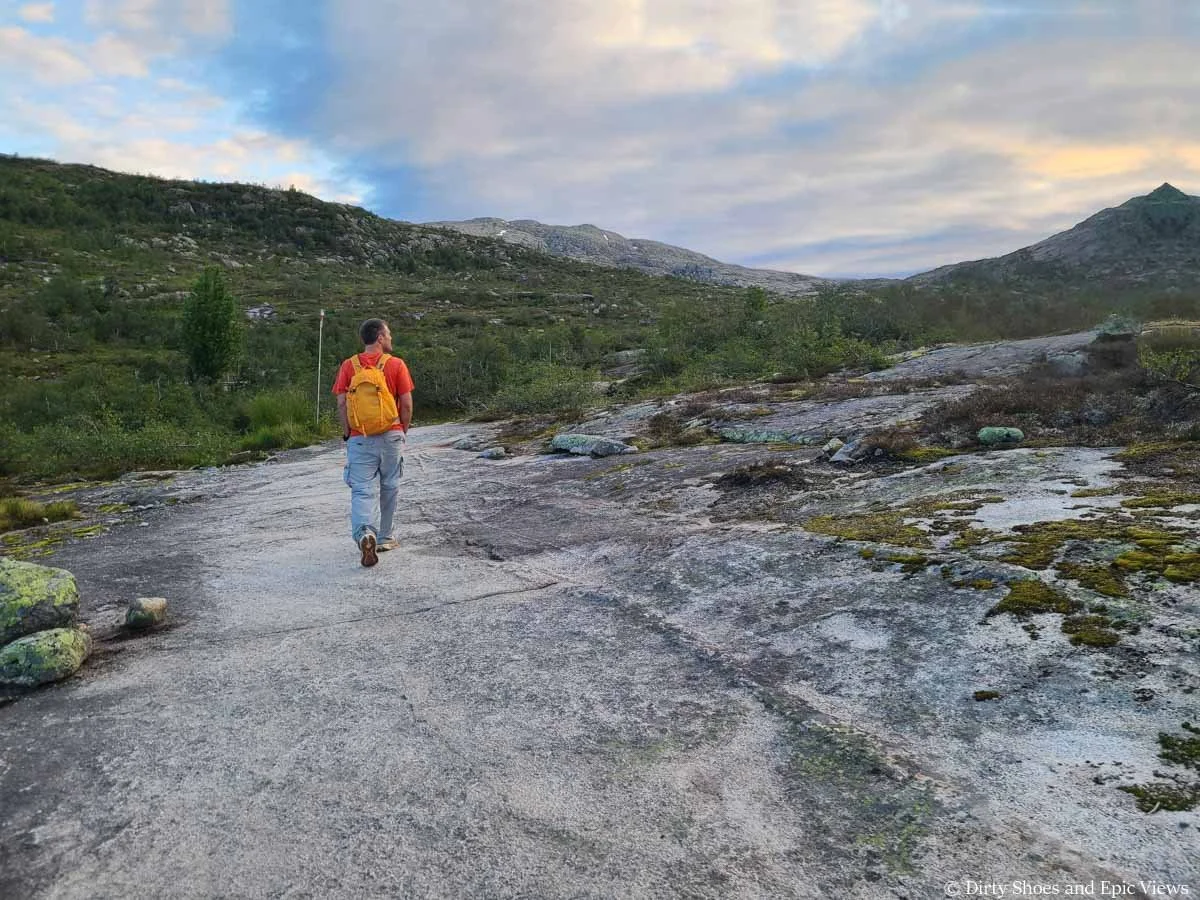
The early flat part of the Trolltunga hike
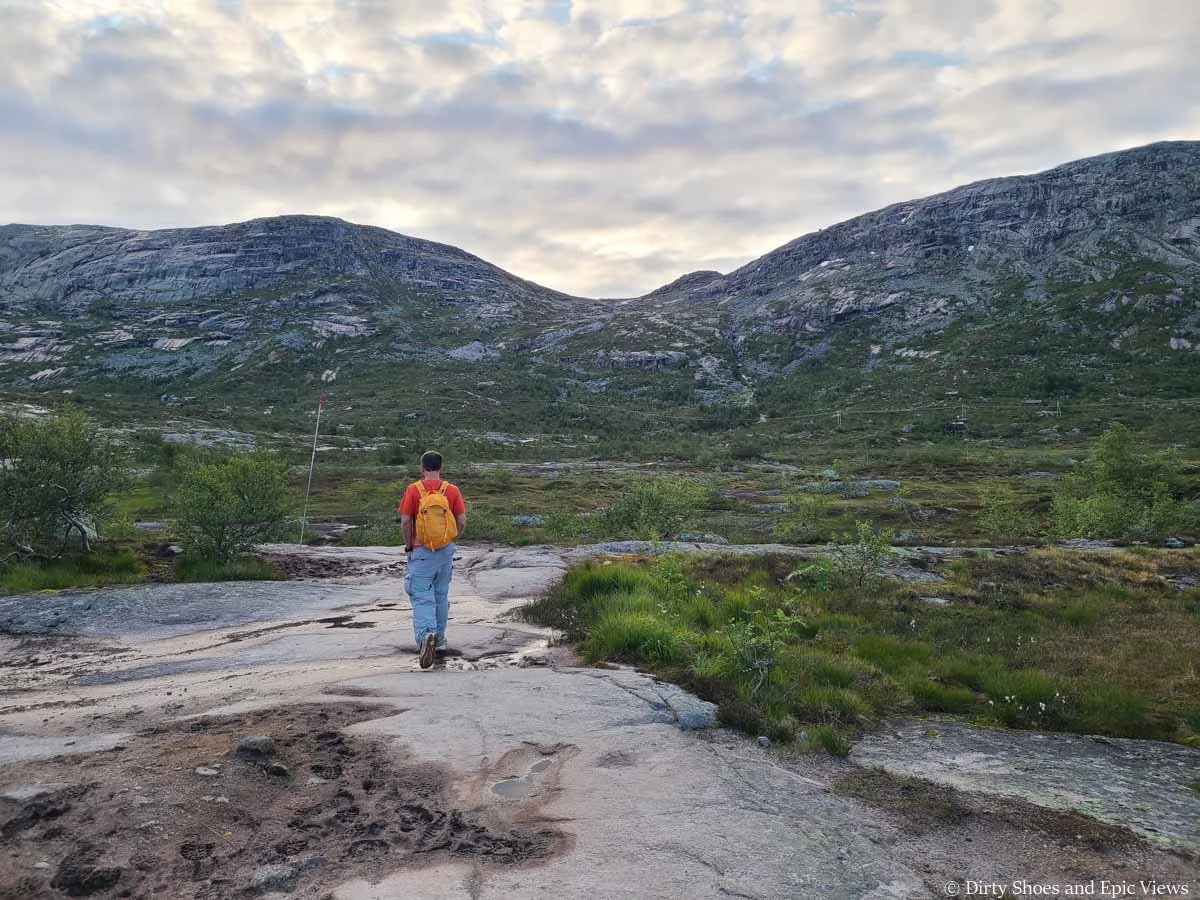
Heading towards the mountain pass pictured ahead- you’ll be climbing that soon!
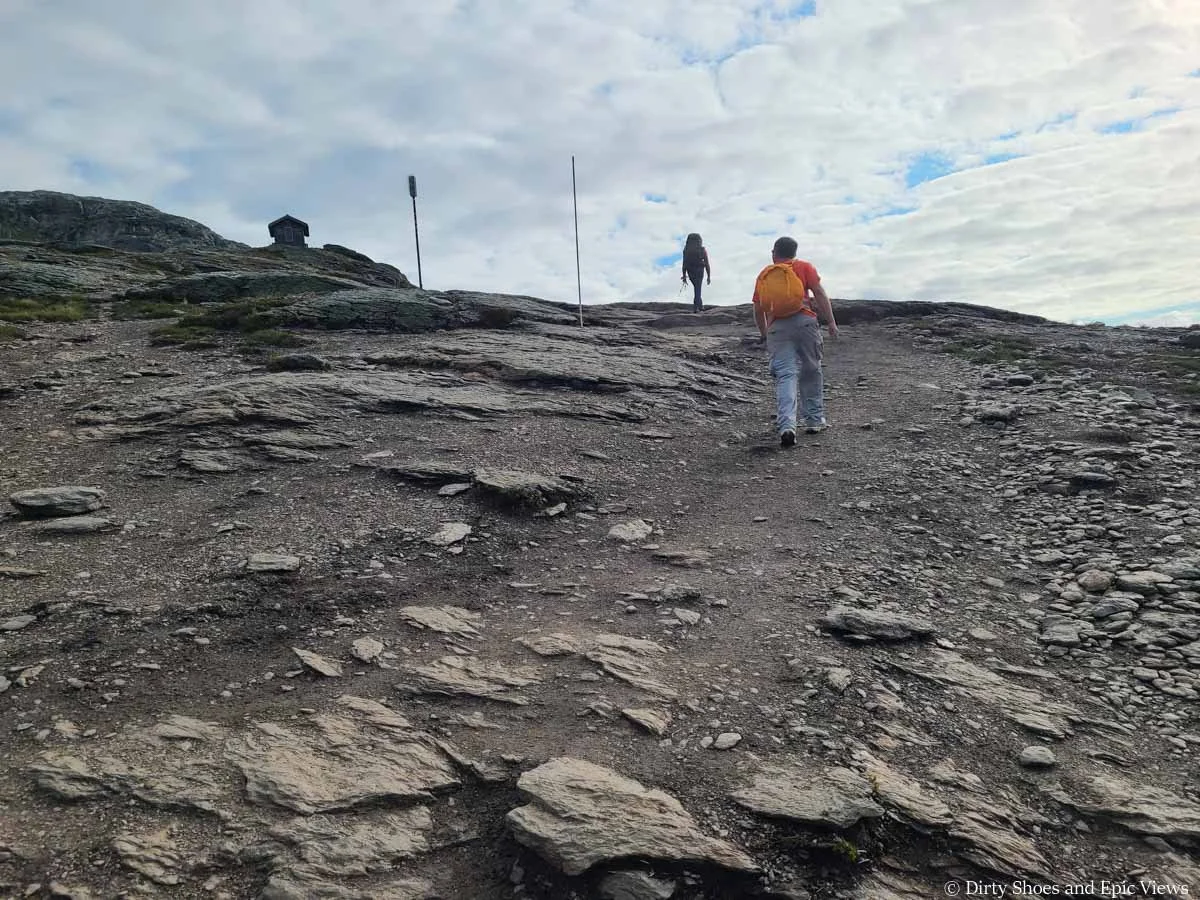
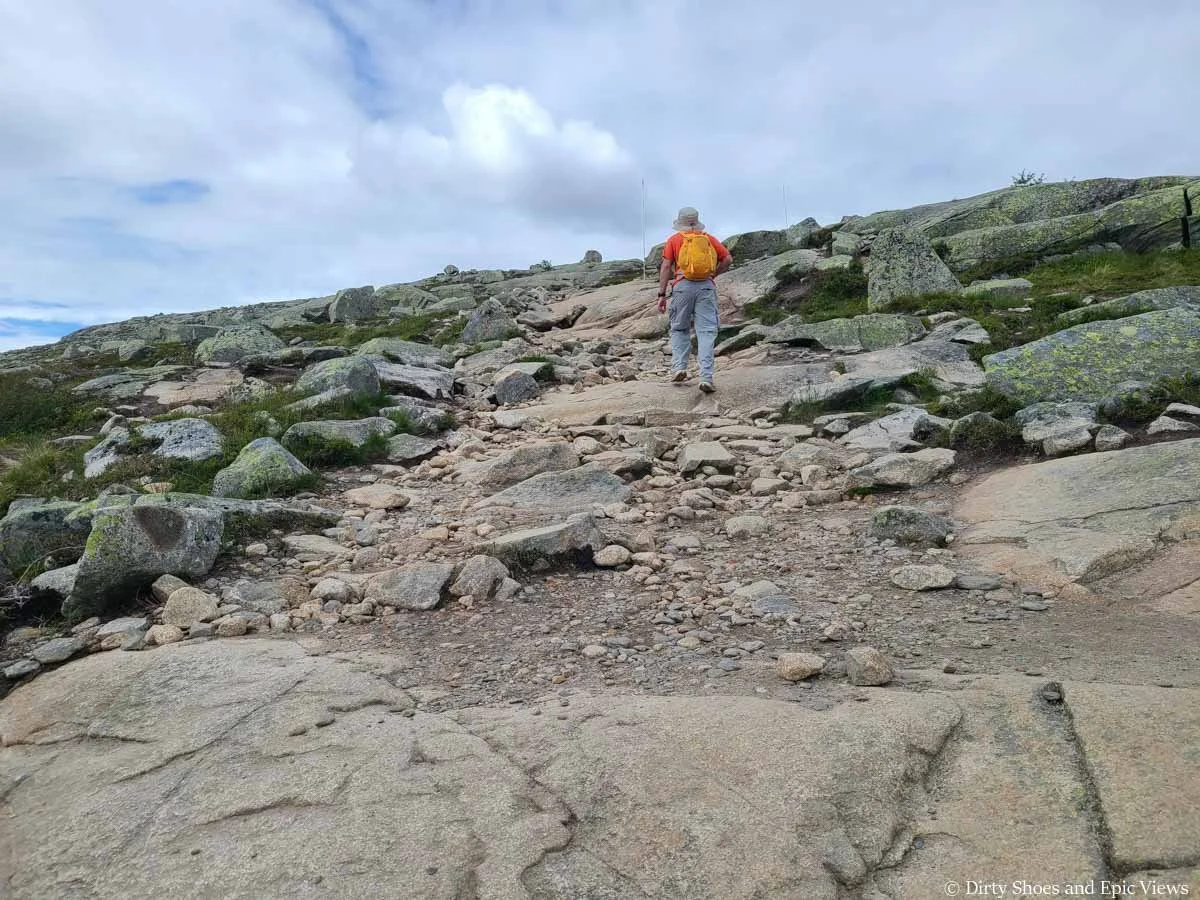
After about 20 minutes or so of easy hiking you’ll come to the bottom of the pass, which marks the start of the biggest climb and most strenuous part of the entire Trolltunga hike (it’s nice to get it out of the way early!). It’s a pretty steady climb and somewhat steep, but very doable and well-maintained. It felt a bit exhausting for me because we had just hiked up the road to P3 (and spent three previous days hiking all around the Lofoten Islands!), but I think on fresher legs this climb wouldn’t seem too terrible.
The first part of the climb basically consists of a long stone staircase- so expect a lot of steps!
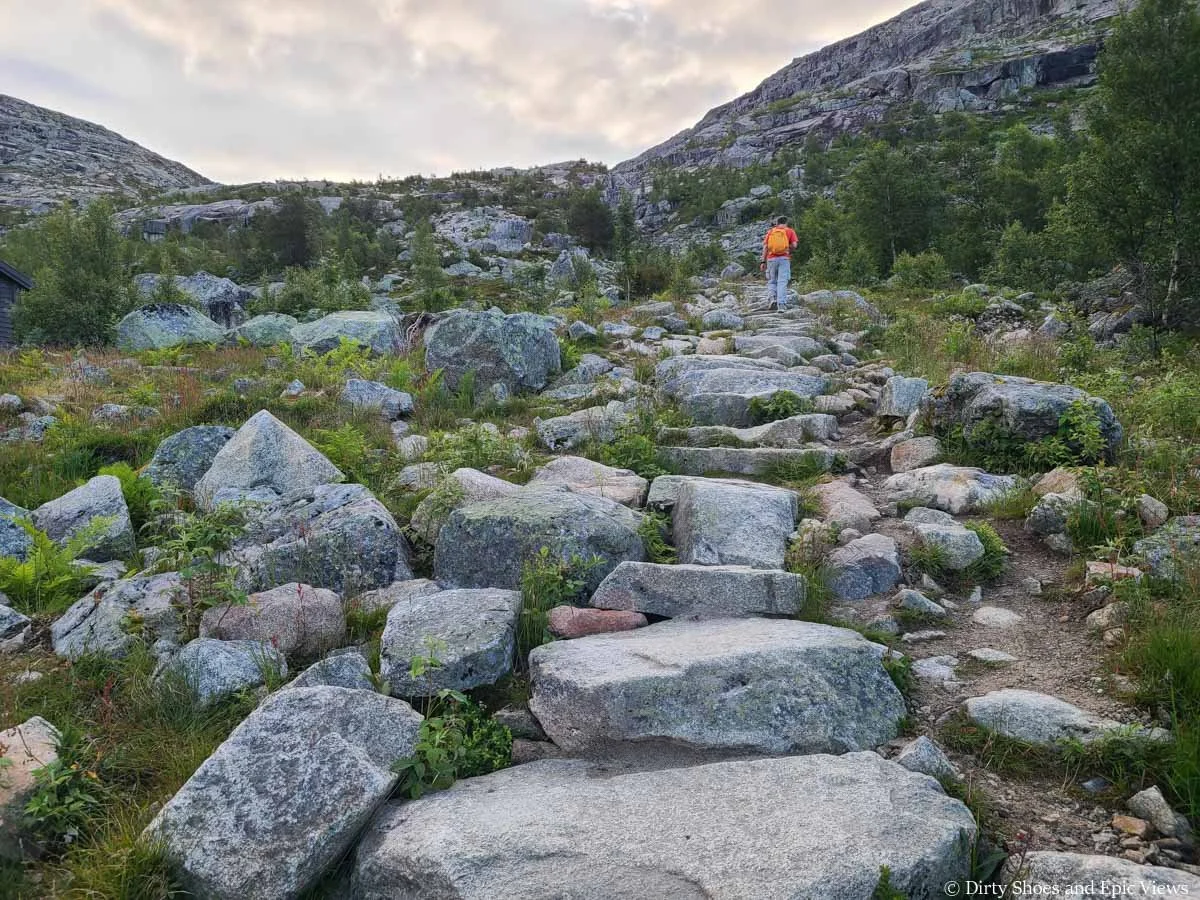
Lots of stone steps going up the pass to Trolltunga
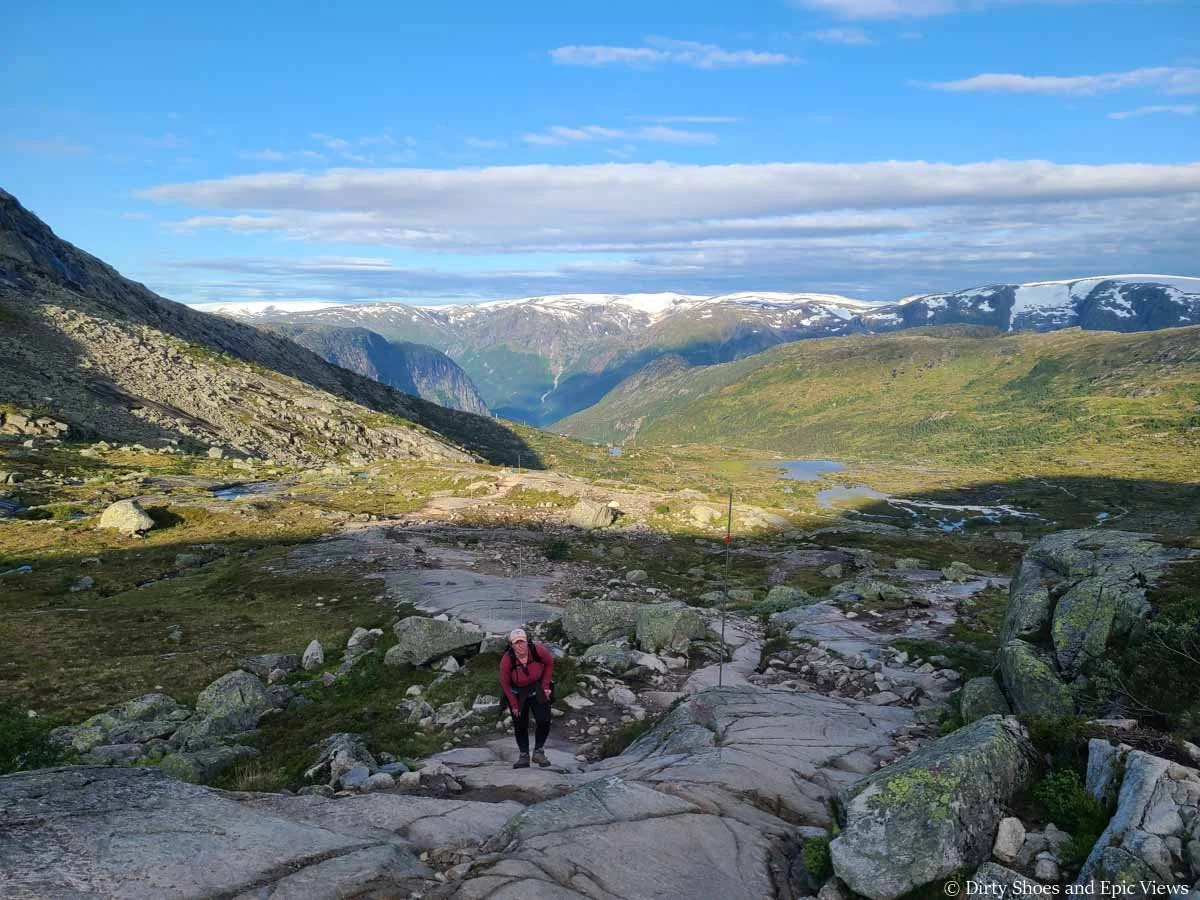
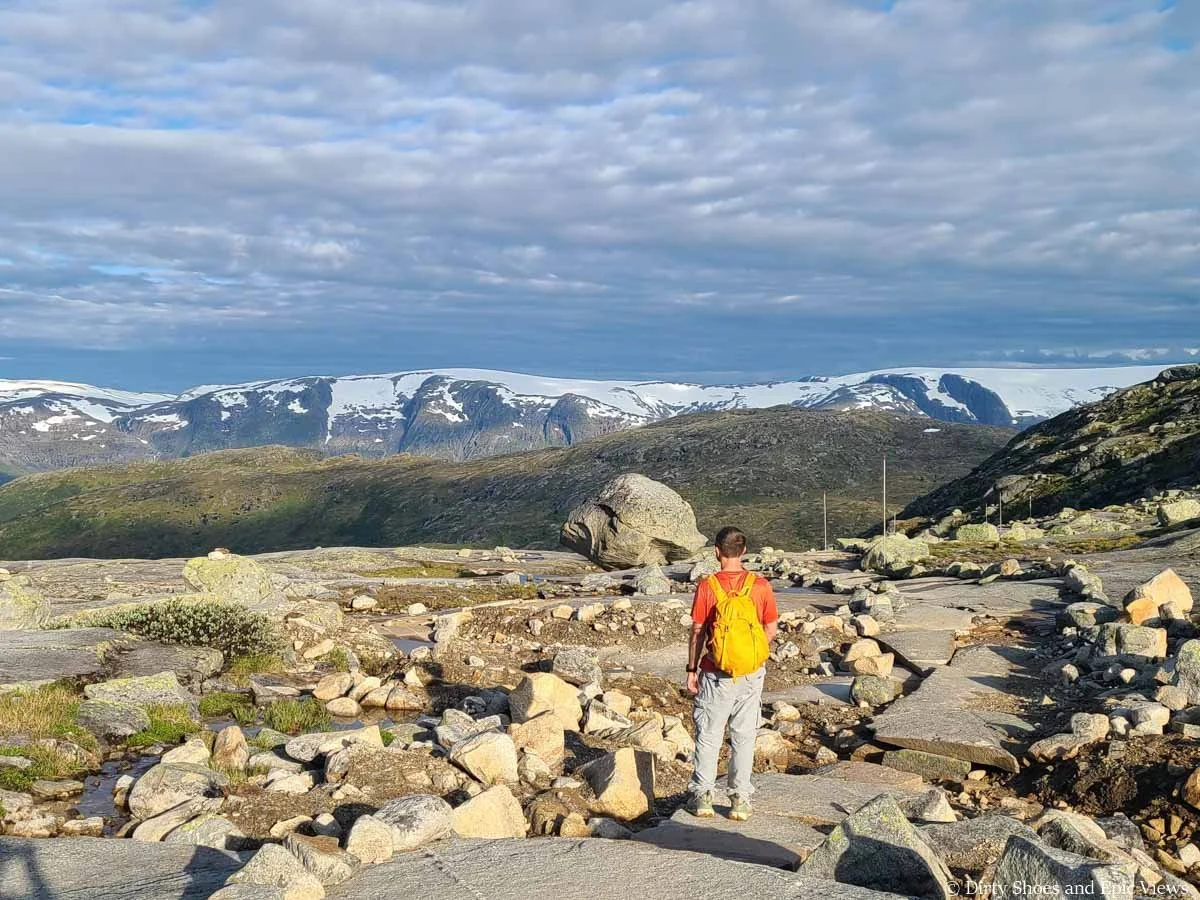
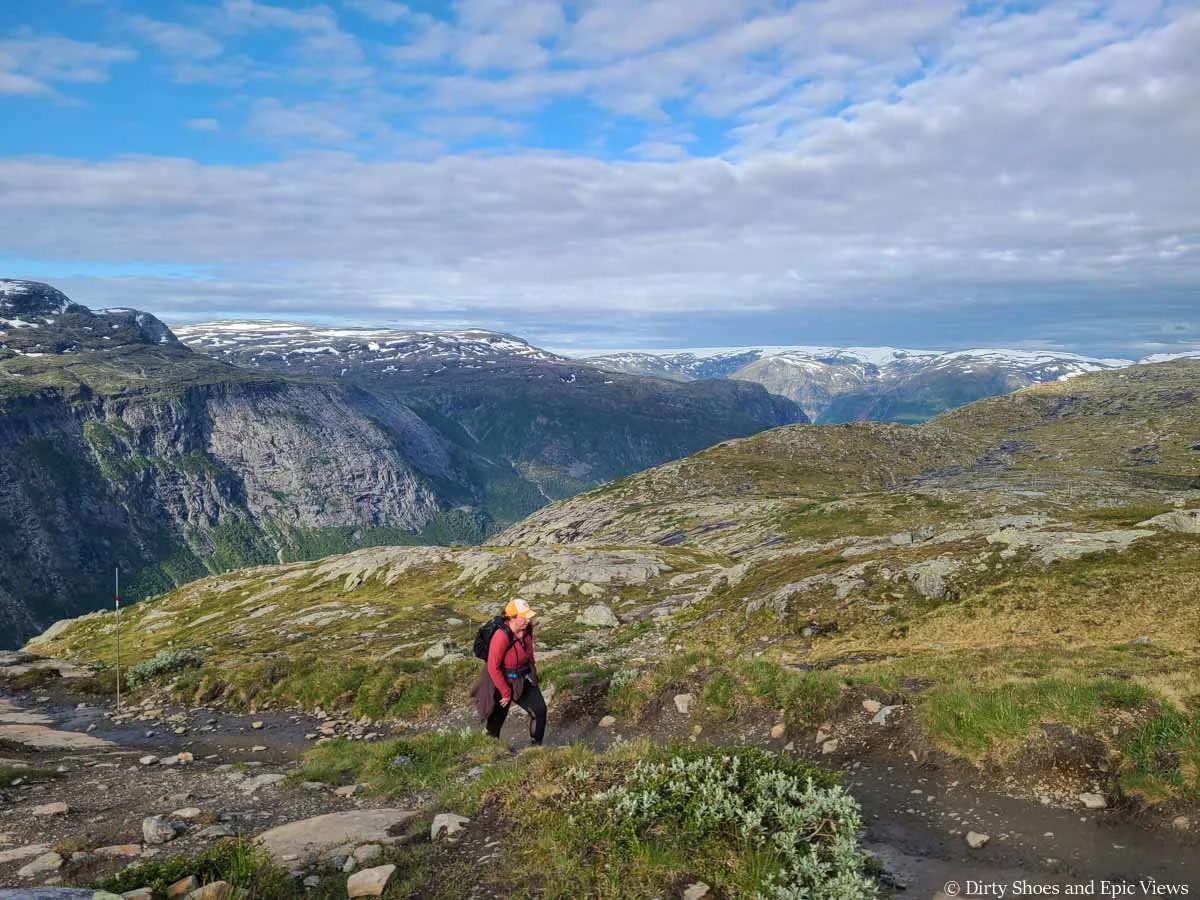
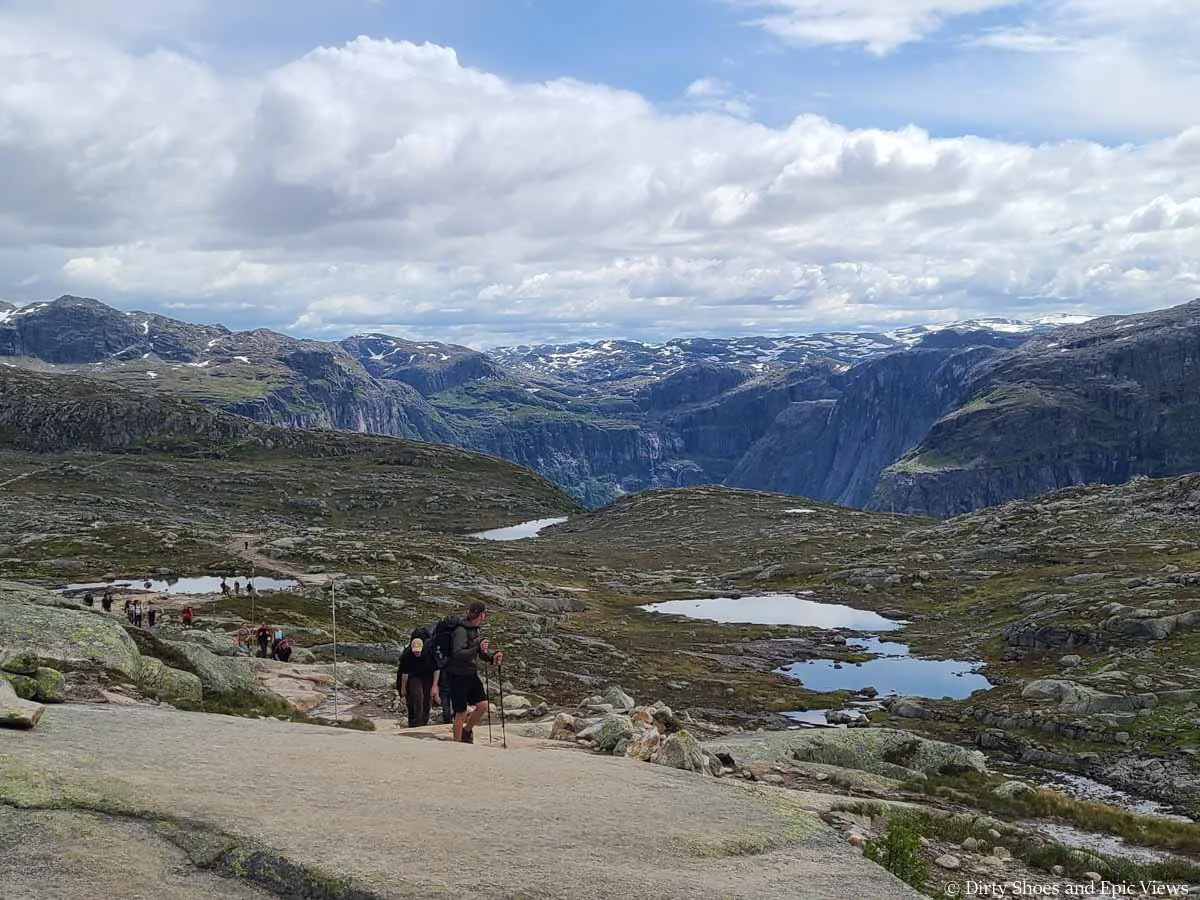
As you get higher and higher up the pass, don’t forget to look behind you because you’ll be rewarded with increasingly better views of the distant snow-capped mountains and the valley below that you just hiked across (you can see the first part of the trail snaking its way across the landscape from up here).
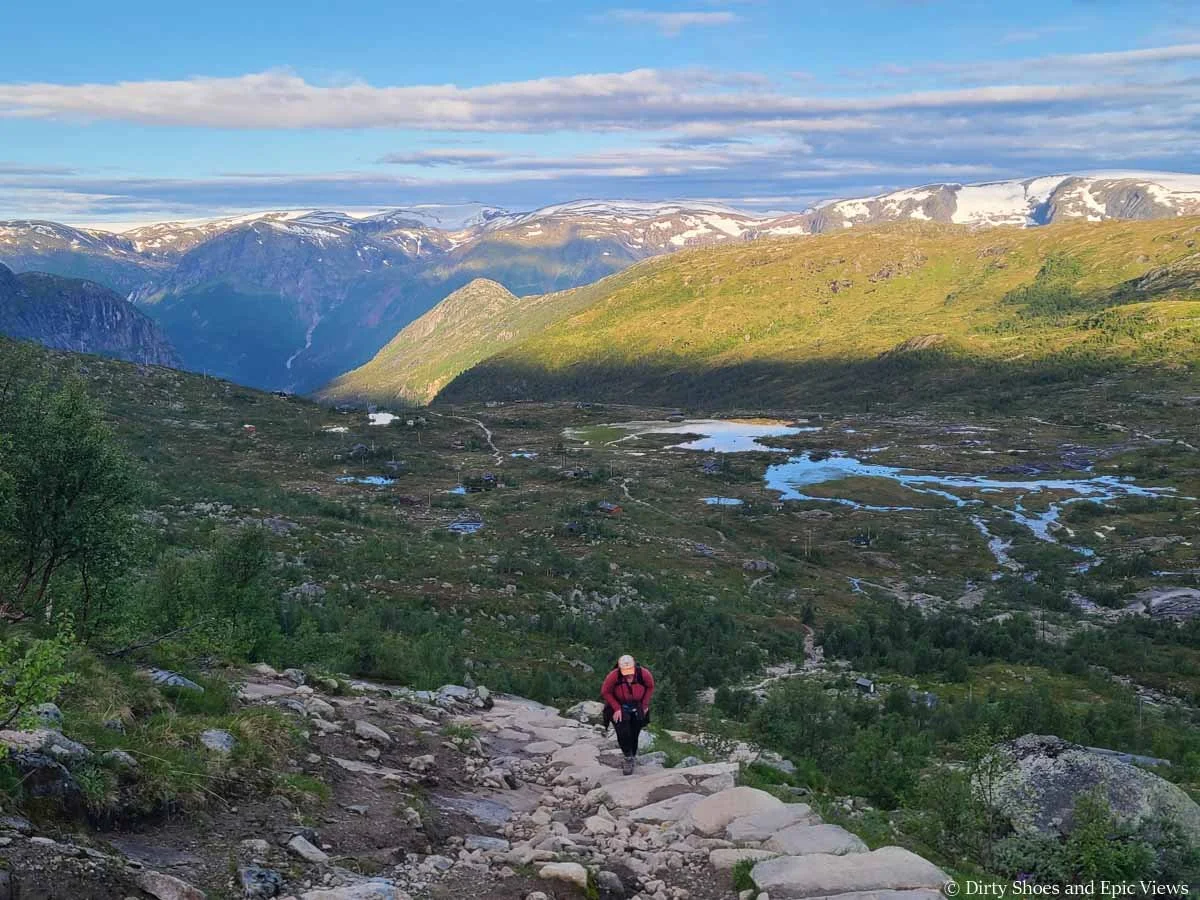
As you climb higher up the pass, views of the mountains open up, and you can see the hiking trail weaving through the meadow below
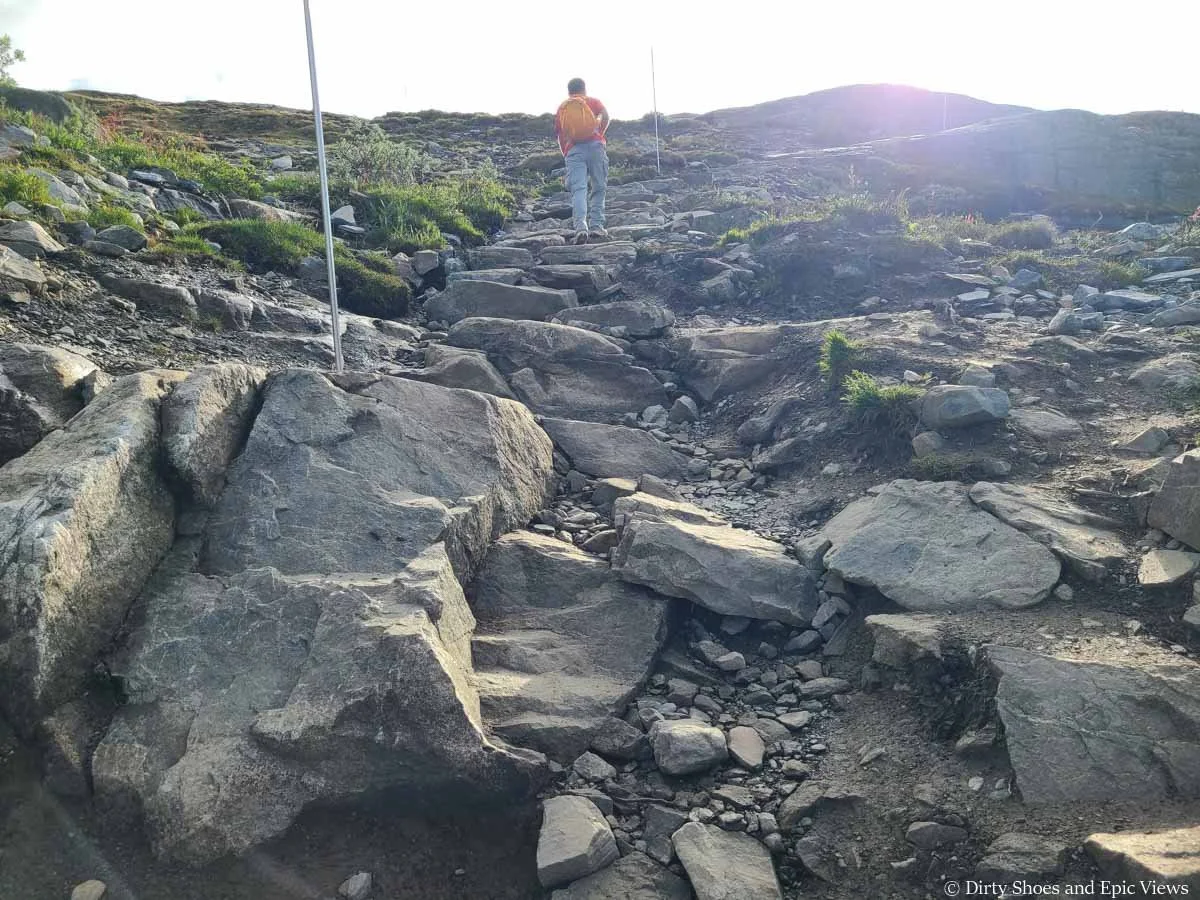
Towards the top of the pass, the stairs disappear and fade into steep granite slabs, which can become slick when wet.
Up here, you might also start to notice signs that begin counting off the kilometers you have left to go (which can be discouraging or motivating depending on how you’re feeling!).

You’ll see signs like this along the hike to indicate how far left you have to go!
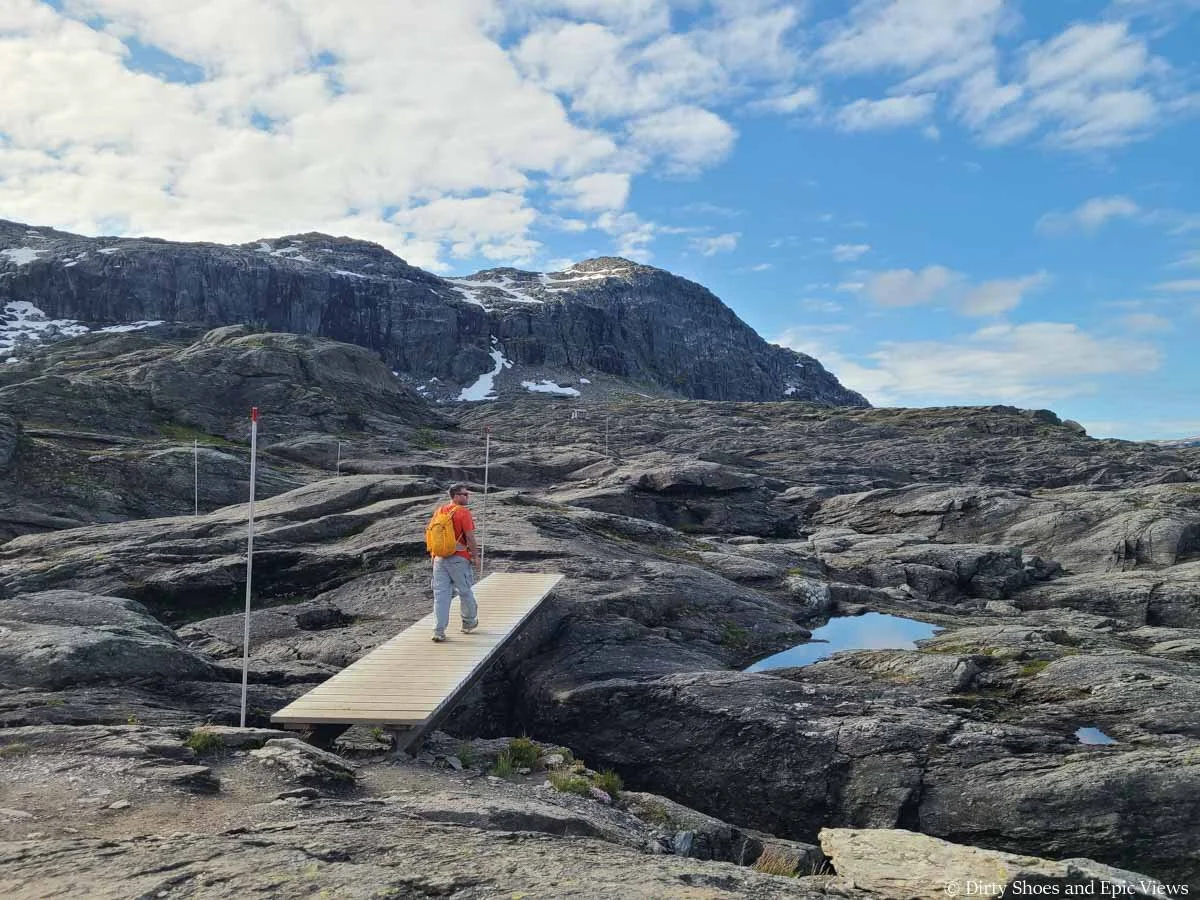
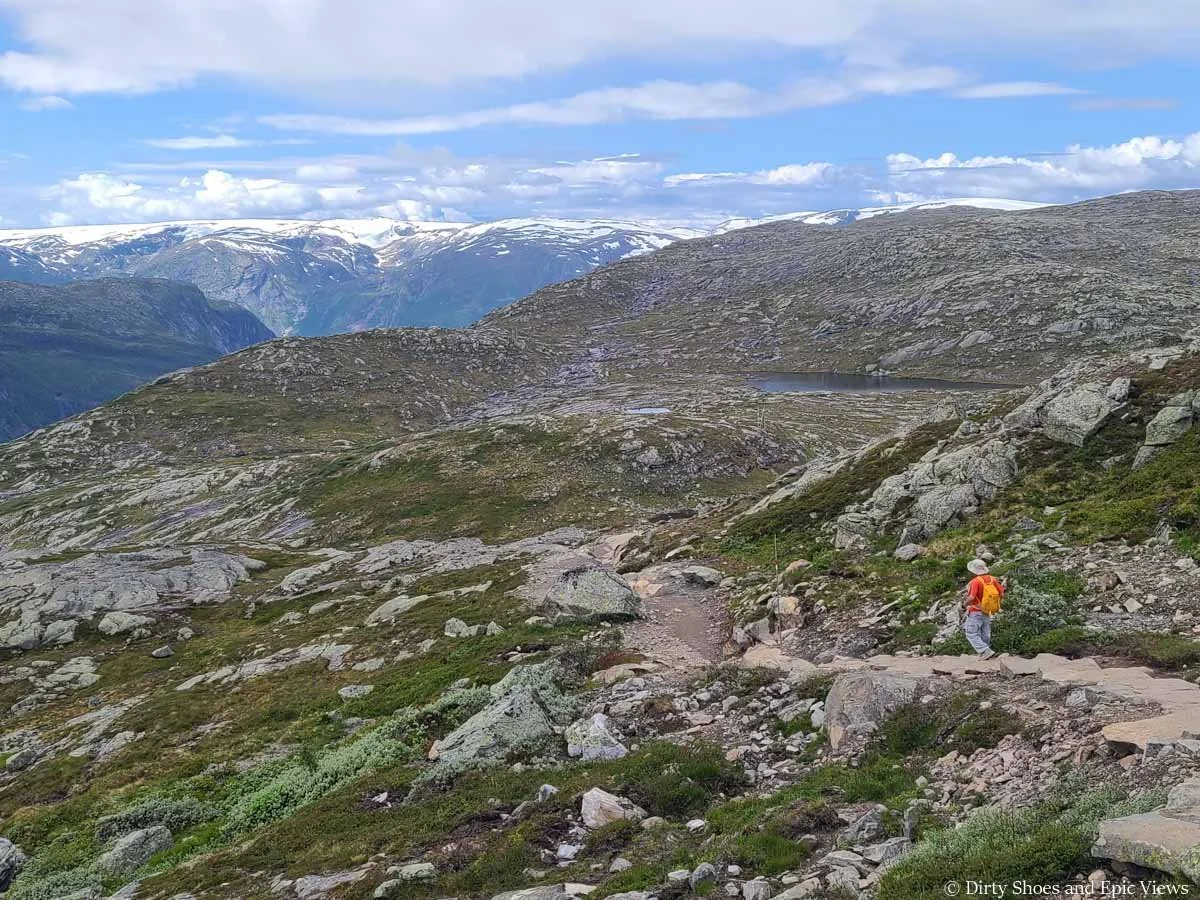
Continue to follow the tall poles to navigate through the maze of rock and dirt up here past small tarns and lingering snow patches.
Ascending the granite slab on the top half of the pass

We loved watching the sun light up the meadow and distant mountains as we climbed higher and higher up the pass
View from near the top of the pass on the hike to Trolltunga
Despite having already tired legs, we crested over the pass after about 40 minutes of climbing. Up here is where we started seeing other people for the first time on our hike to Trolltunga (some backpackers hiking out and some of the very first and fastest shuttle hikers starting to catch up to us).
At the top of the pass, the trail flattens out for a little bit and you’ll be following a well-maintained rock-lined path to the other side.
A well-maintained rock-lined path sits on top of the pass
Looking back down the trail from the top of the pass
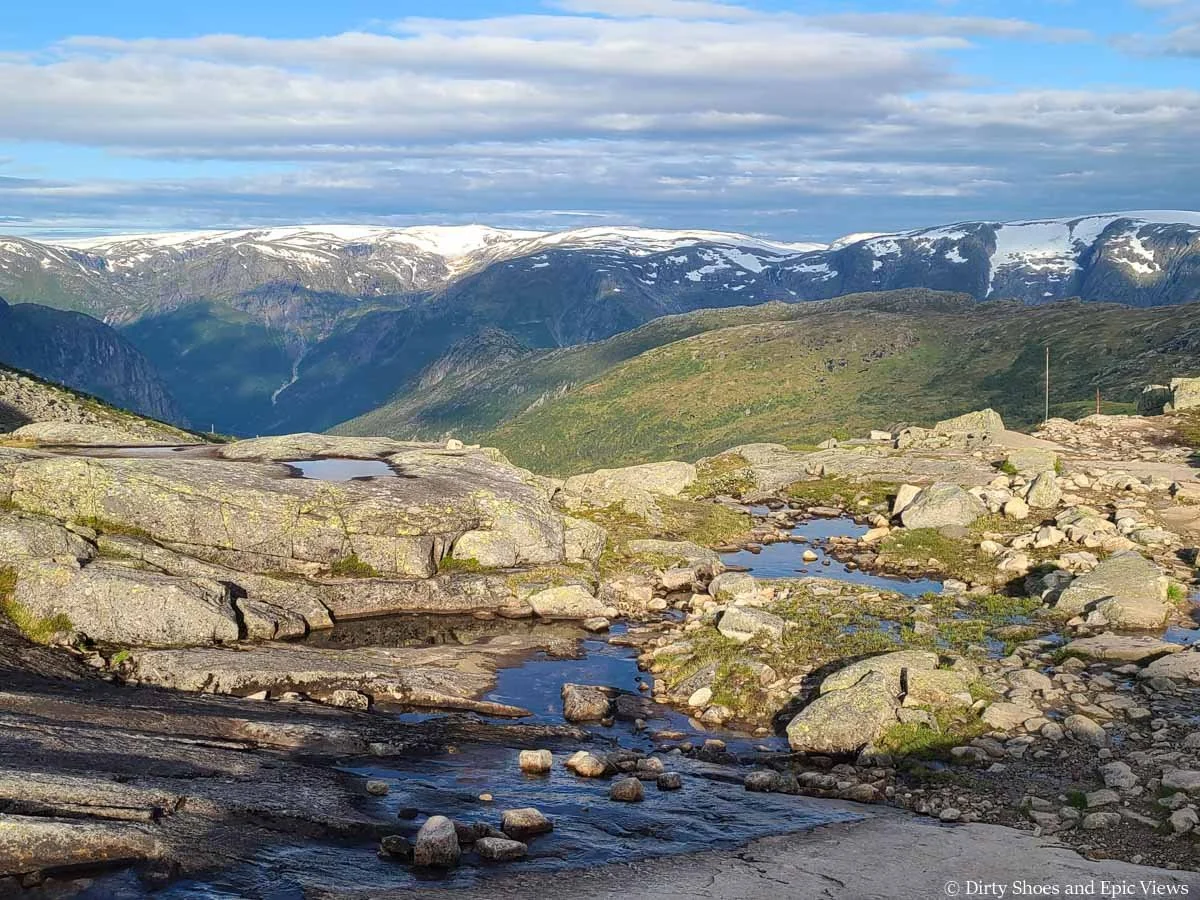
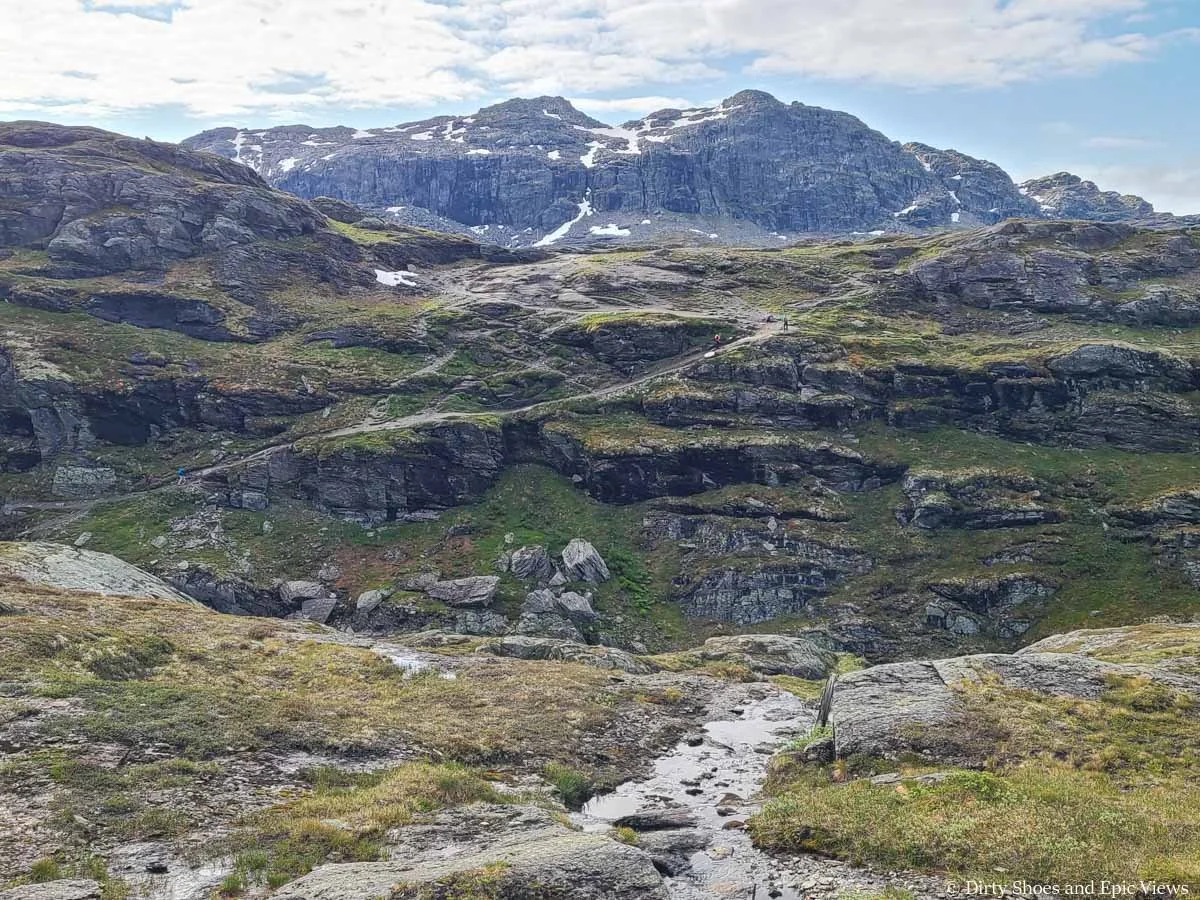
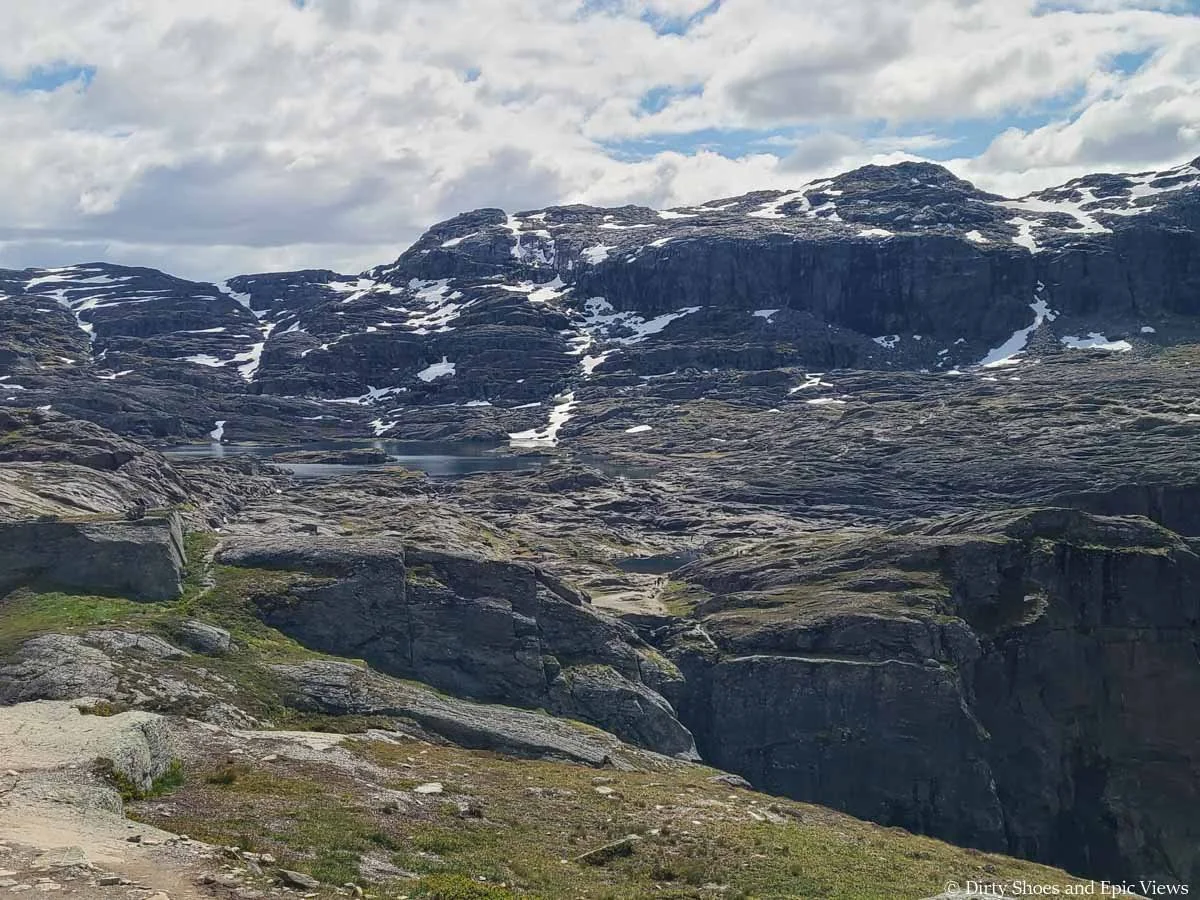
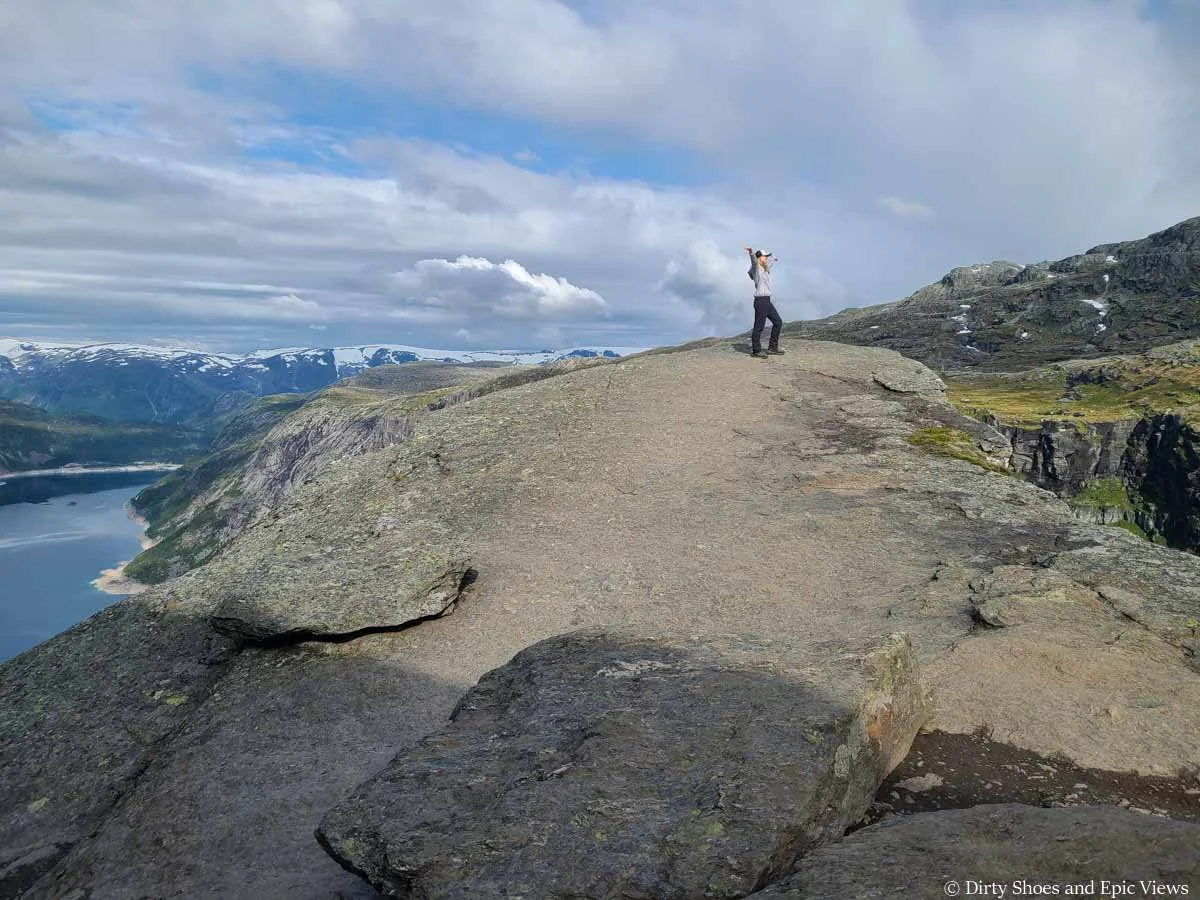
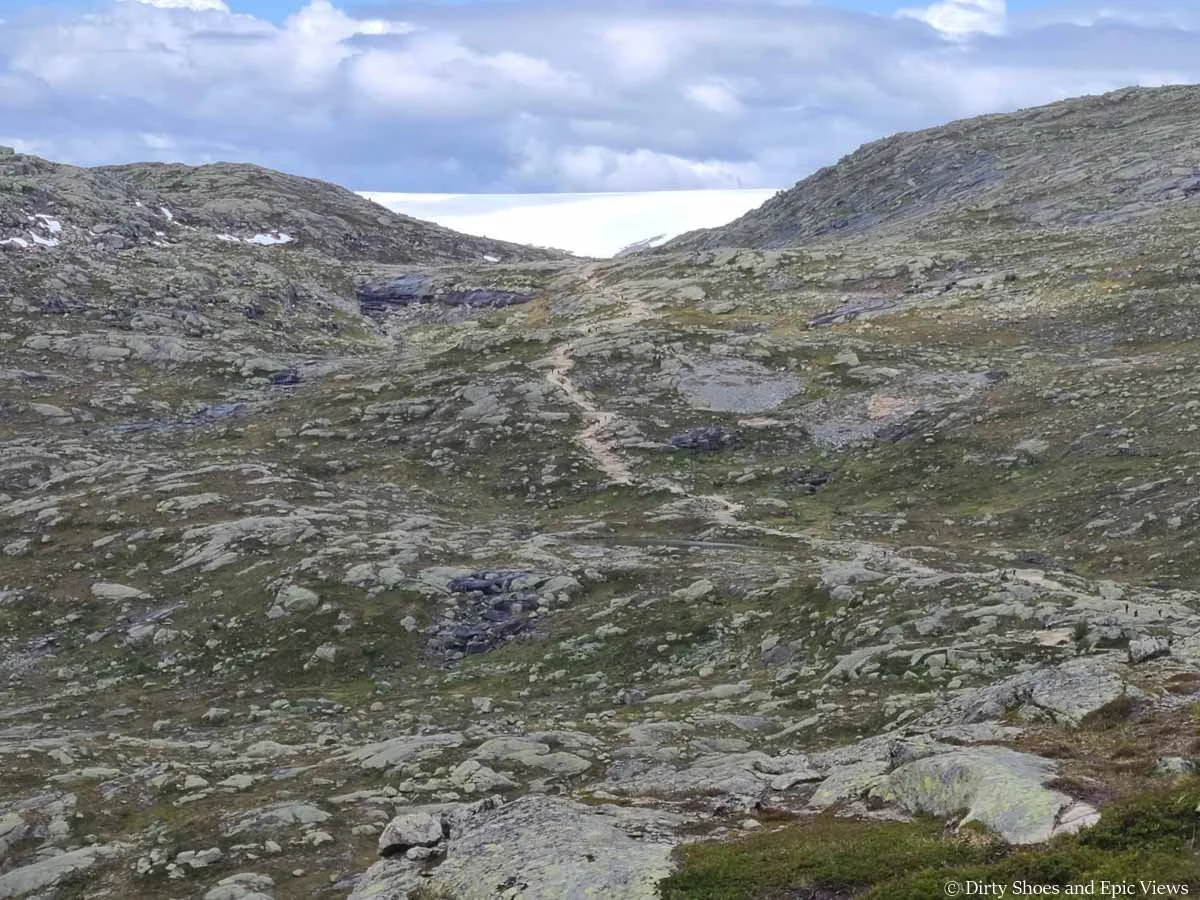
When you reach the other side of the pass, you’ll be greeted by a still lake backdropped by a beautiful mountain range in the distance. The trail gently wraps around the lake and when you get to the other side, beautiful views open up over a valley spotted with small lakes.

The trail wraps around a large tarn on top of the pass before it drops back down the other side
The trail descends gently down into this valley on a mix of granite, dirt and some loose rock. We loved the views from this part of the Trolltunga hike- the lakes were so still and reflective and the mountain views were really getting good.
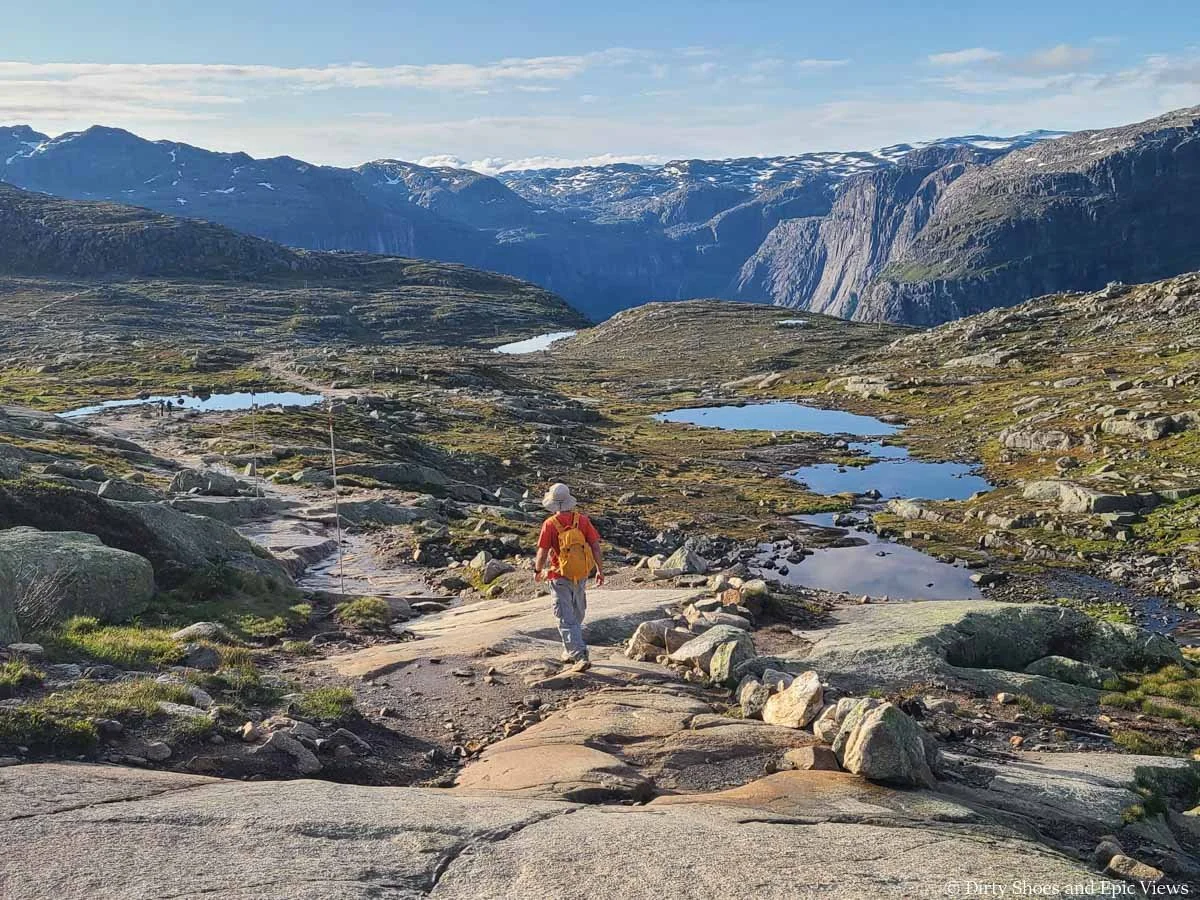
The views from the other side of the pass on the Trolltunga hike
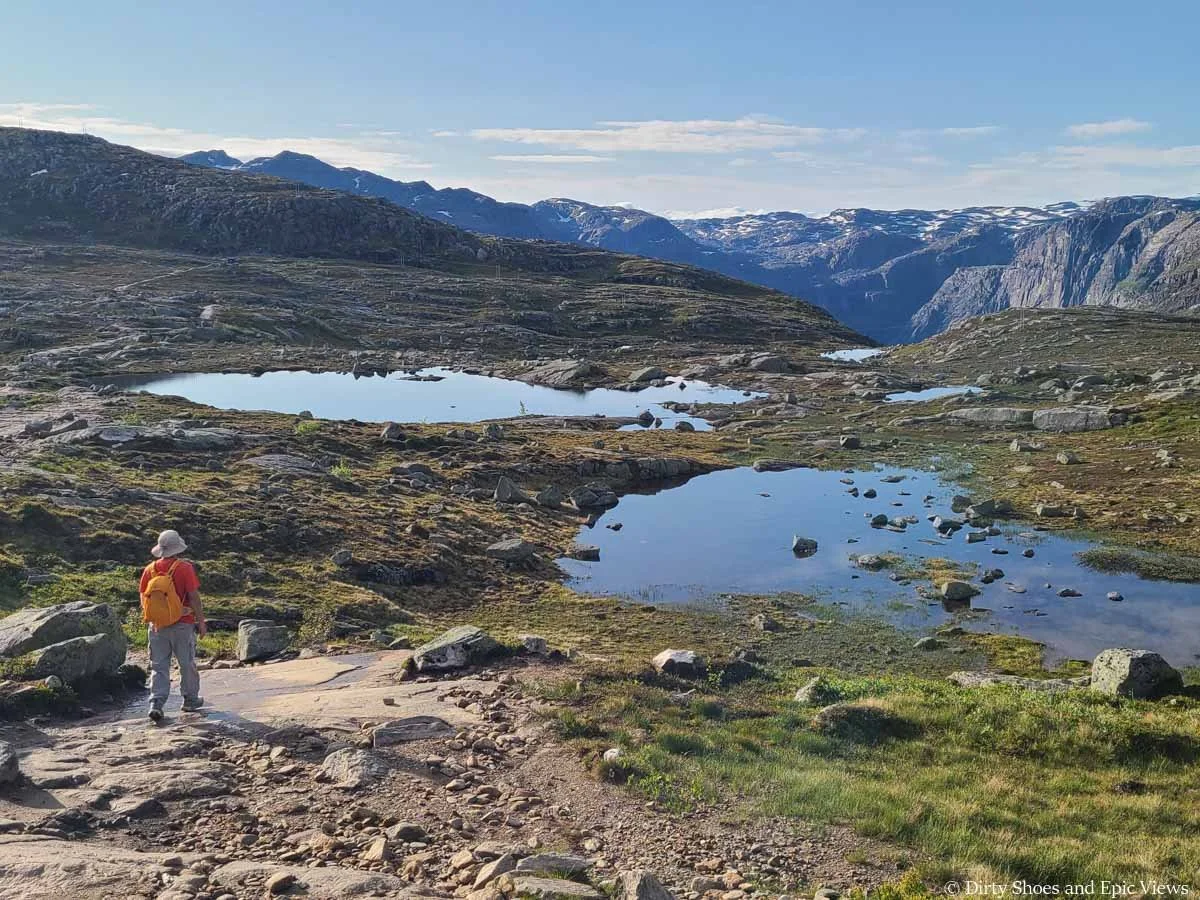
Gorgeous alpine views on the hike to Trolltunga
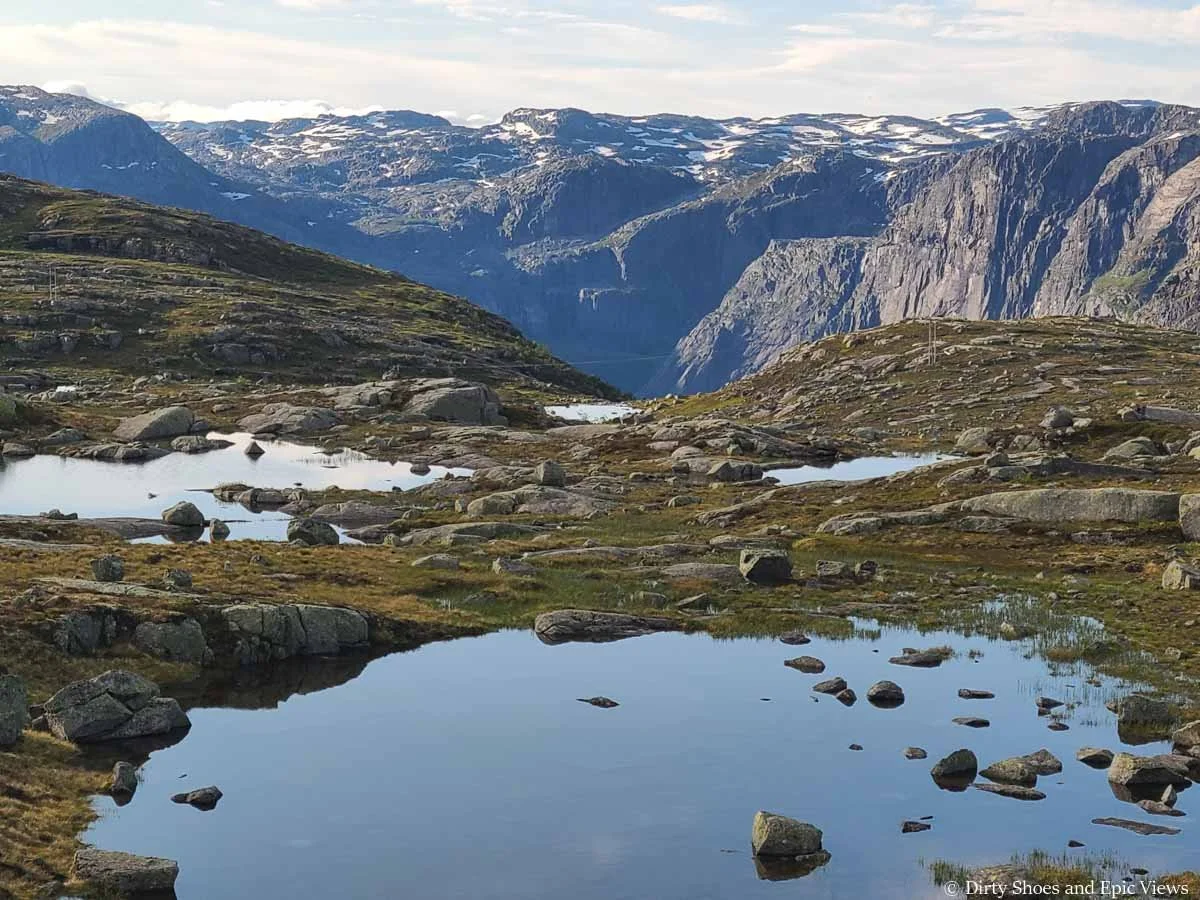
Beautiful tarns dot the meadow along the Trolltunga trail
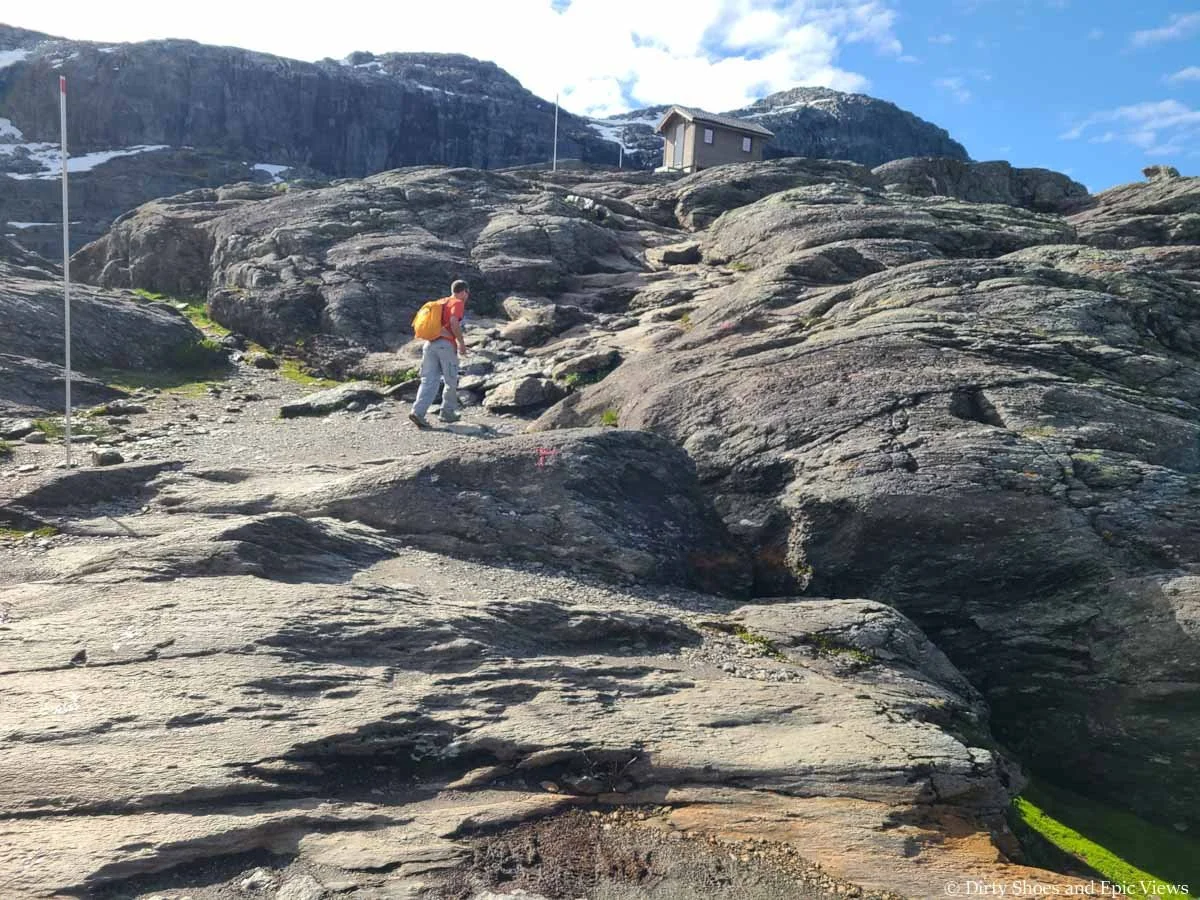
Once in the valley, it’s a short flat walk until you reach the first of three emergency shelters along the Trolltunga hike which make for good waypoints along the trail. The first of the three is called Floren. We reached this point after about an hour and 45 minutes of hiking from the P3 trailhead.
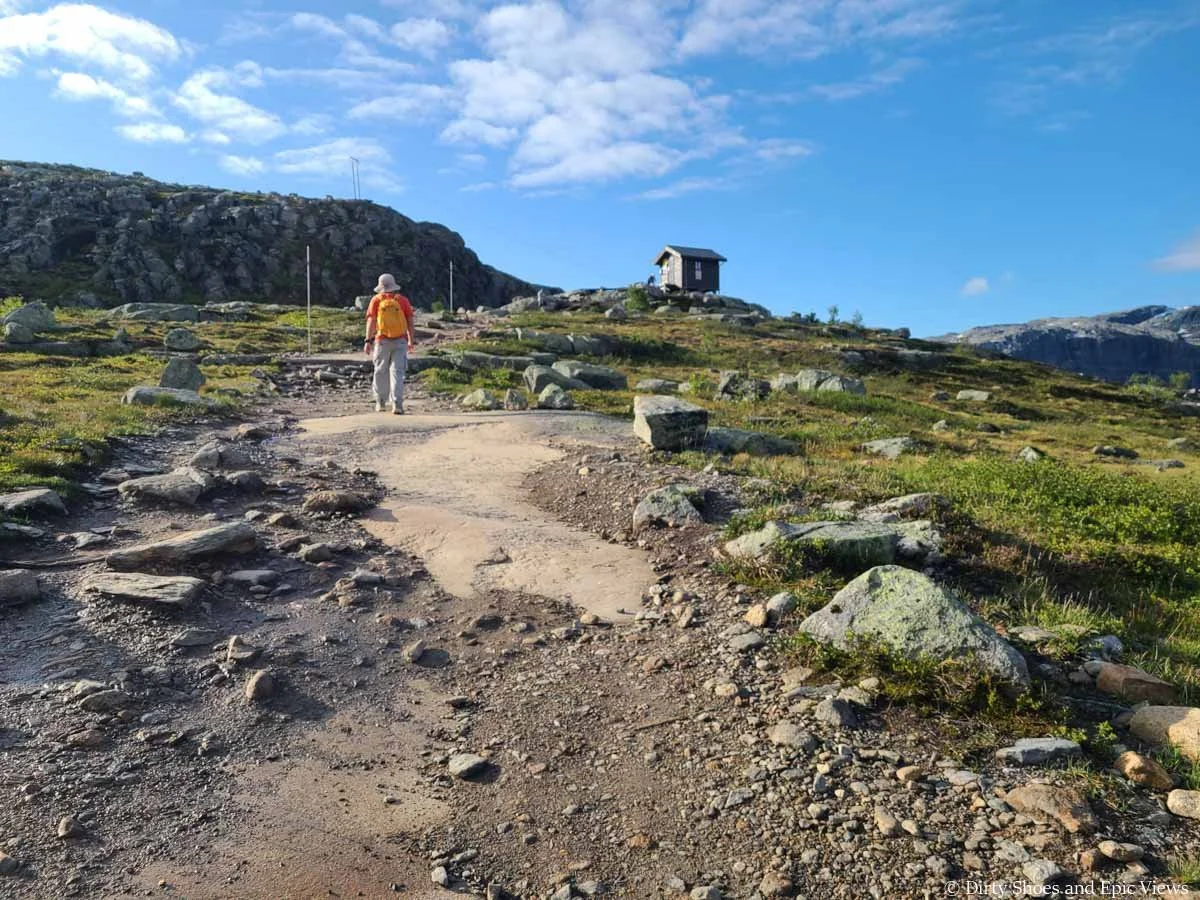
Arriving at the Floren shelter- the first of three on the Trolltunga hike
At this point in the hike is where people really started catching up to us. I was probably spending a little bit too much time enjoying the scenery and taking pictures as I hiked, but it was also just the wave of very fast hikers from the first shuttles and from the P3 lot catching up.
At first, I’ll admit it was a bit frustrating for me because I was starting to feel like our early wake-up call was for nothing. It seemed like everyone was sort of racing to get to Trolltunga first and with each person who passed us, I just kept seeing the line at the end growing longer and longer in my mind. But after enough people passed us, I sort of gave up on trying to get there as fast as I could- I just wanted to go back to enjoying the hike.
And despite my initial frustrations, I am still super happy with our experience hiking to Trolltunga. We only did see about 20 or so people on the hike in, all of which were solo or pairs of friendly hikers who quickly passed by us, so the whole experience was very peaceful and serene. And as we’ll get to soon, we didn’t have to worry about lines at Trolltunga at all. Definitely a different experience from the hike out…which you’ll see in just a bit!
The Floren hut sits just before the start of the next climb of the Trolltunga hike. However, this climb is nothing like the climb up the pass. In fact, most of the rest of the hike to Trolltunga from here is pretty easy-going, with just smaller ups and downs along the way.
Hiking back up after passing Floren. You can see the pass we just passed over in the background- it’s the small dip in the mountain ridge in the distance.
There are some brief steep spurts of climbing throughout the rest of the Trolltunga hike
More climbing!
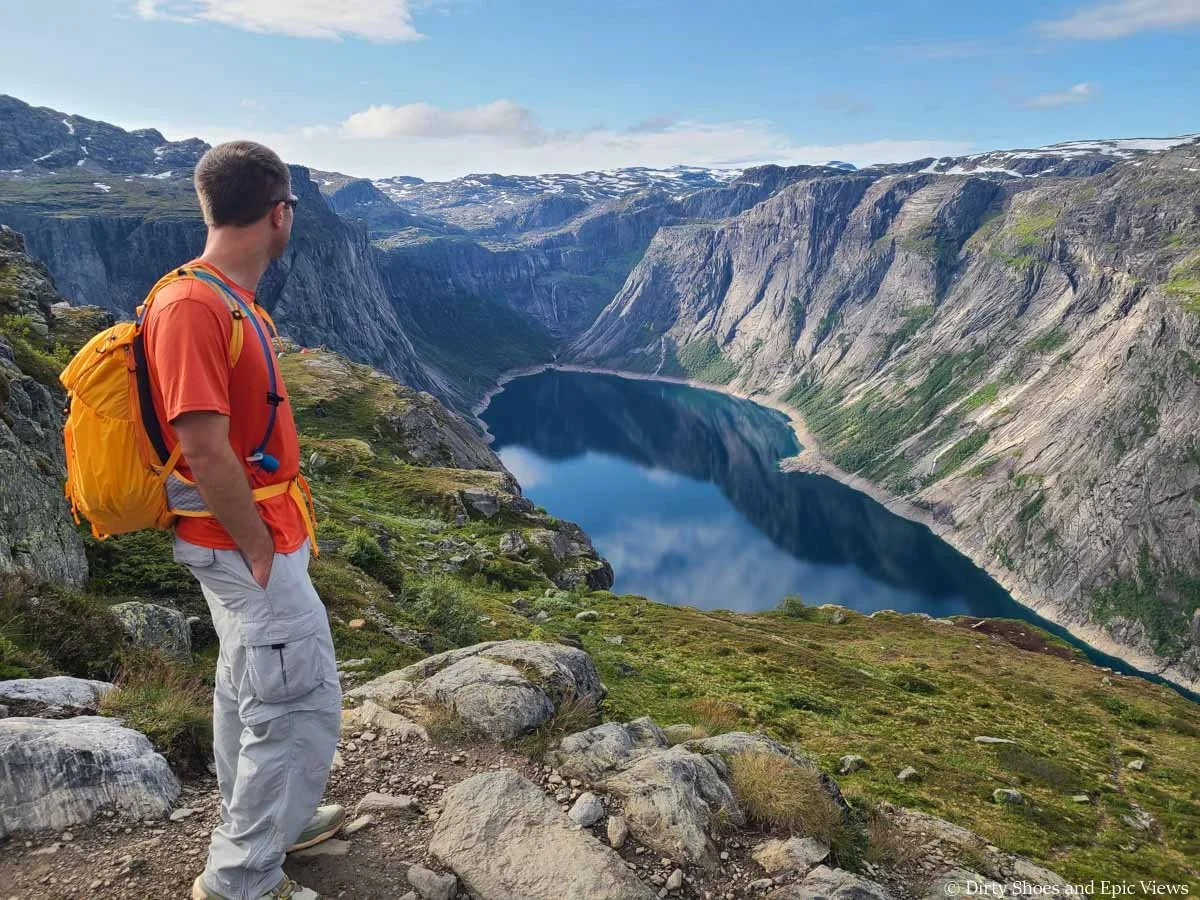
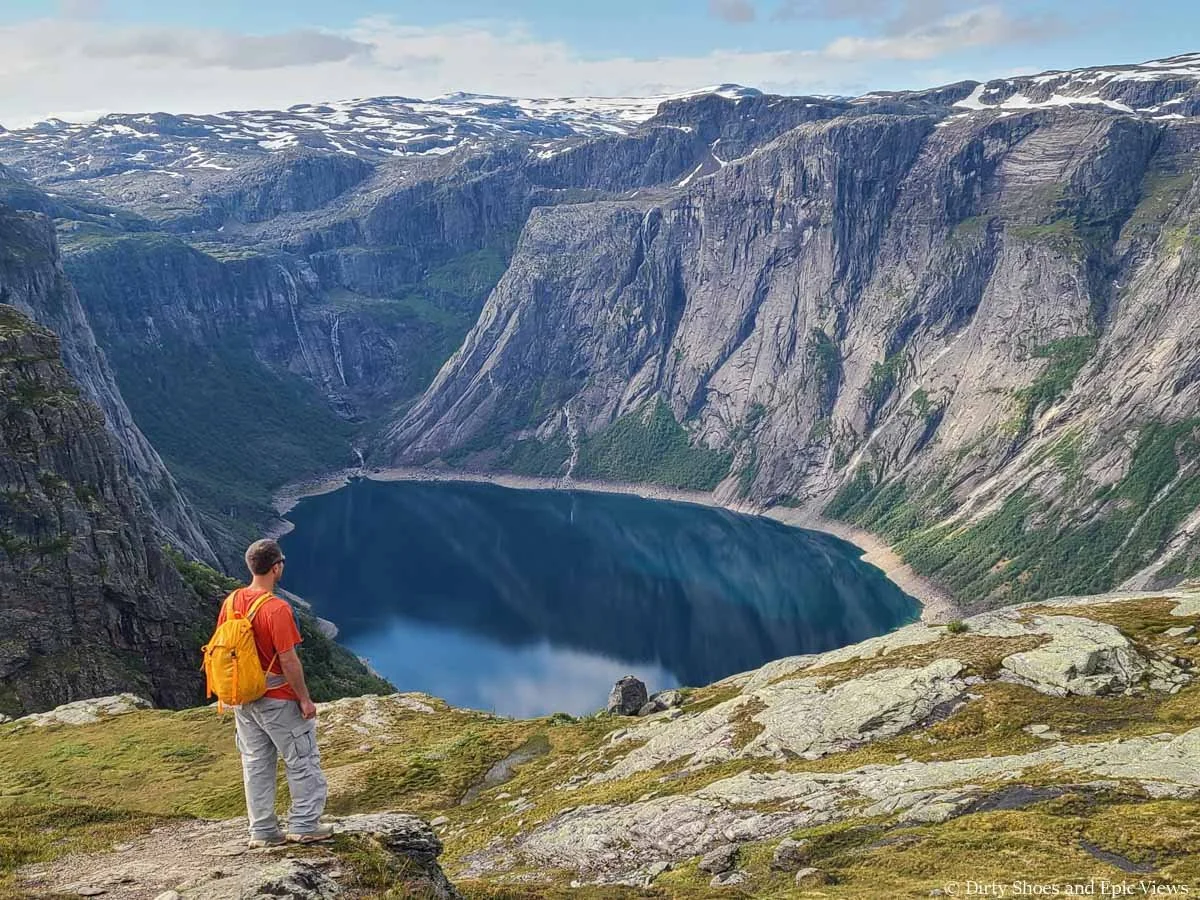
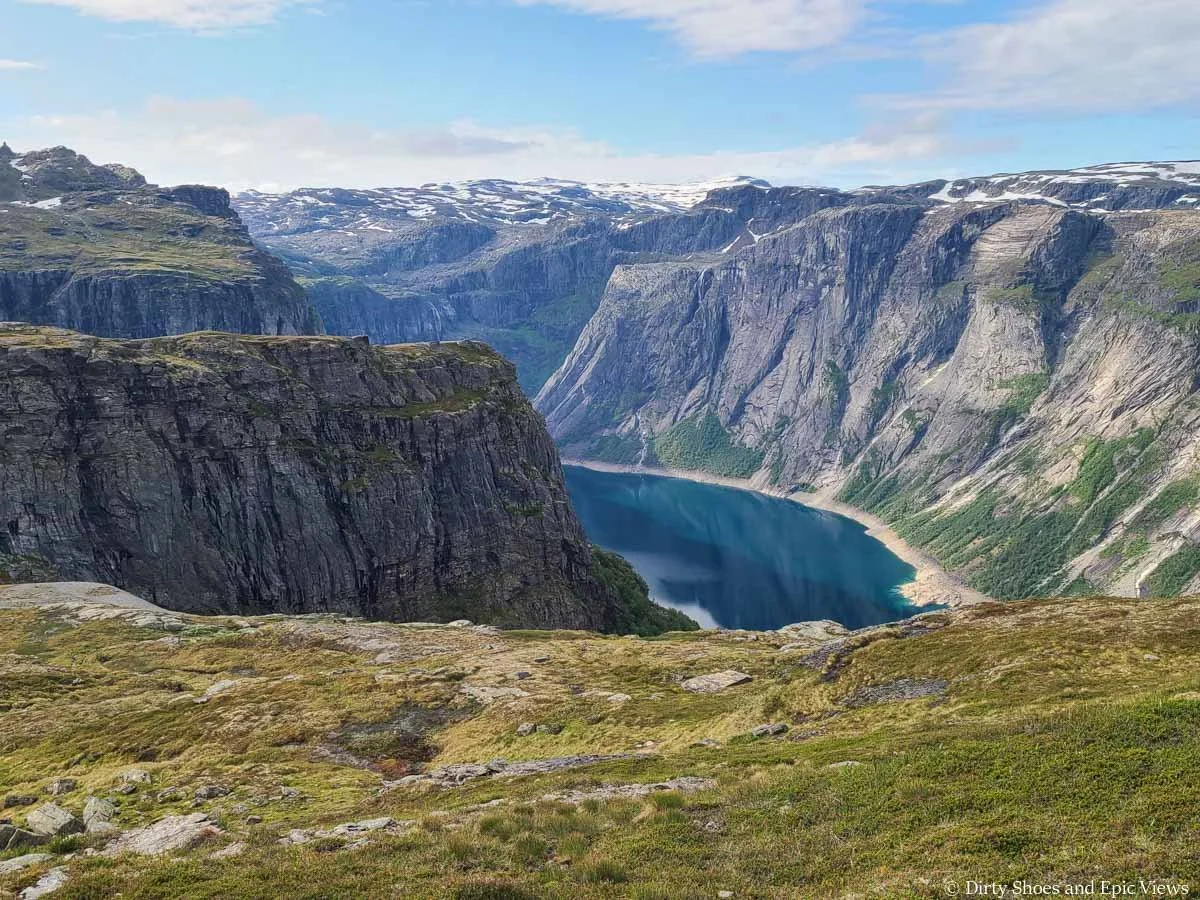
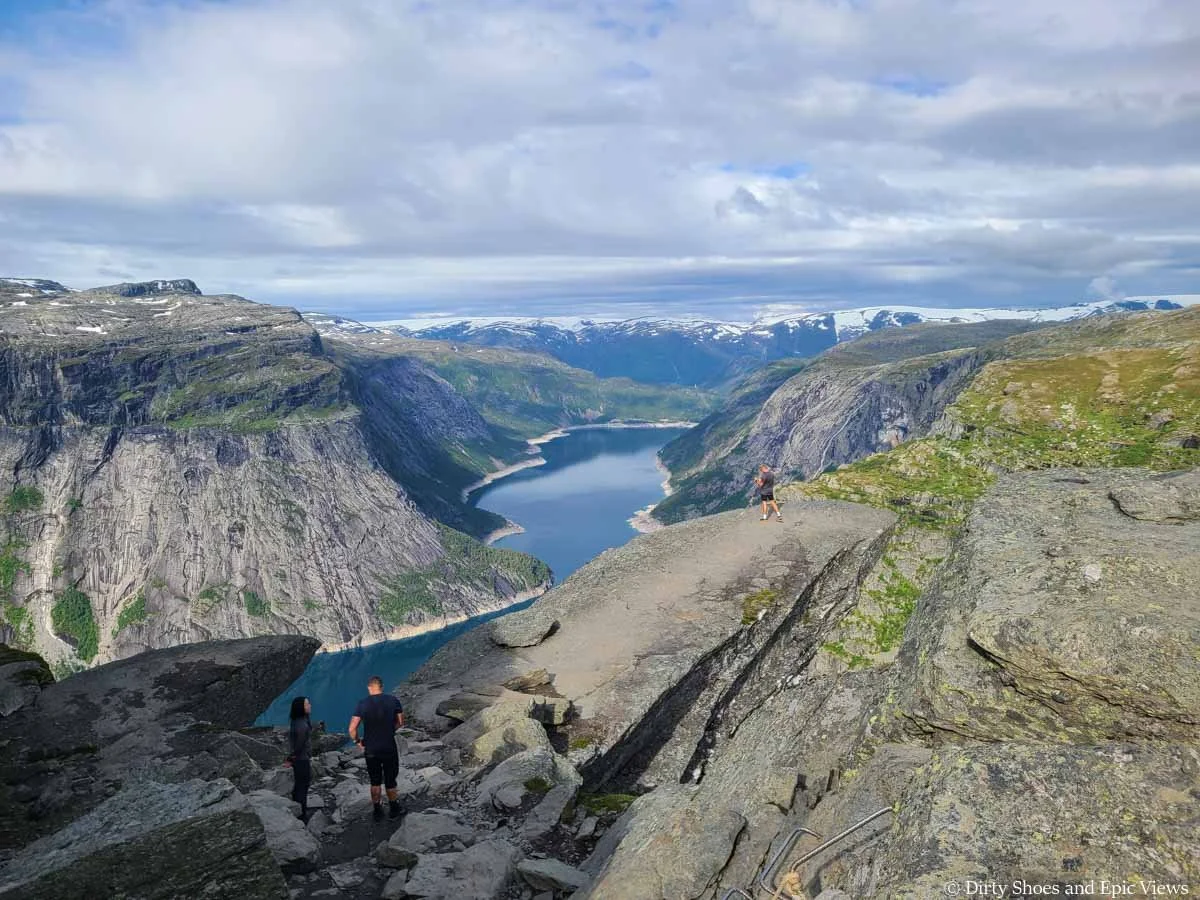
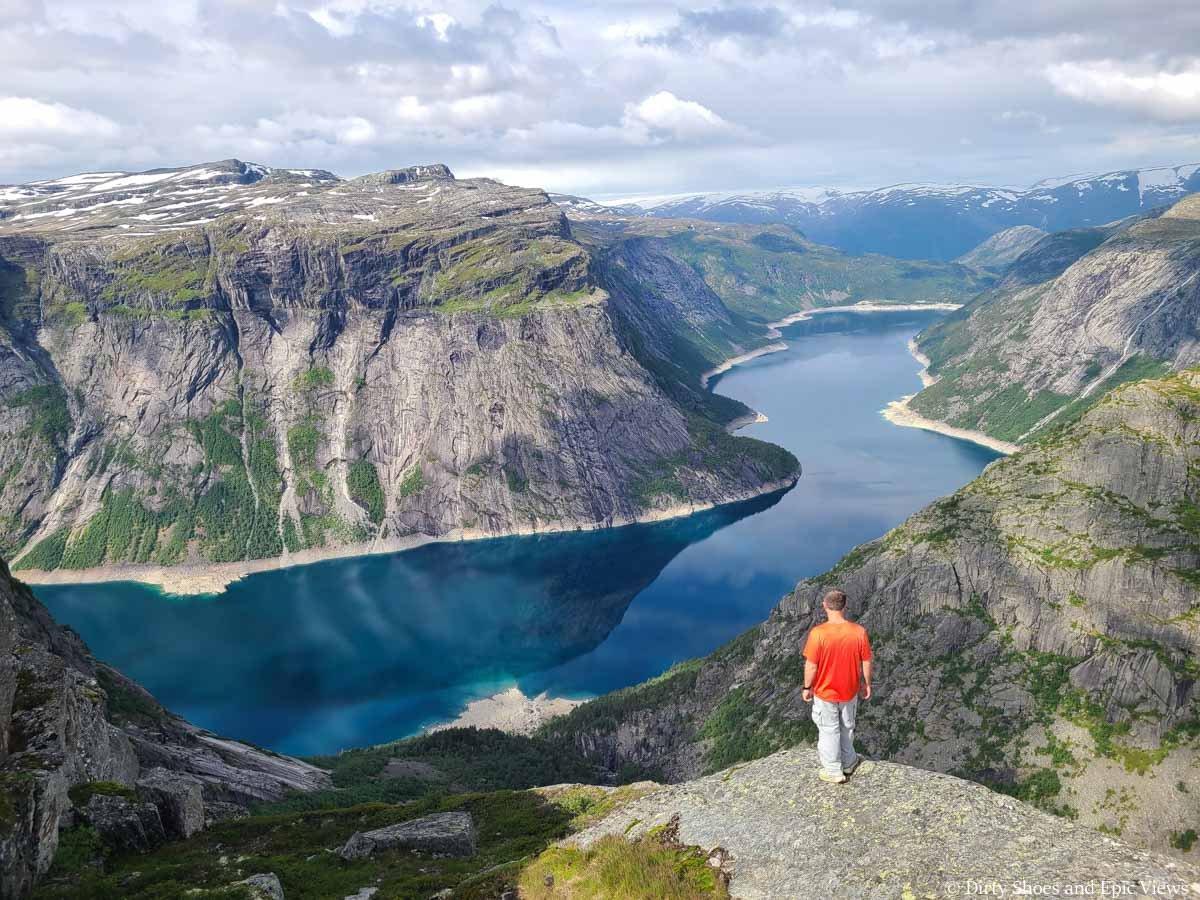
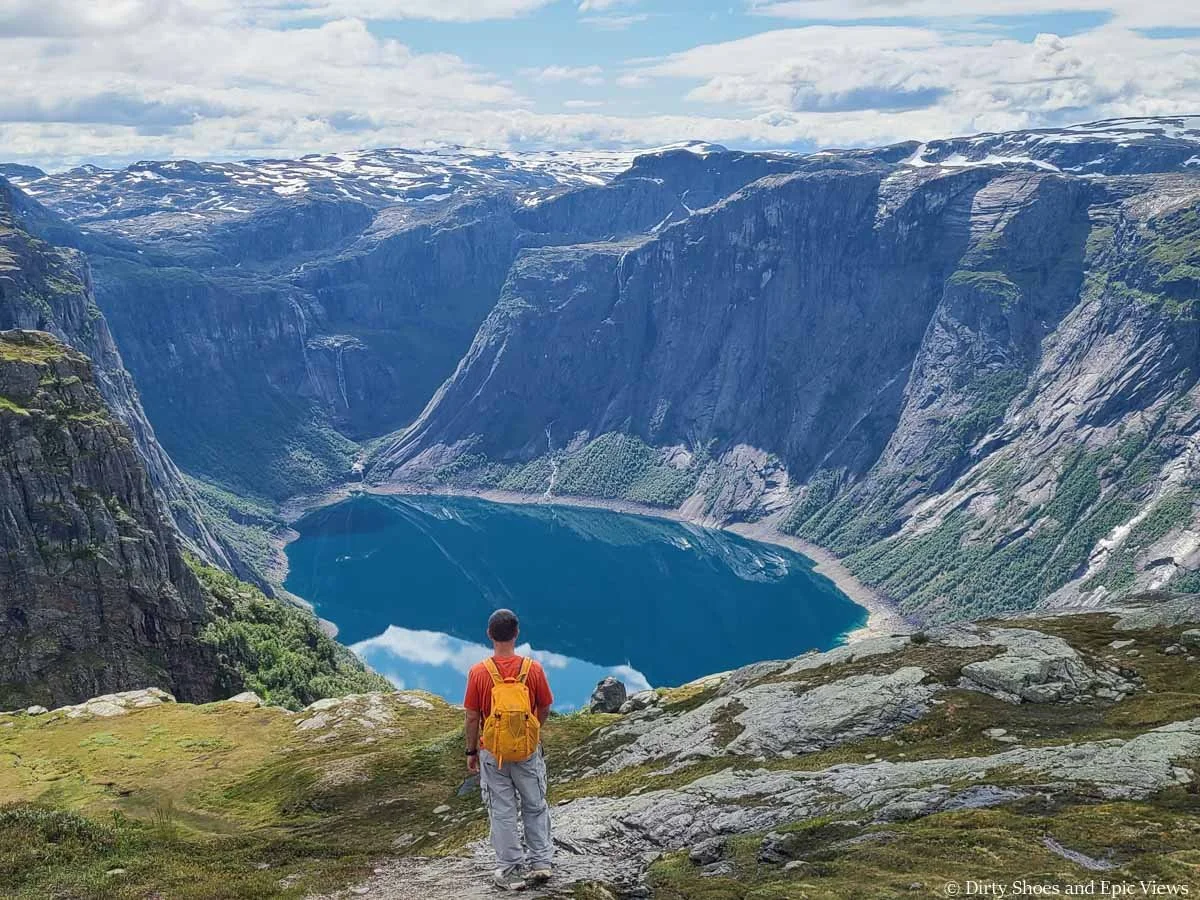
This next climb past Floren will bring you back above the meadows below and up a steady dirt trail. You’ll turn away from these meadow views and before you know it, you’ll get your first views over Ringedalsvatnet, the brilliantly blue lake that sits beneath Trolltunga. The higher you climb, the better in view it becomes, and this was definitely a highlight of the Trolltunga hike for us. The sun was shining off it and the color was an intense deep blue that we just couldn’t get over. The mountains surrounding it only made the views that much better.
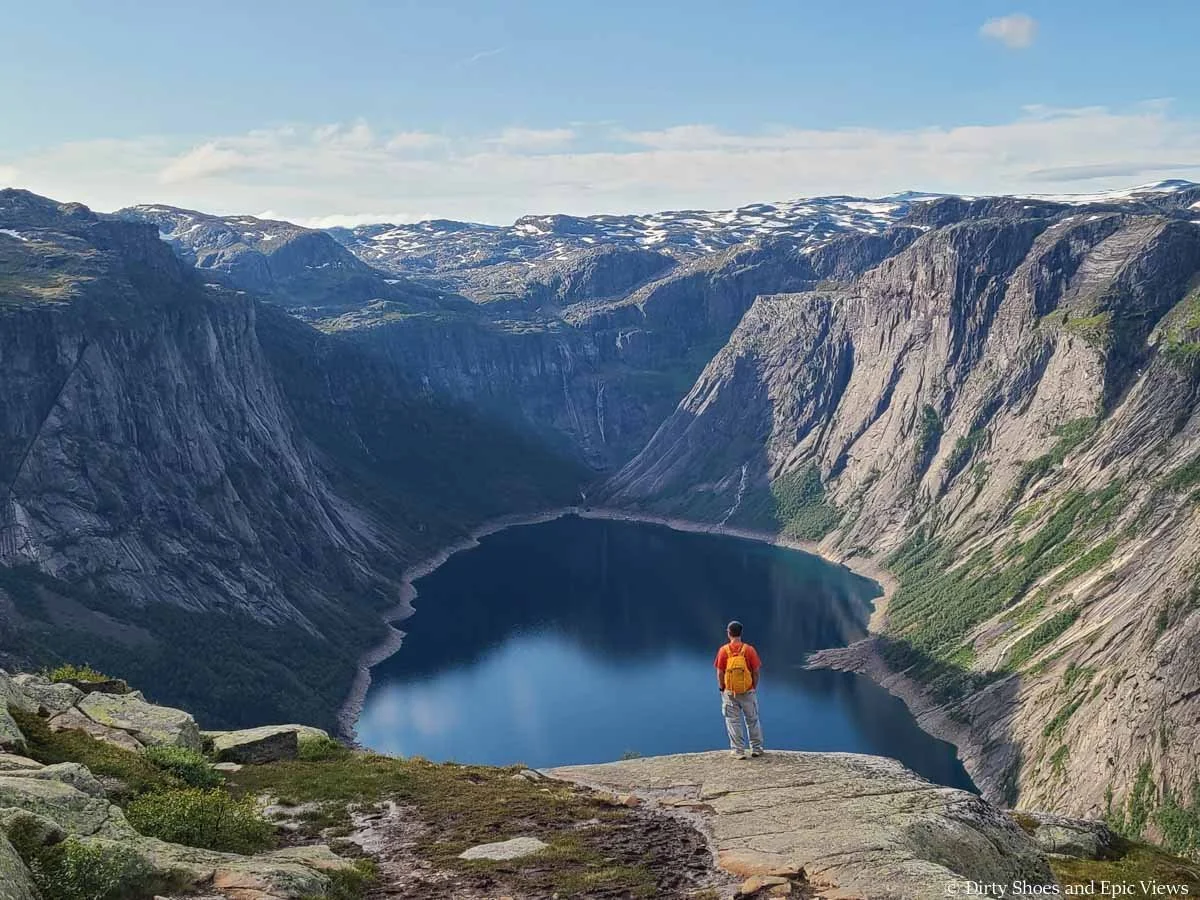
Looking over the gorgeous Ringedalsvatnet from the Trolltunga trail
This section of climbing after the Floren shelter takes only about ten minutes. It’s on a mix of more gradual dirt trail and steeper stone stairs, and it will spill you out onto another extended section of flat hiking.
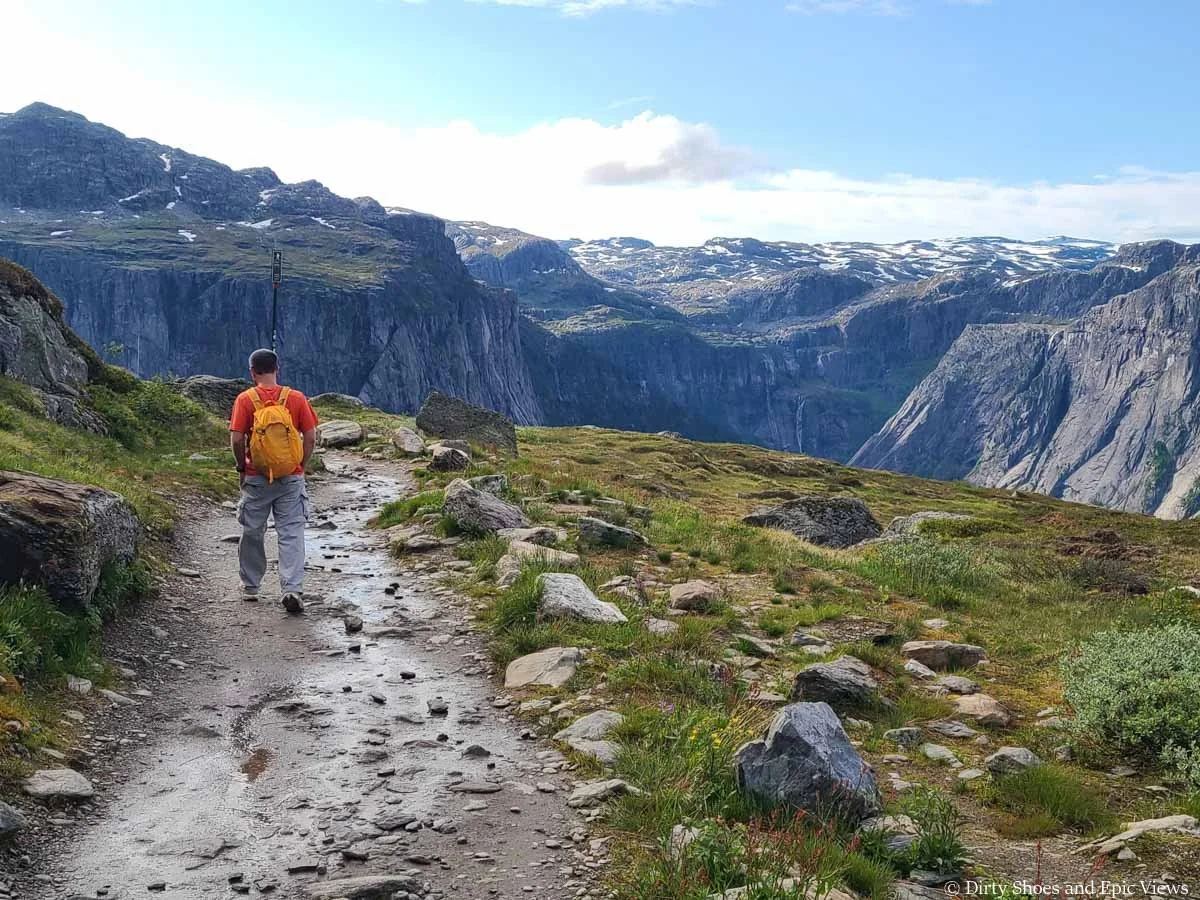
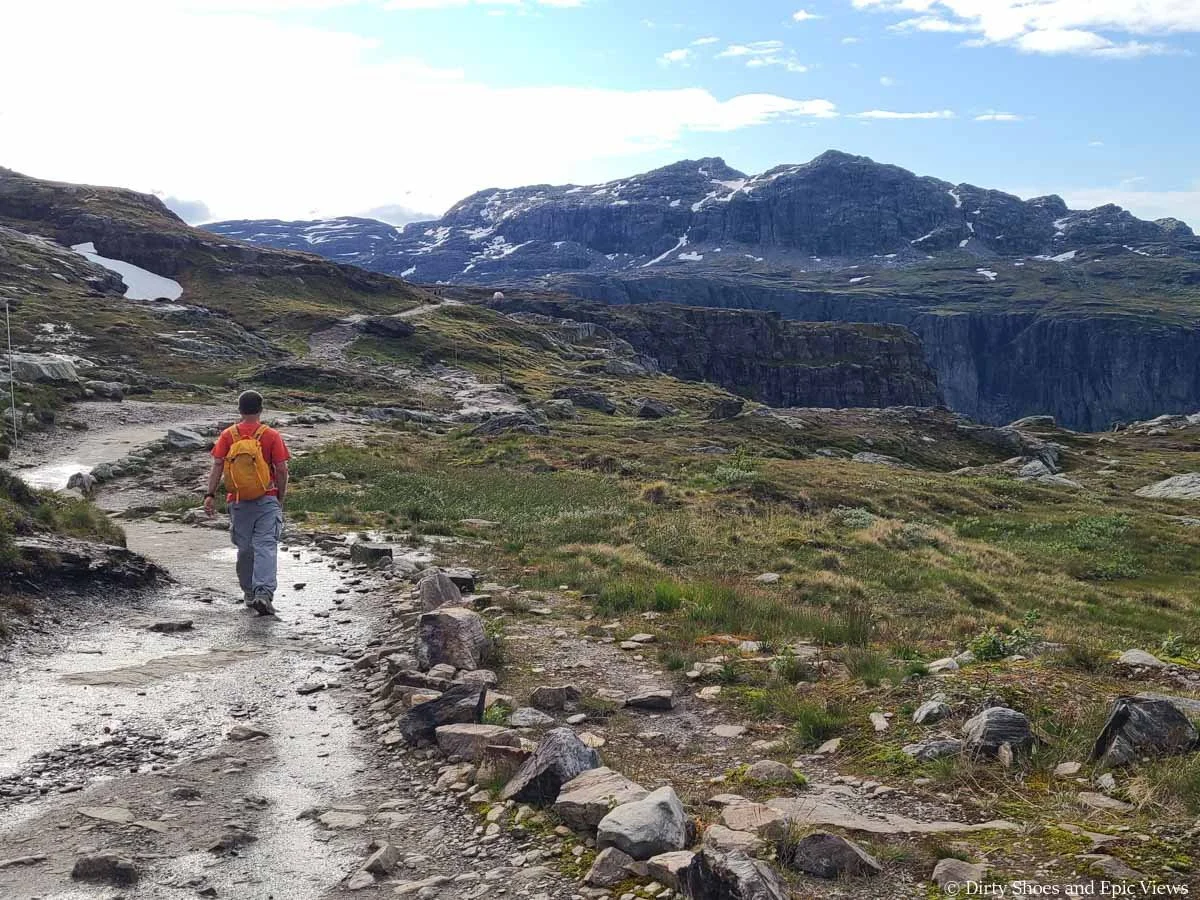
The Trolltunga trail skirts along the meadows that lie above Ringedalsvatnet, which sits in the valley ahead, making for stunning views the whole way!
Through this part of the trail, you’ll continue to have awesome views over the lake, and there are plenty of good photo-ops along the way.
Enjoying those amazing views of the deep blue Ringedalsvatnet on the hike to Trolltunga!
Just look at that deep blue color…
Ahead, you can see the trail sprawl out across the flat meadows as it heads towards the next small climb of the hike. It’s easy hiking through here, with continuously amazing views all around.
Looking ahead as the path wanders across the flat meadow towards Trolltunga
After the flat trail ends, you’ll come to another short and steady rocky climb that takes about ten minutes, at which point you’ll arrive at the second emergency shelter along the hike- the Endaen shelter (at this point, we were about 2.5 hours into the hike from the P3 trailhead).
Arriving at Endean- the second shelter along the Trolltunga hike
We just couldn’t stop admiring these gorgeous views of the lake!
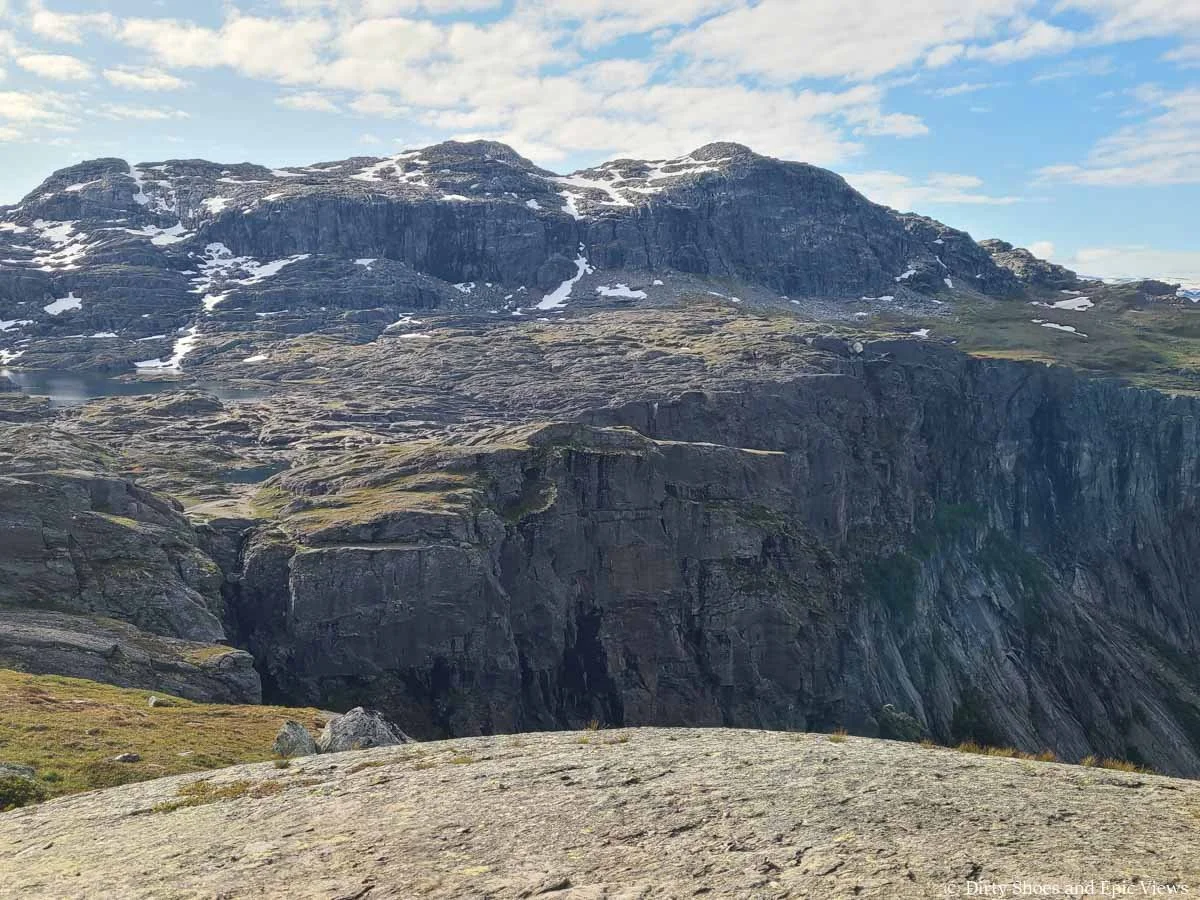
From this vantage point, you’ll see a closer rocky cliffside jutting out towards the lake, and it will be spotted with little domes used by some of the overnight guided tours.
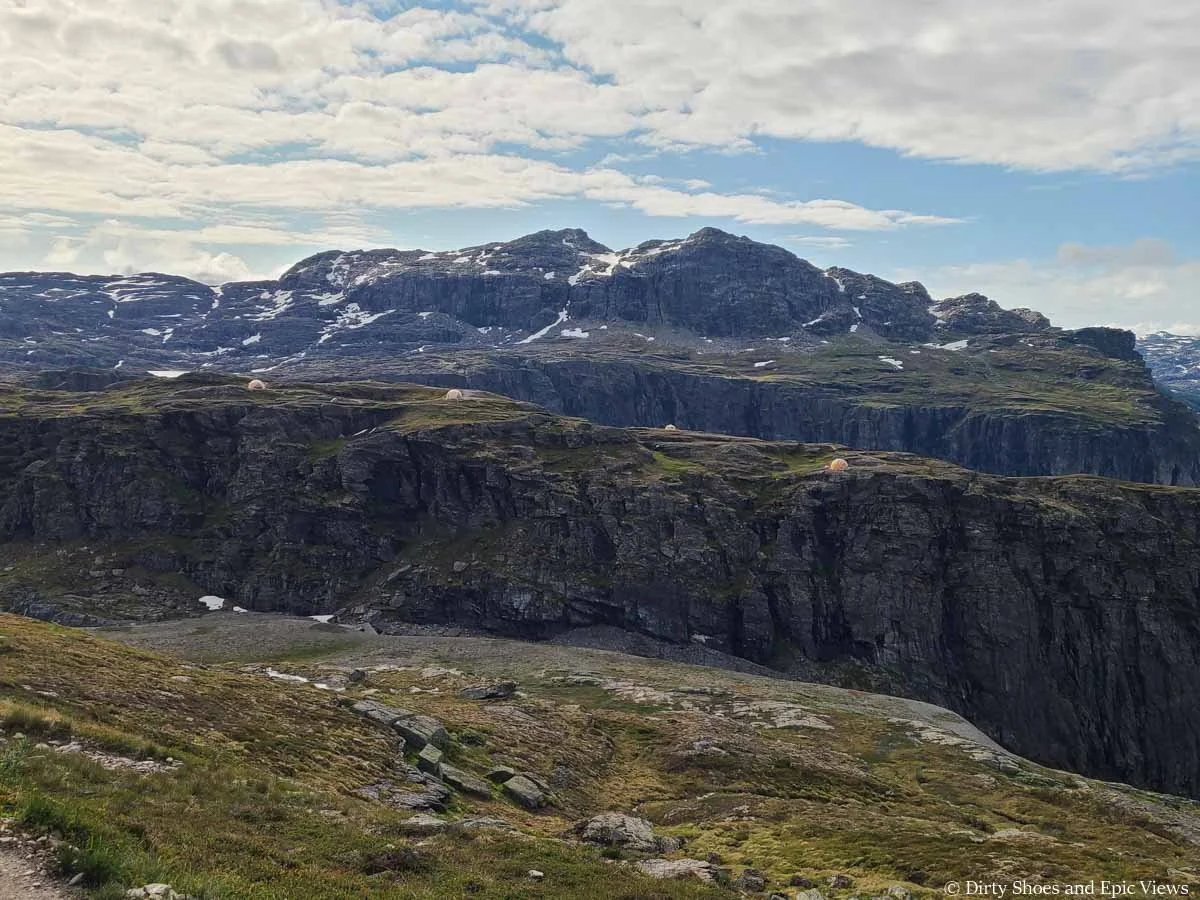
Looking out at the ridge spotted with domes used for overnight guided hikes to Trolltunga
Behind this is a second rocky cliffside- and this is the one that contains Trolltunga! On the rest of the hike, you’ll make your way onto that first ridge containing the domes, and then over two that second ridge behind it that has Trolltunga.
From the Endaen shelter, there’s a short and gradual descent into a small gully, followed by a short and steep climb up onto the ridge of that first rocky cliffside where the domes are.
The narrow trail drops briefly into a gully before climbing steeply back up the other side. You can see the trail as it climbs up to the ridge above.
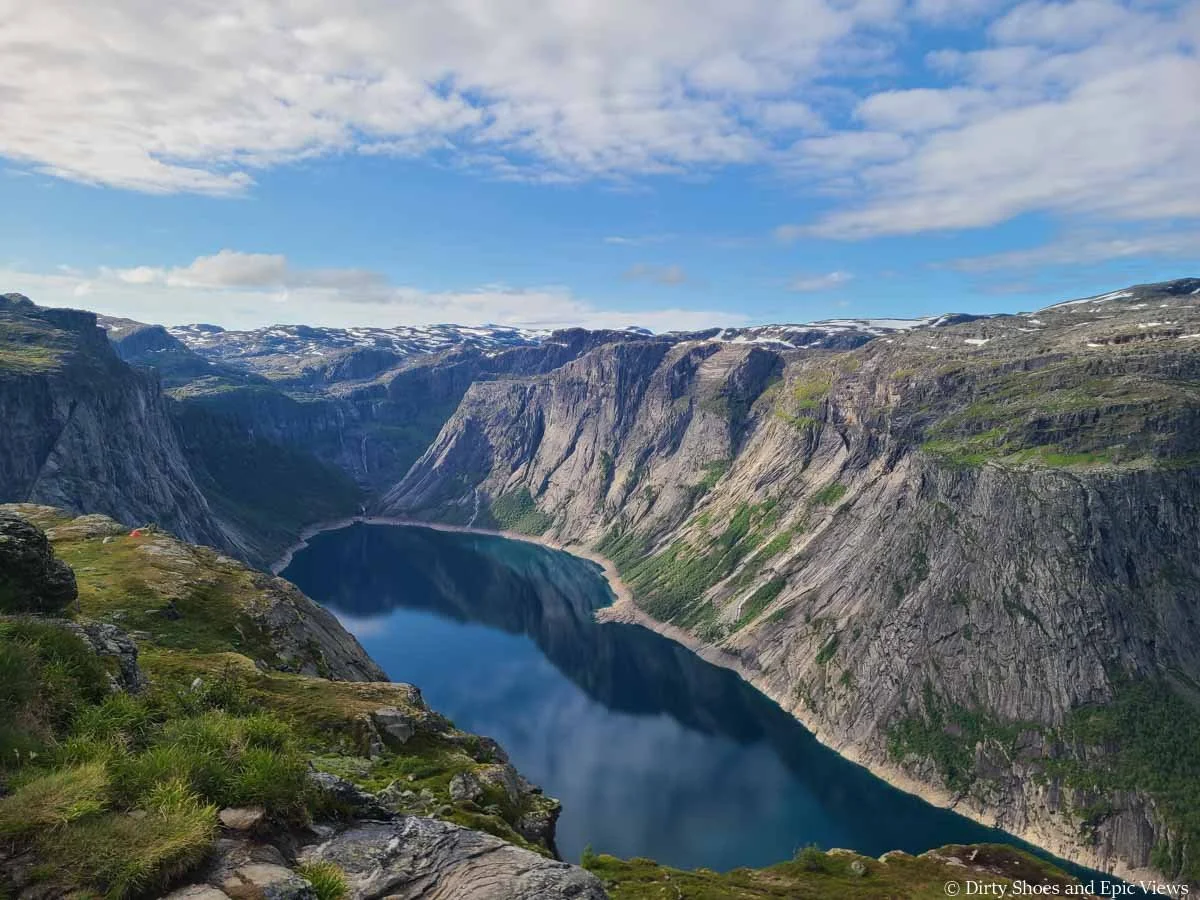
Ringedalsvatnet is still in view! We loved all the different perspectives we got of the lake throughout the hike to Trolltunga.
Climbing back out of the other side of the gully
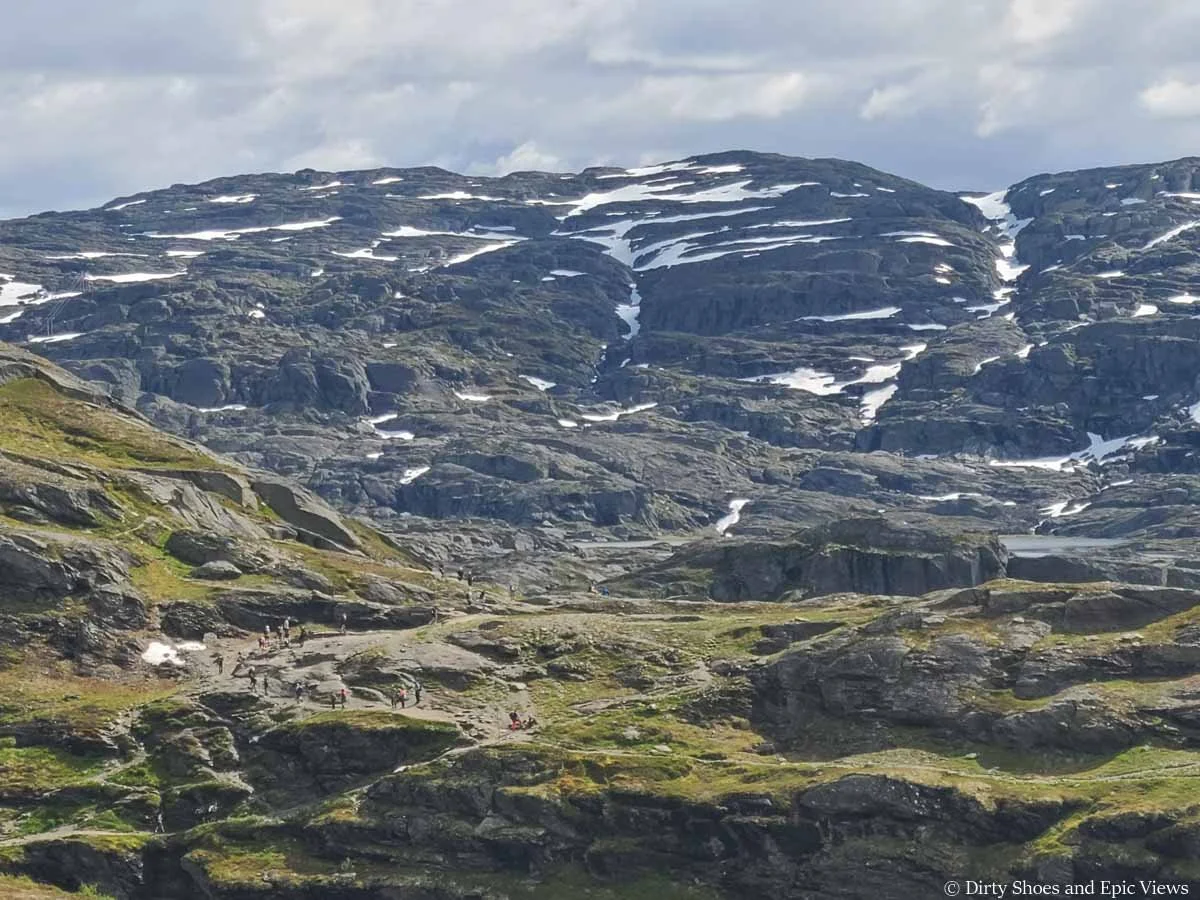
Once you top out on this short climb, the rest of the Trolltunga hike is pretty easy-going from here, and you’re almost there. Now that you’ve crossed onto the ridge with the domes, you’ll be staring right at the cliff face that has Trolltunga! On the hike in, we had no idea what we were looking at and where Trolltunga was hiding, but on the hike out, we could look back and see all the people crowded around one spot, so Trolltunga was easier to see that way. Without the crowds of people, we would never have known how to spot it- it’s actually such a small and hidden feature on the massive cliff face from this perspective!
Little did we know that hiding somewhere in this cliff face was Trolltunga!
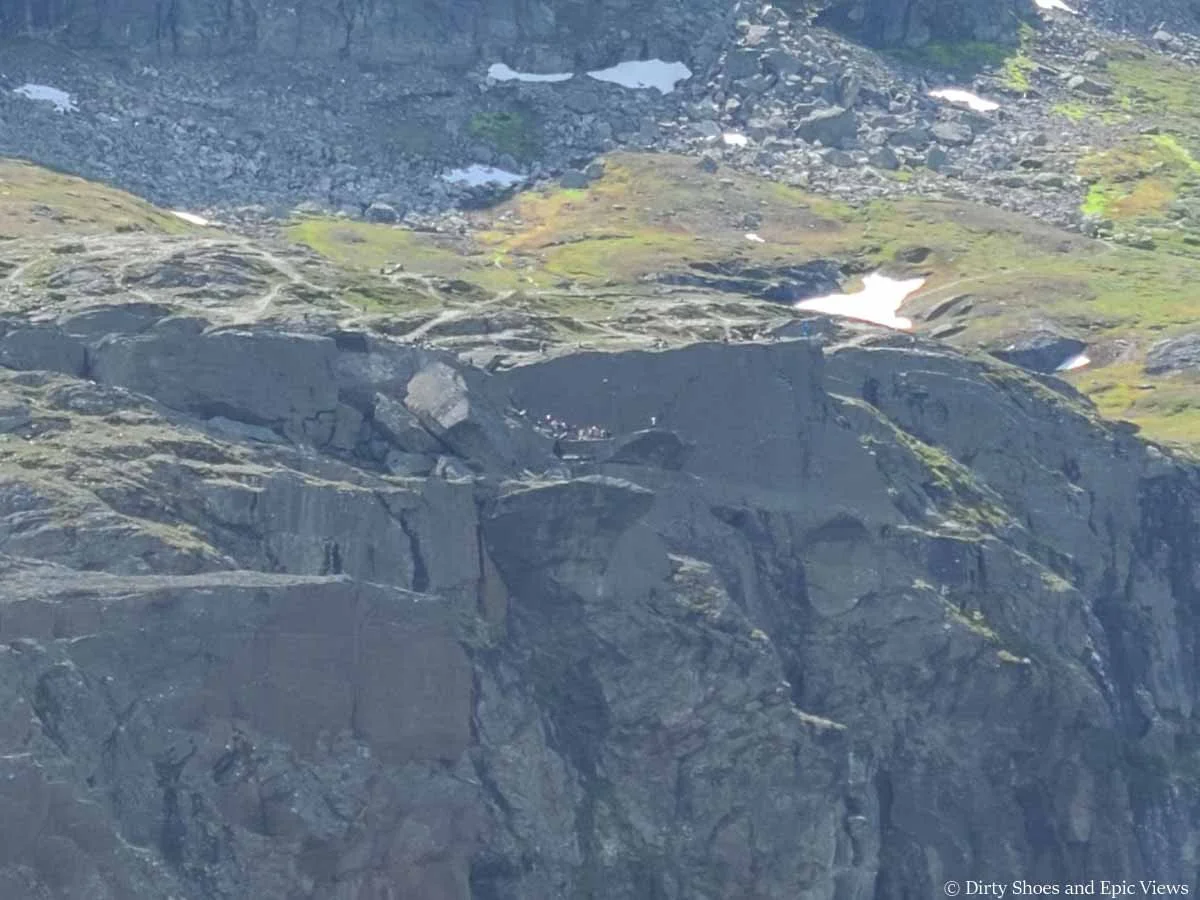
We took this picture on the hike out- Trolltunga was much easier to spot from afar when there were a bunch of people around it! This is a vary zoomed in shot- can you see all the little ants lined up at Trolltunga?
But even though you’re so close to Trolltunga here, the trail does meander quite a bit to get there…
After a bit of hiking, you’ll traverse through a shallow stream at the base of a waterfall cascading down a small rock wall.
From here, you’ll enter into a tarn-filled rocky alpine landscape. You’ll follow the poles to navigate through the rock maze, which involves some small ups and downs.
On the last leg of the Trolltunga hike, the trail enters a rocky landscape filled with small tarns
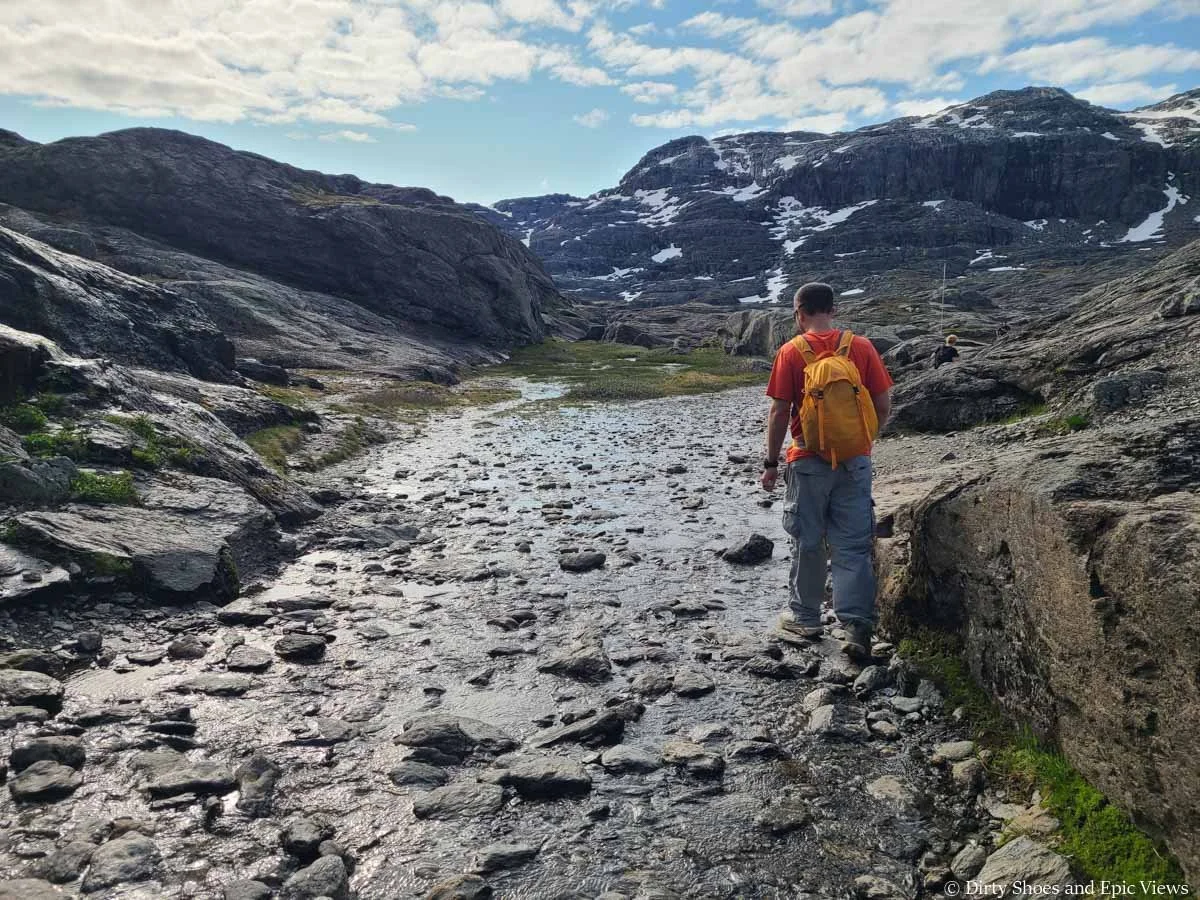
Rock hopping past a small waterfall and its stream on the final stretch to Trolltunga
Navigating the rocky landscape
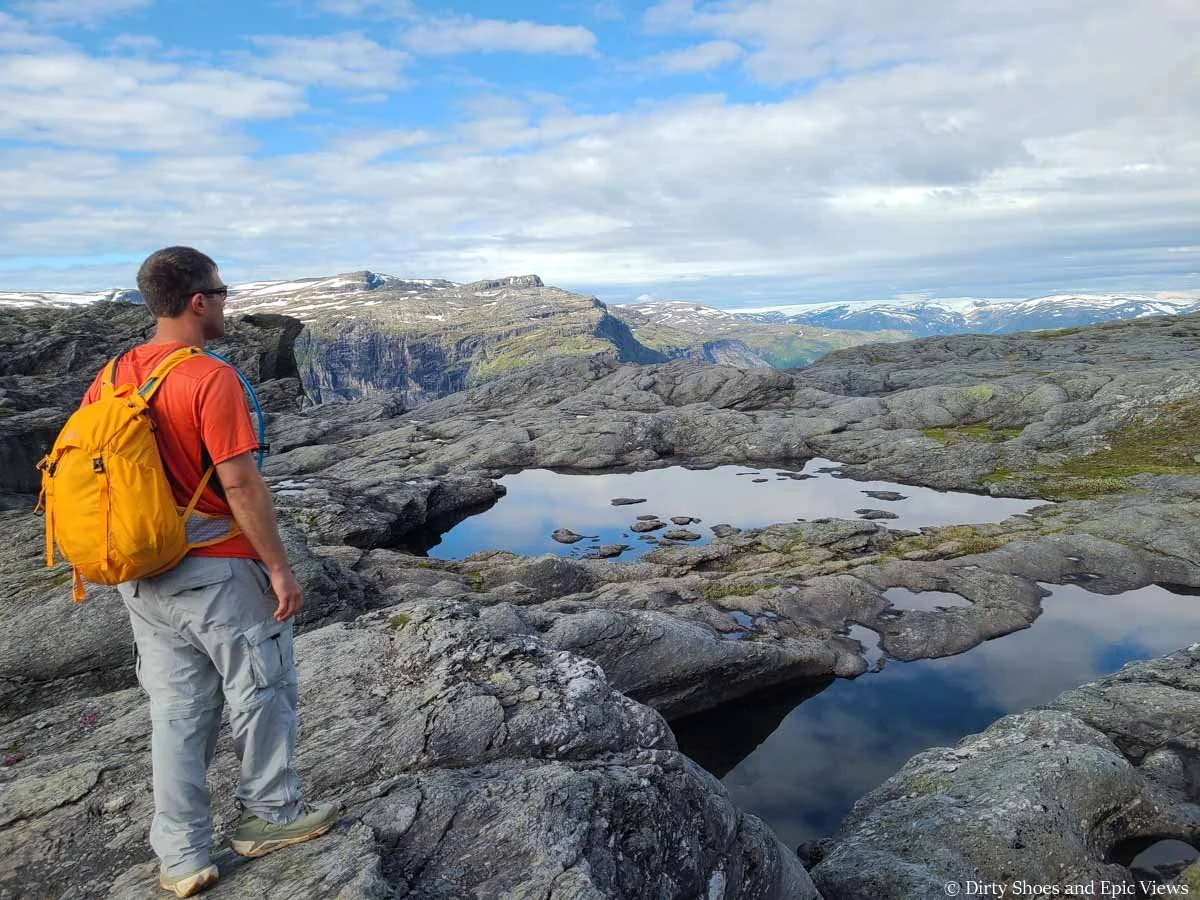
Enjoying the views of the alpine landscape near Trolltunga
I will admit, by this point in the hike, I was just ready to be there! I knew Trolltunga was close, but the trail just seemed to be dragging on at this point! The trail was also starting to feel quite a bit busier.
After about ten minutes, the poles will guide you to the third and final emergency shelter along the Trolltunga hike- the Tyssehol shelter. And when you get here, just know that you are practically there!
Once you reach this third shelter along the Trolltunga hike, you’re just about there!
Just a few minutes past this final shelter, we finally saw signs in the distance and knew that this was the end…and I was so excited! Kevin ran ahead and I saw the big grin on his face which told me the view was going to be good.
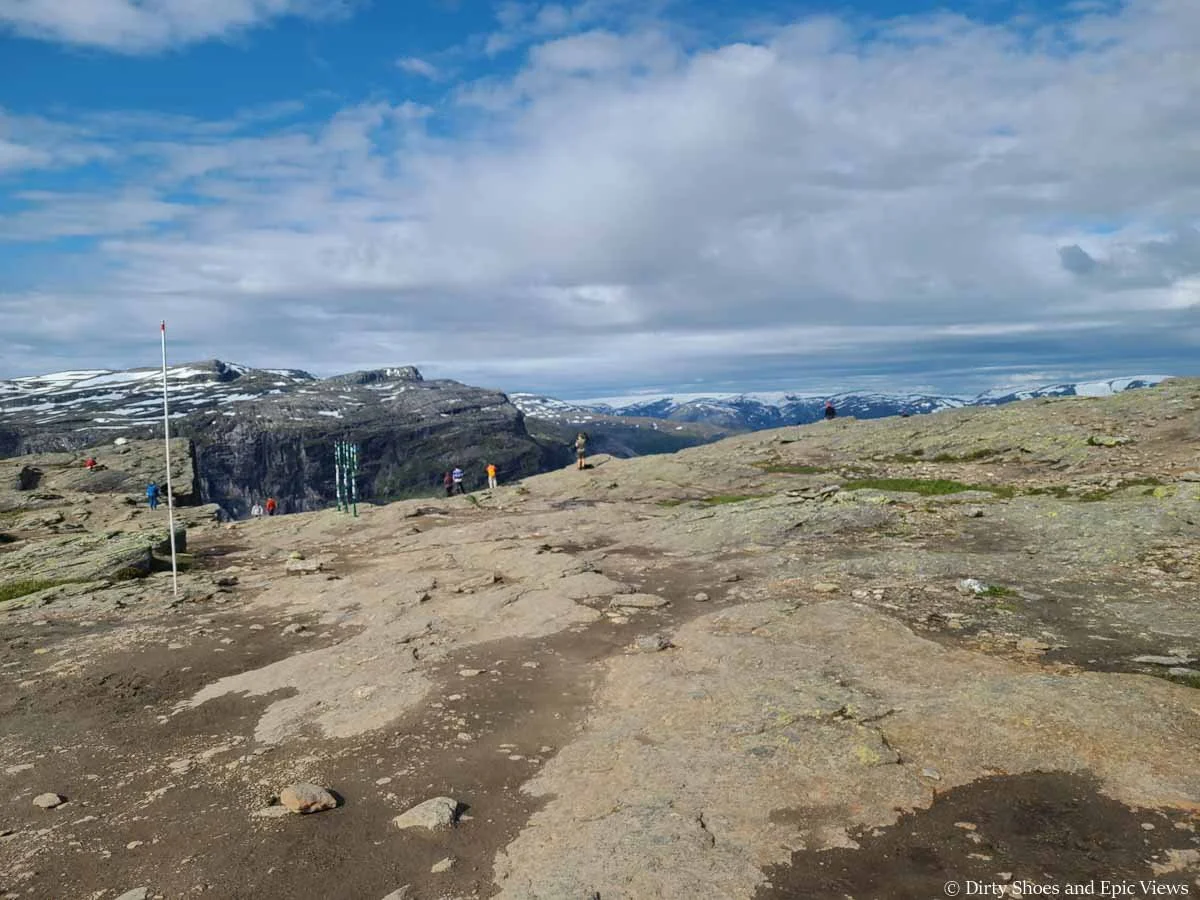
We made it! This is the final approach to the cliff edge overlooking the famous Trolltunga
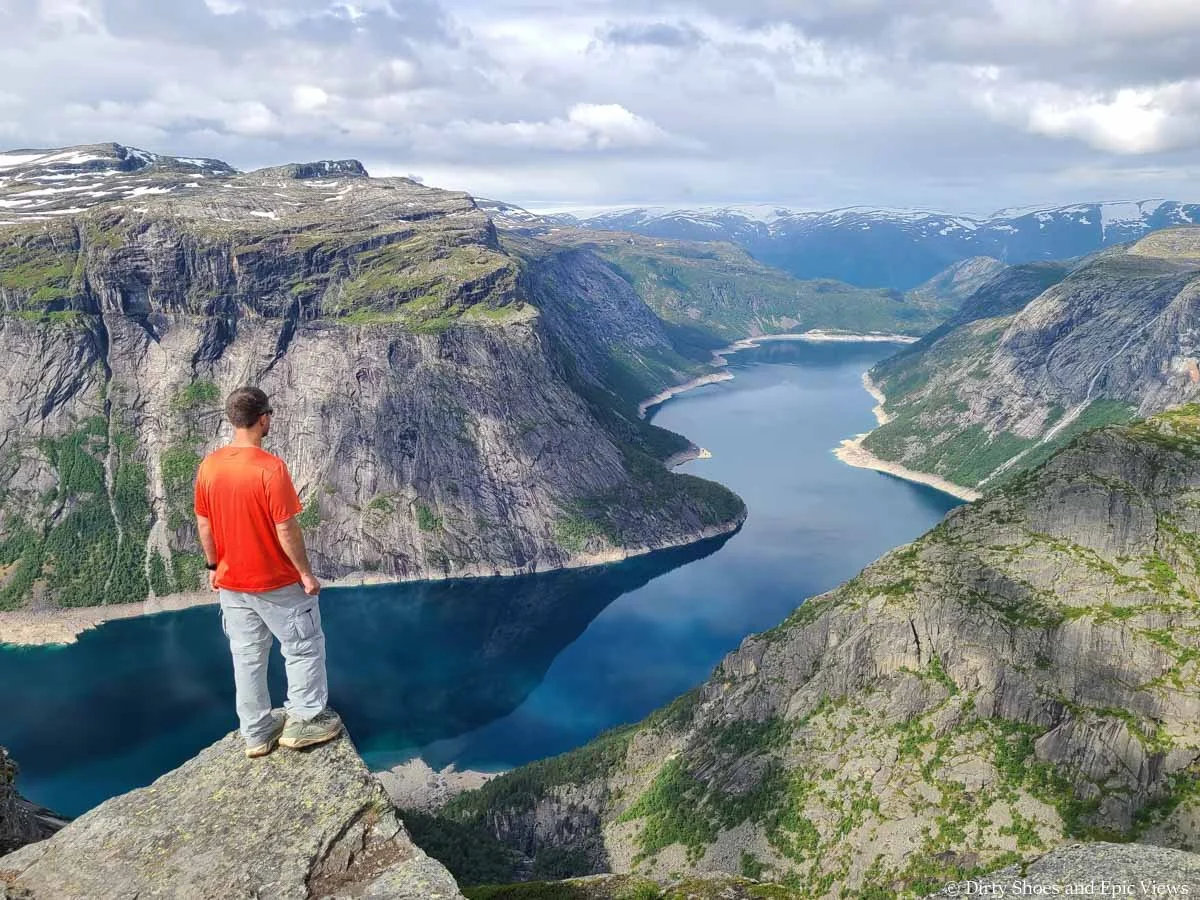
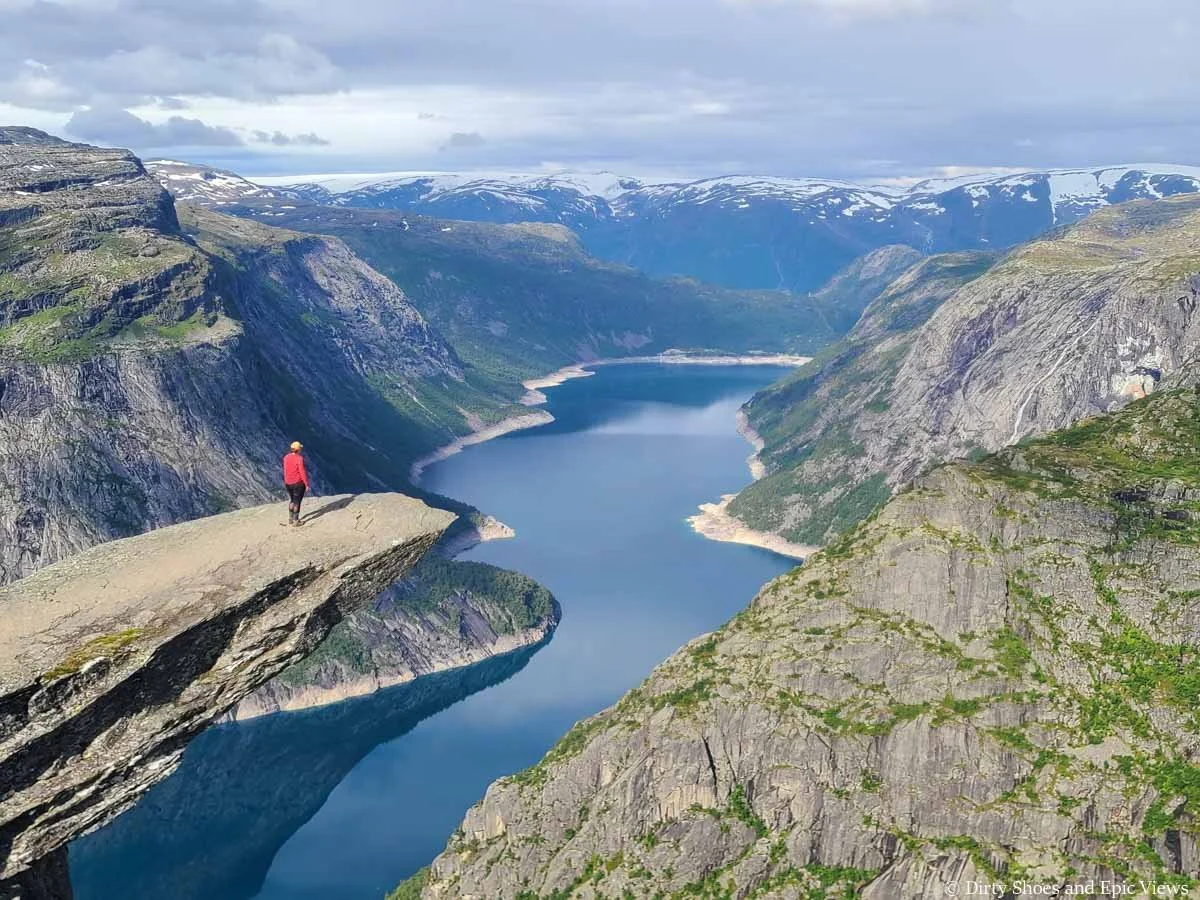
And after nearly 3.5 hours of hiking from the P3 trailhead (or just about 4.5 hours from P2), I walked to the cliff edge and was immediately hit with my first view of Trolltunga…and it was epic.
It was truly a “wow” moment. For everyone! It’s hard to explain but the real-life view is just so much more stunning in person than any picture we had previously seen of Trolltunga. The rock formation is massive and in- your- face, the lake below was such a deep intense blue, and everything just seemed so vibrant. It was such an awesome reward for the early wake-up call and all the effort it took to get here. Totally worth it! I loved seeing everyone’s first impression as they came up and got their first views. It was like a collective “wow, we made it” group moment that we all got to excitedly share in.
Standing on Trolltunga
And because we had got there so early in the day, there were barely any people in line for the famous shot of Trolltunga! We did get passed by a number of faster hikers from the first shuttles of the day earlier on the trail, but most had already gotten their pictures and were relaxing on the nearby rocks, and there weren’t enough people yet to actually form any sort of substantial line.
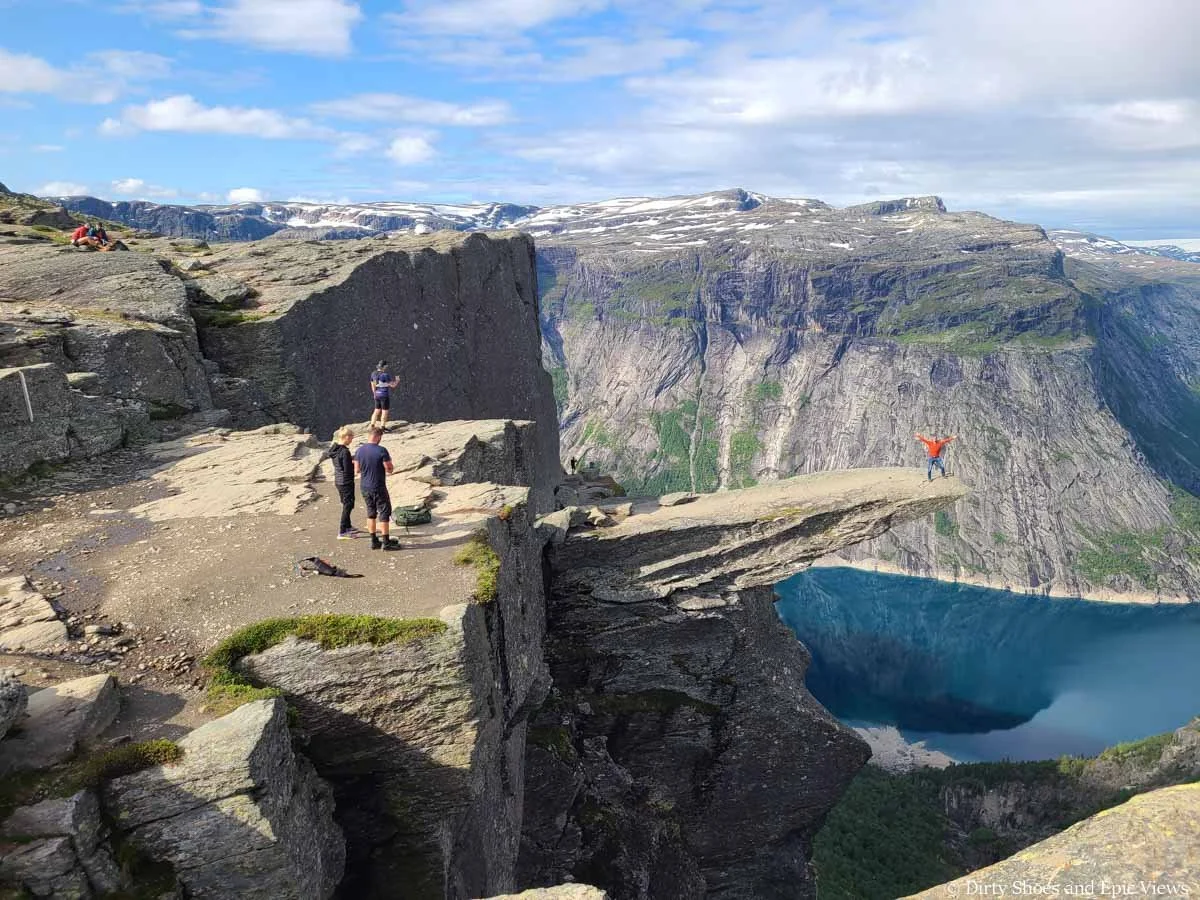
This is what Trolltunga looked like when we first got there- pretty empty!
In a span of about 20 minutes, I got to step out on Trolltunga four times, and Kevin did a few times, too! We never had to wait any more than a few minutes for a turn. Everyone was taking quick pictures and being super respectful and nice and just enjoying the experience. We got to talking to a few others, shared in our excitement, and took photos of each other. It was pretty cool!
And as far as Trolltunga itself goes, I am happy to report (as someone uneasy about heights and huge exposure) that walking out on Trolltunga isn’t scary. It might seem like it would be from the pictures, but it’s not that bad.
To get to the base of Trolltunga, you’ll have to climb down a short set of metal rungs on a rock boulder. And once you get down here, Trolltunga looks totally different from this perspective. The feature is actually really wide and flat and it’s angled up, so when you walk out onto it, you don’t really even notice any sort of exposure. If you stay right in the middle, you’d really have no idea that there are thousands of feet below you on three sides!
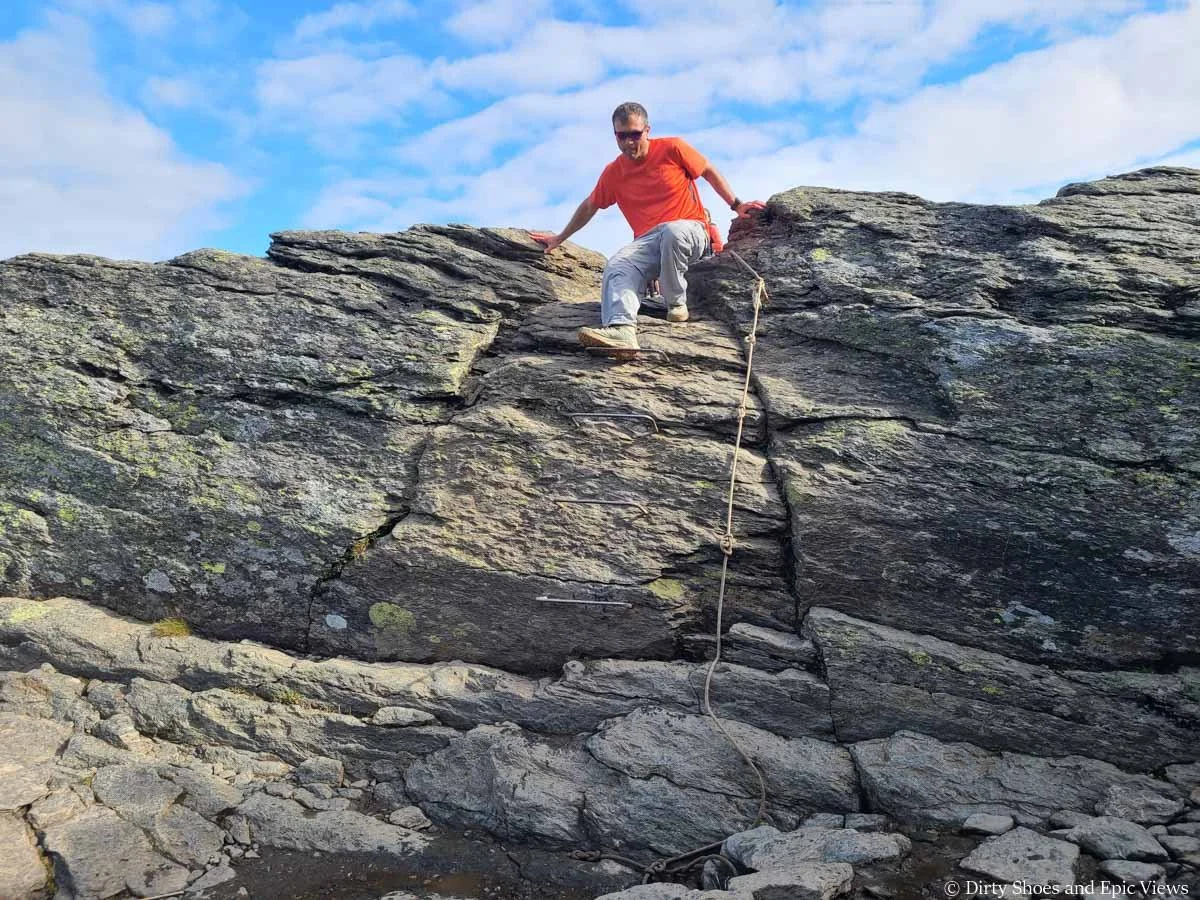
Climbing down to Trolltunga
This is the view right at the start of Trolltunga. It’s actually a pretty wide ledge and not scary at all.
The short line for Trolltunga when we got there nice and early!
Of course, there were people going right to the edge, sitting down, and dangling their feet over, which I would never do! But simply walking out onto the center of it was easy-peasy.
You also might notice a sort of mini-Trolltunga feature just to the left of the real thing! That one kind of gets ignored, and it’s easy to get a picture there without disturbing the main picture spot.

Standing on the “mini-Trolltunga” near the real Trolltunga
It’s a slight scramble to get down to the mini-Trolltunga from the base of the real Trolltunga
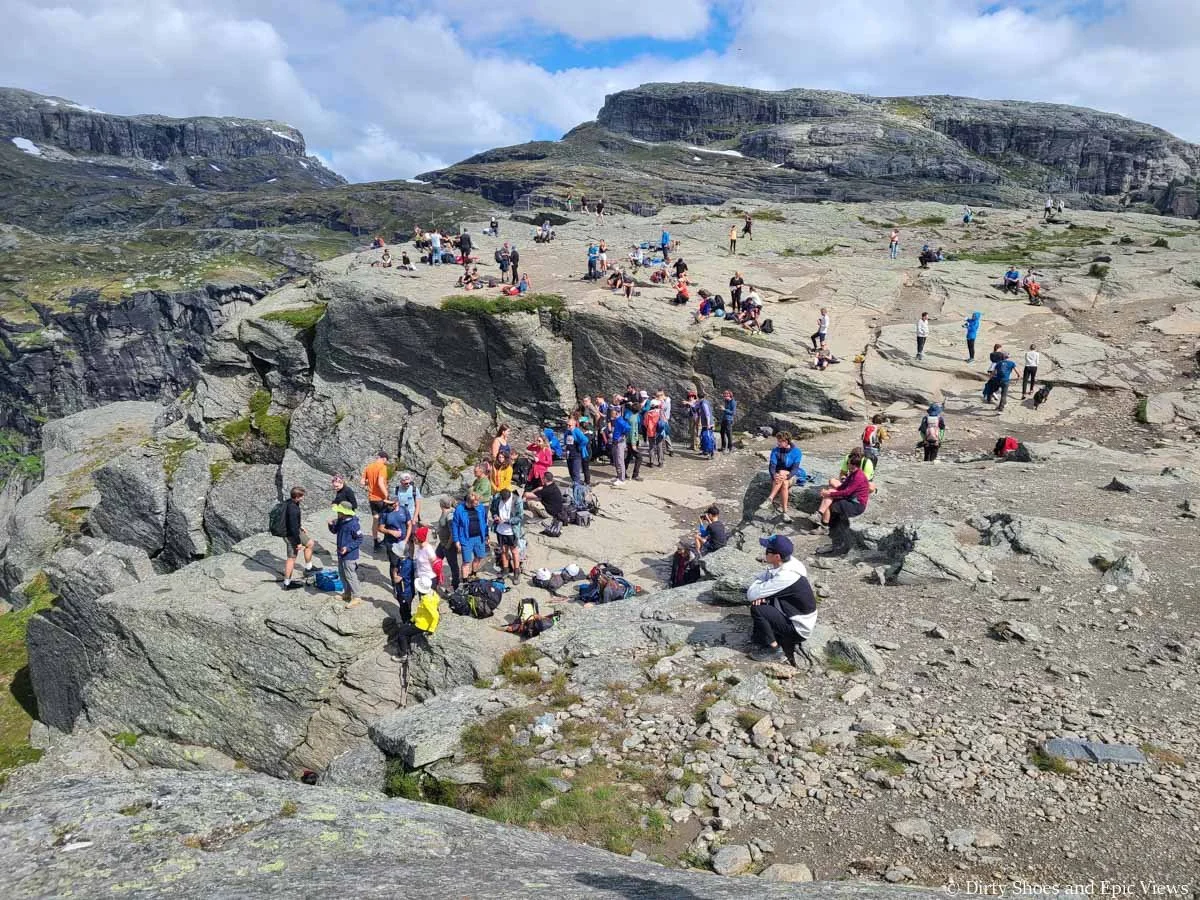
After feeling satisfied with our experience and pictures from Trolltunga, we decided to hike a bit further past the feature to hang out, eat an early lunch, and enjoy the views away from the crowds that were now quickly forming. We’d say that by about 10 am, it was getting noticeably busier and the line for the picture was starting to get long, but it wasn’t too bad yet.
These are the crowds forming at Trolltunga at 10 am
Fortunately, there is a ton of space to spread out around Trolltunga, so we were able to find a quiet spot and enjoy all the amazing views over the lake below. We seriously couldn’t get over the rich blue color.
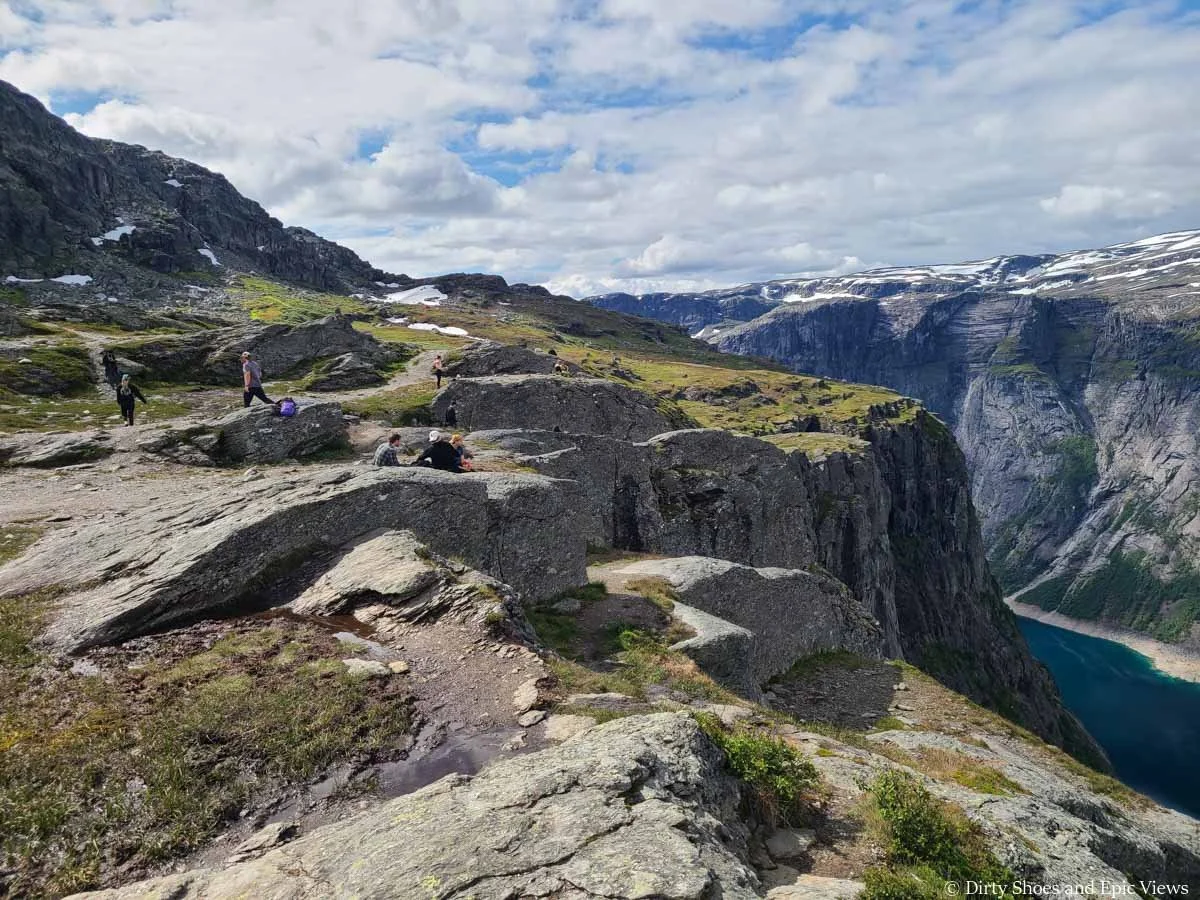
There is a huge area past Trolltunga where you can enjoy the views with a bit more solitude
The views from Trolltunga are stunning!
We ended up staying at the top for almost two hours! It may seem long, but hey- we earned it! And by the time we were leaving just after 11 am, the crowds were big. We wouldn’t be surprised if the wait for the shot was now 45 minutes or more.
The line at Trolltunga was definitely getting long by midday!
We took one last look at Trolltunga to sear it into our memories and started the long hike out.
The hike back from Trolltunga was pretty easy and straightforward. The uphills in this direction were pretty gradual and spaced out. However, the trail was very crowded at this point, especially for the first hour of our hike out. We could frequently look out to the trail ahead and see the trains of people pumping in and out in both directions (but most were still coming in at this point).
If you look closely, you can see all the tiny ants making their way along the Trolltunga trail in the distance as we hiked back out
Hiking against the traffic on the way back from Trolltunga in the afternoon
By about 12:30 pm, things started to slow down along the trail, which makes sense because the shuttles stop running for the morning at 11 am, so we were now seeing the last boluses of hikers coming through until the afternoon. At this point, there were more people hiking out than in.
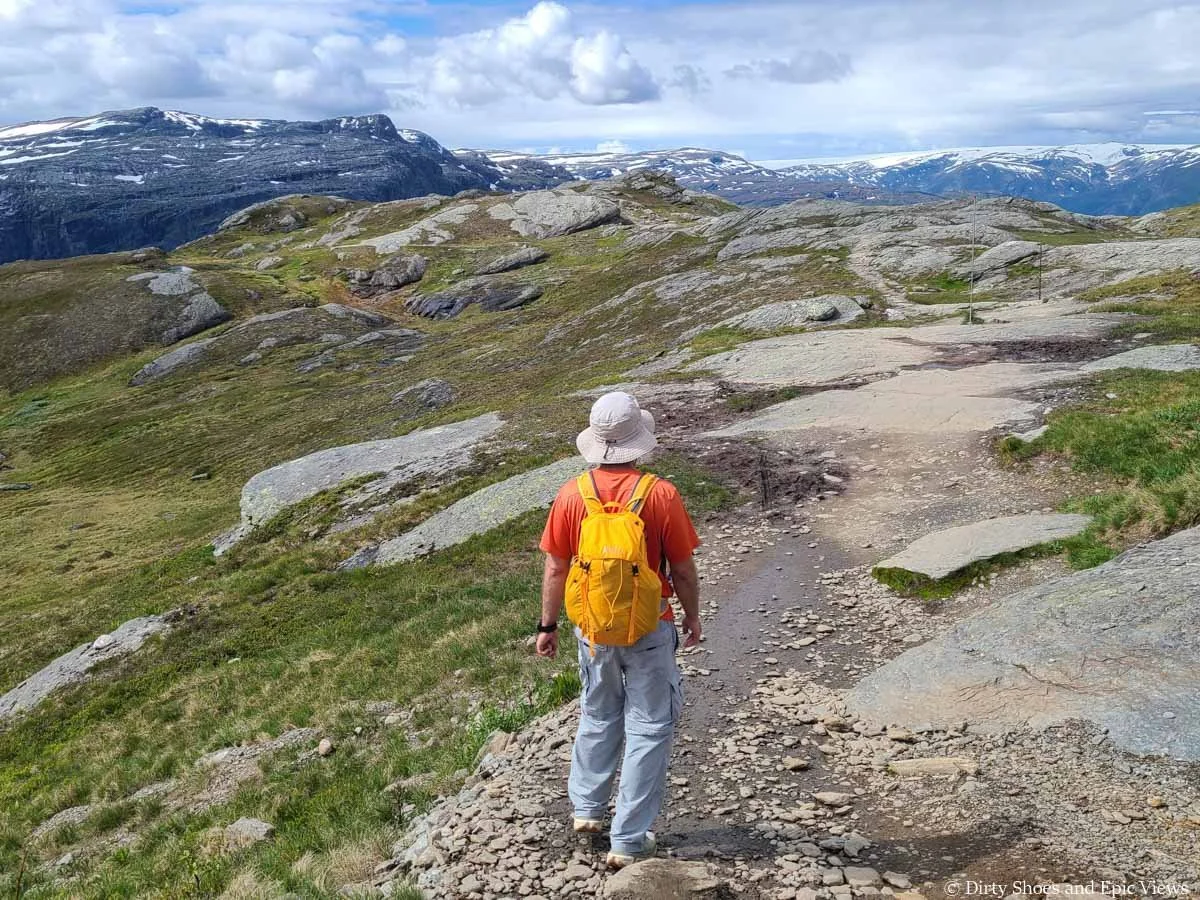
Soaking in these final lake views from the Trolltunga hike
There are a few uphills to tackle on the hike out from Trolltunga but nothing difficult
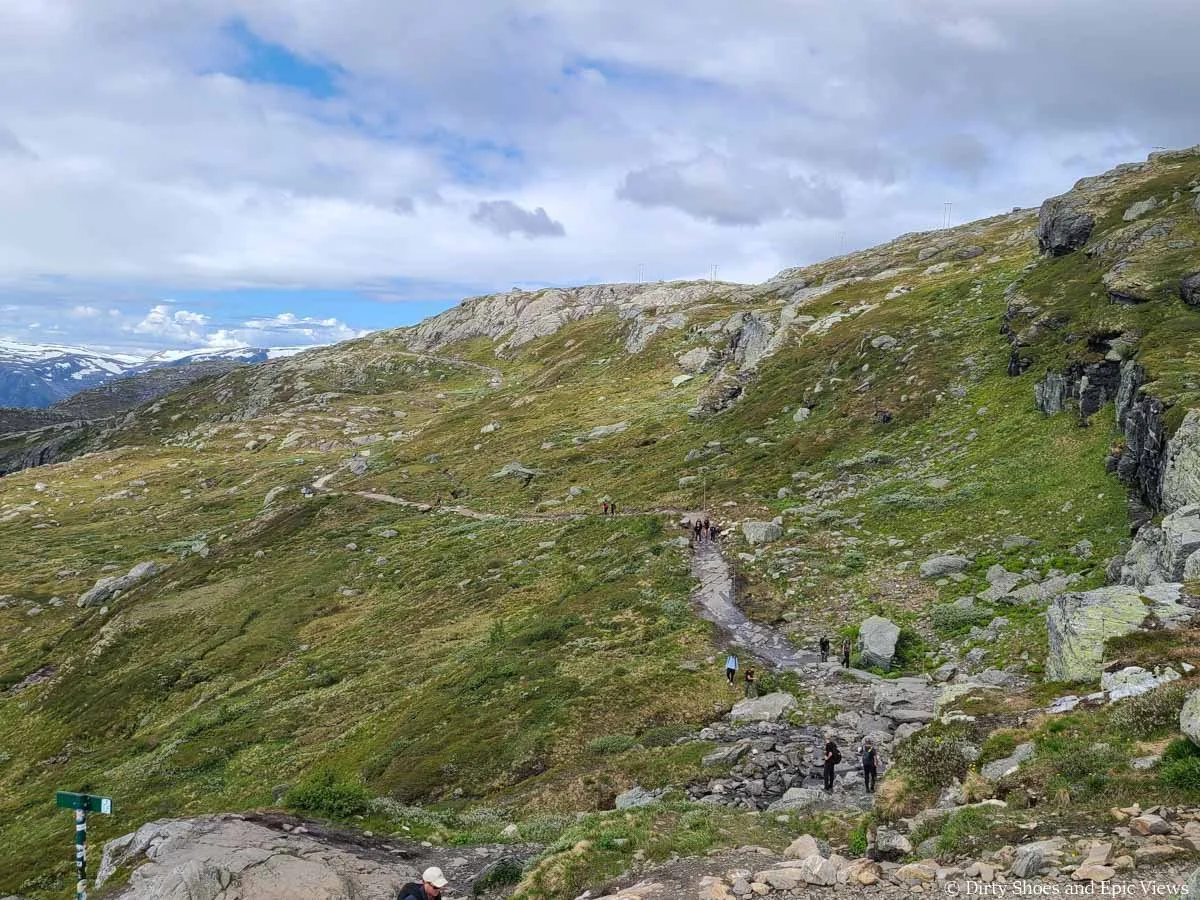
As we hiked out from Trolltunga, we tried to take our time and enjoy the view, and took a brief rest for more snacks, so a lot of people ended up catching up to us, and the last part of the hike, particularly down the big pass right near the start, became extra crowded and kind of frustrating. It made me appreciate even more the experience we got to have on the hike in!
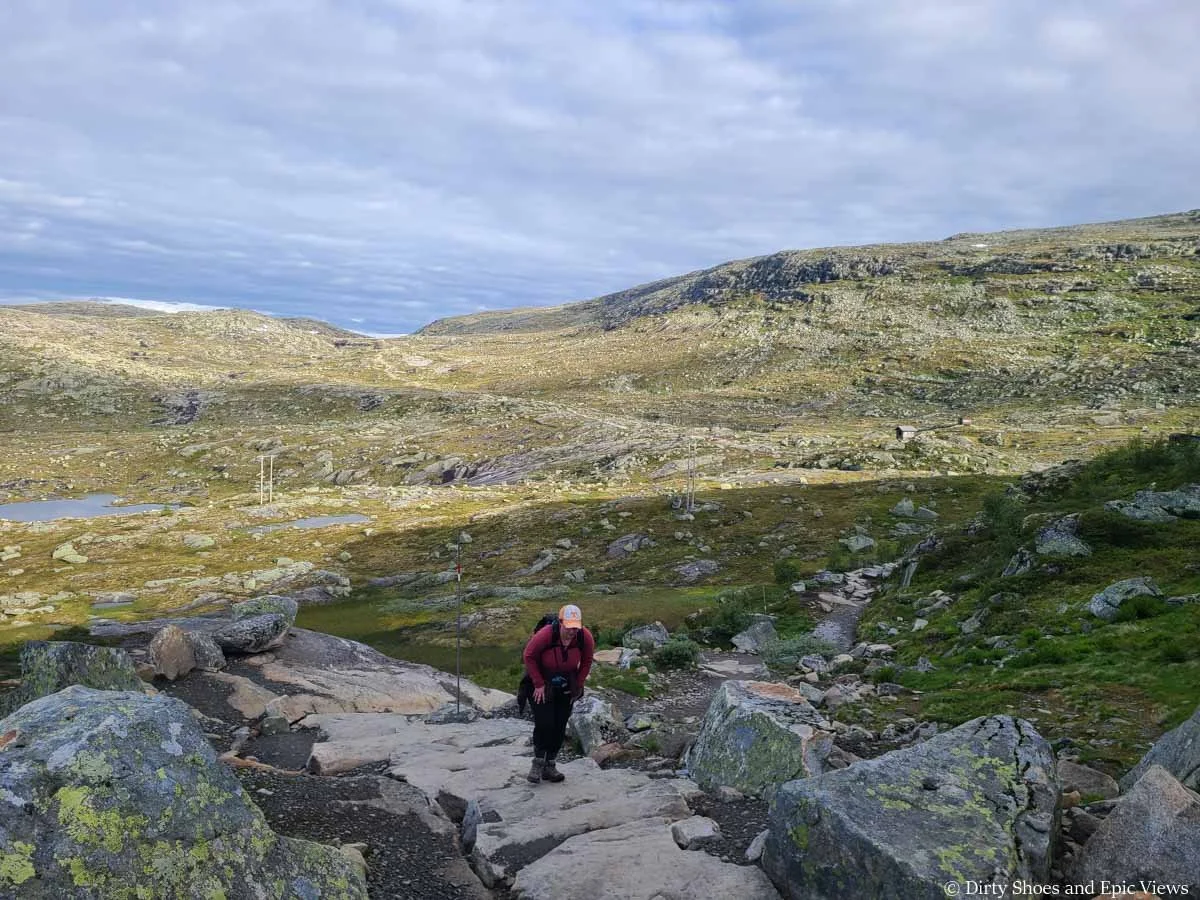
This is the view back up the pass towards the end of the hike out from Trolltunga, which is probably the most substantial climb of the hike out
Hiking back up the pass
The trail started getting busy again around the pass- you can see the line of hikers running down the trail
Descending back down the other side of the pass in the final push back to the Trolltunga trailhead
The trail was definitely busy through here!
By the time we made it down the pass, I was super ready to be off the trail, but we still had the flat walk out through the valley. We got to the P3 trailhead just before 3 pm, so overall, it took us almost 9 hours for the entire roundtrip hike from P3 (with 2 hours of that hanging out at the top).
The shuttle stop for the Trolltunga shuttle back to the P2 parking lot
We rested for just a few minutes before starting the steep descent down the road back to P2. We did briefly contemplate just hopping on a shuttle from here, but we figured we might as well just see this whole thing through! We made it down the road in about 50 minutes.
Is the Trolltunga hike worth it?
We’re usually quick to admit whether we think a hike is overhyped or overrated (I’m looking at you Salkantay Trek), so you can trust us when we say that the hike to Trolltunga is absolutely worth it.
It is a super popular hike so it’s easy to feel like you can skip this one on your Norway itinerary in favor of other less busy hikes, but we think that’s a bad idea. Trolltunga is popular for a very good reason, and sometimes it’s worth it to brave the crowds (or wake up at an ungodly hour!) to get to experience it, too.
Trolltunga itself was so much better in person in our opinion, but we also thought the entire hike was beautiful, so we highly recommend adding the hike to Trolltunga to your Norway itinerary.
Where to Stay Near the Trolltunga Hike
Odda is the closest big town to Trolltunga, and we 100% recommend staying here before your hike. There are plenty of options here, but because of its proximity to such a famous hike, it can get quite pricey, unfortunately.

The town of Odda sitting along Hardangerfjord near the Trolltunga hike
Because of this, we spent a lot of time trying to figure out where else we could stay. We were looking at all the “nearby” towns along Hardangerfjord, as far away as Eidfjord and Vossevangen, and also down near Roldal, because the options were much cheaper than staying in Odda. Some of the places we looked at were over an hour away from Trolltunga. And after doing the hike and experiencing this area, I am so glad we didn’t end up doing that.
We were able to find somewhere in Odda within our budget- there are actually some cheap hidden gems that you can find, especially if you start looking early before they all get snatched up.
Staying outside of Odda would make a long day on the trail even longer, and we wouldn’t say that you can entirely trust Google Map driving times around Norway. A 45-minute drive can easily take double the time. The roads around the fjords are narrow and winding, there are a lot of bigger vehicles and campervans that are slow-going, and there might be a few unexpected delays and hold ups. After our stay in Odda, our drive out of Odda and around the Hardangerfjord took sooo much longer than we anticipated. So I couldn’t imagine having to deal with that kind of drive on the same day as hiking to Trolltunga, especially since the hike typically requires such an early start.
So moral of the story? Stay in Odda.
There are lots of hotel and rental property options. If you are camping your way through Norway, Trolltunga Camping and Lothepus Camping are two major campgrounds in town.
Backpacking to Trolltunga (and Guided Tours)
It’s definitely possible to break up the Trolltunga hike into an overnight backpacking trip. We saw lots of backpackers during our day hike to Trolltunga.
Tent camping along the trail is free, and you’re welcome to do it independently, but be sure to read more info here about where and how to set up camp. Be sure to set up your camp on bare rock in order to protect the fragile vegetation, don’t camp in prohibited areas, and pack all waste out (keeping in mind there are no bathrooms along the trail!). There are a few recommended camping areas on the map at the link above near the first two shelters and near Trolltunga itself. You’ll see signs along the trail designating these areas. We saw plenty of tents set up in some pretty epic areas! And of course, make sure to be prepared for cold nights!
If you didn’t pack your own gear for this trip, you can also take a guided backpacking tour to Trolltunga. They will provide and likely carry most gear that you’ll need. The two main companies that provide these tours are Trolltunga Active and Trolltunga Adventures.
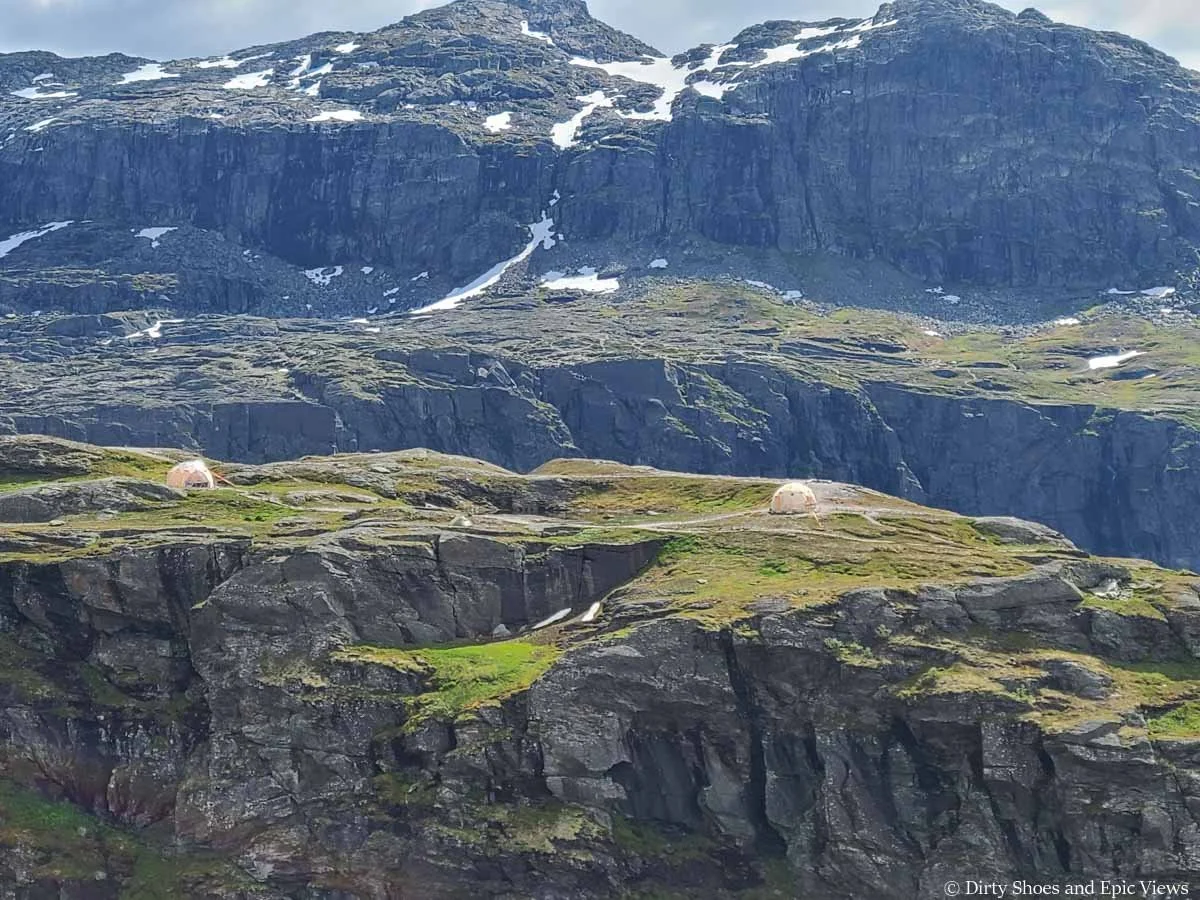
Some guided hikes to Trolltunga have you staying in these domes overnight right near Trolltunga
And speaking of guided tours to Trolltunga, another way you can get to Trolltunga is through the Trolltunga via ferrata! Using a series of iron rungs and ladders, you can scale the cliffs directly beneath Trolltunga for a unique and challenging way to get to the famous rock feature, and it’s a great way to avoid the crowds! Check out this site for more information about the via ferrata and tour groups.
Tips for the Trolltunga Hike in Norway
We’ve covered a lot already, but here are some of our final tips for hiking to Trolltunga!
What to pack for the Trolltunga hike
Aside from all the usual day hiking gear, we’d specifically recommend bringing the following for the hike to Trolltunga:
Good hiking boots: The hike to Trolltunga isn’t one to do in regular sneakers or flip flops! It’s a long hike across rocky terrain and dirt. It can get slick or muddy when wet, and it’s a long day on your feet. Make sure you have comfortable waterproof shoes with good traction.
Layers: Pack warm clothes for cooler temperature shifts and changing weather.
Rain gear: There may be always a slight threat of rain in the mountains and fjords, so be prepared!
Sun protection: Pretty much the entire Trolltunga hike is exposed to the sun, so be sure to have sunscreen at the very least.
Headlamp: Pack one just in case you find yourself starting or ending the hike to Trolltunga in the dark for whatever reason.
Toilet paper and trash bag: There are no bathrooms anywhere along the Trolltunga hike so pack what you’ll need and be sure to bring a bag to pack out all waste (toilet paper, food waste, etc).
A lot of the terrain on the Trolltunga hike is rugged and rocky so good hiking shoes are a must!
Check the weather the day before your hike
Weather in the mountains and fjords of Norway can be unpredictable and unstable. We found that it wasn’t very helpful to check the forecast too far in advance. Even if it shows clear skies and sun a week out, make sure to still check the forecast again the day before, and even the morning of your Trolltunga hike when it’s more reliable. We wouldn’t recommend this hike in rain or bad weather because of how exposed it is and all the slick rock that you’d encounter. And we certainly wouldn’t recommend standing out on Trolltunga in such weather, and it’s a very long hike and requires a lot of effort to not get the experience you want.
We found the most reliable forecast to be with YR.
Give yourself enough time and flexibility
Because the weather can be unpredictable, we’d strongly recommend committing 2-3 days at the very least in your Norway itinerary for staying in Odda. That way, you can work around any bad weather and increase your chances of being able to do the Trolltunga hike. Having just one day on your itinerary for this hike would definitely be a gamble.
If you do have a day or two of bad weather, you can chase some waterfalls in the area, such as Latefoss, Langfoss, Furebergsfossen, and Vorringsfossen.
If the weather is just gloomy with low-lying clouds and not particularly rainy or stormy, you can also check out the easy Bonhusvatnet hike, about 20 minutes outside of Odda.
And if you’re lucky enough to get more than one awesome day in Odda and need another hike to do after Trolltunga, consider the Reinanuten hike- an incredible (but quite challenging!) hike to an overlook over the Folgefonna icecap- Norway’s third largest glacier.
Use Caution Around Trolltunga
While trying to get the picture-perfect view of Trolltunga, you’ll be standing right along sheer cliffs. Use caution, especially if it’s windy or slightly wet.
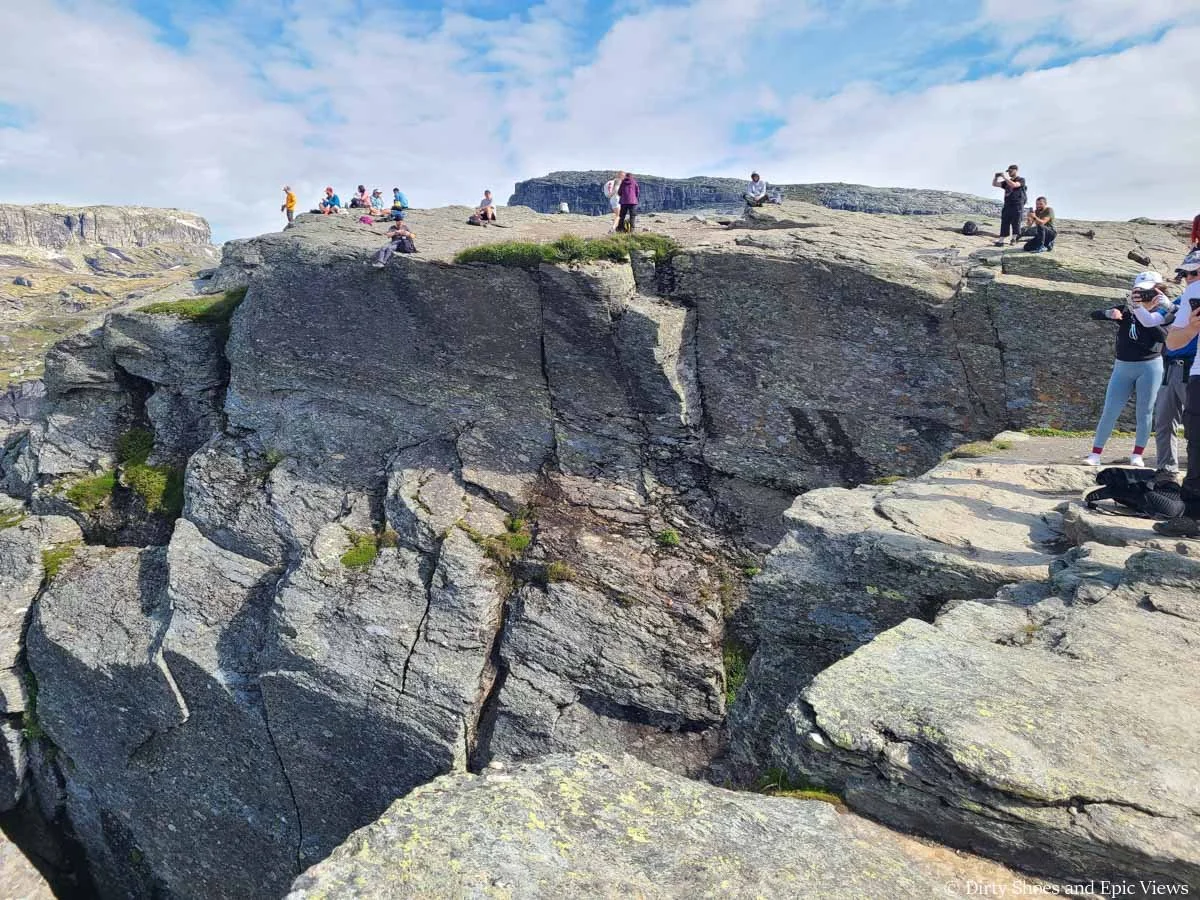
These are the cliffs right near Trolltunga where you’ll be taking those postcard-worthy photos
And while we didn’t think standing out on Trolltunga itself was too scary, there’s no shame in not doing it if it’s something you aren’t comfortable with! The views from everywhere up here are great! And you can still always get a picture of Trolltunga on its own- it might be a little tricky to get one with no one on it, but it’s possible! You just have to be ready and quick to get the brief moment in time where one person is running off while the next is running on.
Be considerate of others
We know you’ve been likely waiting for a long time for this moment to be standing on Trolltunga, but it’s advised to be quick when posing for your epic picture, especially if there’s a long line. Being quick and striking just a few poses will help keep the line moving for everyone and allow everyone to hike back in a reasonable time before dark or to catch their shuttles. Once you’ve gotten the picture, head back up to the cliff tops and enjoy the views from there!
More Norway Guides
Looking for more things to do in Norway after your hike to Trolltunga? Check out all or Norway guides to help you plan your ultimate Norway road trip!
The hike to Trolltunga in Norway is one of the best hikes to put on your Norway itinerary. We hope this guide helps you plan the perfect Trolltunga hike, but if you have any questions, feel free to ask us! Happy hiking!