One to Two Weeks in Costa Rica: An Itinerary for Costa Rica’s Pacific Coast
If you’ve done any research already, even the slightest bit, you’re probably well aware of all the amazing things there are to see and do in Costa Rica. For a small country, it packs a big punch when it comes to fun and adventure.
If you’re like us, you probably only have one or two weeks in Costa Rica. So the big question is, how do you decide what to do and where to go?
Don’t worry, we hear ya loud and clear! We had that same dilemma not too long ago. With tropical beaches, lush rainforest, wildlife reserves, cloud forests, volcanoes, National Parks, ziplining, rafting, whale watching…ahhh, my head’s spinning just thinking about it all again!
For us, we narrowed down our list by identifying our priorities…we wanted to see some cool wildlife (including sloths, of course!), we wanted to find some tropical beaches with those killer jungle-meets-ocean views, and we wanted to have some unique Costa Rica adventures (can anyone say white water tubing?!). As for the rest, well, let’s just say another trip back is in order!
For us, sticking to the Pacific Coast of Costa Rica allowed us to hit all of these must-do’s. From Corcovado to Manuel Antonio to La Fortuna and everything in between, we got to experience some of the best of this incredible country. Here, we’ll share an itinerary for one and two weeks in Costa Rica to help you start to plan your own Costa Rica getaway, and share some tips along the way!
Article Contents
Two week Costa Rica itinerary
One week Costa Rica itinerary
Best time to visit Costa Rica
Driving in Costa Rica
What to pack for Costa Rica
Want to save this article for later? Pin it and come back any time!

Two Week Costa Rica Itinerary
Day 1: Arrive in Costa Rica
Driving time/distance: 3 hr 15 min / 220 km
Where to stay: Uvita
Day at a glance: Arrive in Costa Rica, pick up your rental car, and head to Uvita.
Yay! Today is the day you arrive in Costa Rica!
You’ll fly into the San Jose airport. Many flights to Costa Rica arrive later in the day, so don’t expect to get too much done today. You’ll use this day to drive to your first destination, get groceries, and get ready for the adventures ahead. And just a little head’s up: At the airport, expect long lines at customs. We didn’t leave the airport for a few hours because of these long lines… it seemed as though all the incoming flights arrived right at the same time!
Once we got through customs, we picked up our rental car and off we went. We talk more about driving in Costa Rica and getting around below. Many of the airport rental places are not actually at the airport, but are located within 20 minutes. Most car rentals should have a shuttle to bring you there.
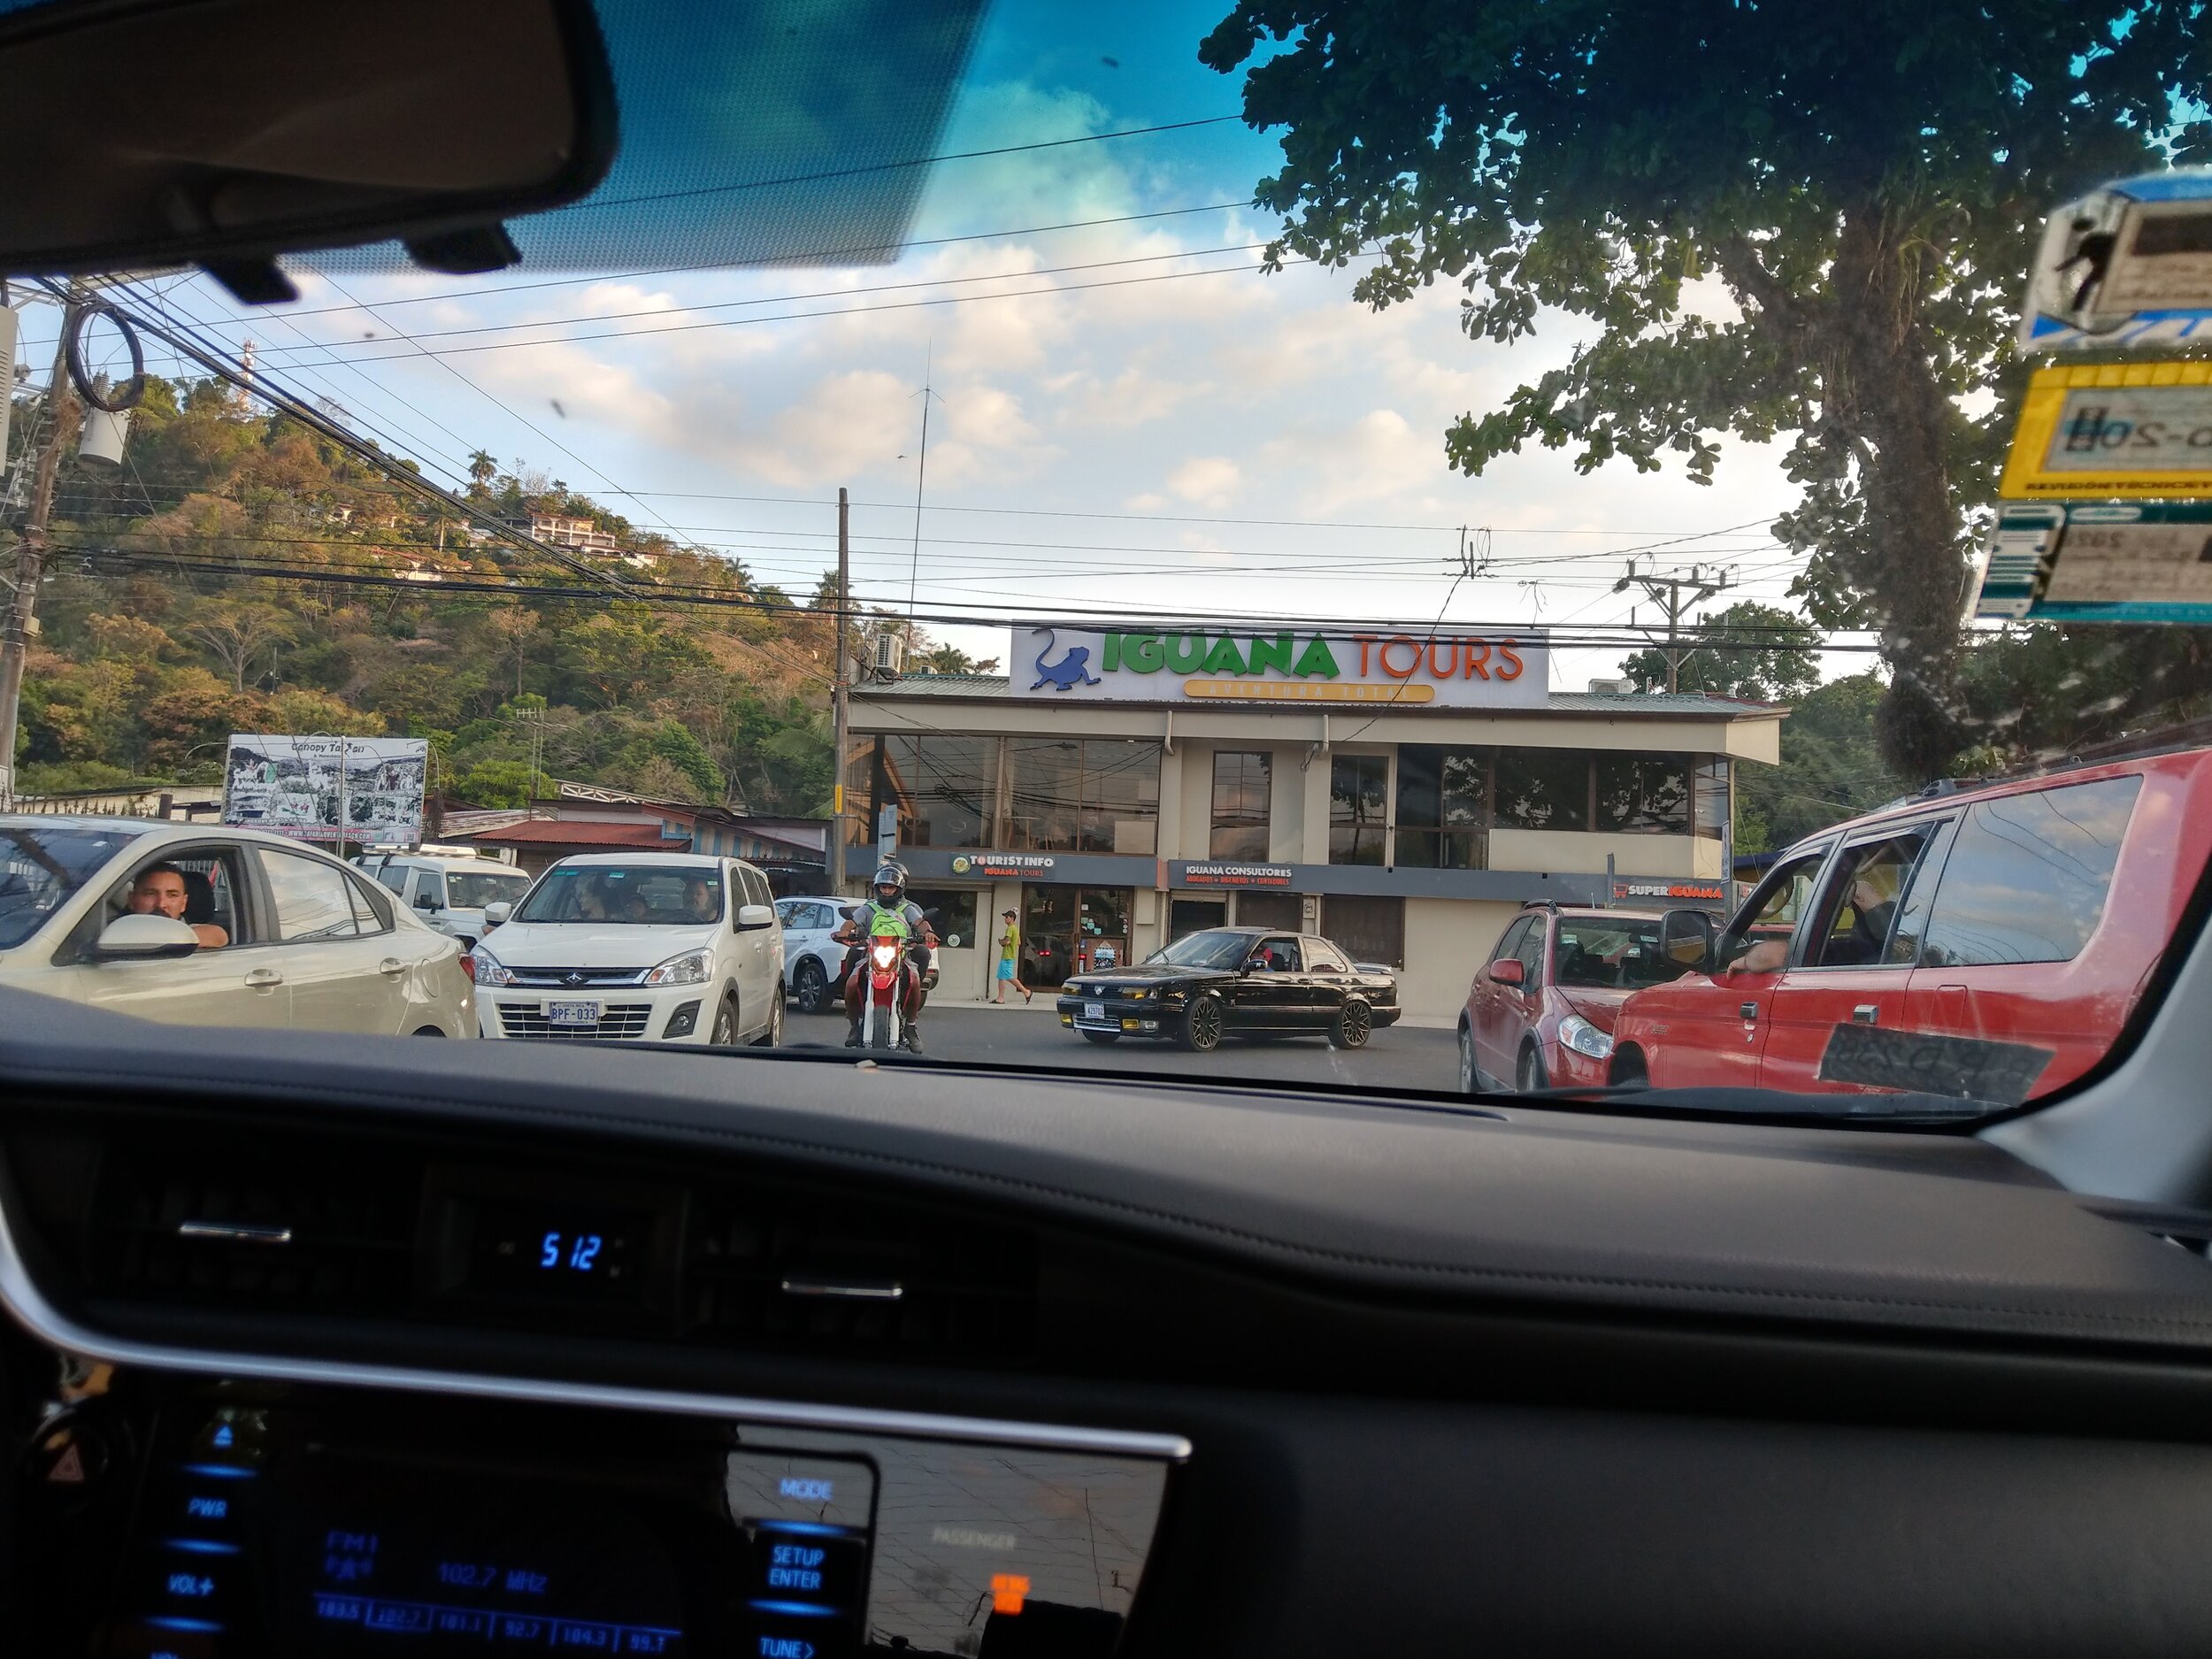
From San Jose, you’ll start your drive to the first destination of this two week Costa Rica itinerary…Uvita! This drive is a little over three hours long, but can become much longer due to traffic. The traffic in San Jose is actually insane during rush hour, and can significantly add time to your drive.
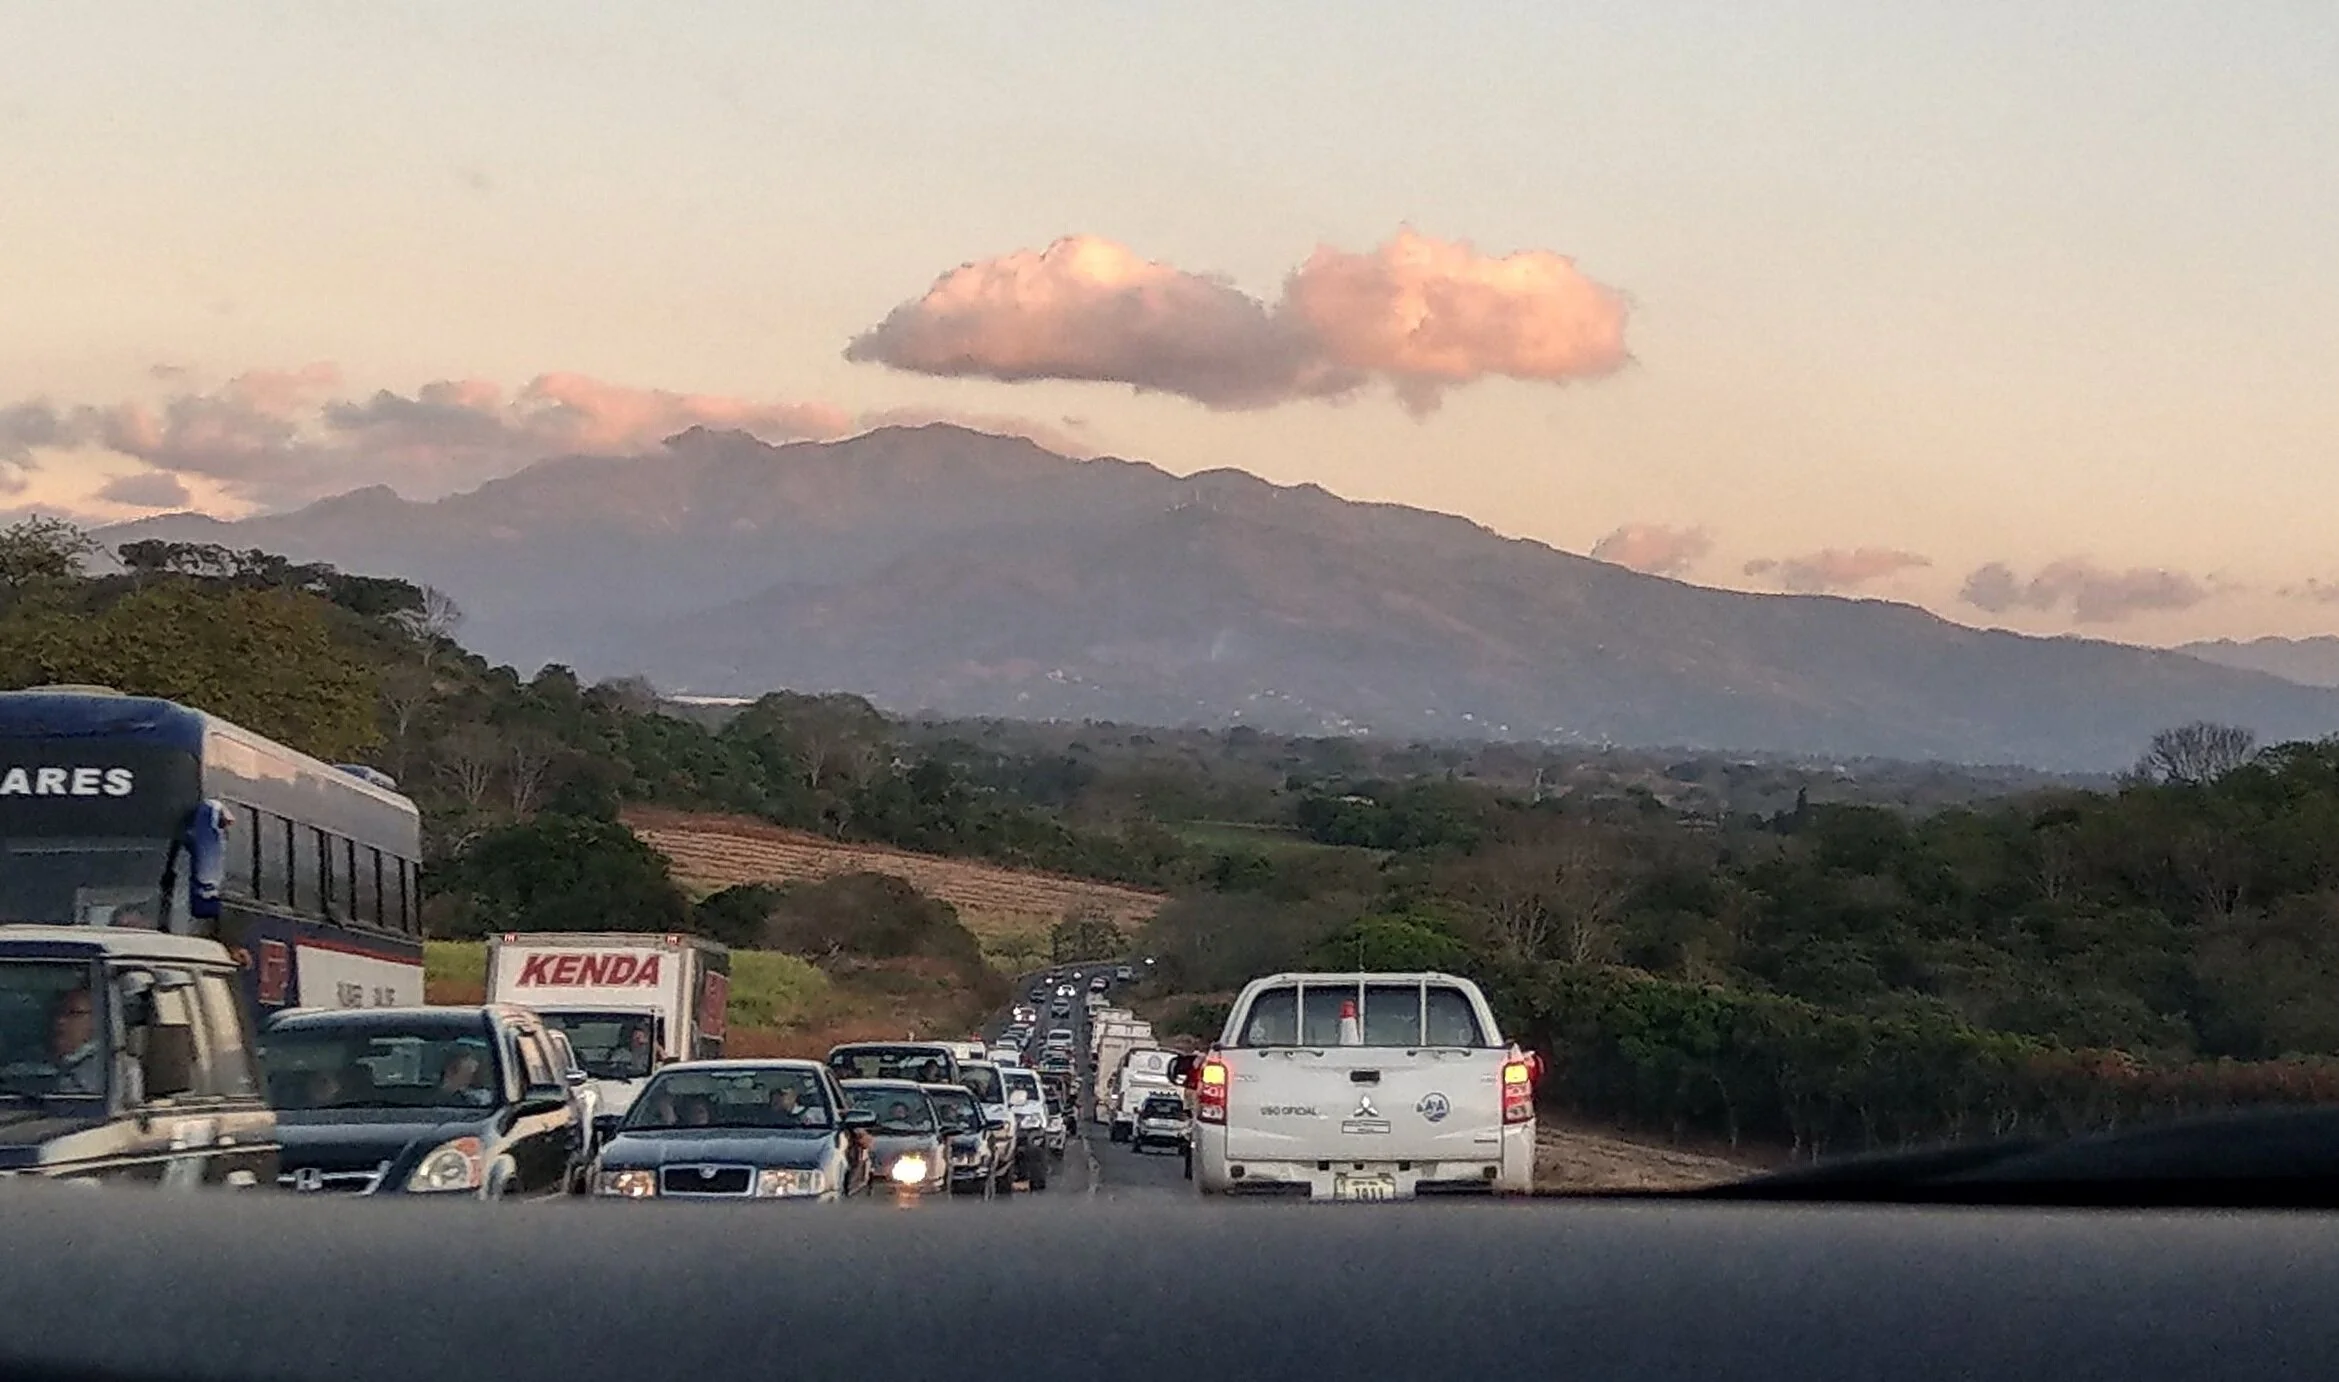
This is a little snapshot of traffic in San Jose! Don’t expect to get anywhere fast.
On your way out of San Jose along route 27, you’ll encounter a few tolls. These are to be paid in cash…both colones and USD are accepted (and remember, if you pay in USD any change will be given in colones). The largest toll we encountered was 760 colones (roughly $1.20).
Days 2-3: Explore Uvita
Days at a glance: Spend your time exploring the pristine Pacific Coast – visit waterfalls, go snorkeling, whale watch, and relax on a tropical beach.

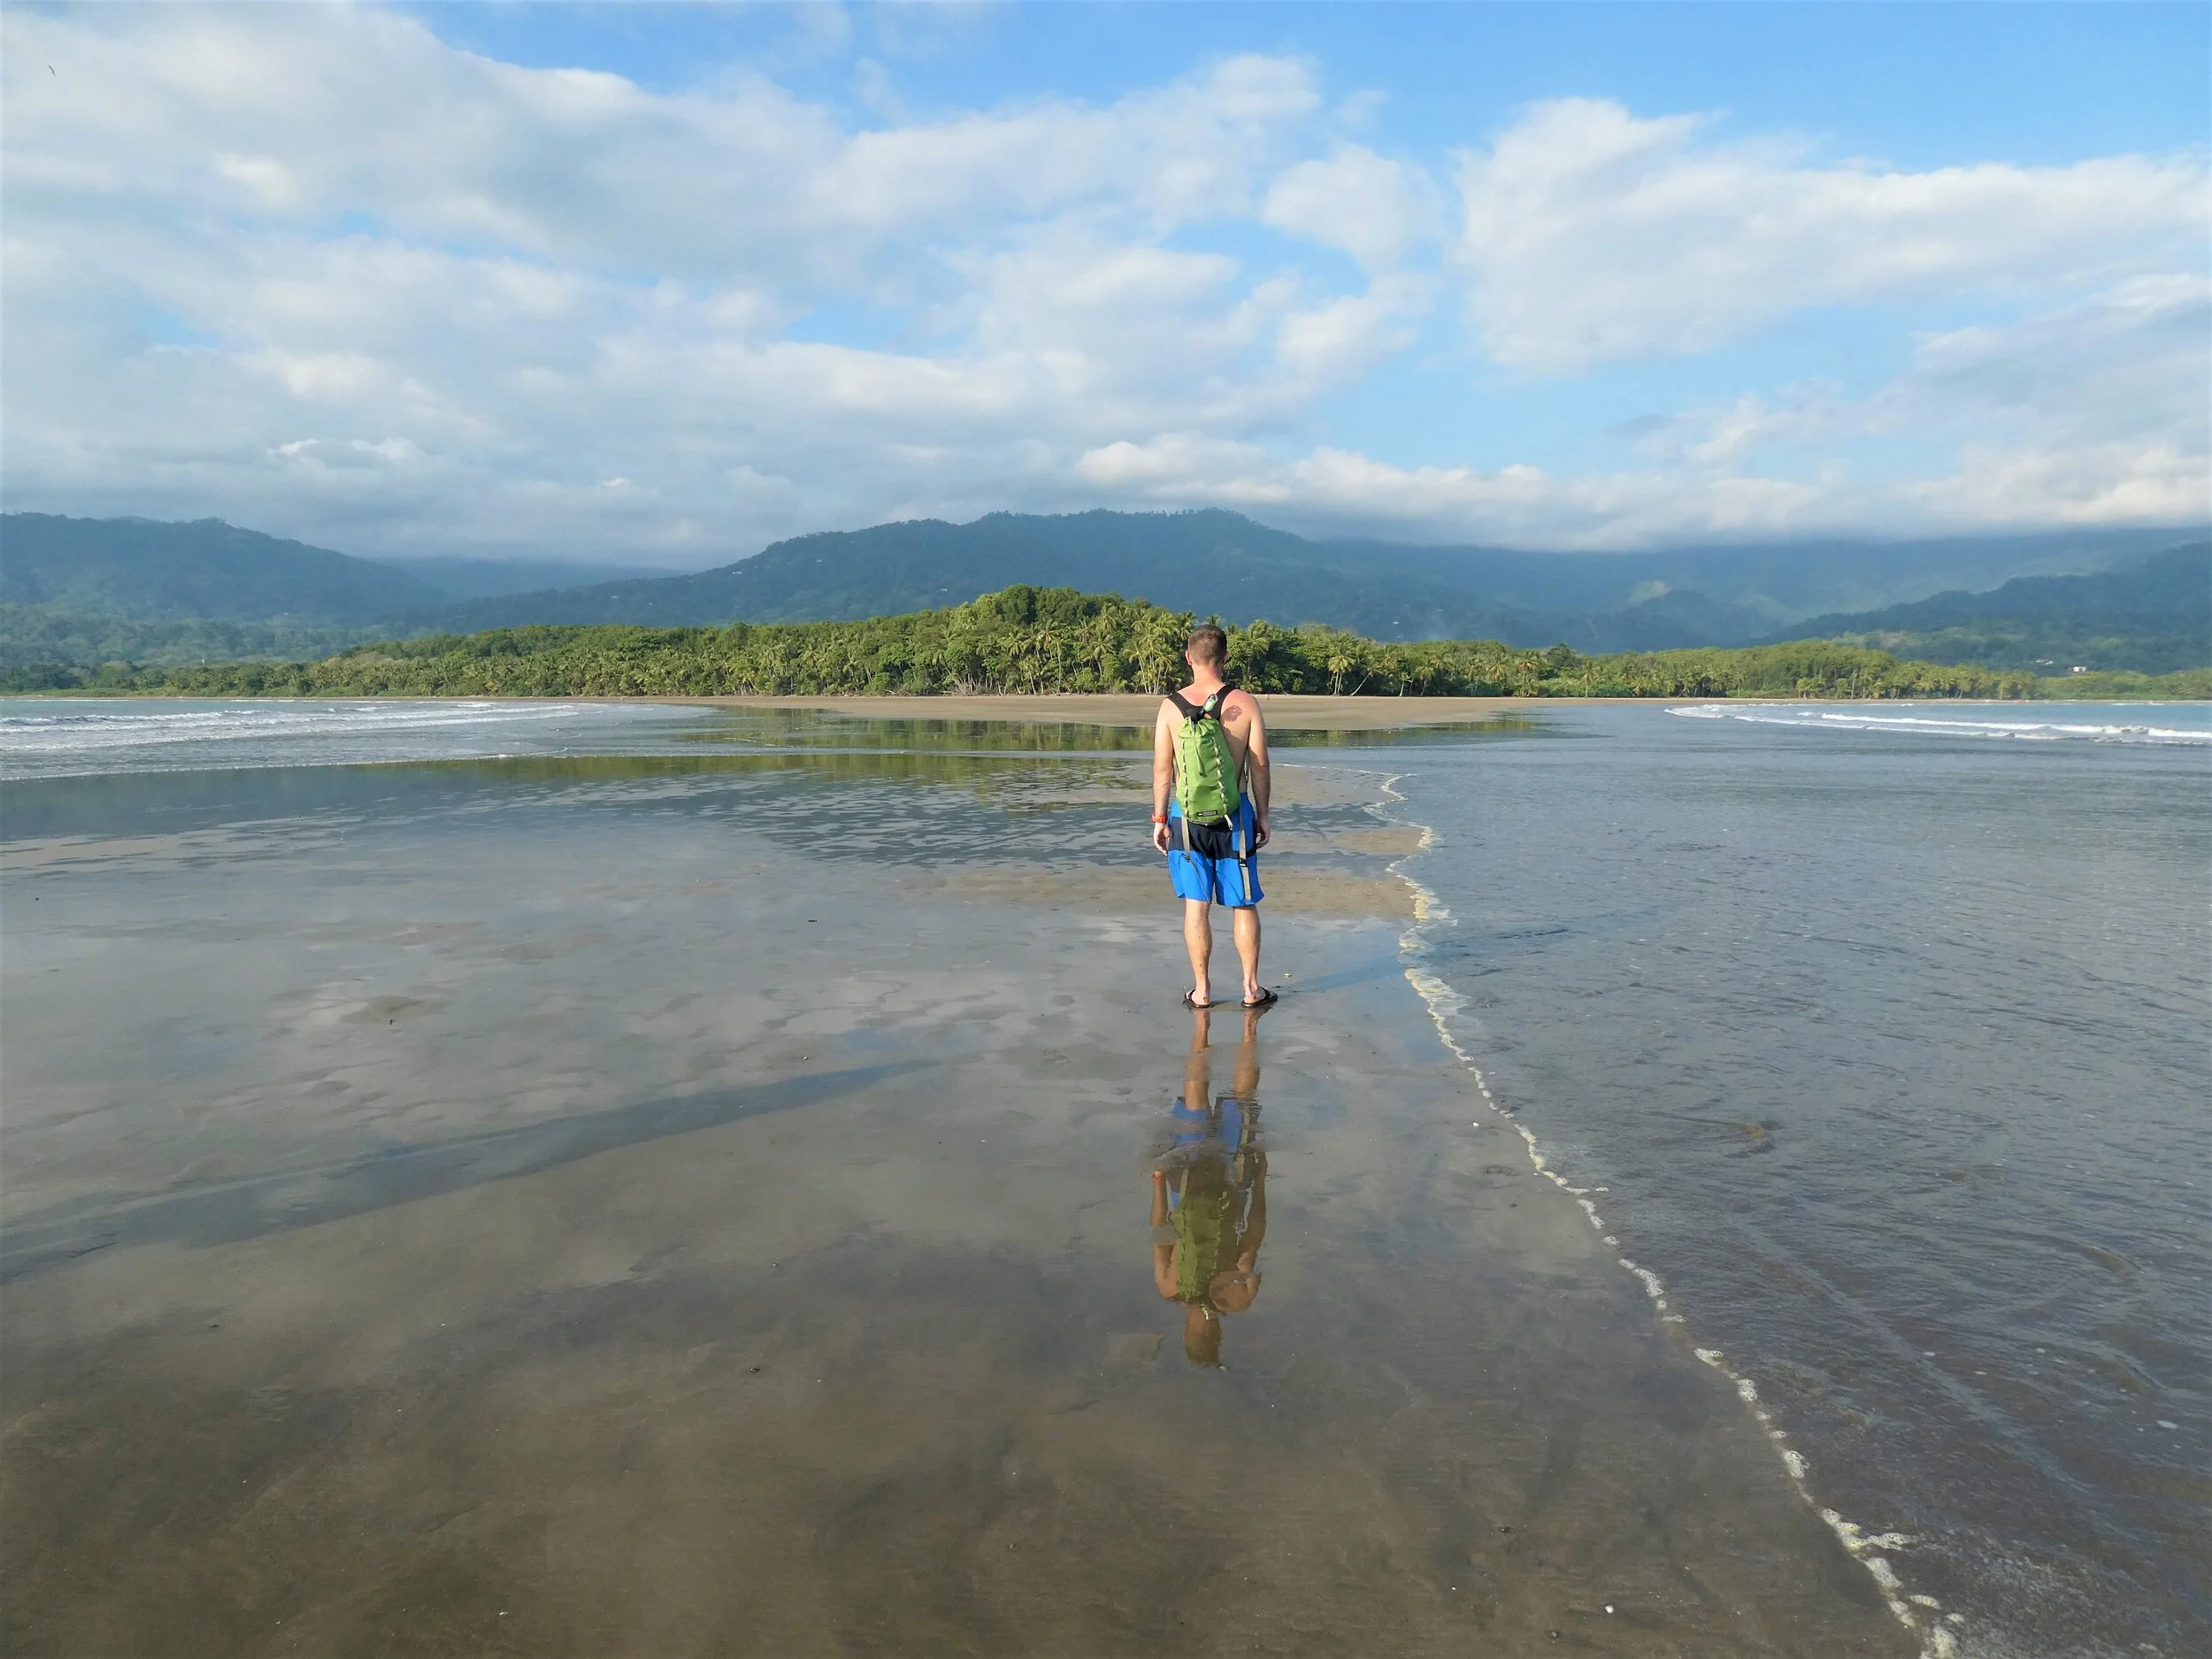
Uvita is a small town found along the South Pacific coast and is a perfect first stop in your two weeks in Costa Rica.
Uvita is home to gorgeous tropical beaches and adventurous activities. And what’s really great about Uvita is that it doesn’t have quite the same amount of crowds as other places on this itinerary. Here, you’ll feel like you’ve found a hidden piece of paradise.
With only two days in Uvita, you’ll certainly have to pick and choose how you want to spend your time. You can definitely spend a lot longer here (and trust us, you’ll want to!), but if you want to maximize your time in Costa Rica, two days is a good amount of time to hit some highlights.
Here are some suggested activities for your two days in Uvita:
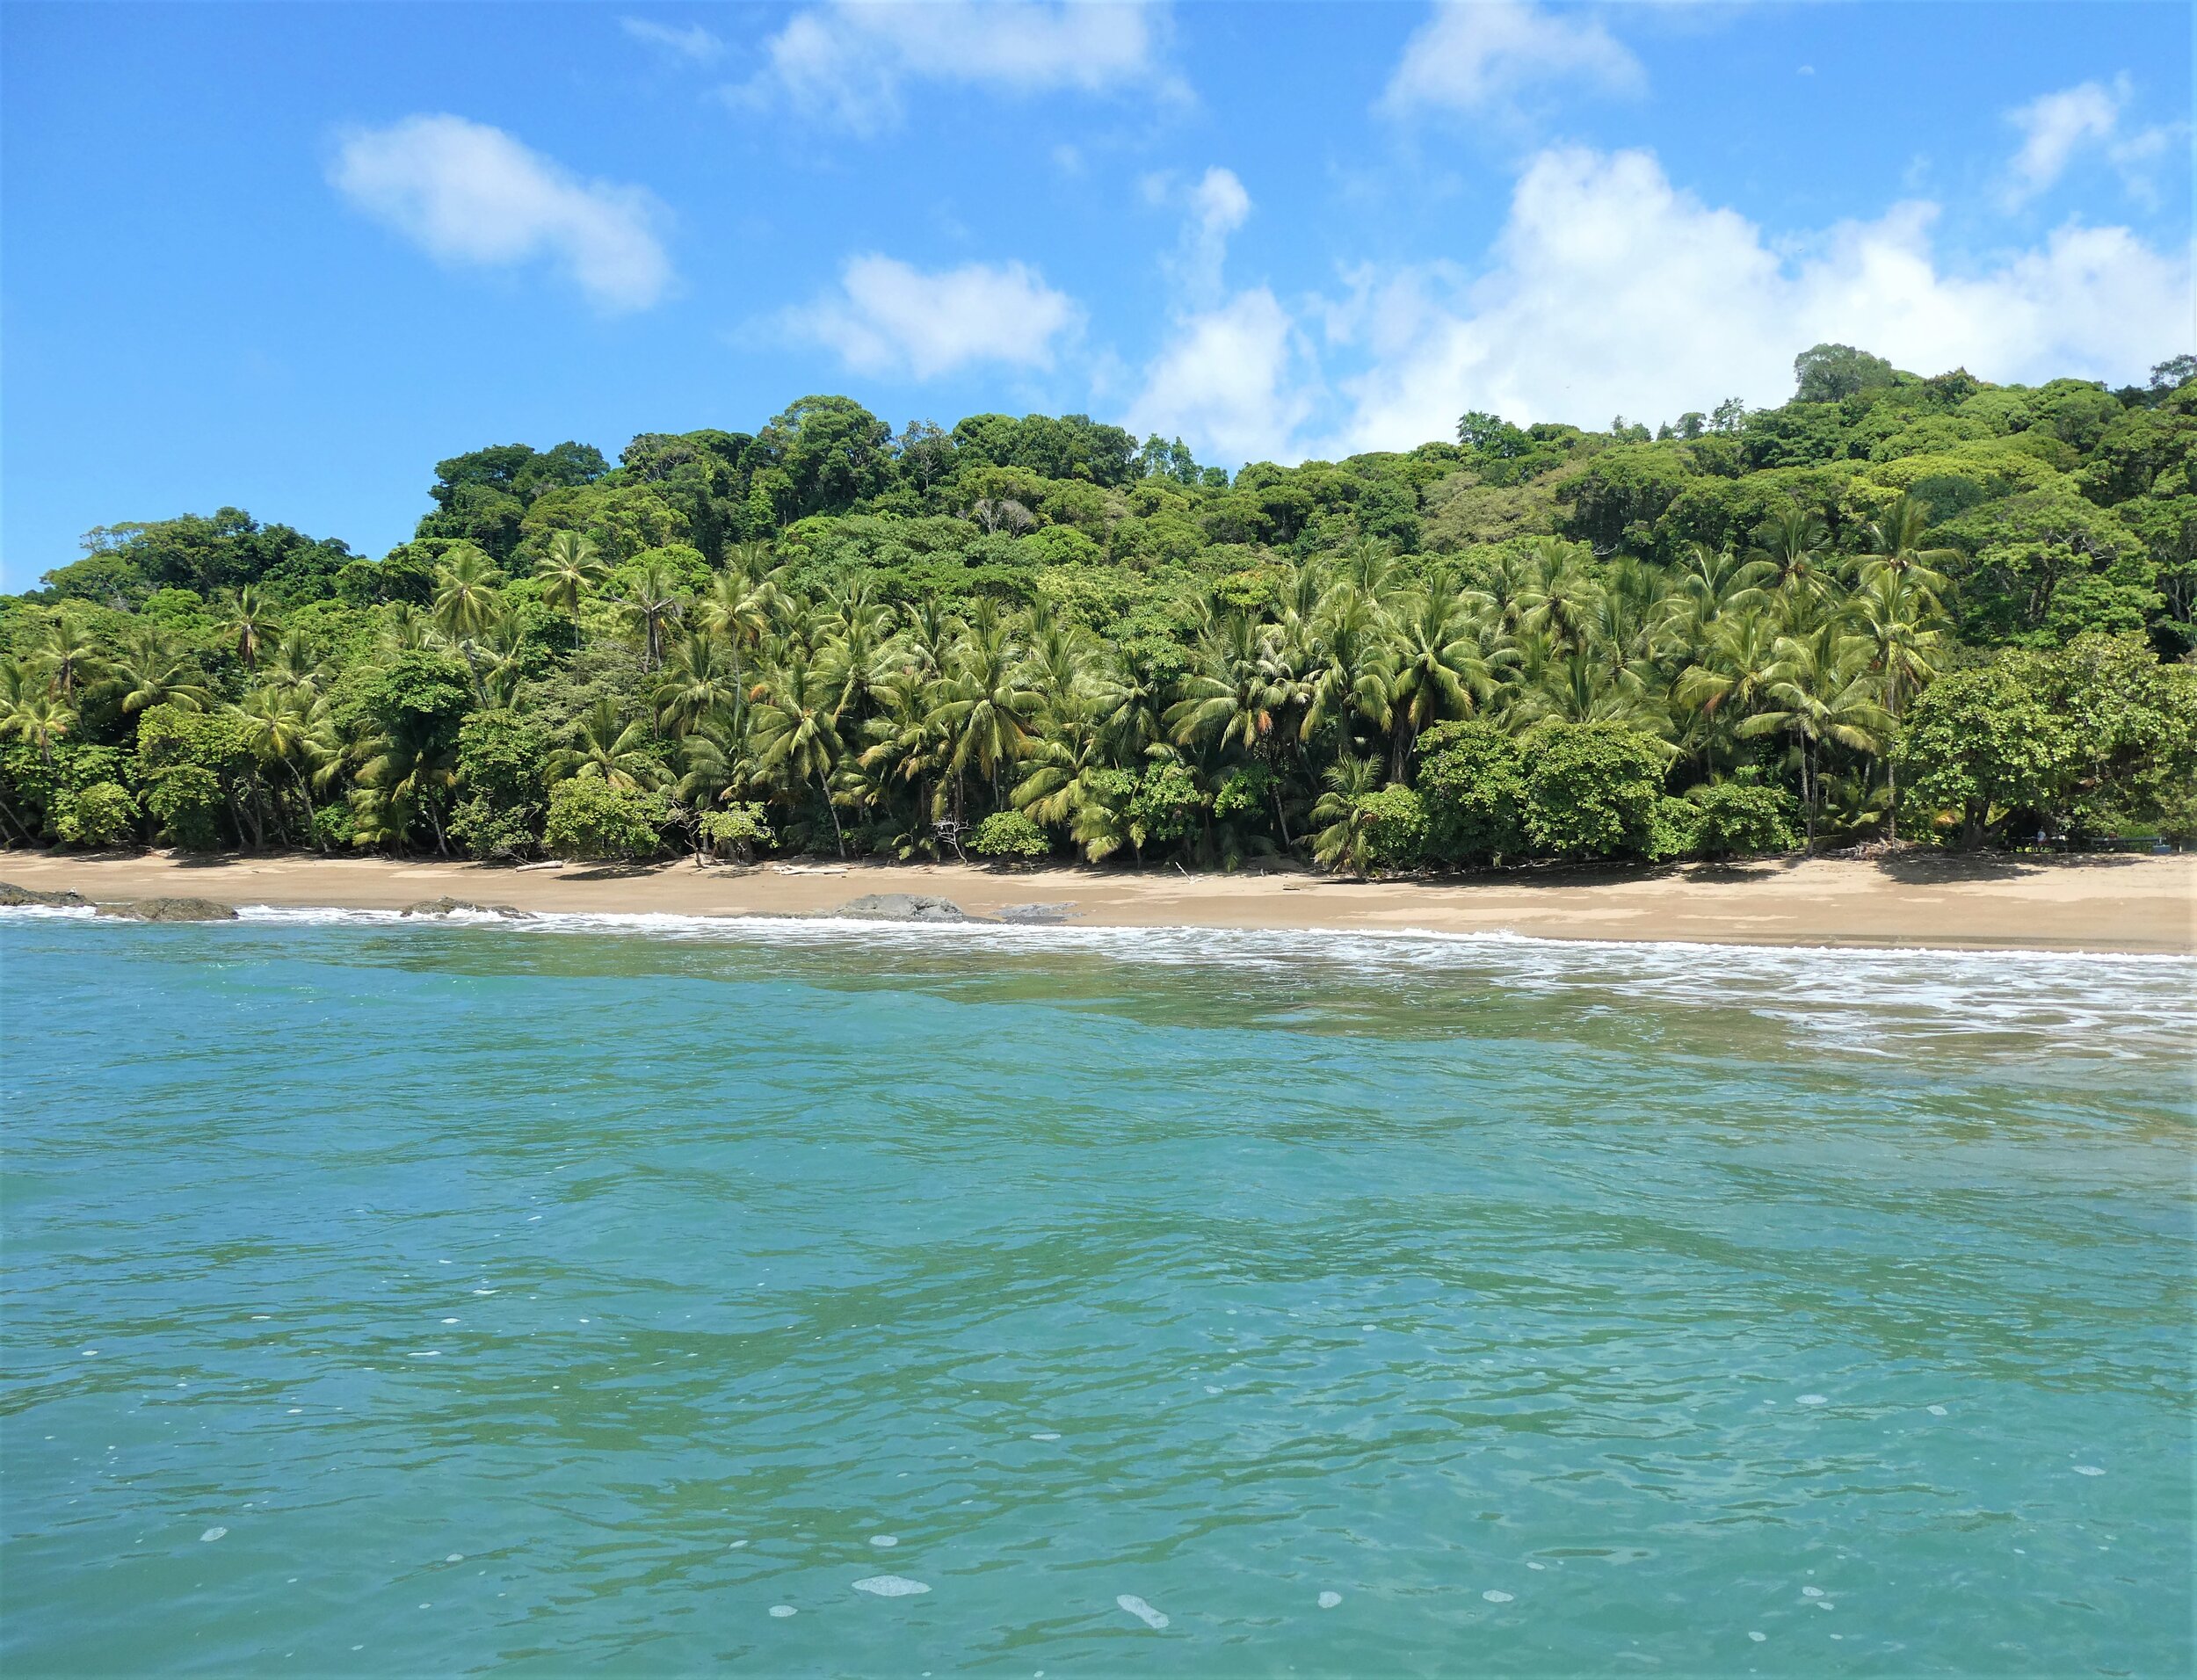
Explore the Whale’s Tail at Marino Ballena National Park. This park is an underrated gem of Costa Rica, protecting 9 miles of coastline and those epic jungle-meets-the-sea views. Home to four beaches, we recommend checking out Playa Uvita so that you can experience a unique natural feature known as the Whale Tail. At low tide, this sand bar juts out into the water in the form of…well, a whale’s tail!

Visit Uvita Falls. Located right in town, this small falls isn’t particularly eye-catching, but it sure is fun! The smooth rocks underneath create a natural (and fast!) waterslide into the freezing cold pool below. It’s a cheap afternoon of fun!
Check out Nauyaca Falls. Located in rainforest about 30 minutes from Uvita, Nauyaca Falls is a popular attraction along the Costa Rica’s Pacific coast. You can hike, ride a horse, and take a truck ride to get to this picturesque two-tiered fall.

Go whale watching. Uvita is one of the best places in the world to see the humpback whale! Sometimes they can bee seen right off the coast, but your best bet is to take a whale watching tour, which are plentiful in Uvita.
Day 4: Travel to Drake Bay
Driving time/distance: 1 hour / 60 km
Where to stay: Drake Bay
Day at a glance: Spend one last morning in Uvita before driving to Sierpe to take the boat into Drake Bay.

Next up on your two week Costa Rica itinerary is a visit to Drake Bay. And get ready for some awesome adventures!
Drake Bay is located on the remote Osa Peninsula in the southwestern corner of Costa Rica. Its draw is that it makes one of just two gateways to Corcovado National Park (more on that below!).
Because this village is so remote, the main way to get to it is by boat. The public boat taxi leaves from the town of Sierpe, located one hour south of Uvita, twice a day (11:30 am and 4 pm).
Today, you’ll leave Uvita and head to Sierpe to catch the boat to Drake Bay. You can take either the morning or afternoon boat depending on your preference. You can use the morning for one last activity in Uvita and arrive to Drake Bay in the evening, or you can head straight to Sierpe, catch the morning boat, and have the afternoon in Drake Bay to relax and explore. Just to be clear, there’s no wrong choice here!
Reservations cannot be made for the Drake Bay boat, so we suggest showing up at least 30 minutes before the boat is scheduled to depart to make sure you know where to be and can claim a spot. The boat ride costs $15-$20 USD per person and must be paid in cash on the boat.
If it’s your first time, catching the boat to Drake Bay can feel a little confusing…we speak from experience! Check out our guide to visiting Drake Bay to read everything you need to know about getting the boat out of Sierpe, including where to park and what to bring. Trust us, you’ll want to read this before you go so you know what to expect!
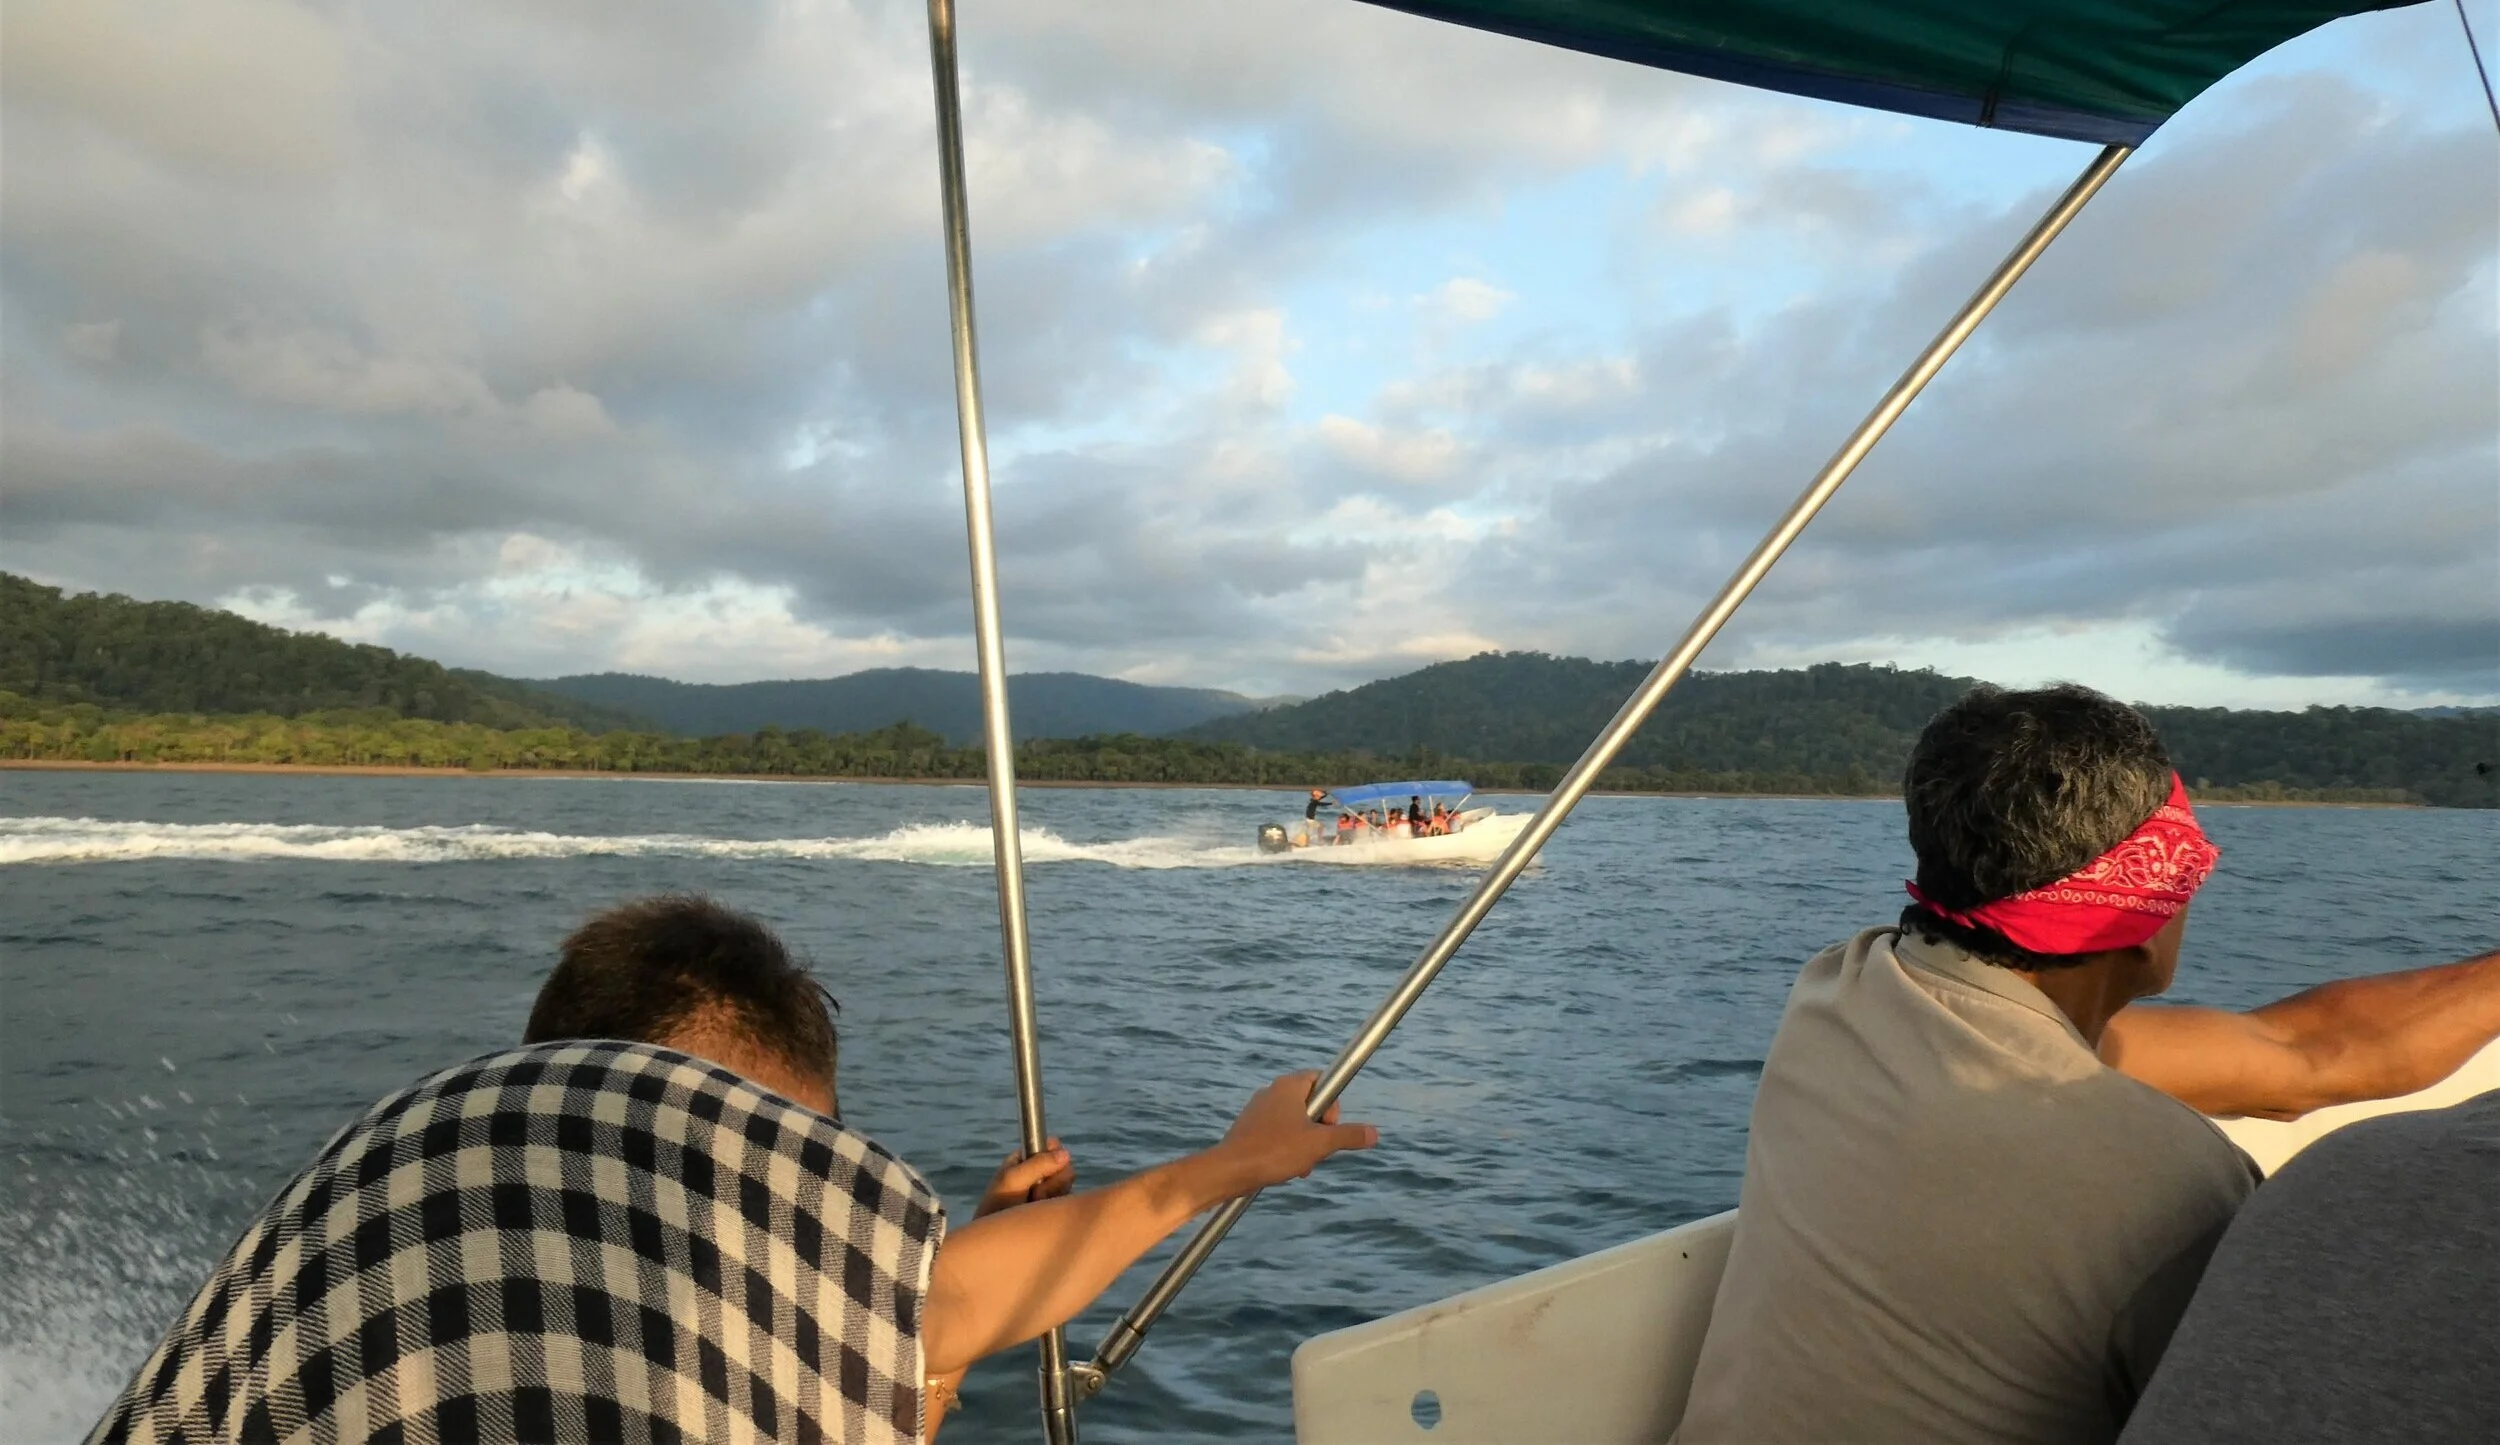
The boat ride from Sierpe to Drake Bay is about an hour long, first through mangroves along the Sierpe River, and then through the choppy waters of the Pacific Ocean.
You’ll be dropped off at the main beach in Drake Bay. This will be a wet landing, meaning the boat docks just off shore and you’ll be wading through up to knee deep water to get onto the beach, so make sure you’re wearing the appropriate footwear for this! Check in advance to see if your lodging arranges transportation from this beach to your accommodations.

Check in to your accommodations and get ready for two days of awesomeness!
Days 5-6: Explore Drake Bay
Days at a glance: Spend two awesome days in the jungle! Take a tour of Corcovado, head to Cano Island, and visit beautiful beaches.
The next two days of your Costa Rica itinerary will be devoted to exploring Drake Bay and the remote Osa Peninsula, and you’re in for a treat. You’ll explore rugged jungle, search for exotic wildlife, visit some of the most pristine beaches you’ll ever see, and maybe even snorkel with turtles and sharks! Sound good? We thought so.
Here’s a sneak peak of what you can do in this small slice of paradise:
Visit Corcovado National Park
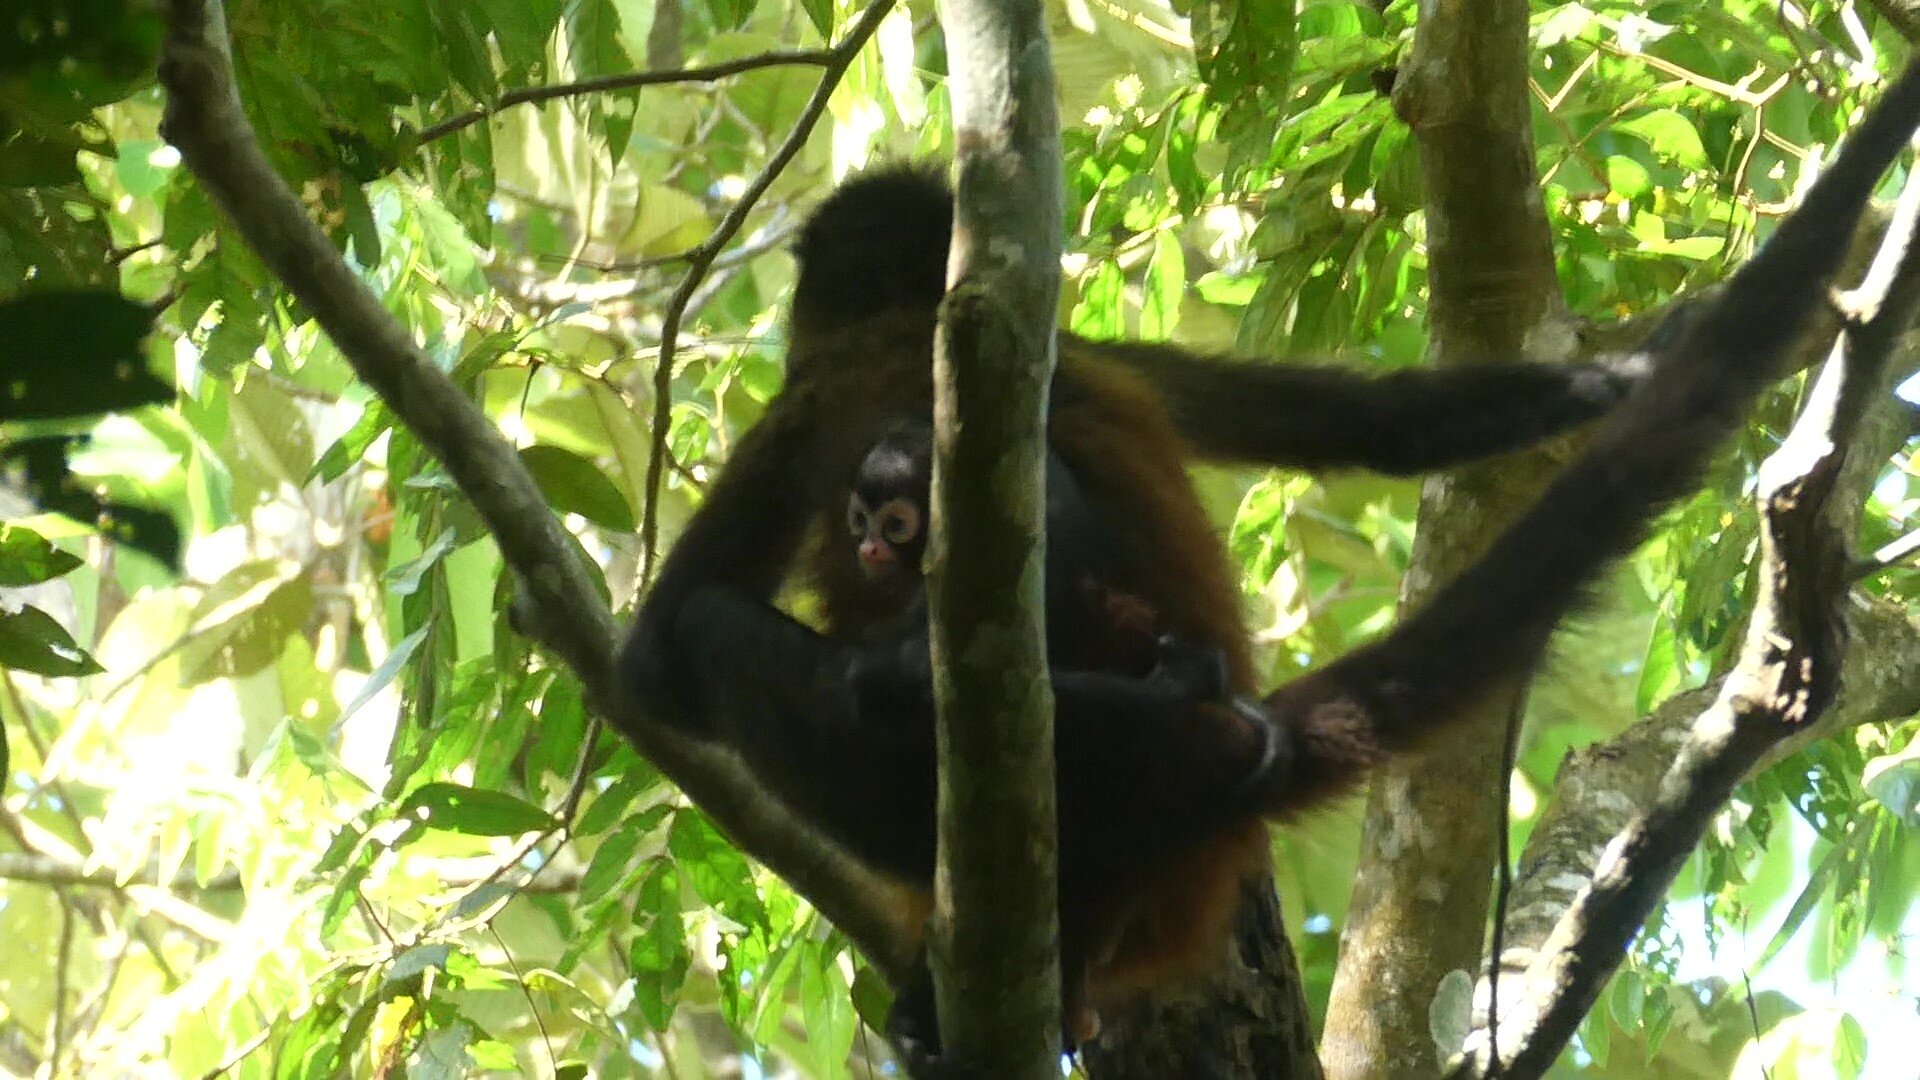
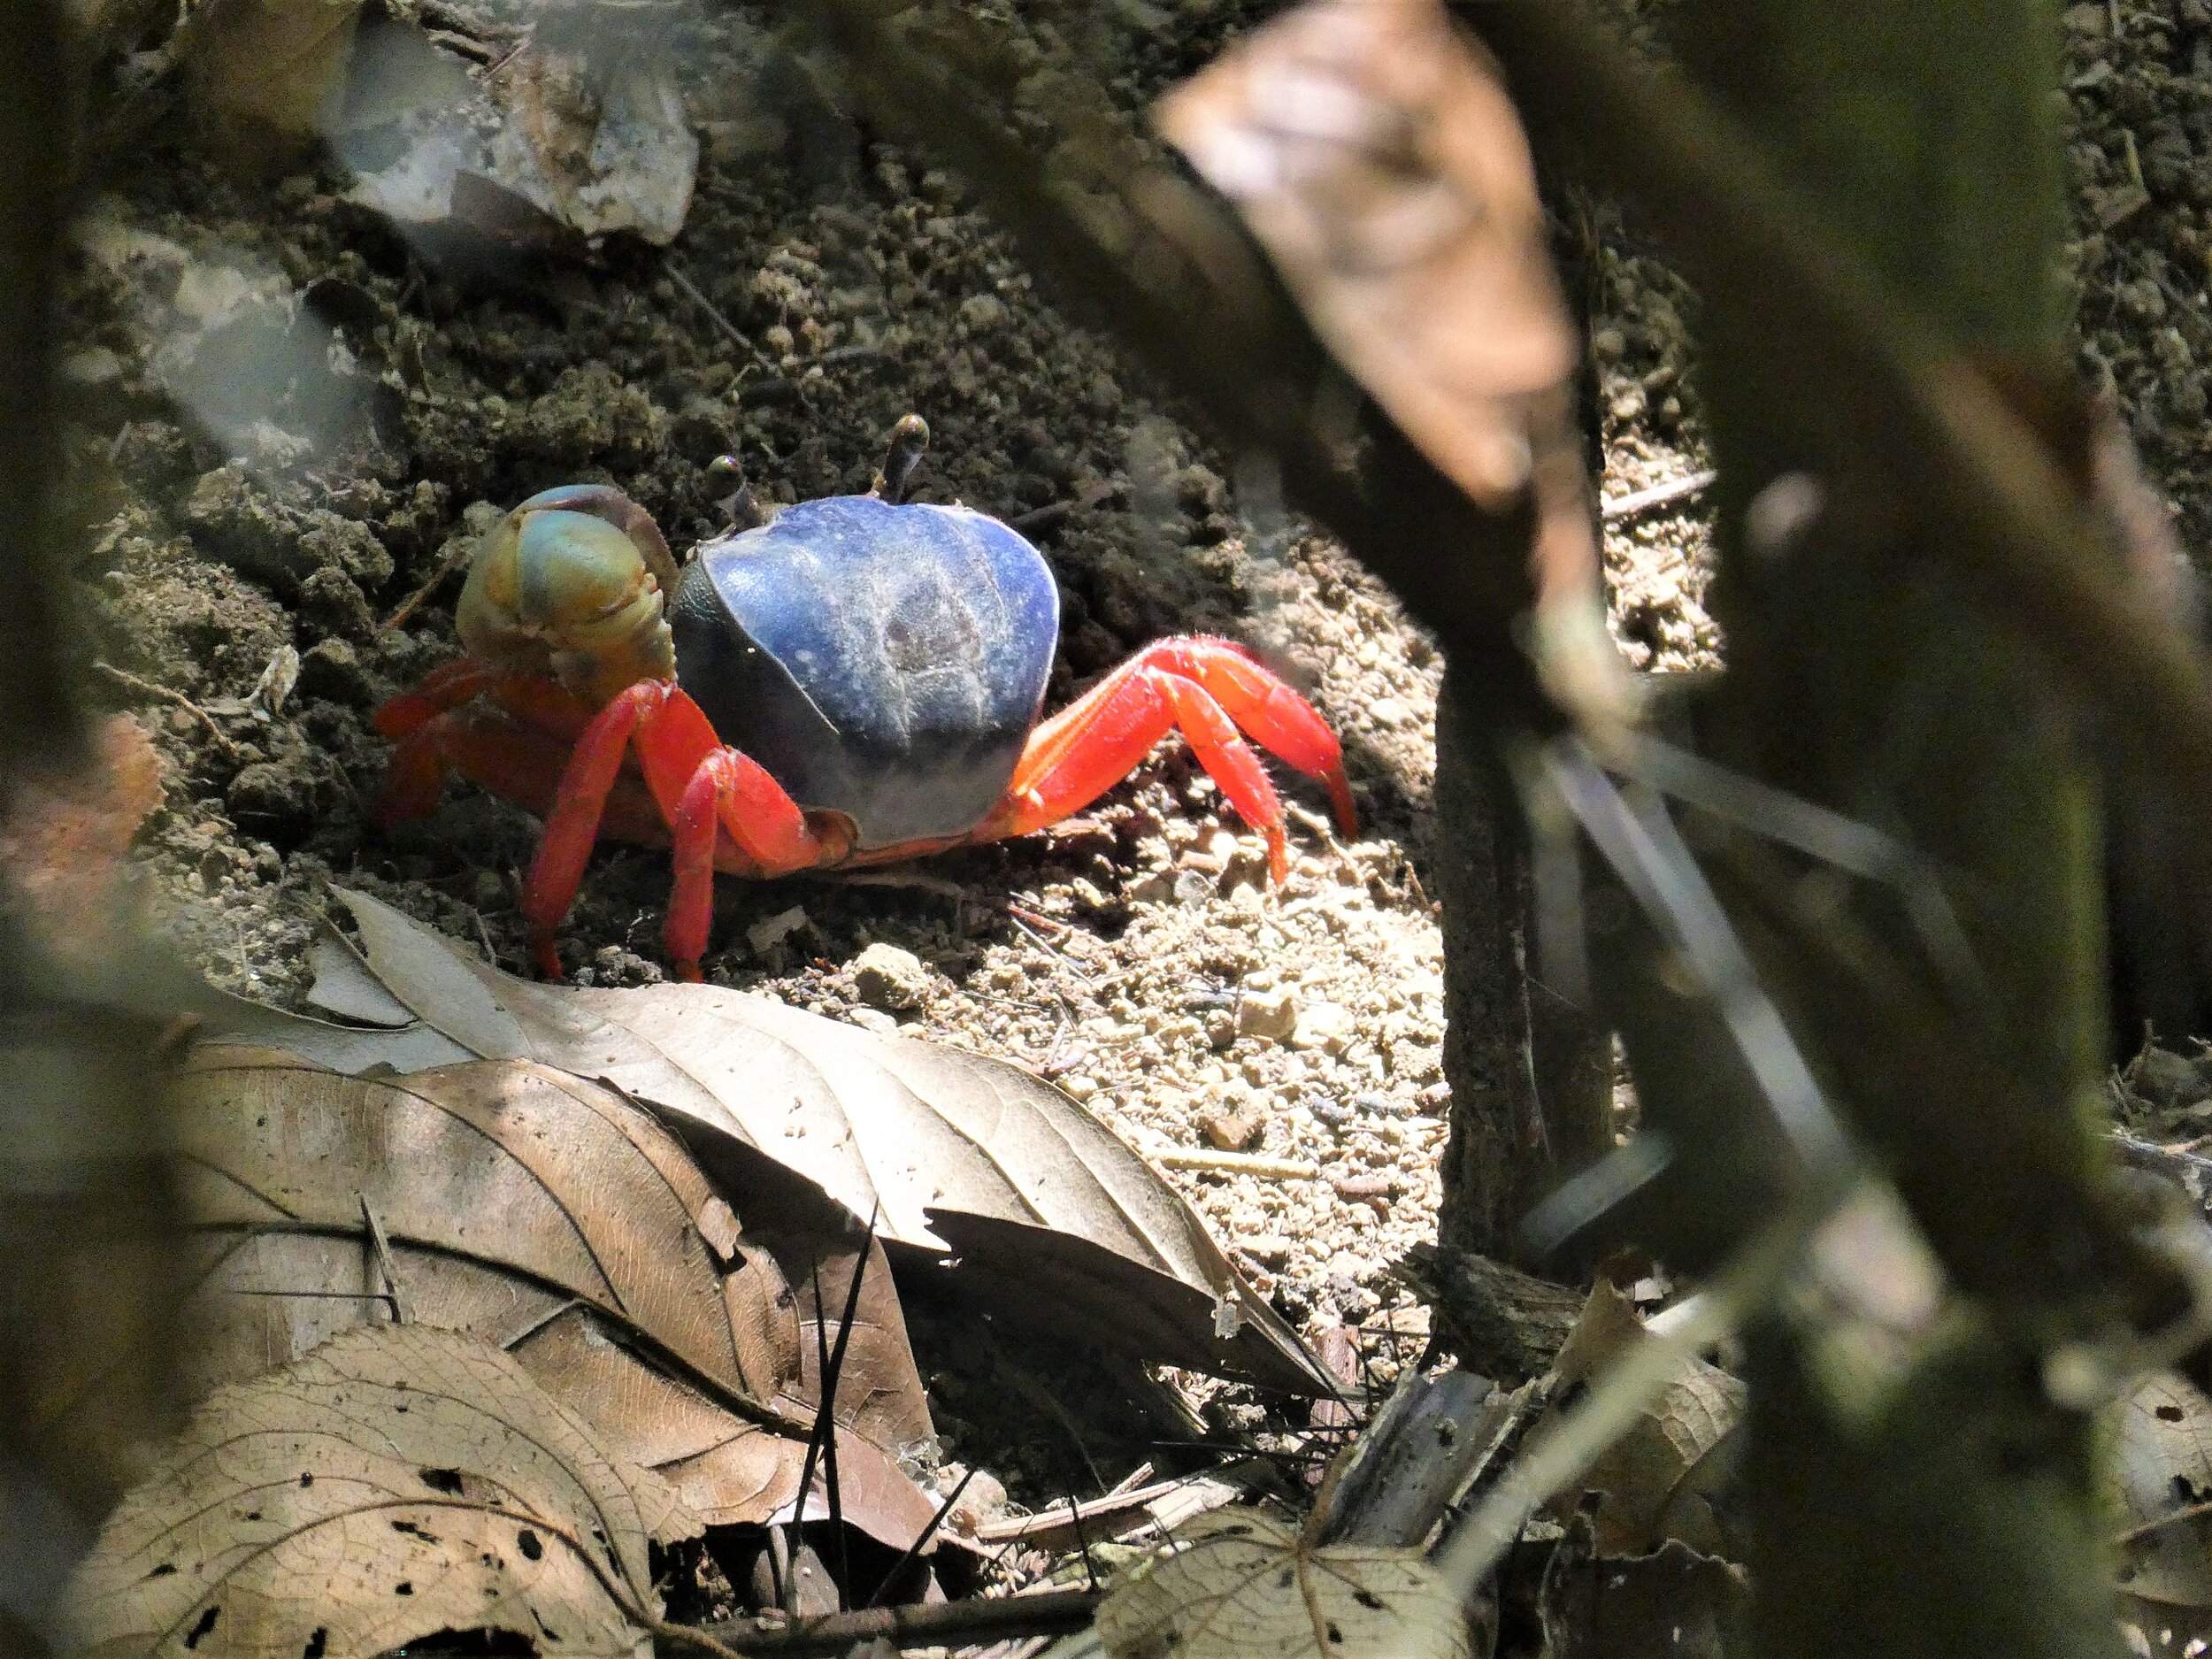
The highlight of a visit to Drake Bay is a visit to Corcovado National Park…Central America’s largest lowland rainforest on the Pacific Coast. And guys, this place is kind of a big deal… it’s been named the most biologically diverse place on the planet…yes, the planet! And it’s right on your doorstep when you’re in Drake Bay. Corcovado was our number one must- do on our own Costa Rica itinerary, and it did not disappoint.
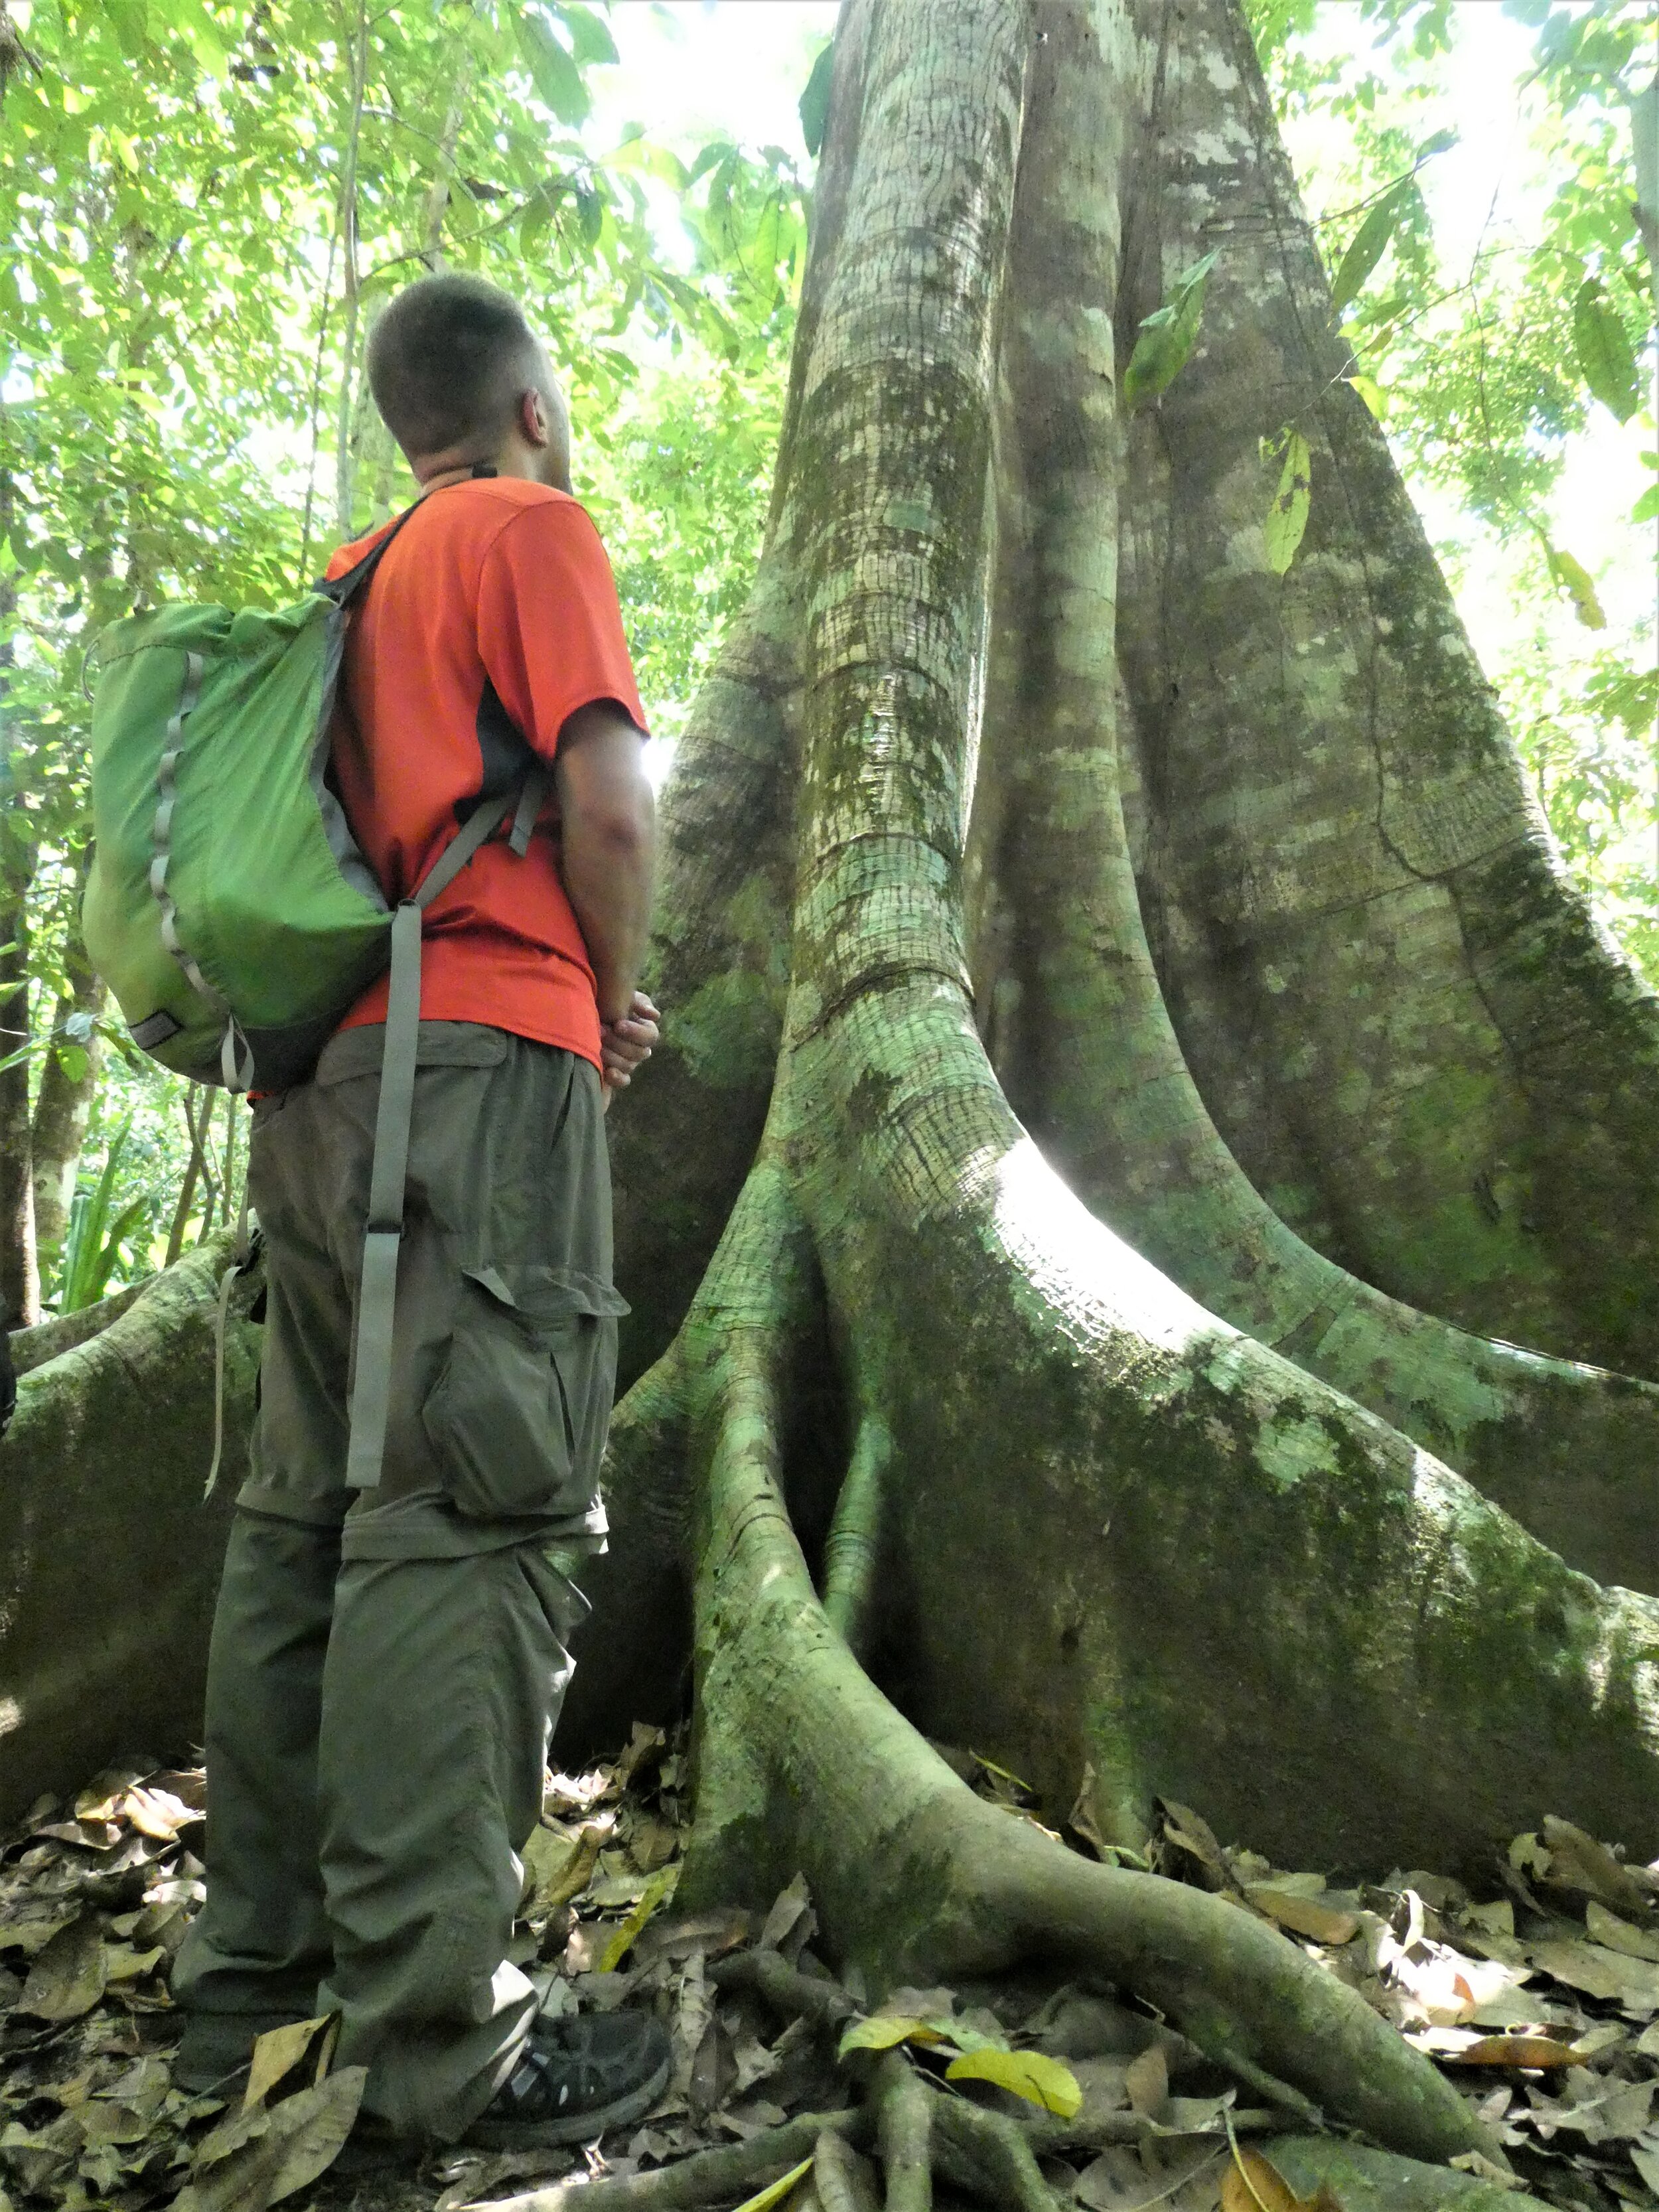
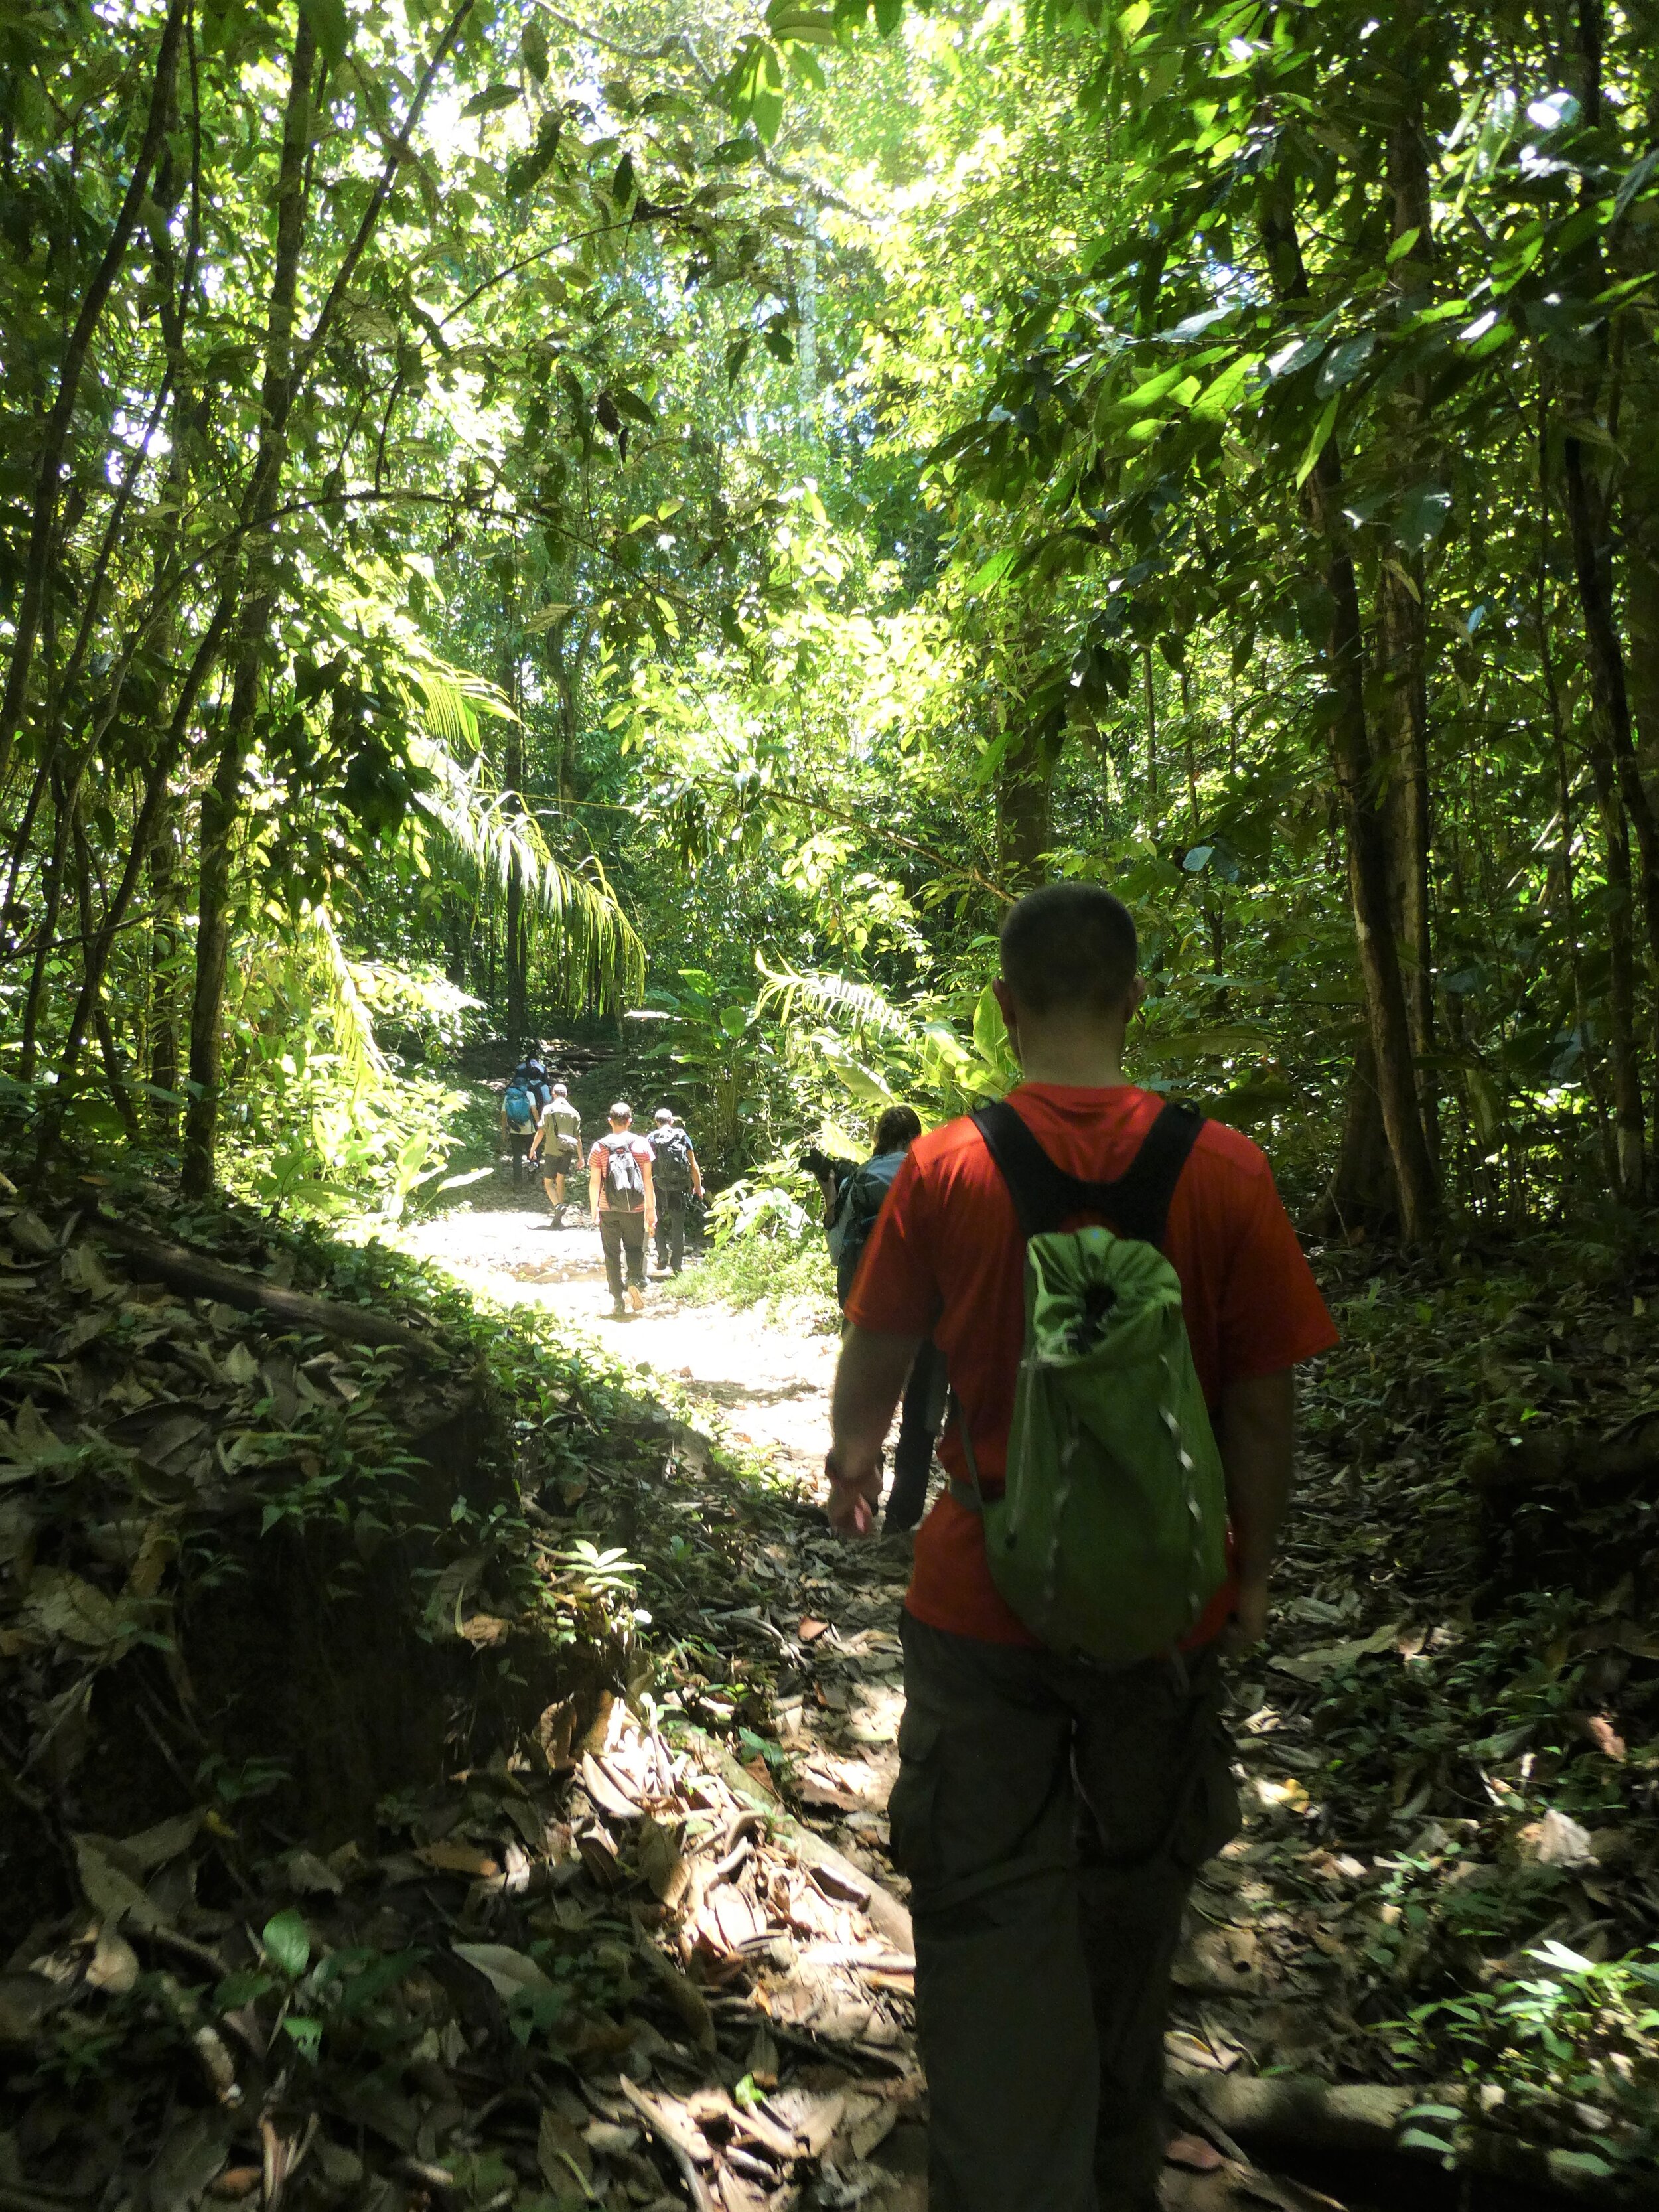
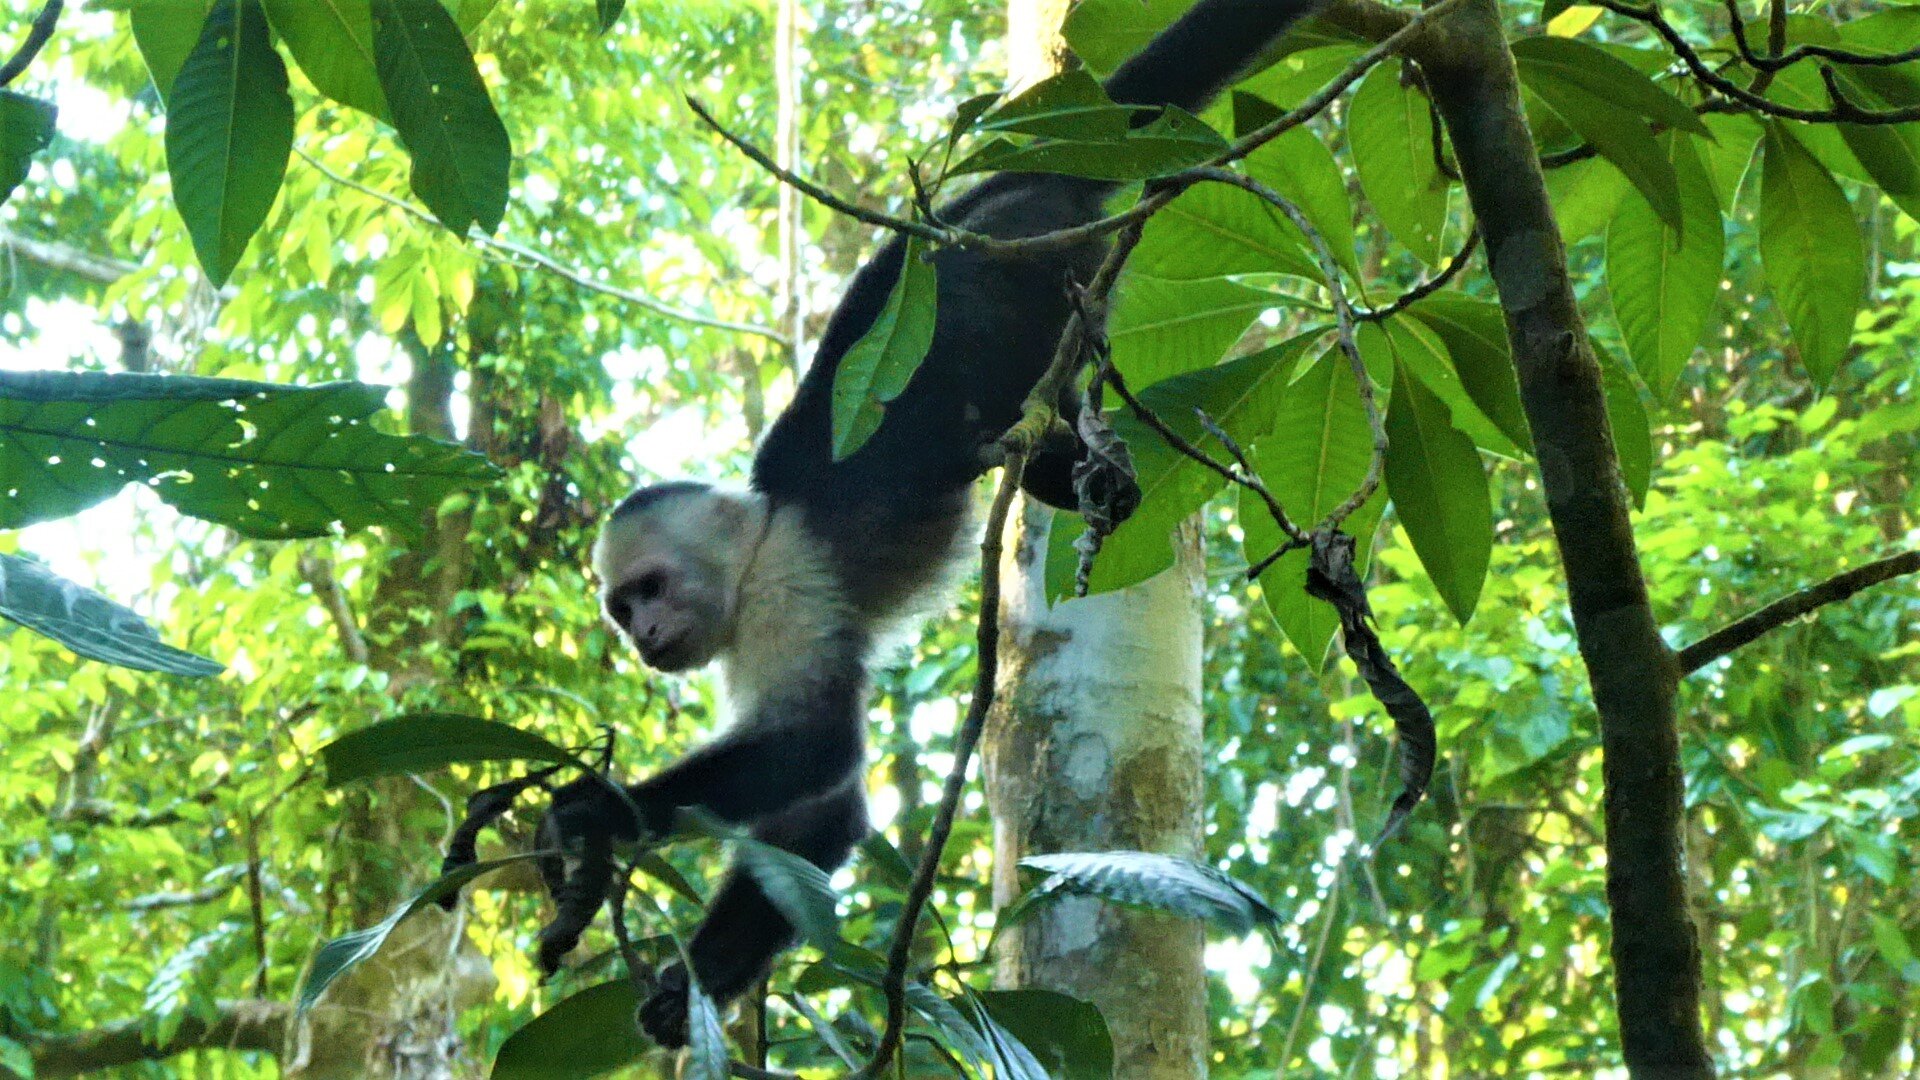
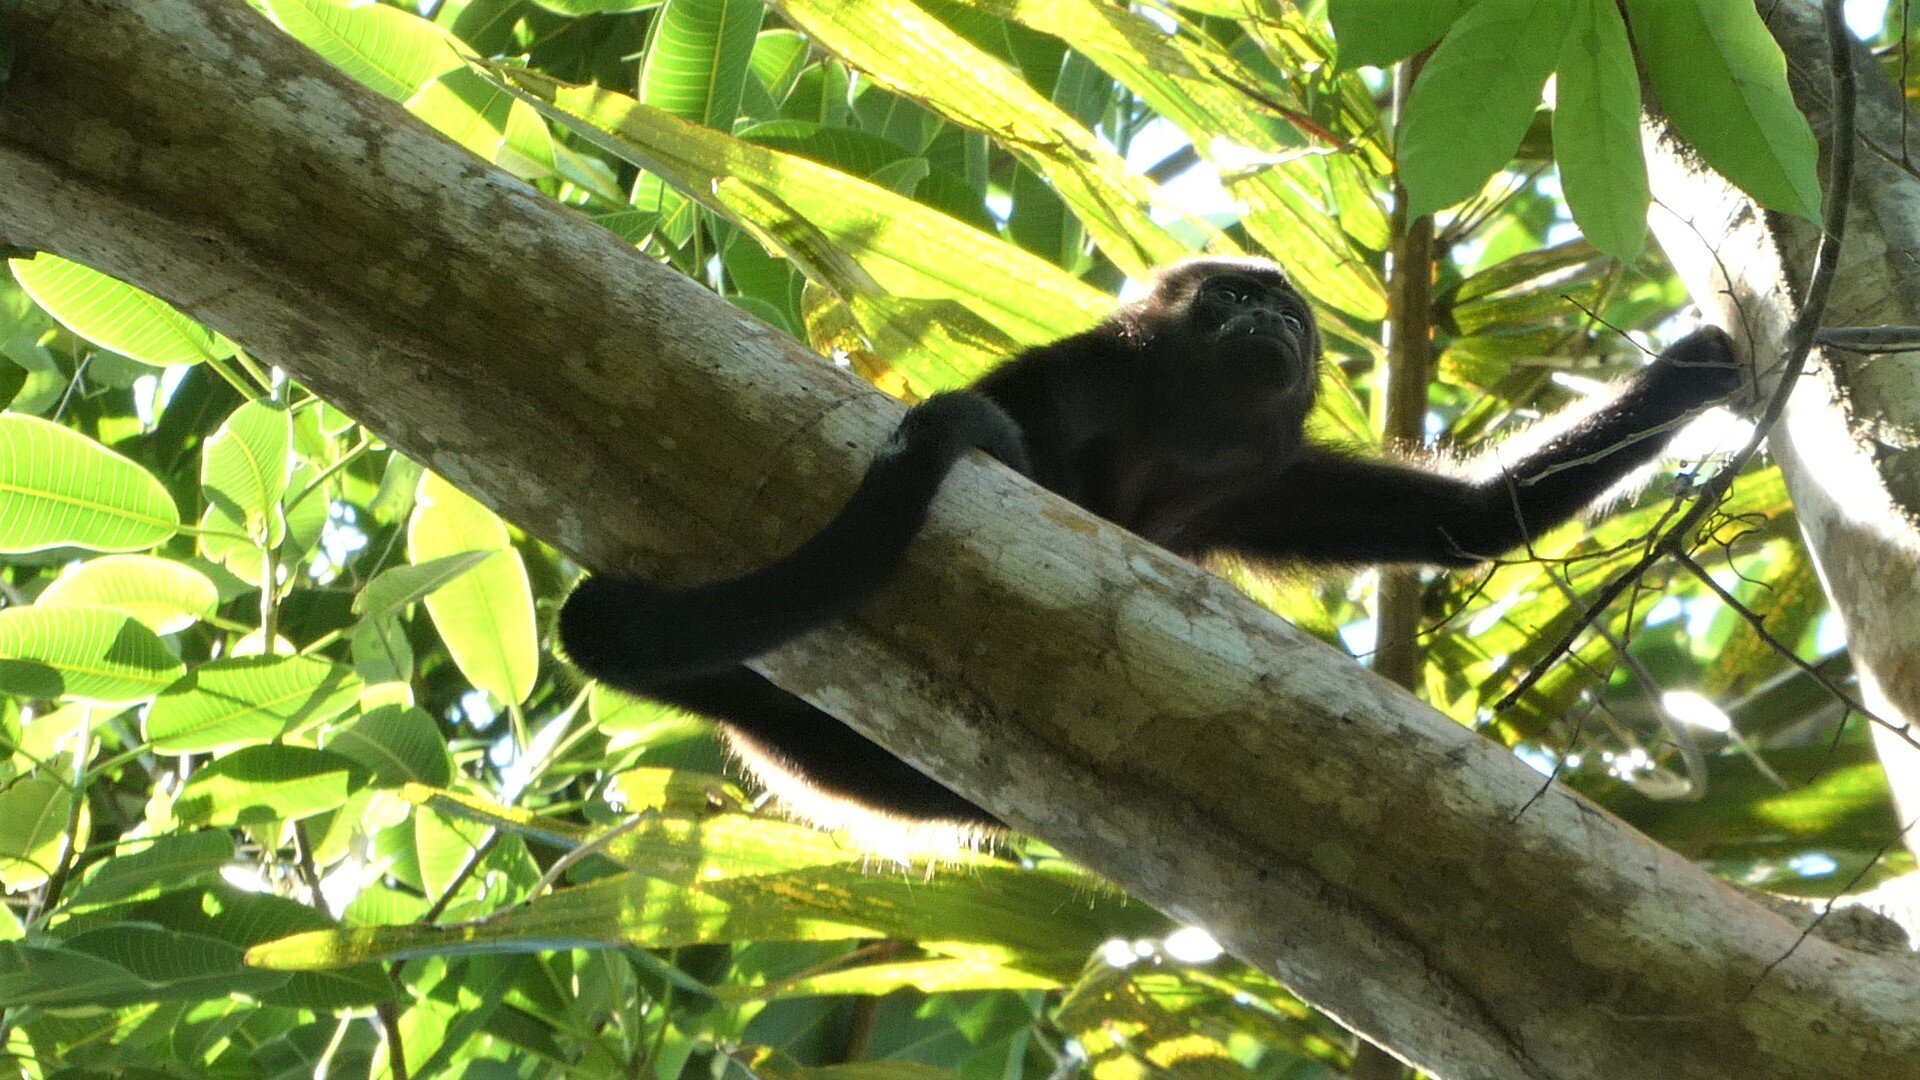
Visits to Corcovado have to be arranged with a tour guide. You can choose from either day or overnight trips to one of two ranger stations located within the park. We highly recommend a visit to the Sirena Ranger Station…it’s the best spot in the park to find wildlife! On our day trip, we spotted monkeys, sloths, exotic birds, and even a tapir!
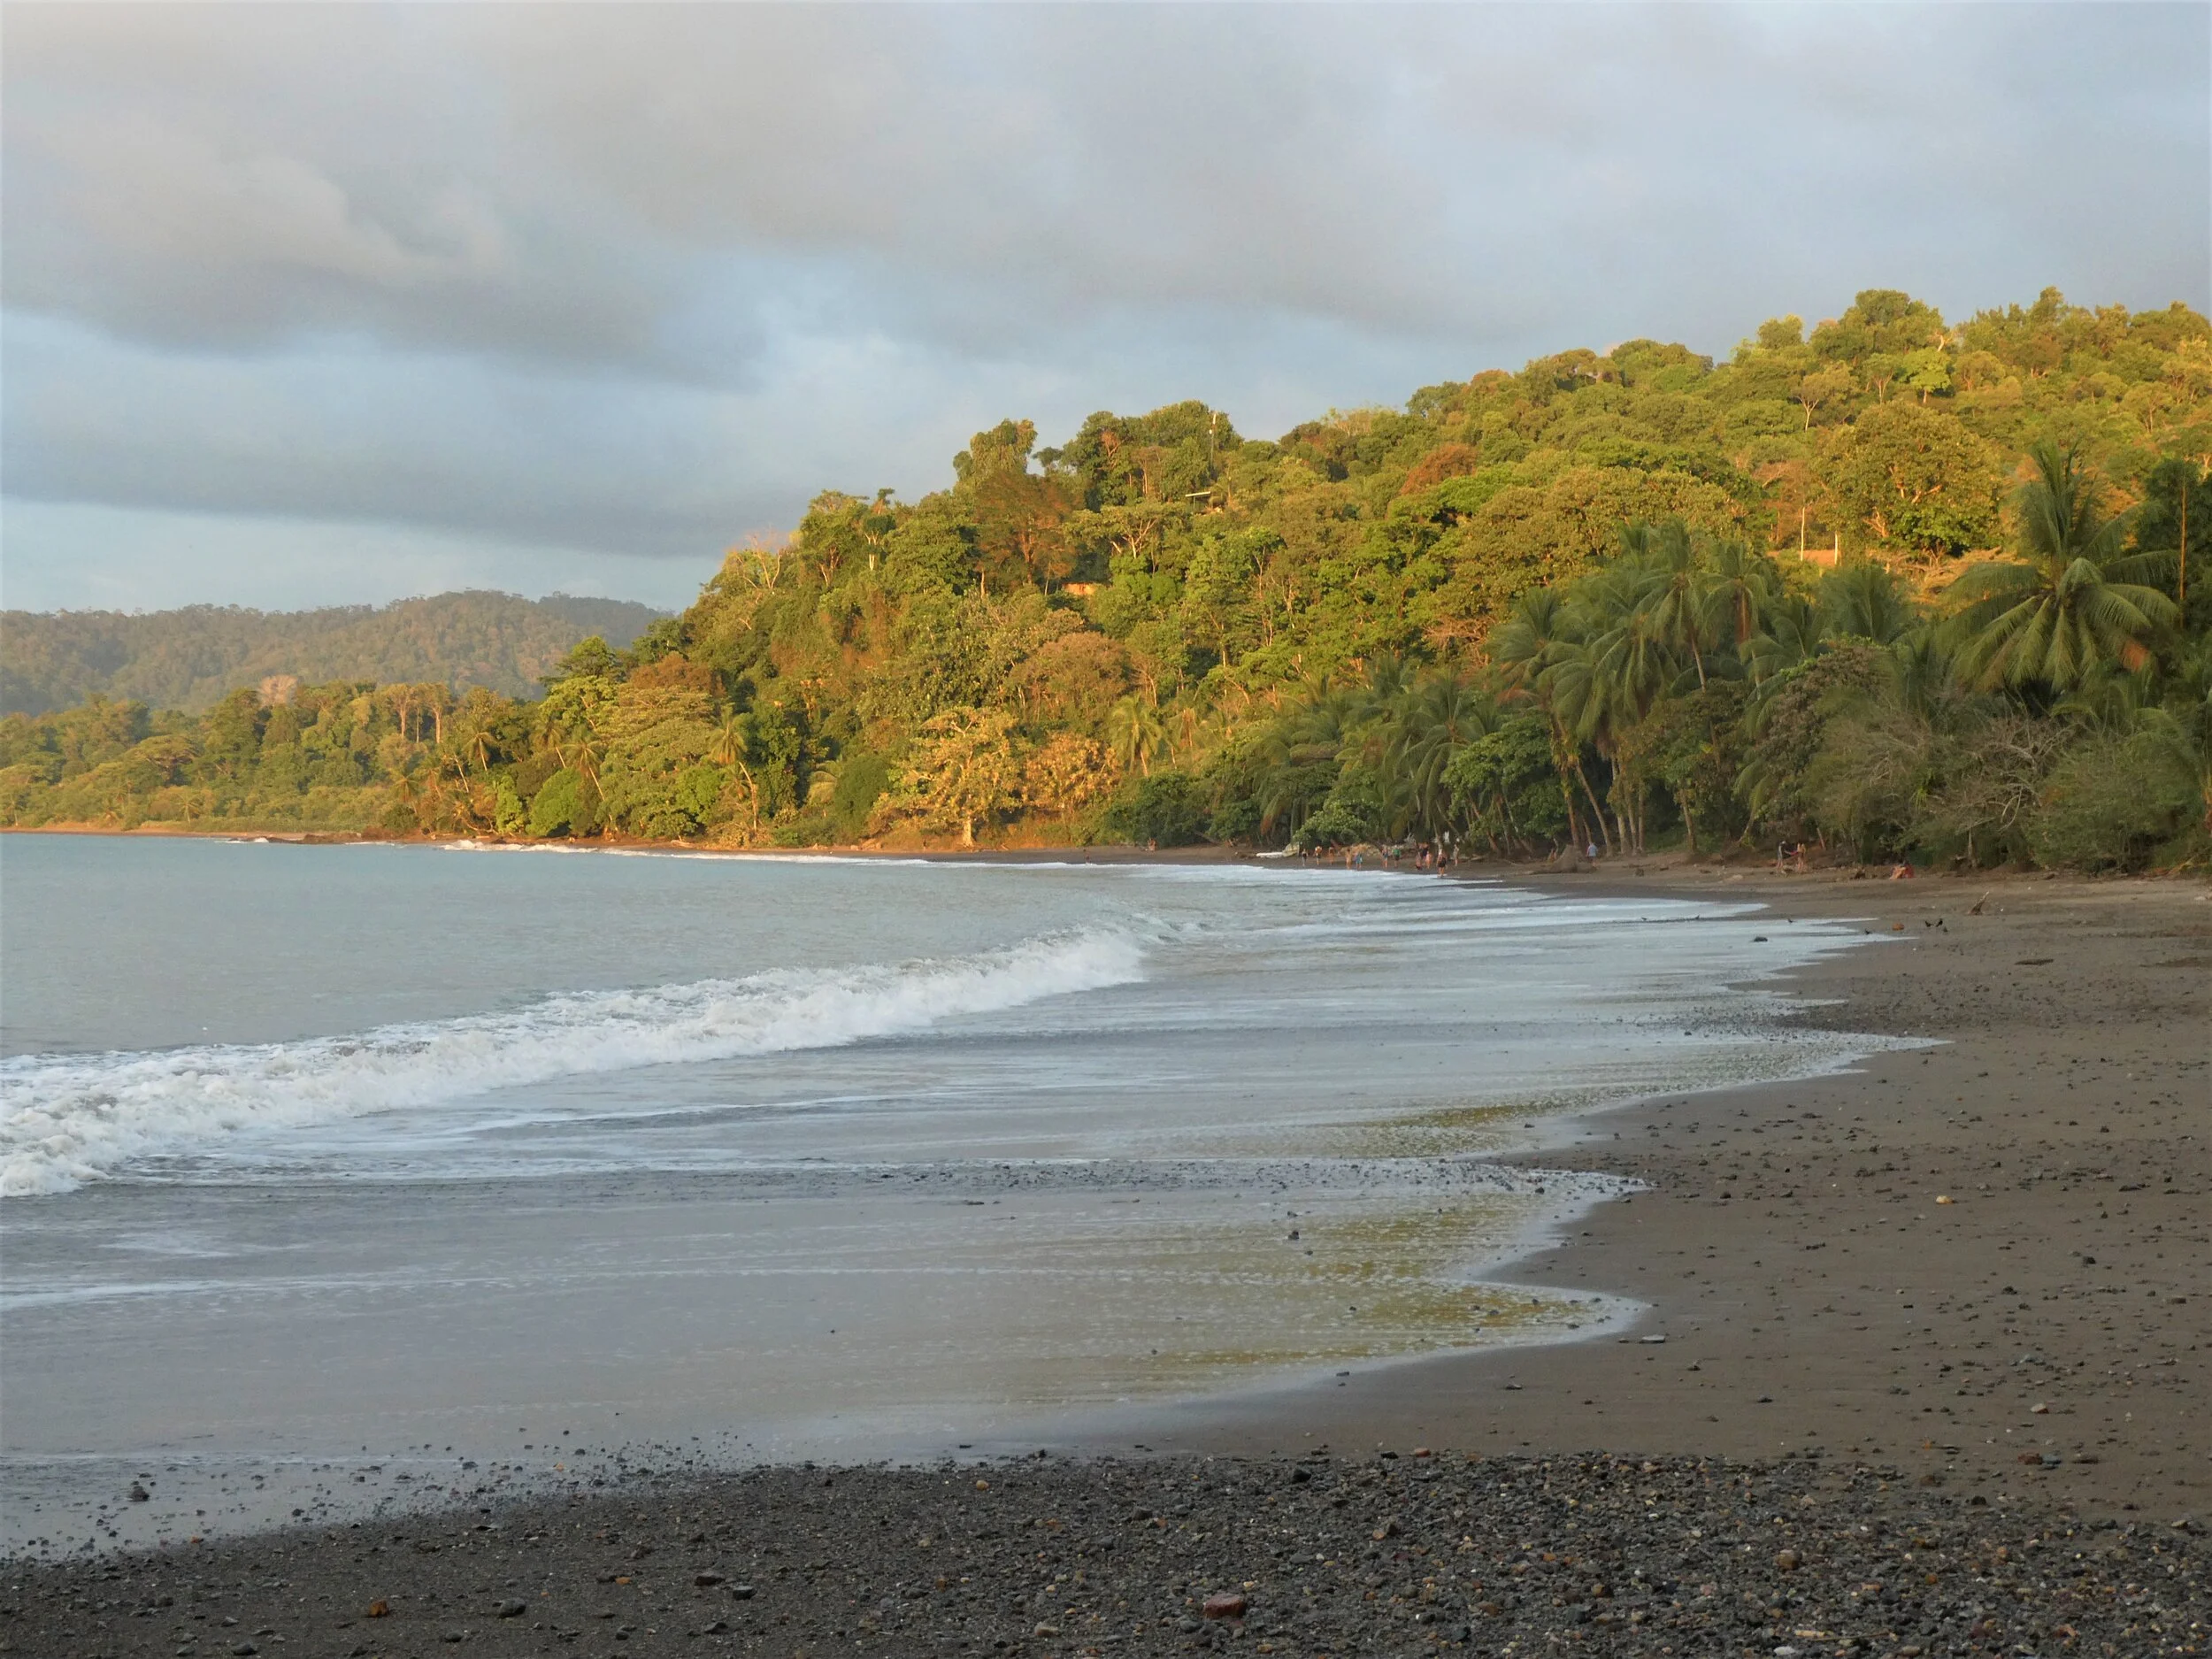
Relax on a remote beach
Playa San Josecito is probably the most stunning, secluded, tropical beach you will ever lay eyes on. Come here for some serious relaxation in paradise, or to snorkel in its clear water. You can hike here from Drake Bay or pay to take a quick boat taxi.
Visit Cano Island
Cano Island is located just ten miles off the coast of Drake bay and is home to one of the best places in Costa Rica for snorkeling and diving. Most tours are half day, giving you the chance to see things like rays, turtles, and maybe even some sharks.
Whatever you decide to do, even if it’s just a relaxing getaway in a tropical paradise, we’re sure you’re going to fall in love with Drake Bay.
Day 7: Head to Quepos and beach hop
Driving time/distance: 1 hr 45 min / 120 km
Where to stay: Quepos or Manuel Antonio
Day at a glance: Take the boat back to Sierpe and drive to Manuel Antonio. On your way, stop at a few beaches to play in the waves and take in the views.

Today, you’ll be leaving Drake Bay (sad faces), but will head to your next adventure in Manuel Antonio (happy faces)!
Two daily boats leave from Drake Bay’s main beach back to Sierpe at 7:15 am and 2 pm. These can usually be arranged through your lodging once you’re there. Today, we recommend you get the morning boat. It will probably take a bit longer than an hour to get back to Sierpe, because the boat will be making lots of stops picking up people at different beaches along Drake Bay. And you want to leave plenty of time today to get to Quepos and make a stop or two along the way.
Once back in Sierpe, you’ll start your drive to Quepos, less than two hours up the Costanera Sur (the main highway running along the South Pacific coast). Along the way, you’ll drive through Dominical, and if you took the morning boat from Sierpe, you’ll have plenty of time to stop at one of its many beautiful beaches located just minutes off this highway.
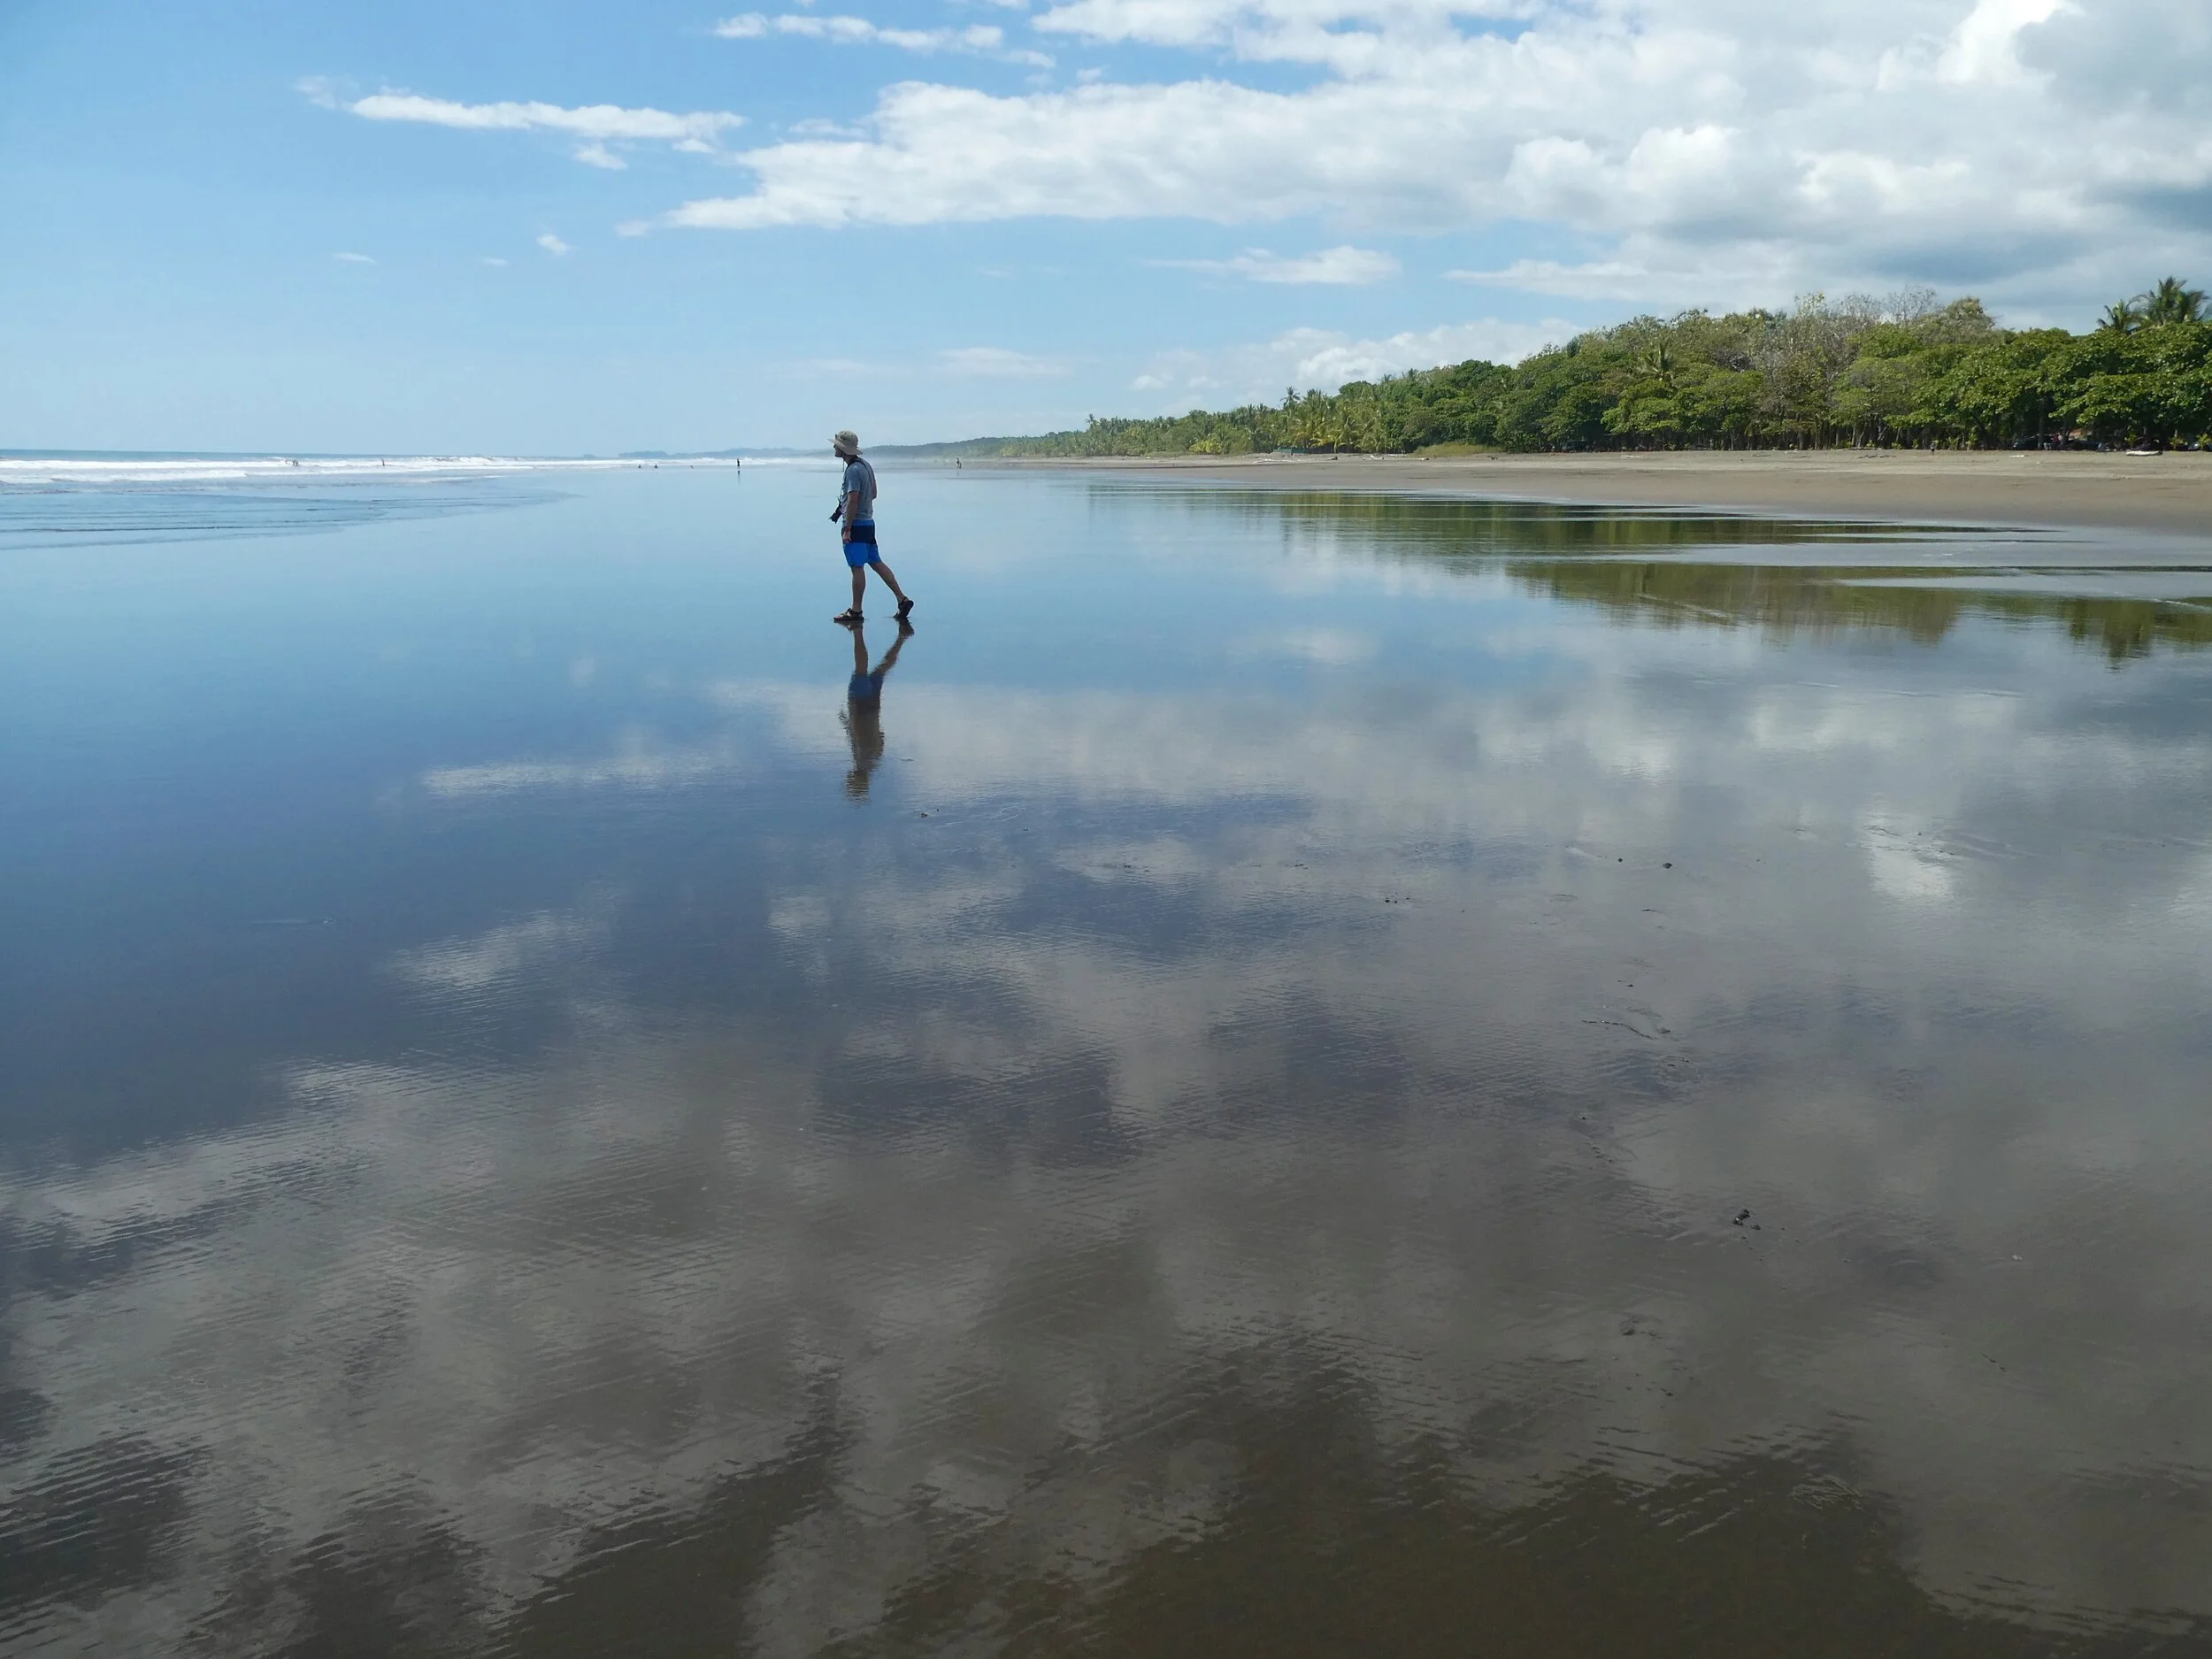
Playa Dominical is a world-renowned beach for surfing. It’s a busy beach located in the heart of town.
For a more relaxed vibe, check out Playa Linda and Playa Matapalo. These two beaches connect to make one long pristine tropical beach along Costa Rica’s Pacific coast.
Today, you can choose to stay in Quepos or Manuel Antonio. There’s no major advantage to one or the other with the exception that Manuel Antonio will make you about 10 minutes closer to Manuel Antonio National Park, tomorrow’s destination (and spoiler alert: you’re gonna want to get there early!).
You can use the rest of the day to explore each of the towns and relax and swim at the beach.
Head to Playa Biesanz, located right at the foot of Manuel Antonio for a small cove-like beach that’s great for swimming. Because of its calm waters, this is a good place to snorkel right off shore. You can rent some cheap gear right on the beach, or bring your own. To be honest, it’s not the most amazing snorkeling in the world… you won’t be seeing turtles or sharks here, but we did see some cool tropical fish!

Playa Espadilla is Manuel Antonio’s free public beach found right along route 618 at the bottom of the hill from Manuel Antonio as you are heading towards the National Park. Hint: This is an awesome beach for sunset!

Rest up and get to bed early…you’re going to have an early wake-up call tomorrow morning!
Day 8: Visit Manuel Antonio National Park
Driving time/distance: 2 hr / 120 km
Where to stay: Orotina
Day at a glance: Hike the trails of Manuel Antonio in search of playful monkeys and lazy sloths. Then start your drive to Bajos del Toro.

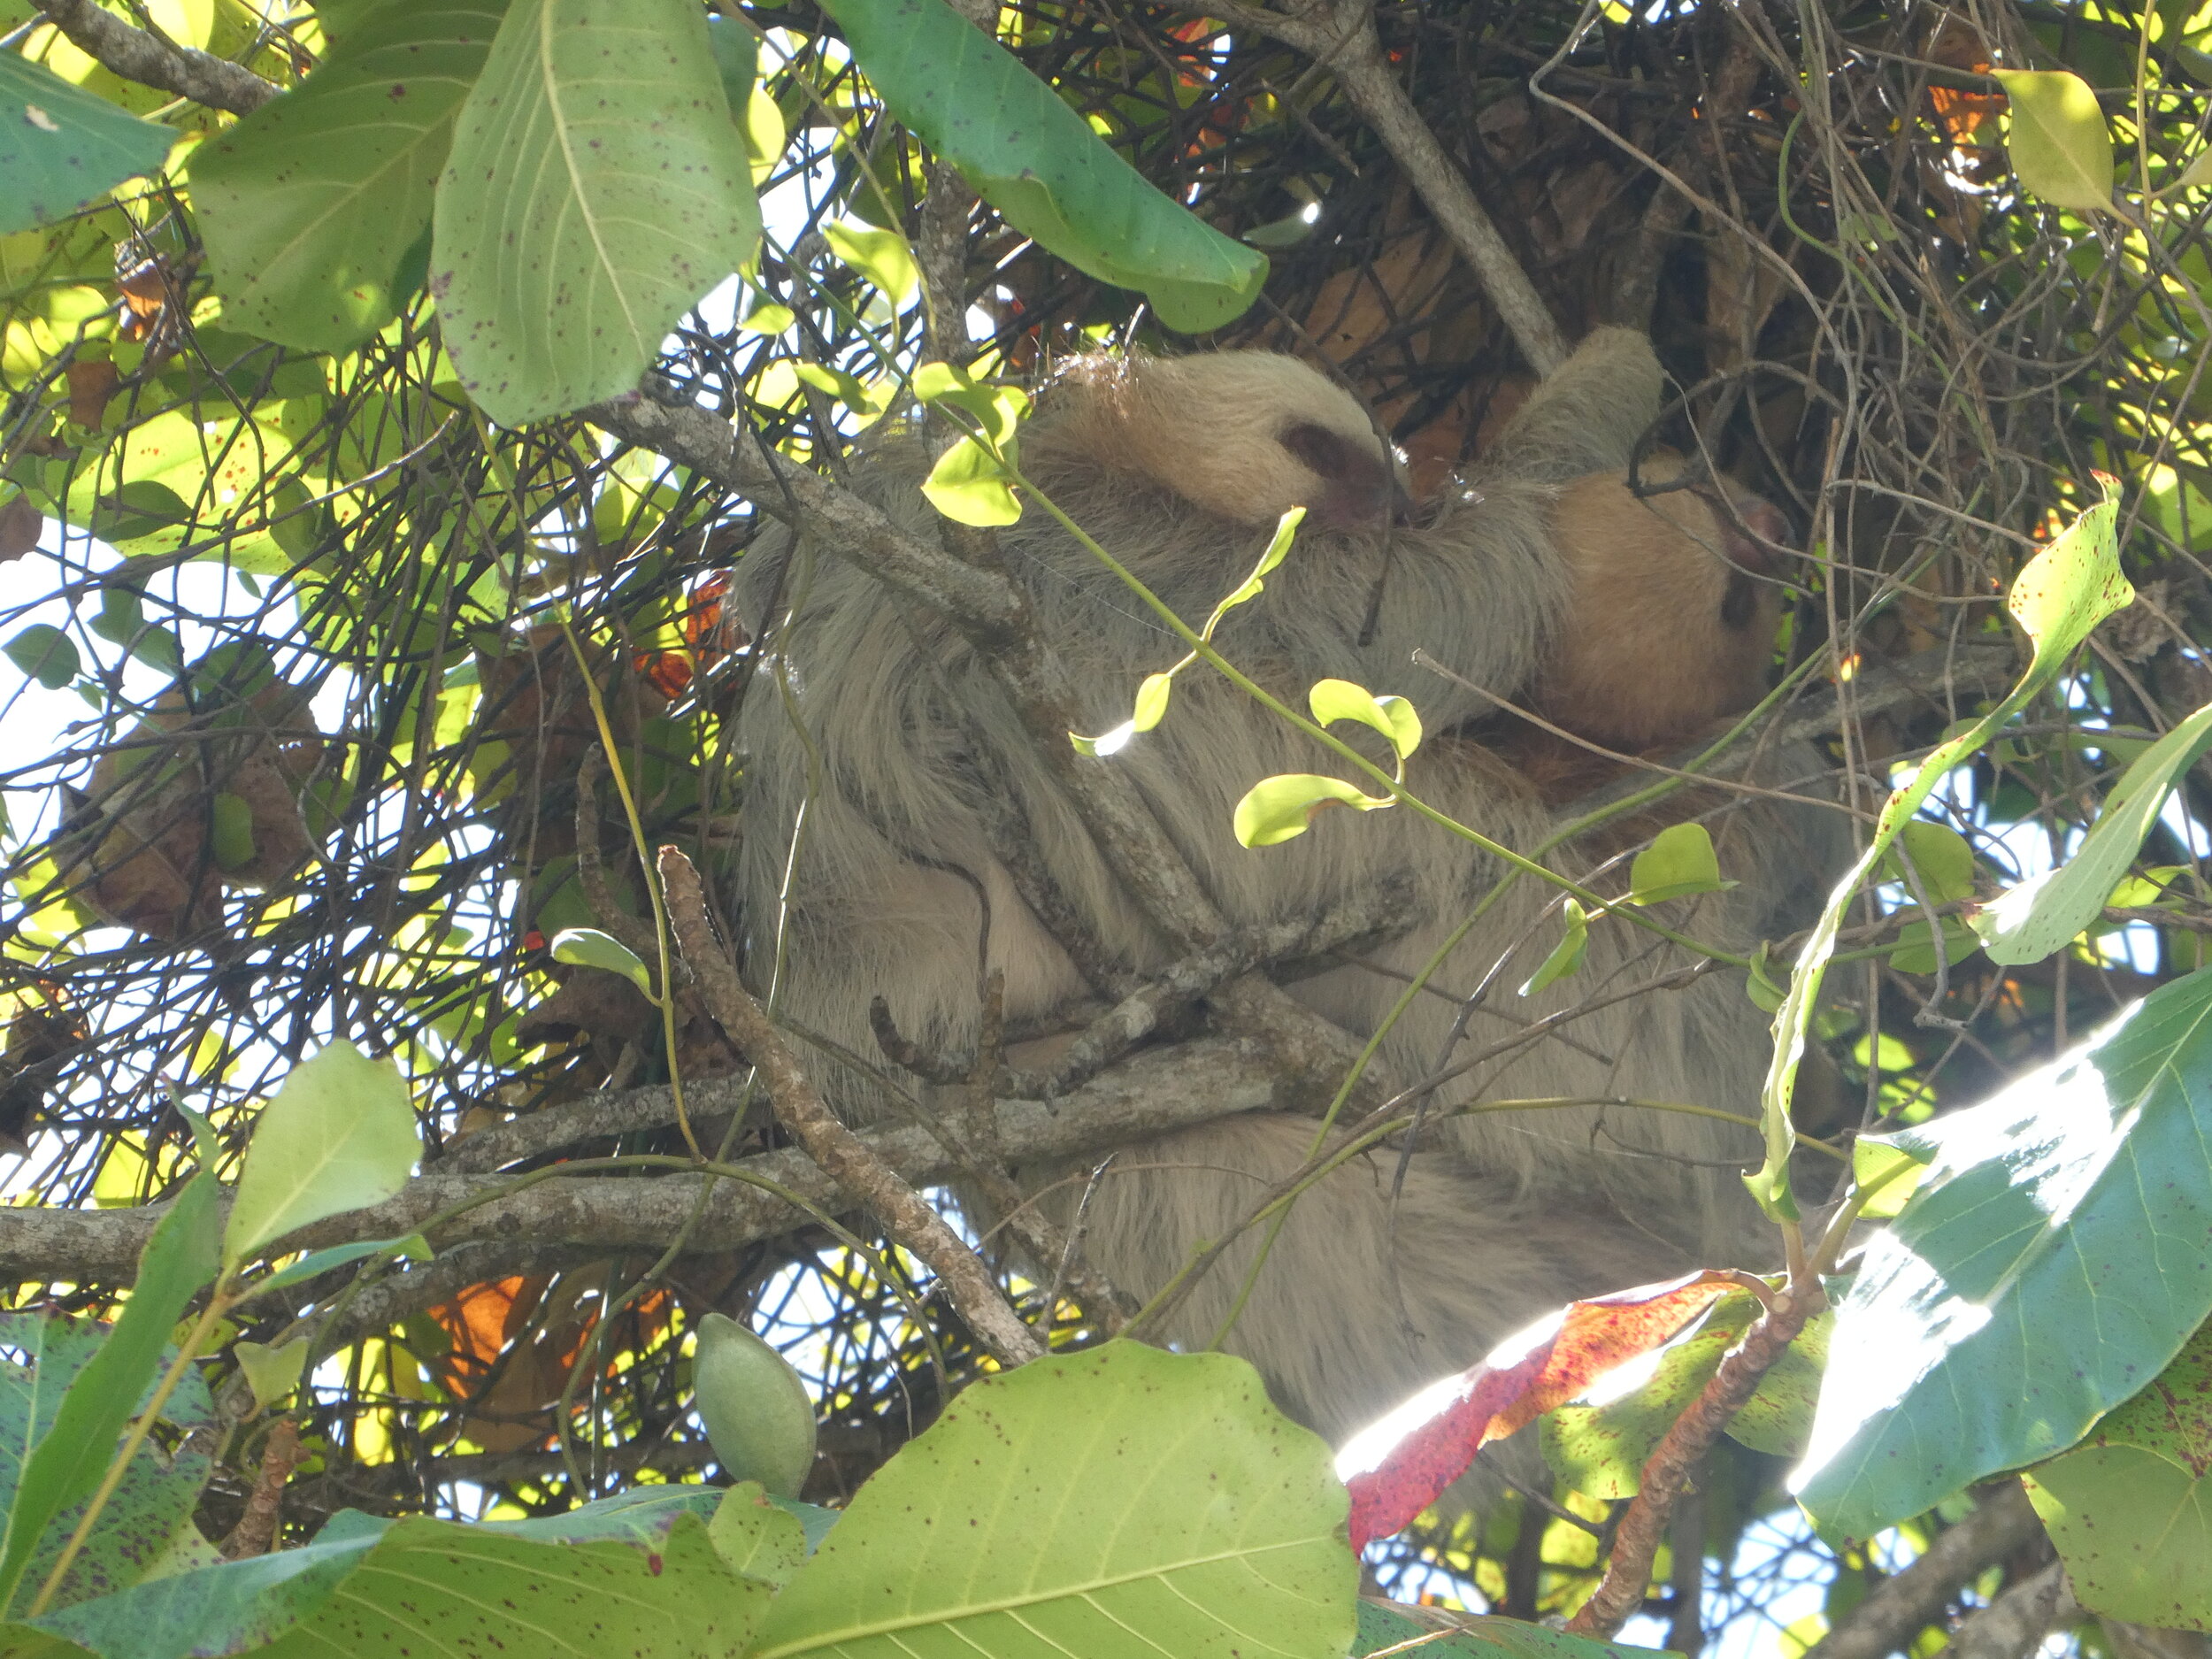
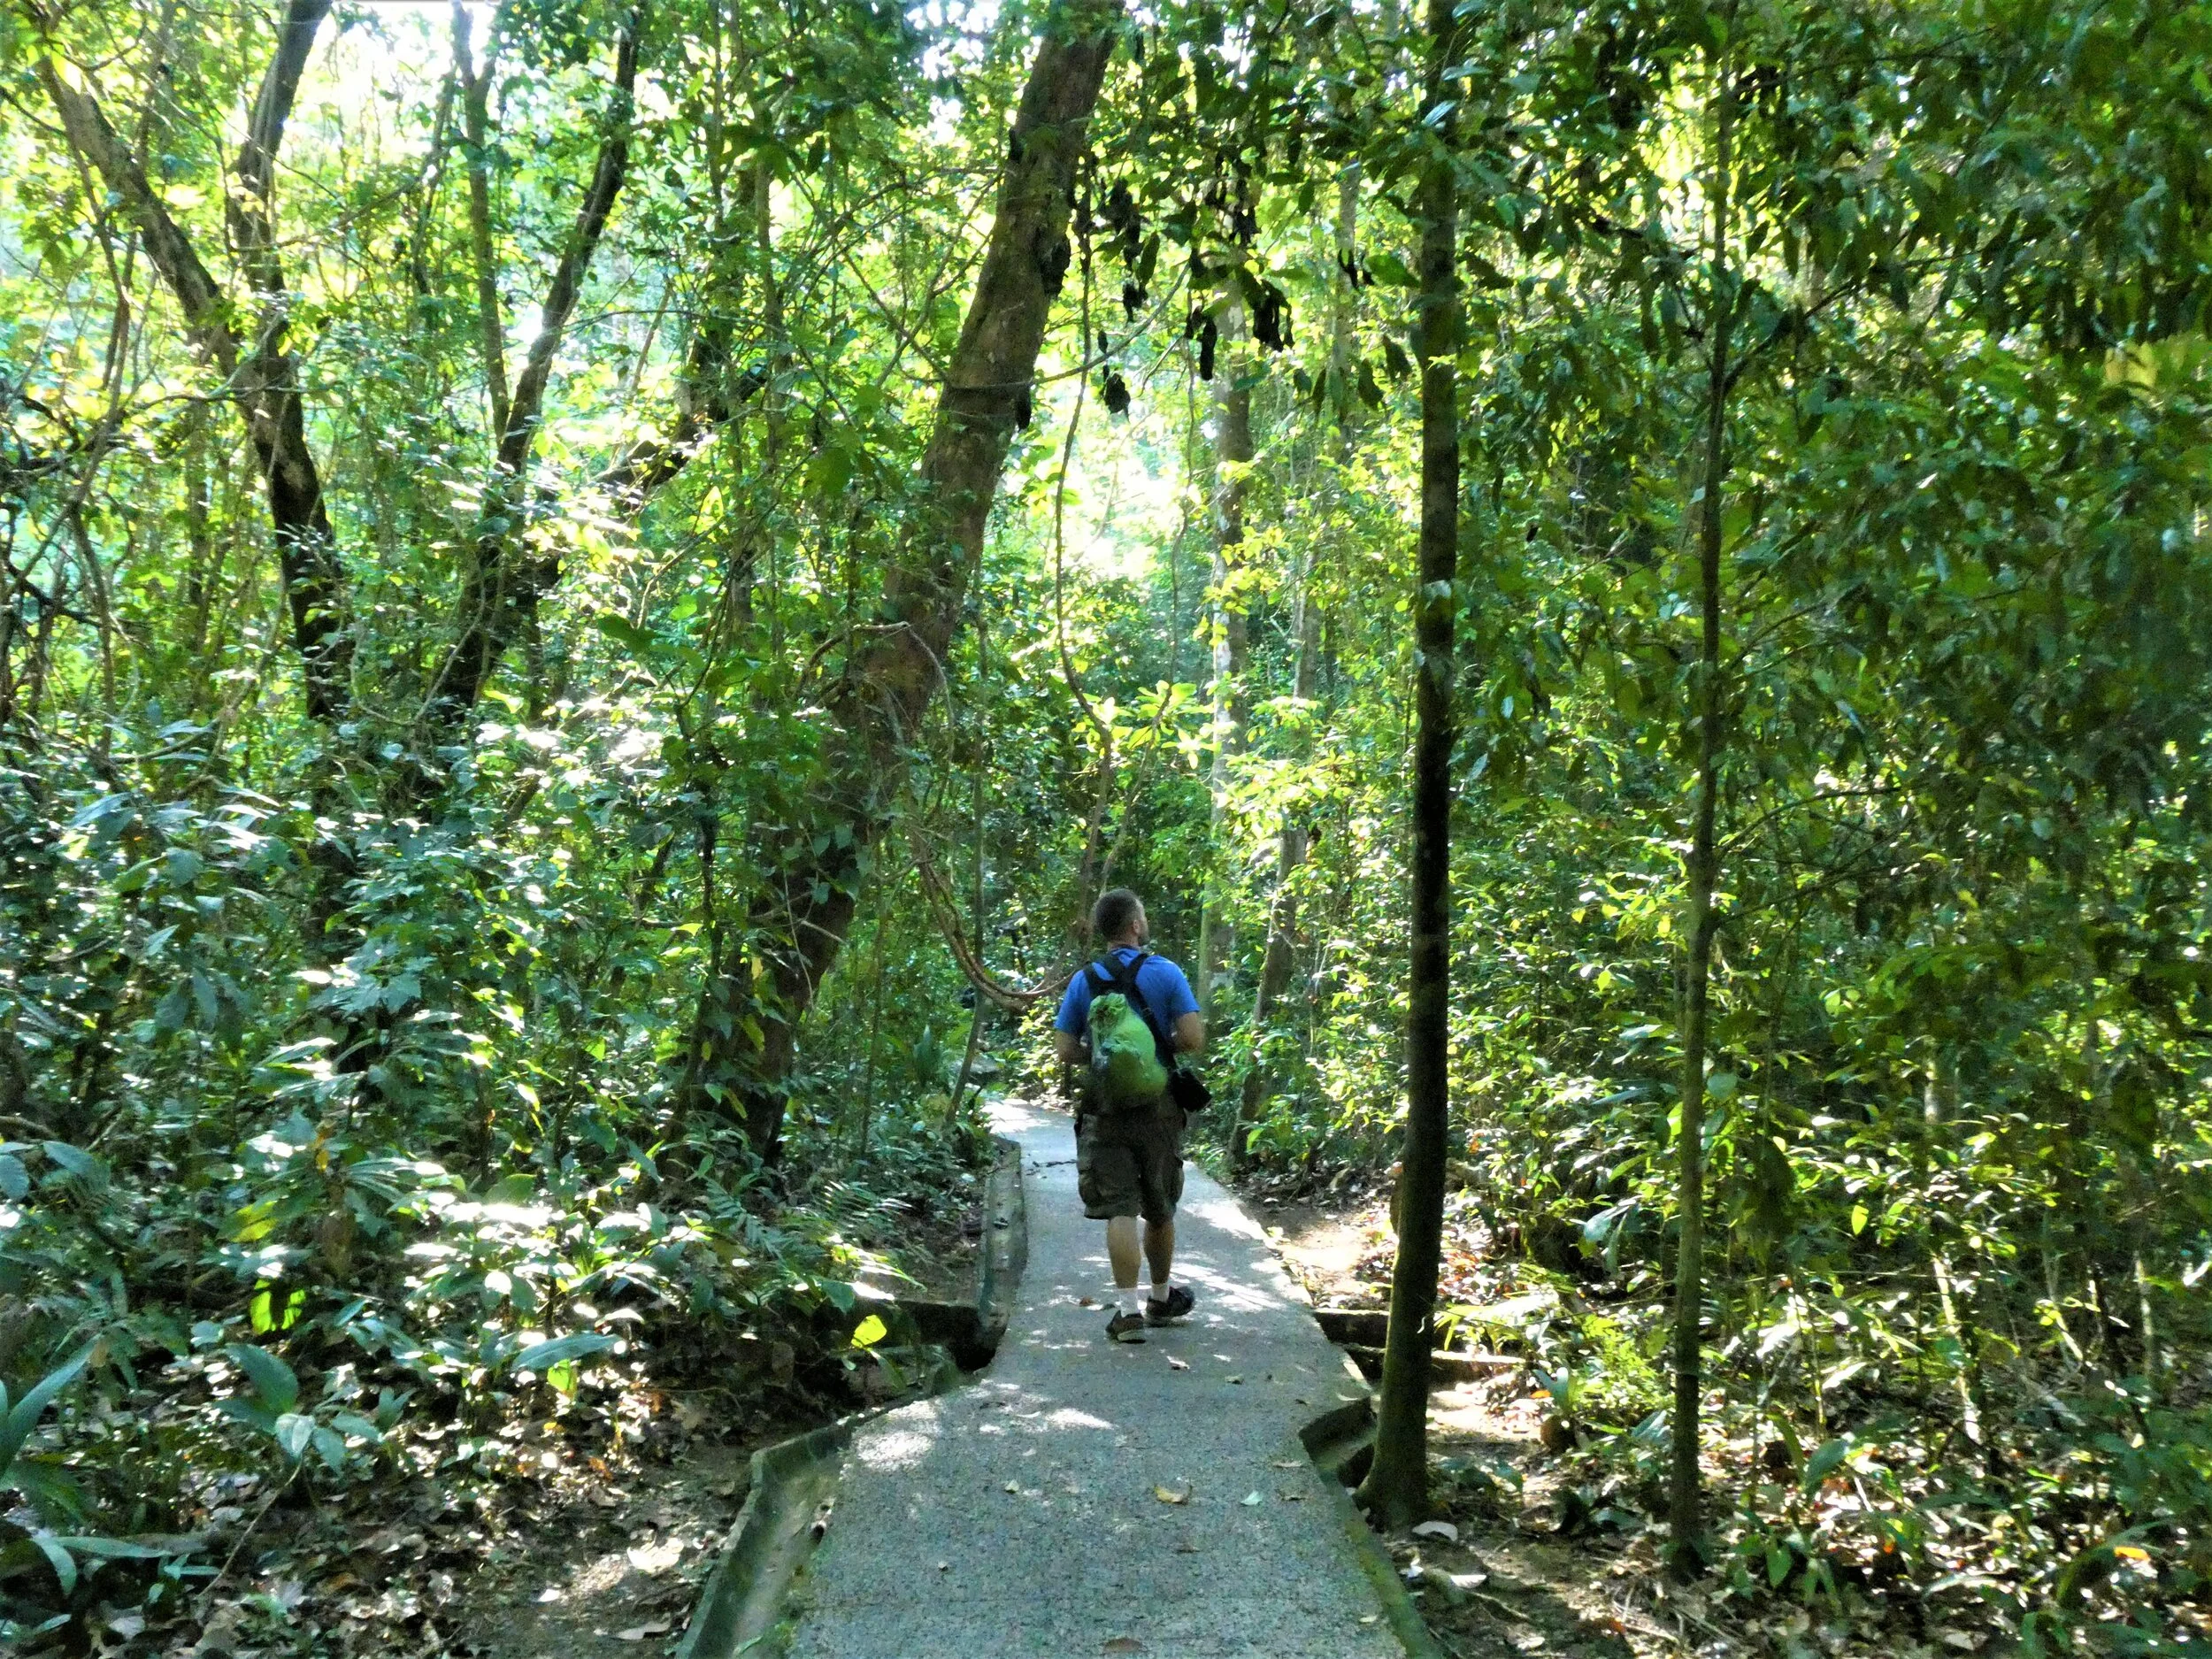
Manuel Antonio National Park is a must-do on any Pacific Costa Rica itinerary. If you’re on a mission to see wildlife, then this is a good choice…it’s one of the best places in Costa Rica to see sloths in their natural habitat! As soon as we learned that, we knew we had to make this a part of our trip.
At Manuel Antonio National Park, you can walk on miles of trails in search of wildlife and relax on beautiful beaches.
The park is open from 7 am to 3 pm. Remember that early wake up call I mentioned? You’ll want to get to the park as close to 7 as you can so that you can have a full day to enjoy at the park (you’ll want it!), but also so that you can get tickets…
Let me explain…
The number of visitors that can enter the park on any given day is capped, and you cannot buy tickets online in advance. So the earlier you get to the park, the better the chance you will get in. We’ve read that in the peak season (between December and April), lines start as early as 6 am!
Here’s a little insider tip, though. There is an option to purchase your tickets in Quepos the day before your visit so you don’t have to deal with it the morning of. Check out our complete guide to visiting Manuel Antonio to learn everything you need to know about visit this park, including buying tickets, what to bring, and some more tips!
Oh, and also, if you’re looking for some wildlife, read about all the best hiking trails in Manuel Antonio.
Once you’re done exploring the park, it’s time to head north to your next destination. You’ll be heading a bit inland to the region of Costa Rica known as Bajos del Toro, but we decided to break up the drive a little bit by staying somewhere half way in between there and Manuel Antonio. In our case, we stayed in Orotina, a cute little town in the hills of Costa Rica. But really, you can choose anywhere along the way. Another possibility is in Atenas. We found cheaper lodging at Orotina so we went with that. Just keep in mind, it’s going to be another early day tomorrow, so the closer you can get to Bajos del Toro tonight, the later you can sleep in tomorrow!
Day 9: Take a tour of the Blue Falls
Driving time/distance: 2 hours / 80 km from Orotina to Bajos del Toro; 1 hr 30 min / 73 km to La Fortuna
Where to stay: La Fortuna
Day at a glance: Visit 7 amazingly blue waterfalls in the untouched rainforest of Bajos del Toro.

The Blue Falls are a super beautiful off-the-beaten-path destination in Costa Rica located just outside of Bajos del Toro.
Bajos del Toro is a tiny, rural, sparsely populated town located in the mountainous cloud forest of central Costa Rica. It’s home to a ton of gorgeous waterfalls, and today, you’re going to see a good number of them! This will be one of the most adventurous days on this Costa Rica itinerary for sure.
And the adventure starts with the journey to Bajos del Toro itself. The drive into Bajos del Toro from the south (which is where you’ll be coming from) will take you up mountain roads that can often times become bumpy, rough, and steep. It was doable for us in a regular 2WD car, but in the rainy season when the roads are a bit rougher, a 4x4 sounds like it would be a good idea. As you get close to Bajos del Toro, the views open up to valleys and mountains surrounded by beautiful countryside.

To visit the Blue Falls of Bajos del Toro, you’ll need to go through a guided tour service with Catarata del Toro Adventure. They are located just past the town of Bajos del Toro. They offer two types of tours – a Light and a Full.
The Light Tour is just $15 USD (a fabulous deal!) and will bring you to the two most popular waterfalls in the area known as Catarata Las Gemelas. The hike to these waterfalls is short and pretty straightforward, though it will still involve stairs, crossing a river, and walking along slippery rocks to access these pair of falls. Worth every step, though!
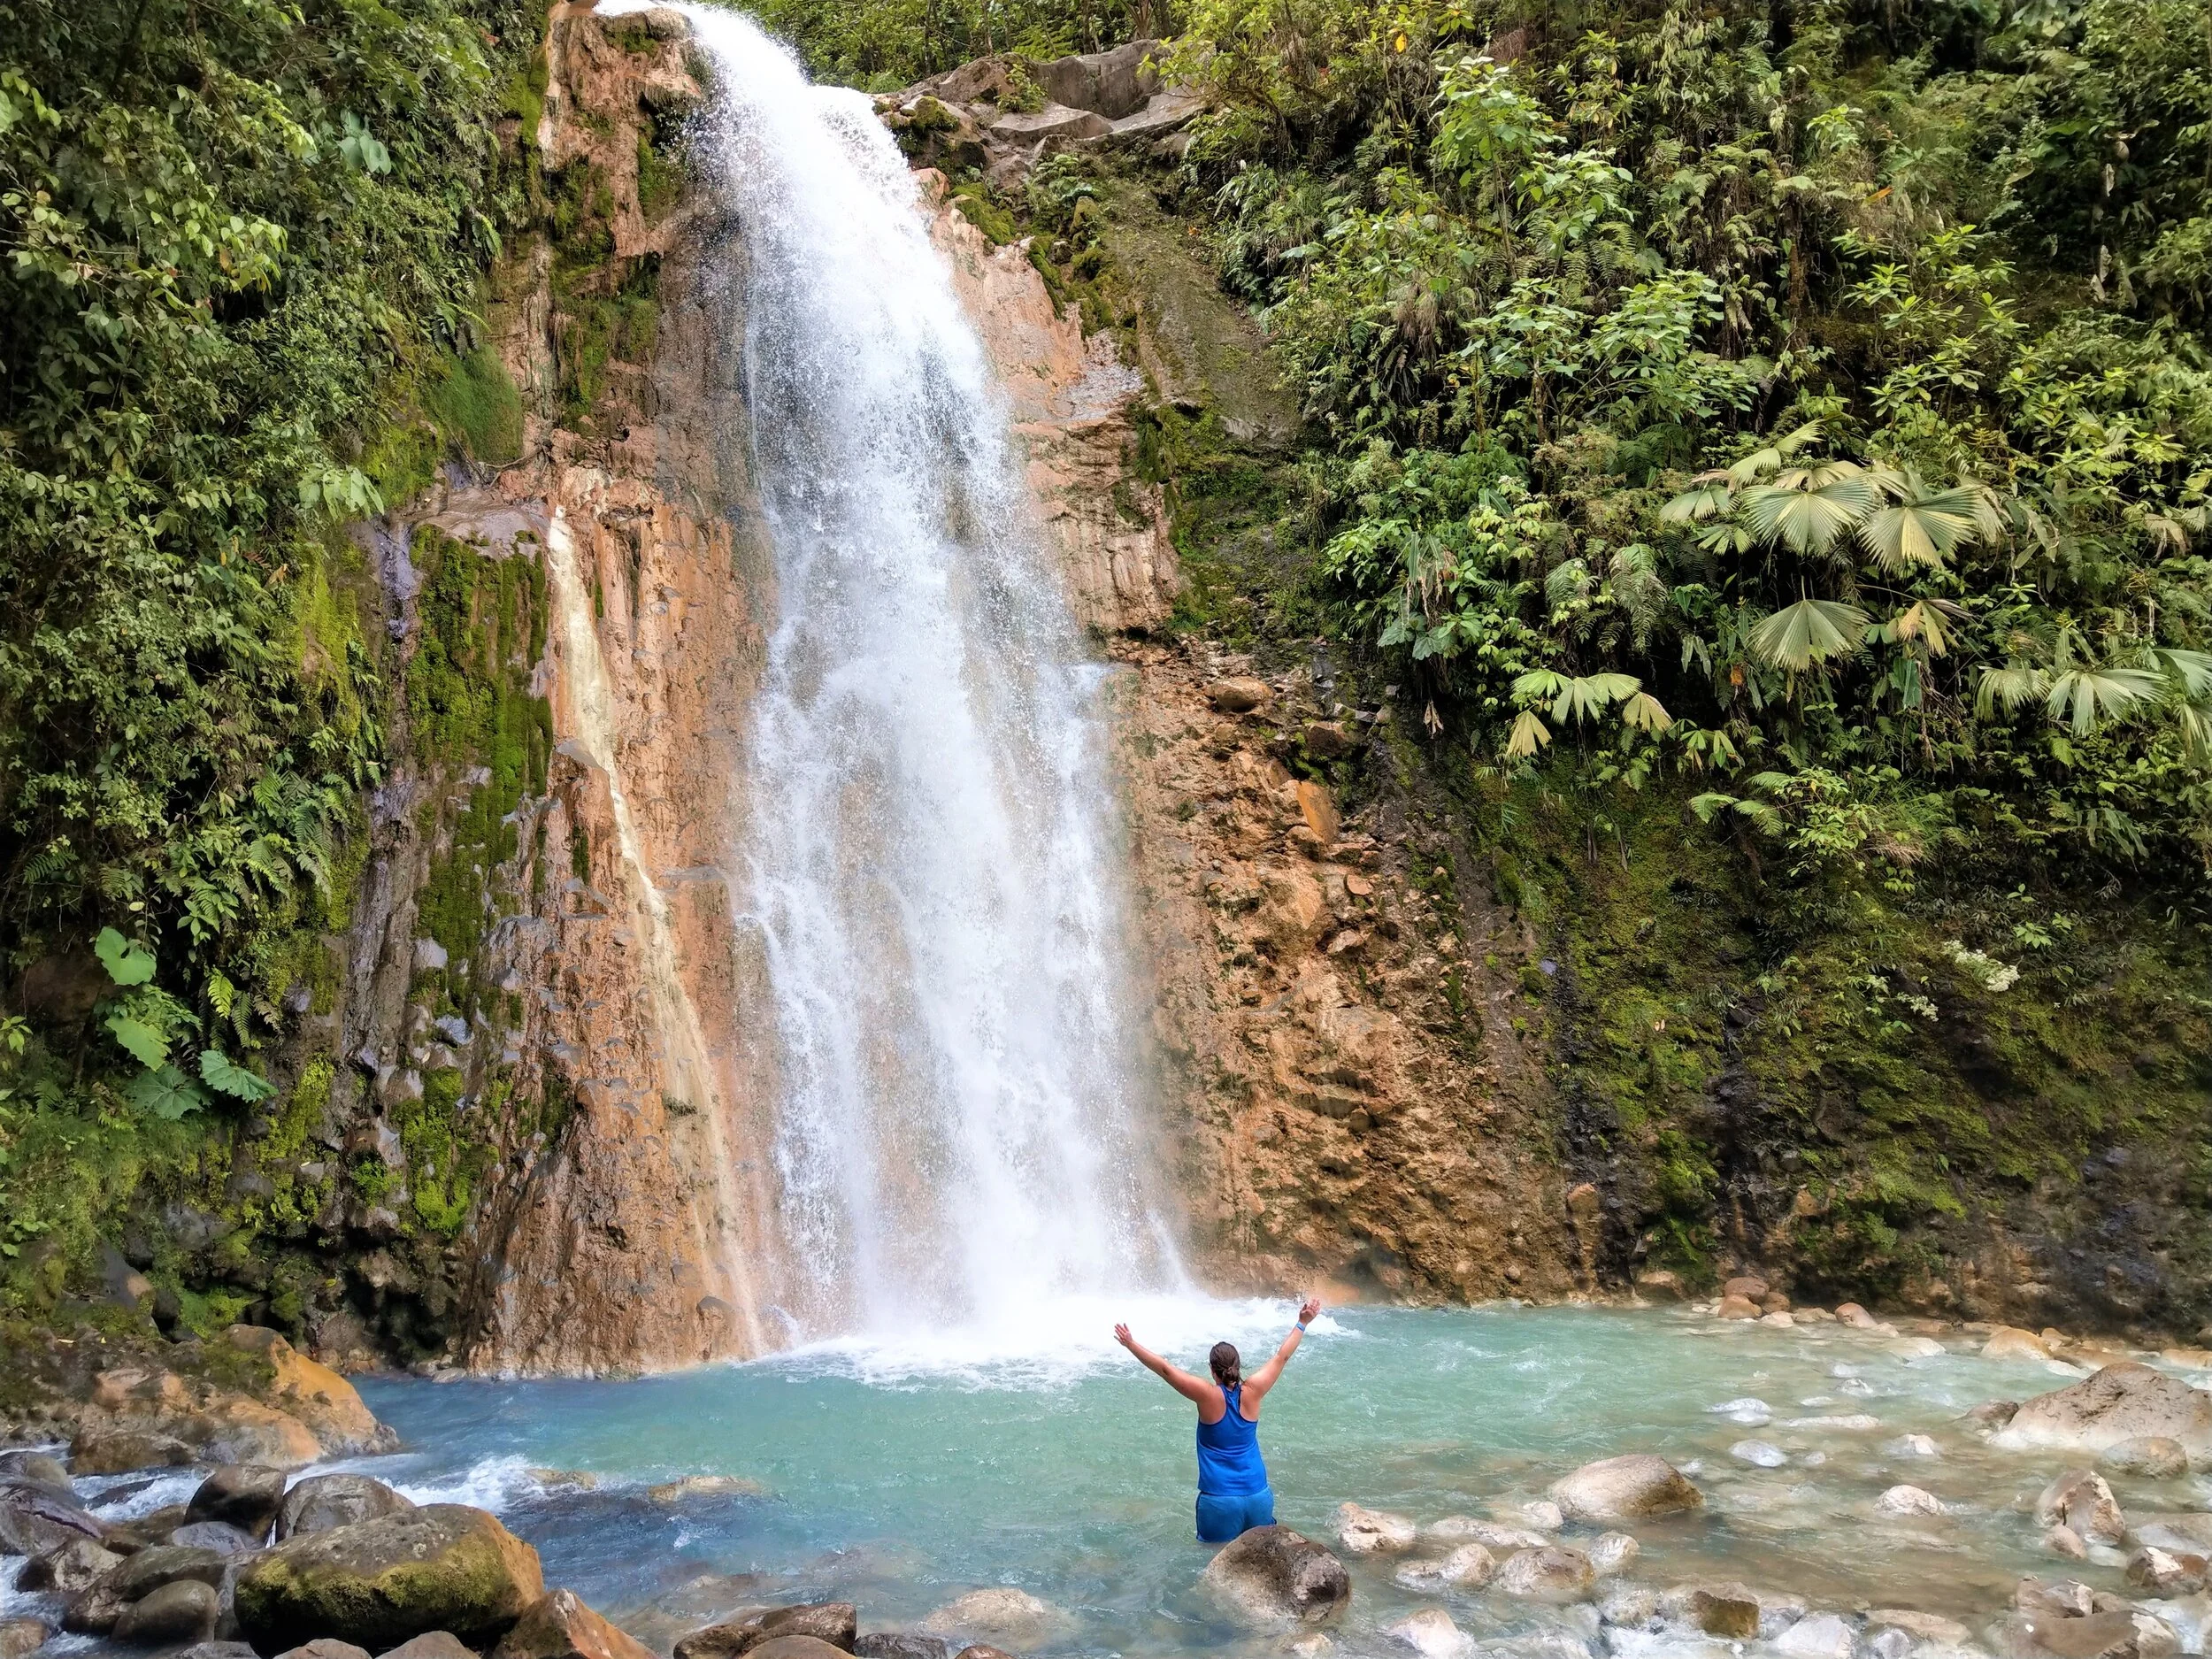
We opted for the Full Tour. The Full Tour ($50 USD) goes to these, plus 5 additional falls and swimming pools located along the river that runs through this part of the cloud forest. Each waterfall was stunningly blue, and it truly felt like we were in pristine, untouched tropical forest.

This full tour is pretty intense, though. The paths to all the waterfalls other than the Gemelas were pretty darn rugged. Well, if you could even call them trails. We basically bushwhacked our way through the rainforest, which involved steep ups and downs – some involving ropes…aaaand some butt slides – and quite a few river crossings. It’s definitely not for the faint of heart or out of shape hiker! You will get muddy, wet, and exhausted.


But it was all worth it to us! And just part of the adventure. The best part? We had the falls to ourselves…all 7 of them!
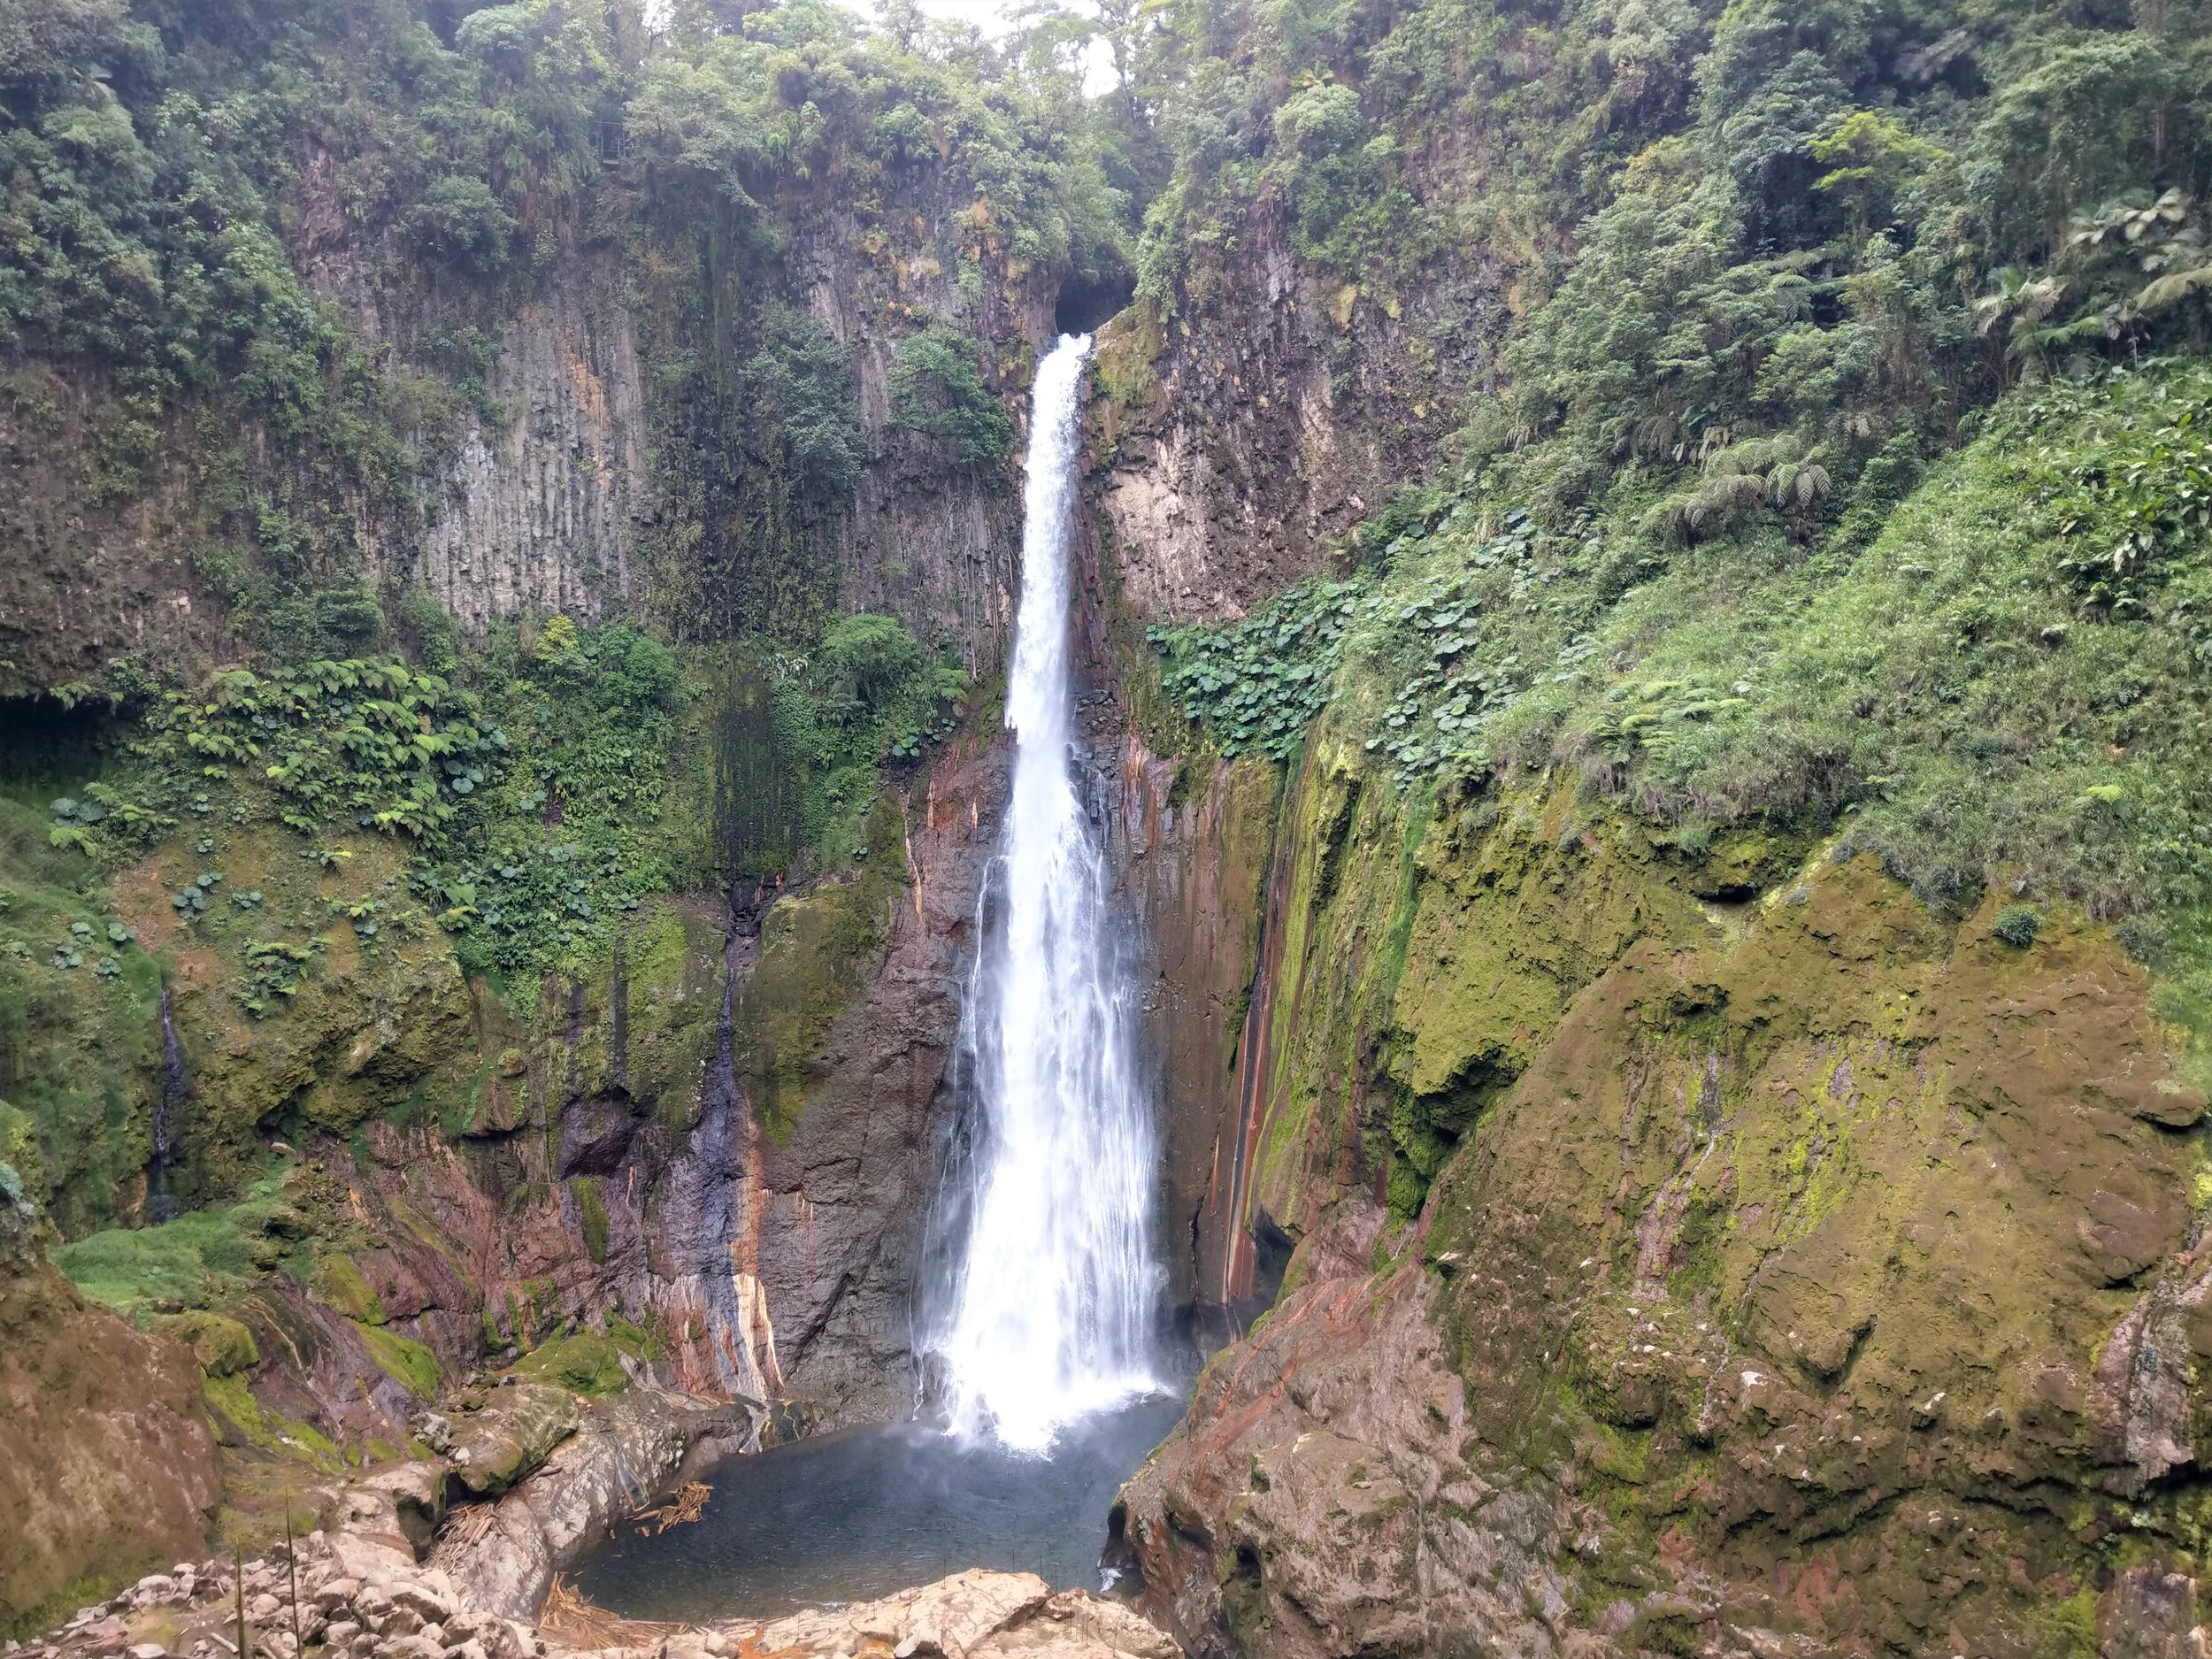
After the tour is done, check out Catarata del Toro, which is right behind the office where you park for the Blue Falls tour. Catarata del Toro is the shining star of Bajos del Toro and is the tallest waterfall in Costa Rica at 270 feet tall. It’s a truly picturesque setting, as it falls into the crater of an extinct volcano that his since grown in with lush forest. You can view the waterfall from a few viewing points behind the office, and you can hike all the way down to its base via a lot of stairs, about 700 of them! The entry fee to Catarata del Toro is $14USD, but you can purchase a ticket for both the Light Tour and Catarata del Toro for $25, or the entry fee is covered under the cost of the Full Tour!
Once you’re done enjoying the beautiful falls of Bajos del Toro, it’s time to continue onto your next step on the itinerary…La Fortuna! This is only an hour and a half away. From the Blue Falls parking lot, you’ll continue driving north on 708. This drive is easy along well-paved roads…nothing like what you drove in on.
You’ll know you’re getting closer to La Fortuna once the massive Arenal volcano comes into view!
Days 10-11: Explore La Fortuna
Days at a glance: Spend your time white water rafting, ziplining, waterfall hunting and soaking in hotsprings in the adventure capital of Costa Rica.

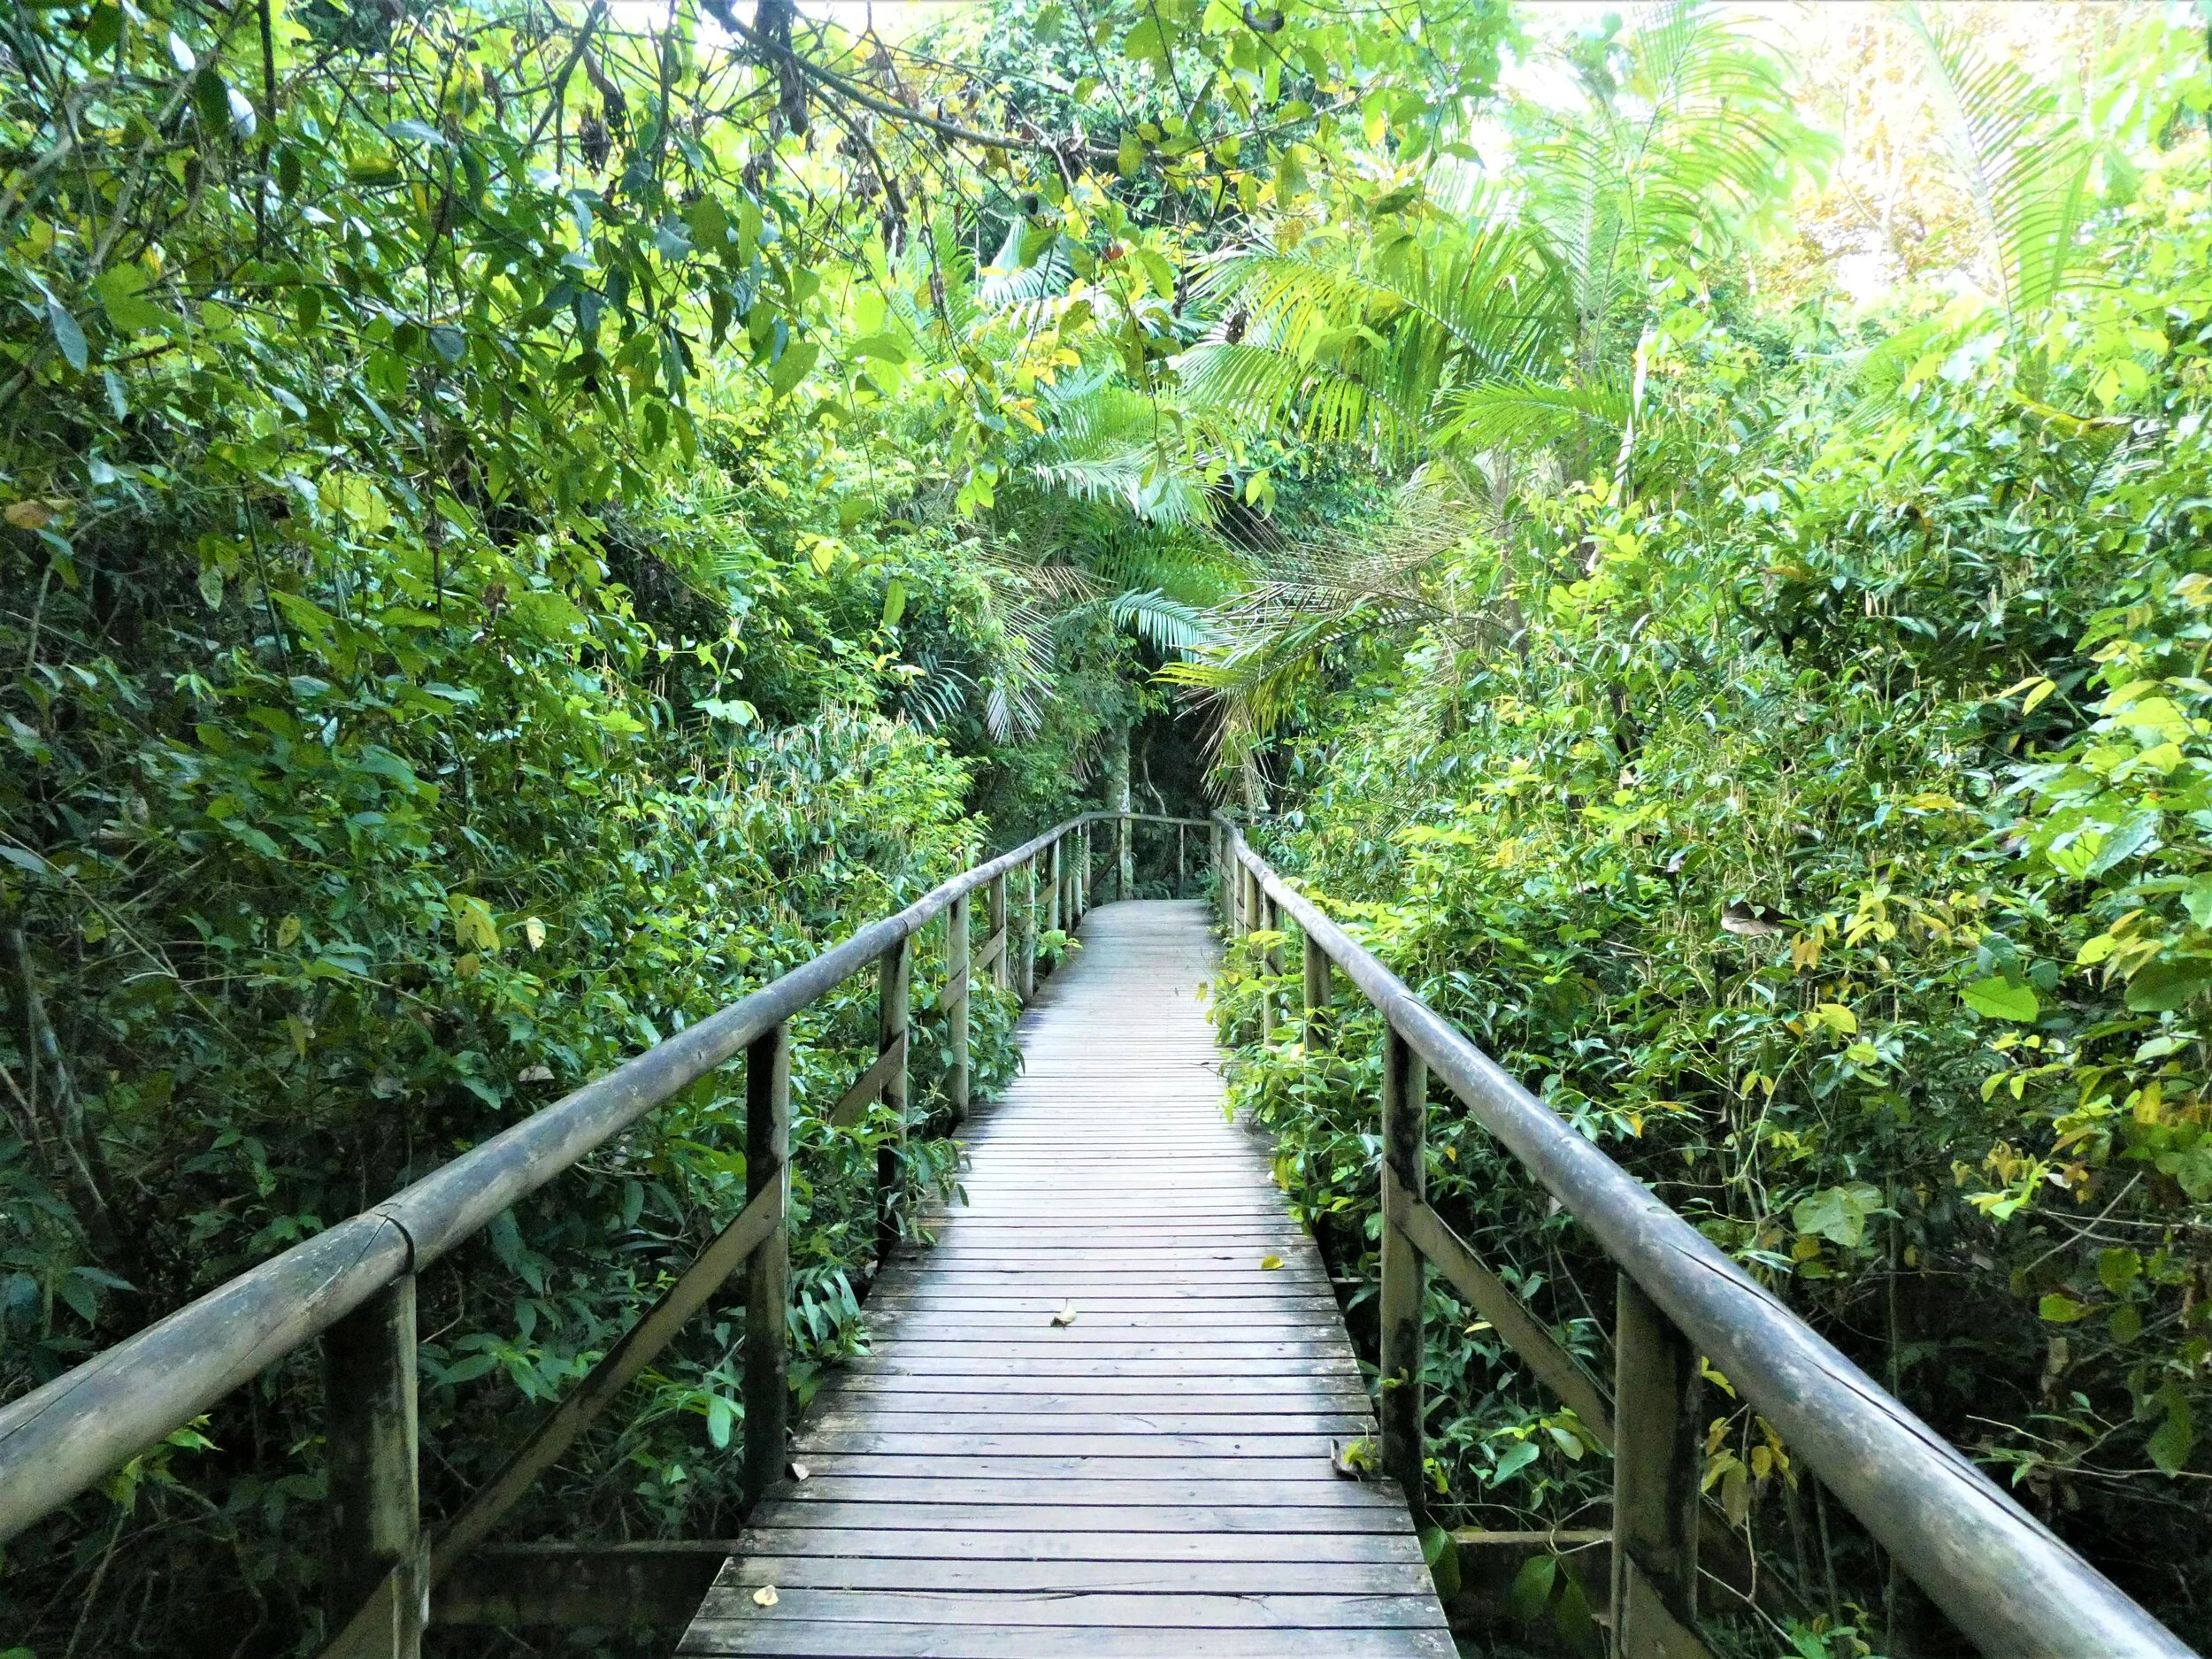
Chances are you’ve heard of La Fortuna. It’s the adventure capital of Costa Rica! It’s quite touristy, but for good reason. There’s tons to do and see here, including spotting exotic wildlife, walking along hanging bridges through the rainforest, hiking around lava fields at the base of a volcano, white water rafting, ziplining, and waterfall hunting! Phew, that’s a lot!
In this Costa Rica itinerary, we’ve dedicated just two days to this adventure town, which isn’t that long. You’ll have to jam pack your days to squeeze in as much as you can! And don’t worry, to help you figure it out, we have a guide to this fun Costa Rica town.
In the meantime, here are some suggestions:
Get the adrenaline pumping. Ziplining, white water rafting, canyoneering…it’s all here in La Fortuna. If you can’t choose just one, some tour companies offer combinations of these for a full day of fun so you don’t have to pick!

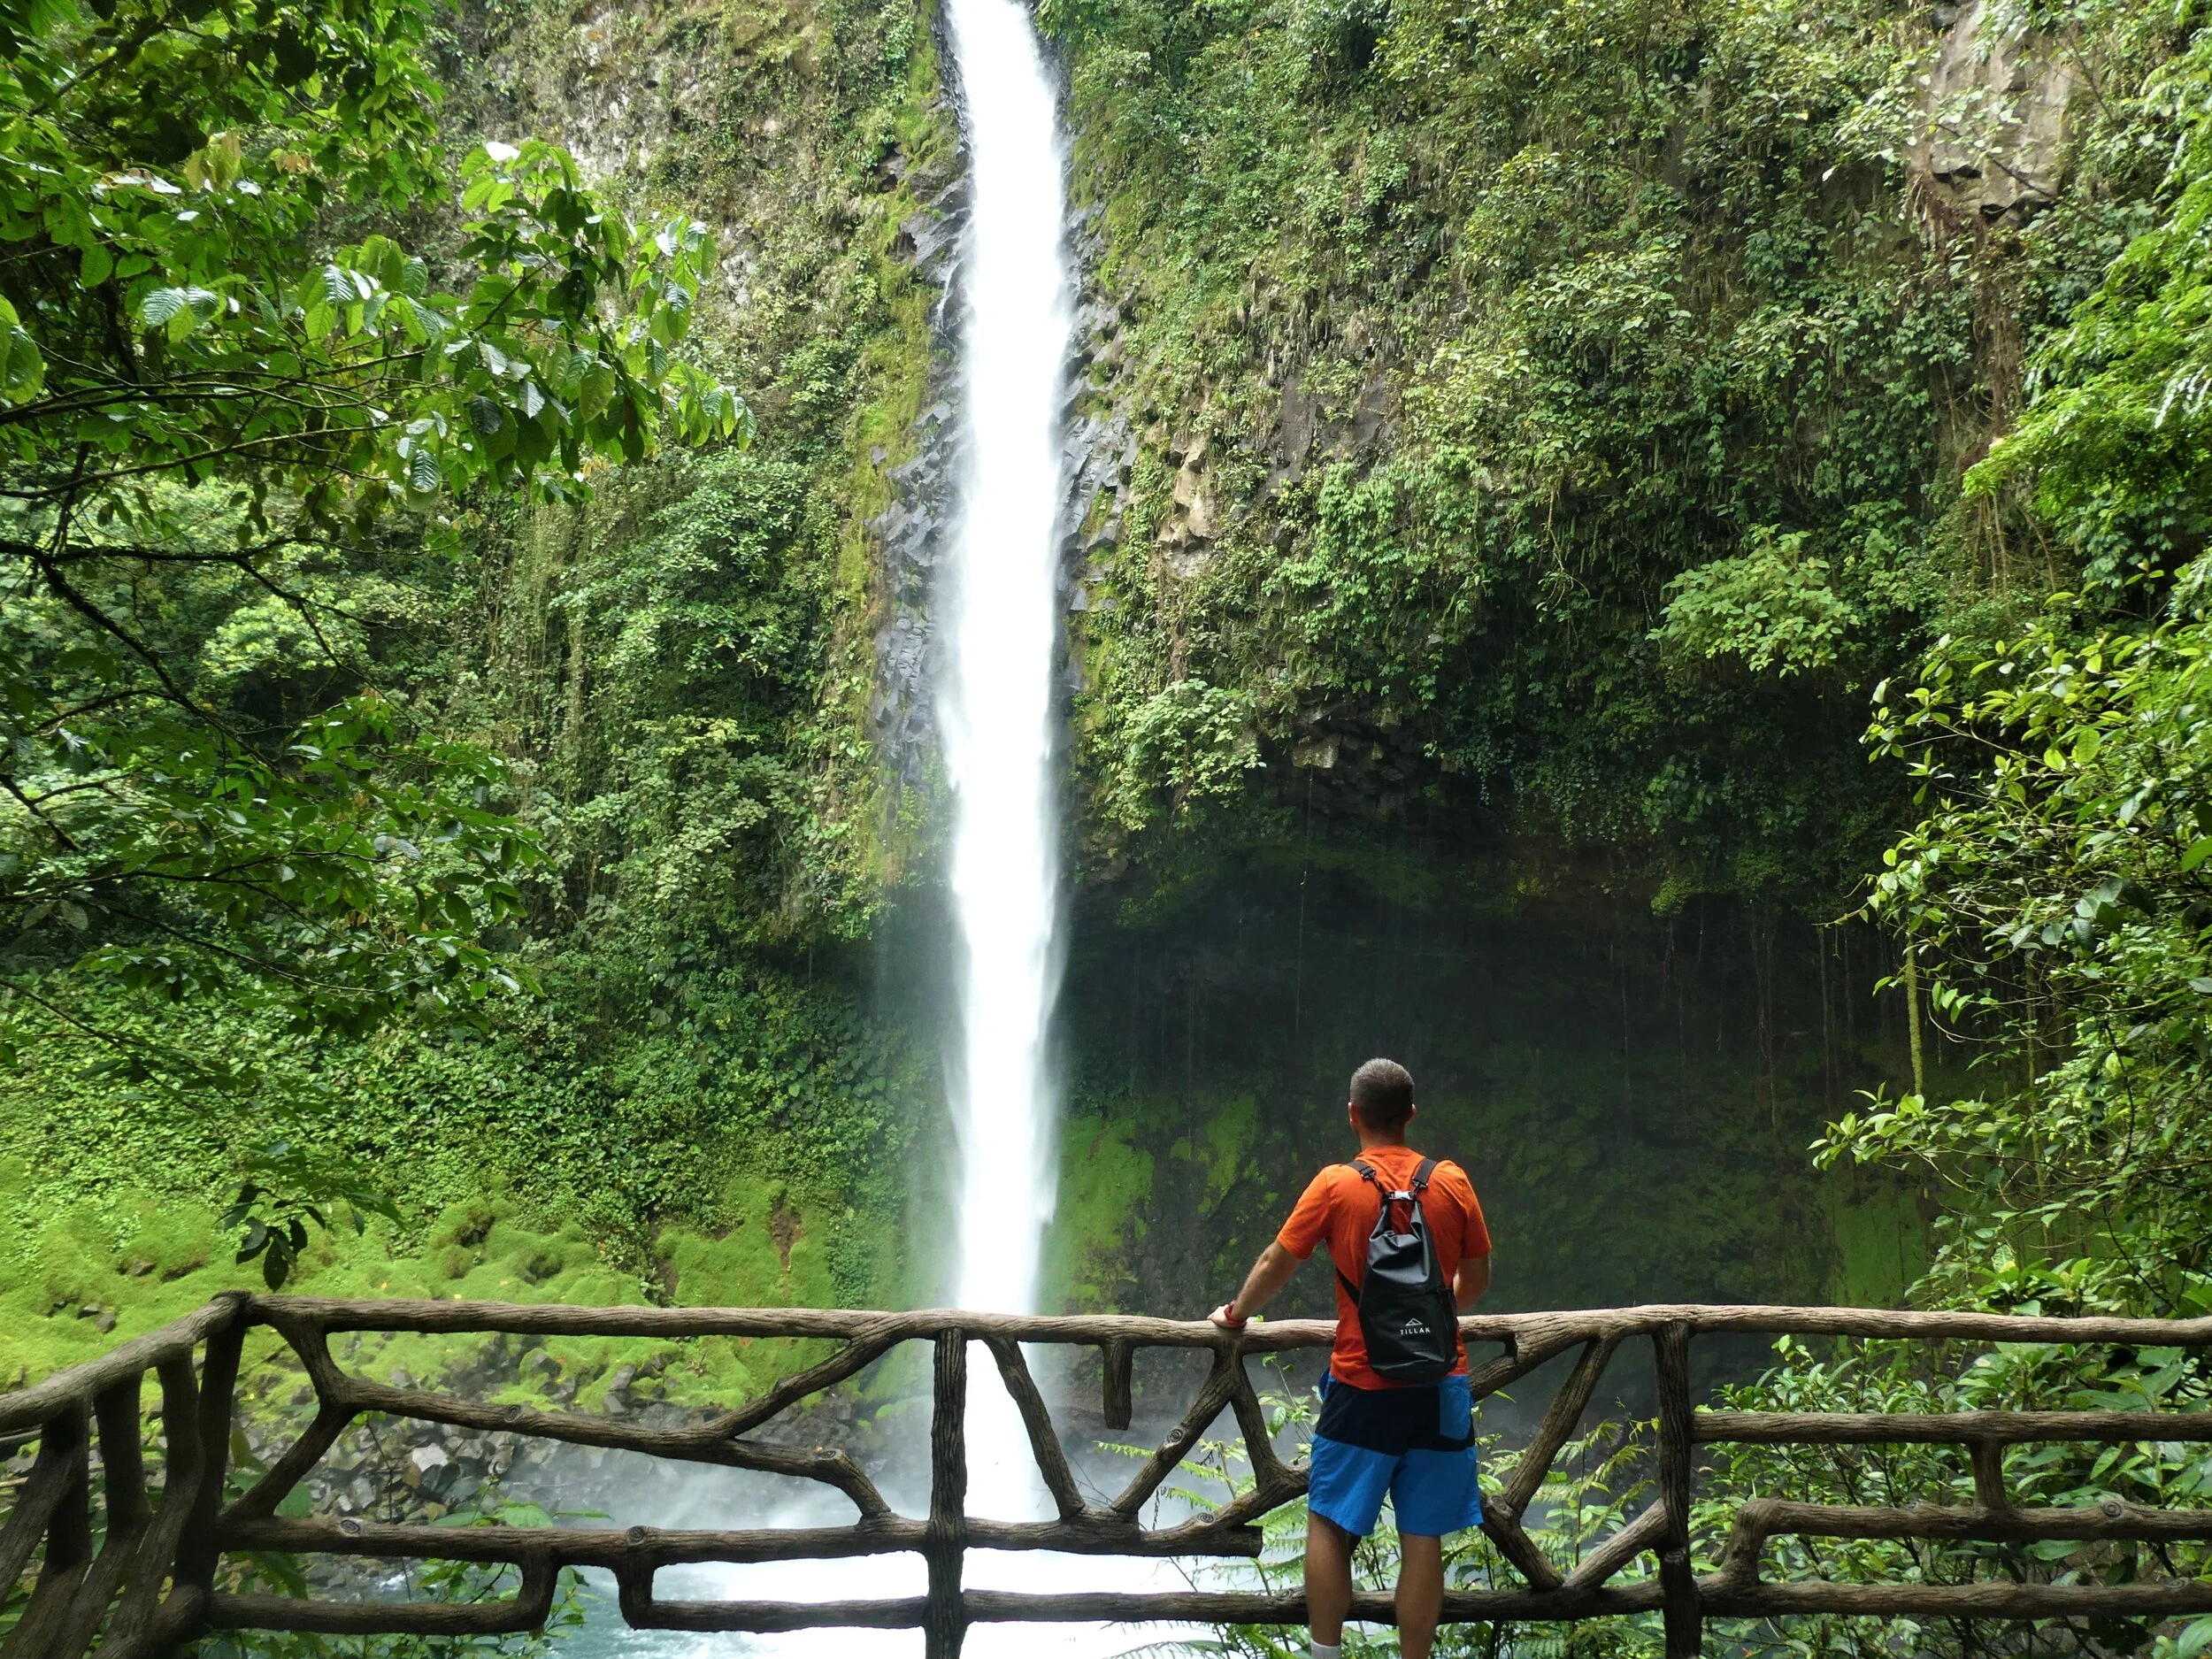
Visit Fortuna Falls. This is a staple in La Fortuna. It’s a beautiful waterfall located in a picturesque jungle setting. You can swim at its base if you’re willing to jump into the freezing cold water!

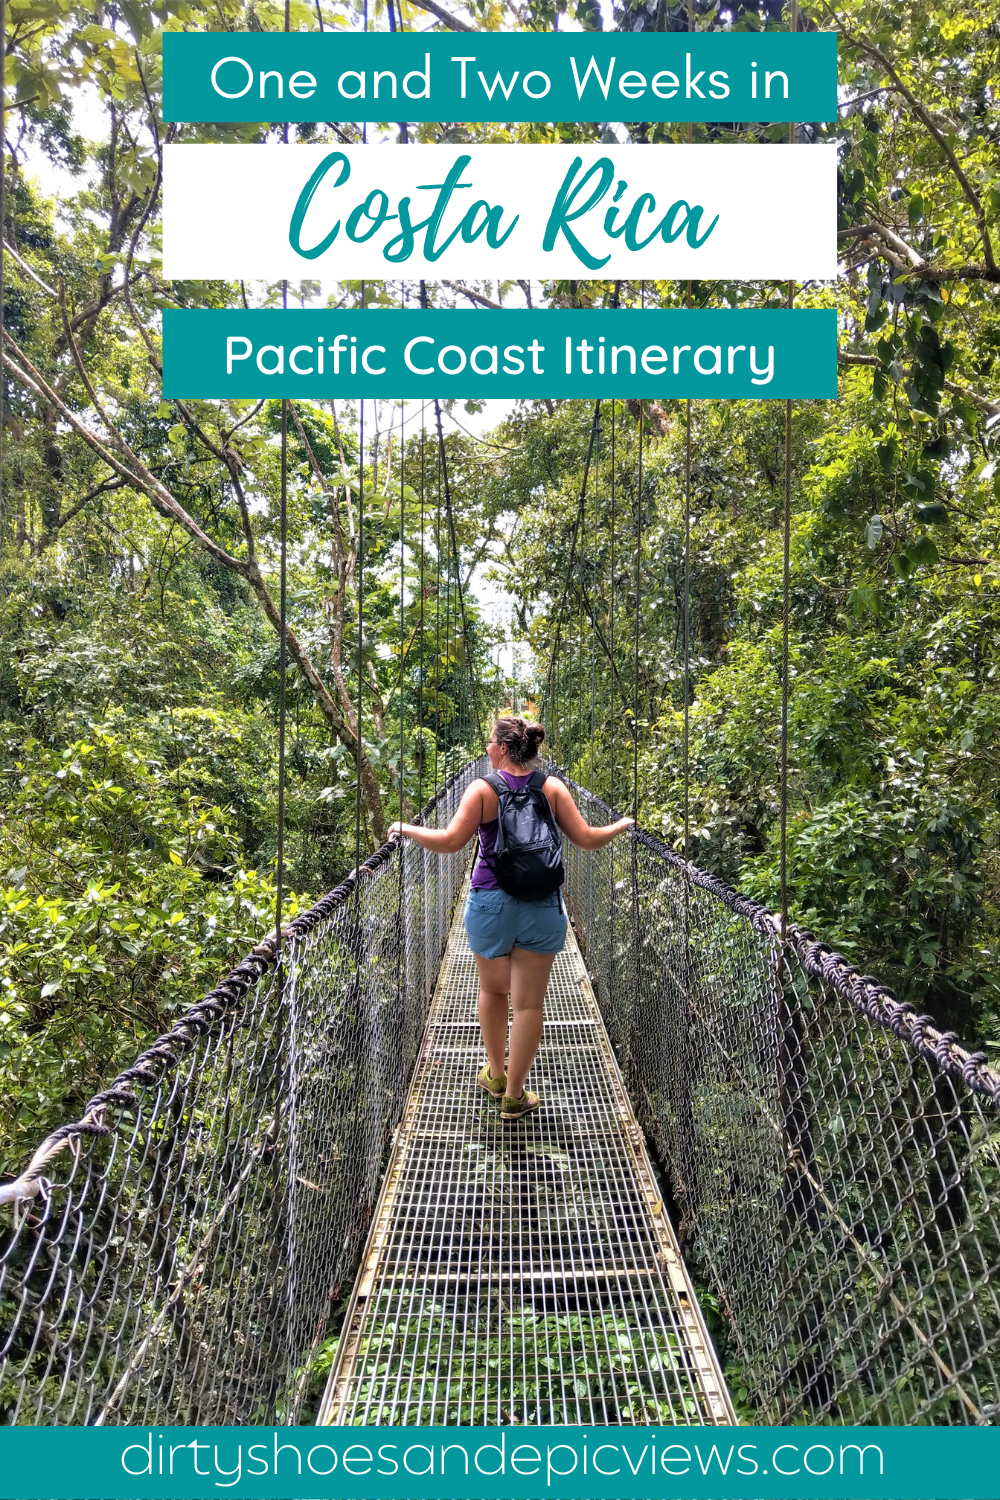
Walk across hanging bridges in the rainforest. Mistico Hanging Bridge Park will give you a unique experience to walk through the rainforest across a series of bridges, 6 of which are hanging suspension bridges, in search of wildlife. It also gives incredible views of Arenal.

Don’t forget to check out our La Fortuna guide for more information on all of these awesome activities and more!
Day 12-13: Monteverde Cloud Forest
Driving time/distance: 4 hours / 190 km
Where to stay: Santa Elena
Days at a glance: Visit the unique ecosystem of the Costa Rican cloud forest, with the opportunity to zipline and walk along hanging suspension bridges high above the forest floor.
The last stop on your Costa Rica itinerary will bring you to the well-known, and well-visited, Monteverde Cloud Forest. The region of Monteverde is comprised of the main tourist hub, Santa Elena, as well as a collection of cloud forest preserves…Monteverde, Santa Elena, and the Children’s Eternal Rainforest, as well as the Curi Cancha Reserve.
Unfortunately, we didn’t make it here during our time in Costa Rica. We left it as an option for our last day in Costa Rica, but we didn’t want it to feel rushed, and we were having such a good time in La Fortuna that we opted for one more day there instead. But, we’ll be back one day to visit Monteverde for sure!
But despite the fact that we didn’t visit here ourselves (yet!), we couldn’t leave this popular Costa Rica destination and opportunity to witness a unique and rare ecosystem off the itinerary! And if you go, let us know how it was!
To get from La Fortuna requires driving route 145 from the North. This road becomes gravel in many places and is a narrow and curvy mountainous drive. A 4x4 is recommended, and in rainy weather, needed.
While in the Monteverde area, you can:
Zipline at an adventure park. Did you know that Monteverde is the birthplace of the zipline? There are multiple adventure parks located with the cloud forests – Sky Adventures Park, Selvatura Park, and 100% Aventura to name a few. In addition to zipling, you can walk along their hanging bridges high above the forest floor.
Hike. Each of the three reserves have their own sets of trail weaving through the mossy trees. This site does an awesome site at explaining each of the three cloud forest reserves and what their trails are like.
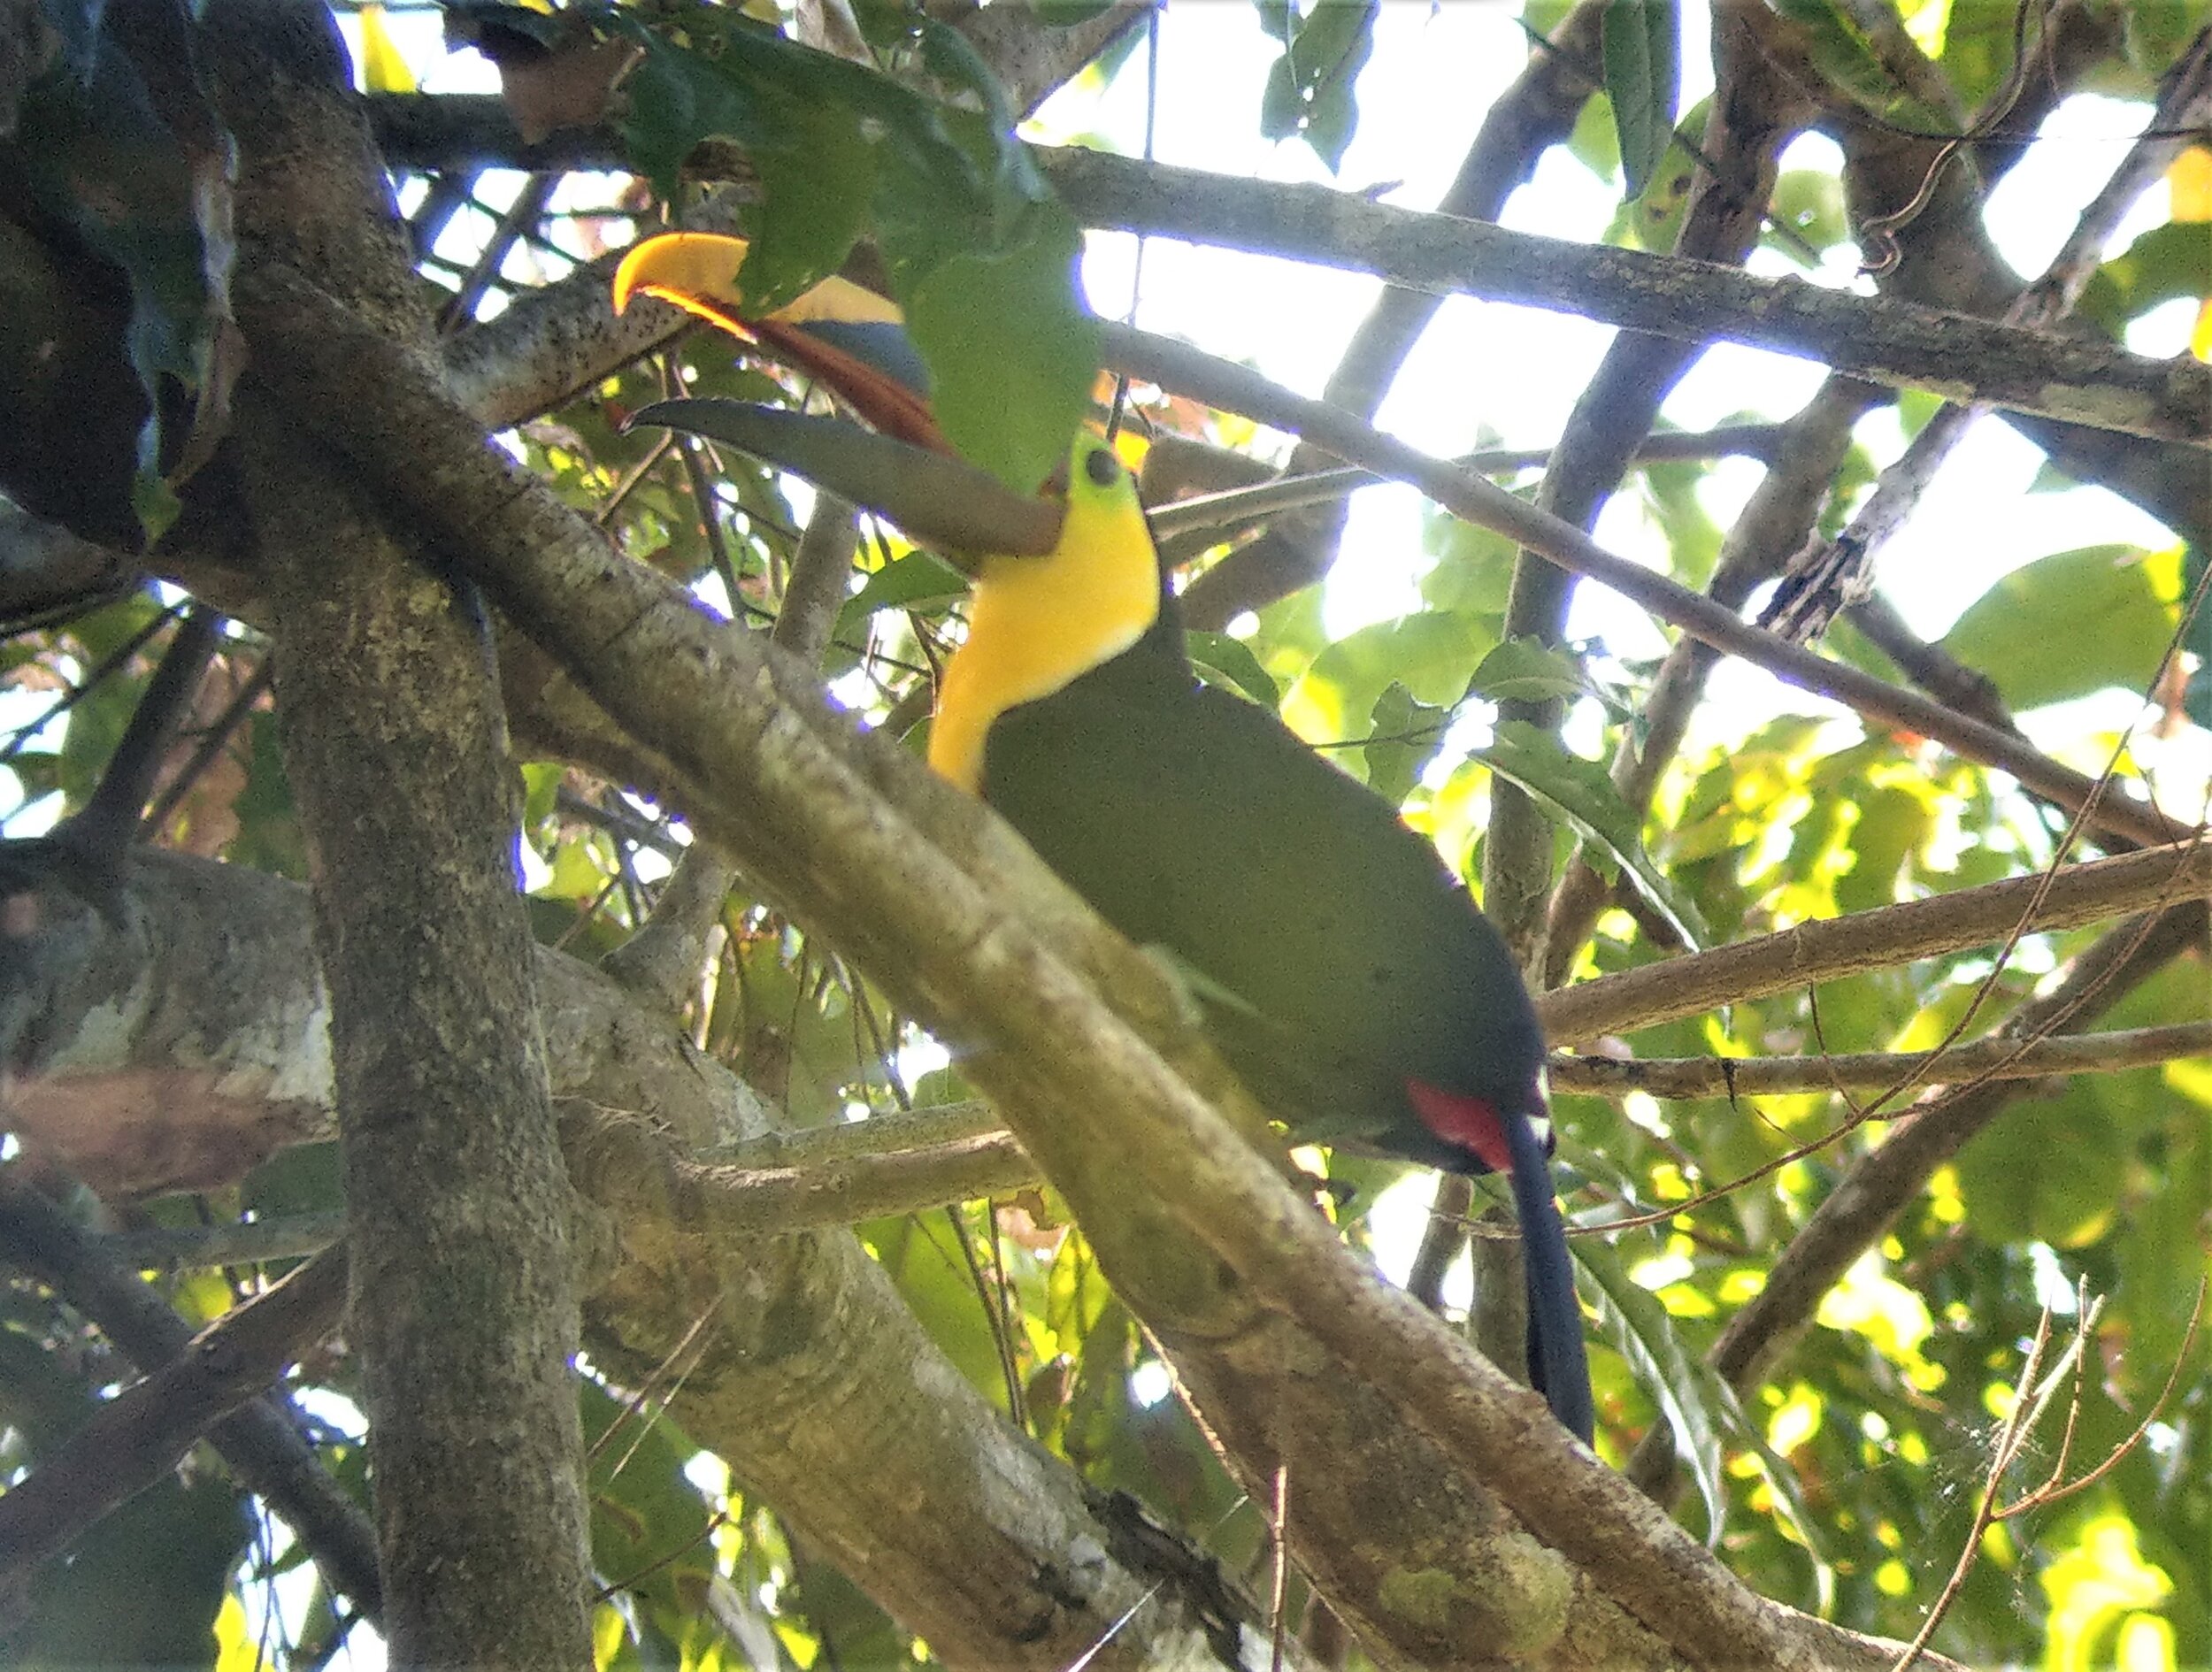
Search for wildlife. You can go on our own, or take guided tours during the day or night to spot things like sloths, birds, snakes, frogs, and creepy crawlers. For the birders out there, the Costa Rica cloud forest is also place in world to see the Resplendant Quetzal, a brightly colored exotic bird that would be so cool to see!
We recommend spending two days here to be able to hit a few of the cloud reserves and spend a half to full day at an adventure park ziplining and walking along the hanging bridges.
Day 14: Fly home
Driving time/distance: 2 hr 45 min / 150 km
Unfortunately, all good things must come to an end, and today is that day.
Today you’ll drive back to San Jose, taking the easier route 606 out of Monteverde. Drop off your car and get your shuttle back to the airport and relish in all the great memories you just made!
One Week Costa Rica Itinerary
If you only have one week in Costa Rica, not to worry…you can still experience some amazing parts of this country!
Below, we have an abbreviated version of our two week Costa Rica itinerary. You’ll still visit the highlights and have plenty of adventure.

Day 1: Arrive in Costa Rica
As on day 1 above, today is the day you arrive in Costa Rica! Survive through customs, grab your rental car, and make your way to La Fortuna!
Days 2-3: Adventure in La Fortuna
Spend one and a half days in the adventure capital of Costa Rica. Zipline, raft, hike, do night walks, spot sloths, and visit amazing waterfalls. See the two week itinerary for all our suggestions.
In the afternoon of the second day, start making your way to Quepos.
Days 4: Manuel Antonio National Park
Arrive bright and early to Manuel Antonio National Park to snag your tickets and get a head start hiking the trails and beach hopping.
When you’re done in the park, stop at Playa Escondido for a swim and gorgeous sunset… a perfect way to end the day.
Days 5-6 Explore Uvita
On the morning of day 5, head to Uvita. On the way, you’ll drive through Dominical, which is a perfect chance to make a visit to Nauyaca Falls!
In the afternoon, slide down Uvita Falls, or walk along Playa Uvita, and if the timing of the tide is right, walk on the Whale’s Tail.
On Day 6, you can choose to relax on more of Marino Ballena’s pristine beaches, or take a tour to ocean kayak or snorkel out at Cano Island.
You can even take a day trip out to Corcovado from here! From Uvita, day tours leave to San Pedrillo Ranger Station only, and are a little bit more expensive than if you left from Drake Bay, but it’s a perfect option to experience the jungle with only one week in Costa Rica.
Day 7: Fly out
Head to San Jose to drop off your rental and fly home.
Best Time to Visit Costa Rica
Costa Rica has two primary seasons…wet and dry. Most people will tell you that the best time to visit Costa Rica is the dry season, from December to April. Here, the weather is the best, with the least chance of rain. It’s also better to come to Costa Rica in the dry season if you’re planning on driving any 4x4 roads. In the rainy season, these roads can get rough, and even washed out with landslides on those curvy mountain roads. The dry season is also a good time for activities like snorkeling. The water is clearest during this time of year, because during the rainy season, sediments from rivers get washed into the ocean, causing murky conditions. December to February is also when the northern humpback whales migrate off the Pacific coast, so it’s a great time for whale watching.
The wet season should not be totally discounted, though. The biggest pro for visiting Costa Rica in the rainy months is that you’ll save money. Because it’s a less busy tourist time, prices for things like accommodations and guided trips go down. And just because it’s the rainy season doesn’t mean the whole trip will be a bust. It might rain every day, but usually the rain is in afternoon, with clear skies in the morning for adventuring. White water rafting is good in this season, the rainforest in lush and full (which may mean more active wildlife!), the southern humpbacks migrate off the Pacific coast between July and October, and, depending on where you are, you might be able to witness sea turtle nesting on one of Costa Rica’s beaches.
How to Get Around in Costa Rica
You’ll be hitting quite a few different places in Costa Rica during these one and two week itineraries, so you’re going to need to find a way to get around! Luckily, Costa Rica has several options.
Public buses. Costa Rica’s public buses are an extremely cheap way to get around, but they come with a lot of cons. There aren’t a lot of direct routes, they can become very crowded and uncomfortable, they may not be dependable or on time, and they increase your transportation by a lot…sometimes doubling the time it would take to get somewhere otherwise. And they don’t go to off the beaten path places. For example, you won’t be able to get to Bajos del Toro with a public bus. You’d end up having to get a very expensive taxi or shuttle.
Private shuttles. This is a good option if you’re not traveling on a budget and don’t want to deal with the hassles of the public bus or with driving yourself. But with as many places as you’ll be going on this Costa Rica itinerary, the costs will add up significantly.
Renting a car. We think the best way to get around in Costa Rica is to rent your own car. It’s actually relatively cheap (we paid less than $30 a day for a sedan – and splitting between multiple people makes it even cheaper!). Plus, it gives you much more flexibility to go where you want on your own schedule. But, I’ll be honest, driving in Costa Rica isn’t quite a walk in the park. It can get a little intense and stressful. Let’s get more into that now…
Driving in Costa Rica
When we arrived in Costa Rica and picked up our rental, we were ready to hit the open road! But it wasn’t quite that simple. In fact, it was pretty stressful! We weren’t quite prepared for driving in Costa Rica. Let’s just say that the driving style wasn’t quite what we’re used to! We wanted to share our experience so you can be better prepared than we were.
Here are some things to be aware of when driving in Costa Rica:
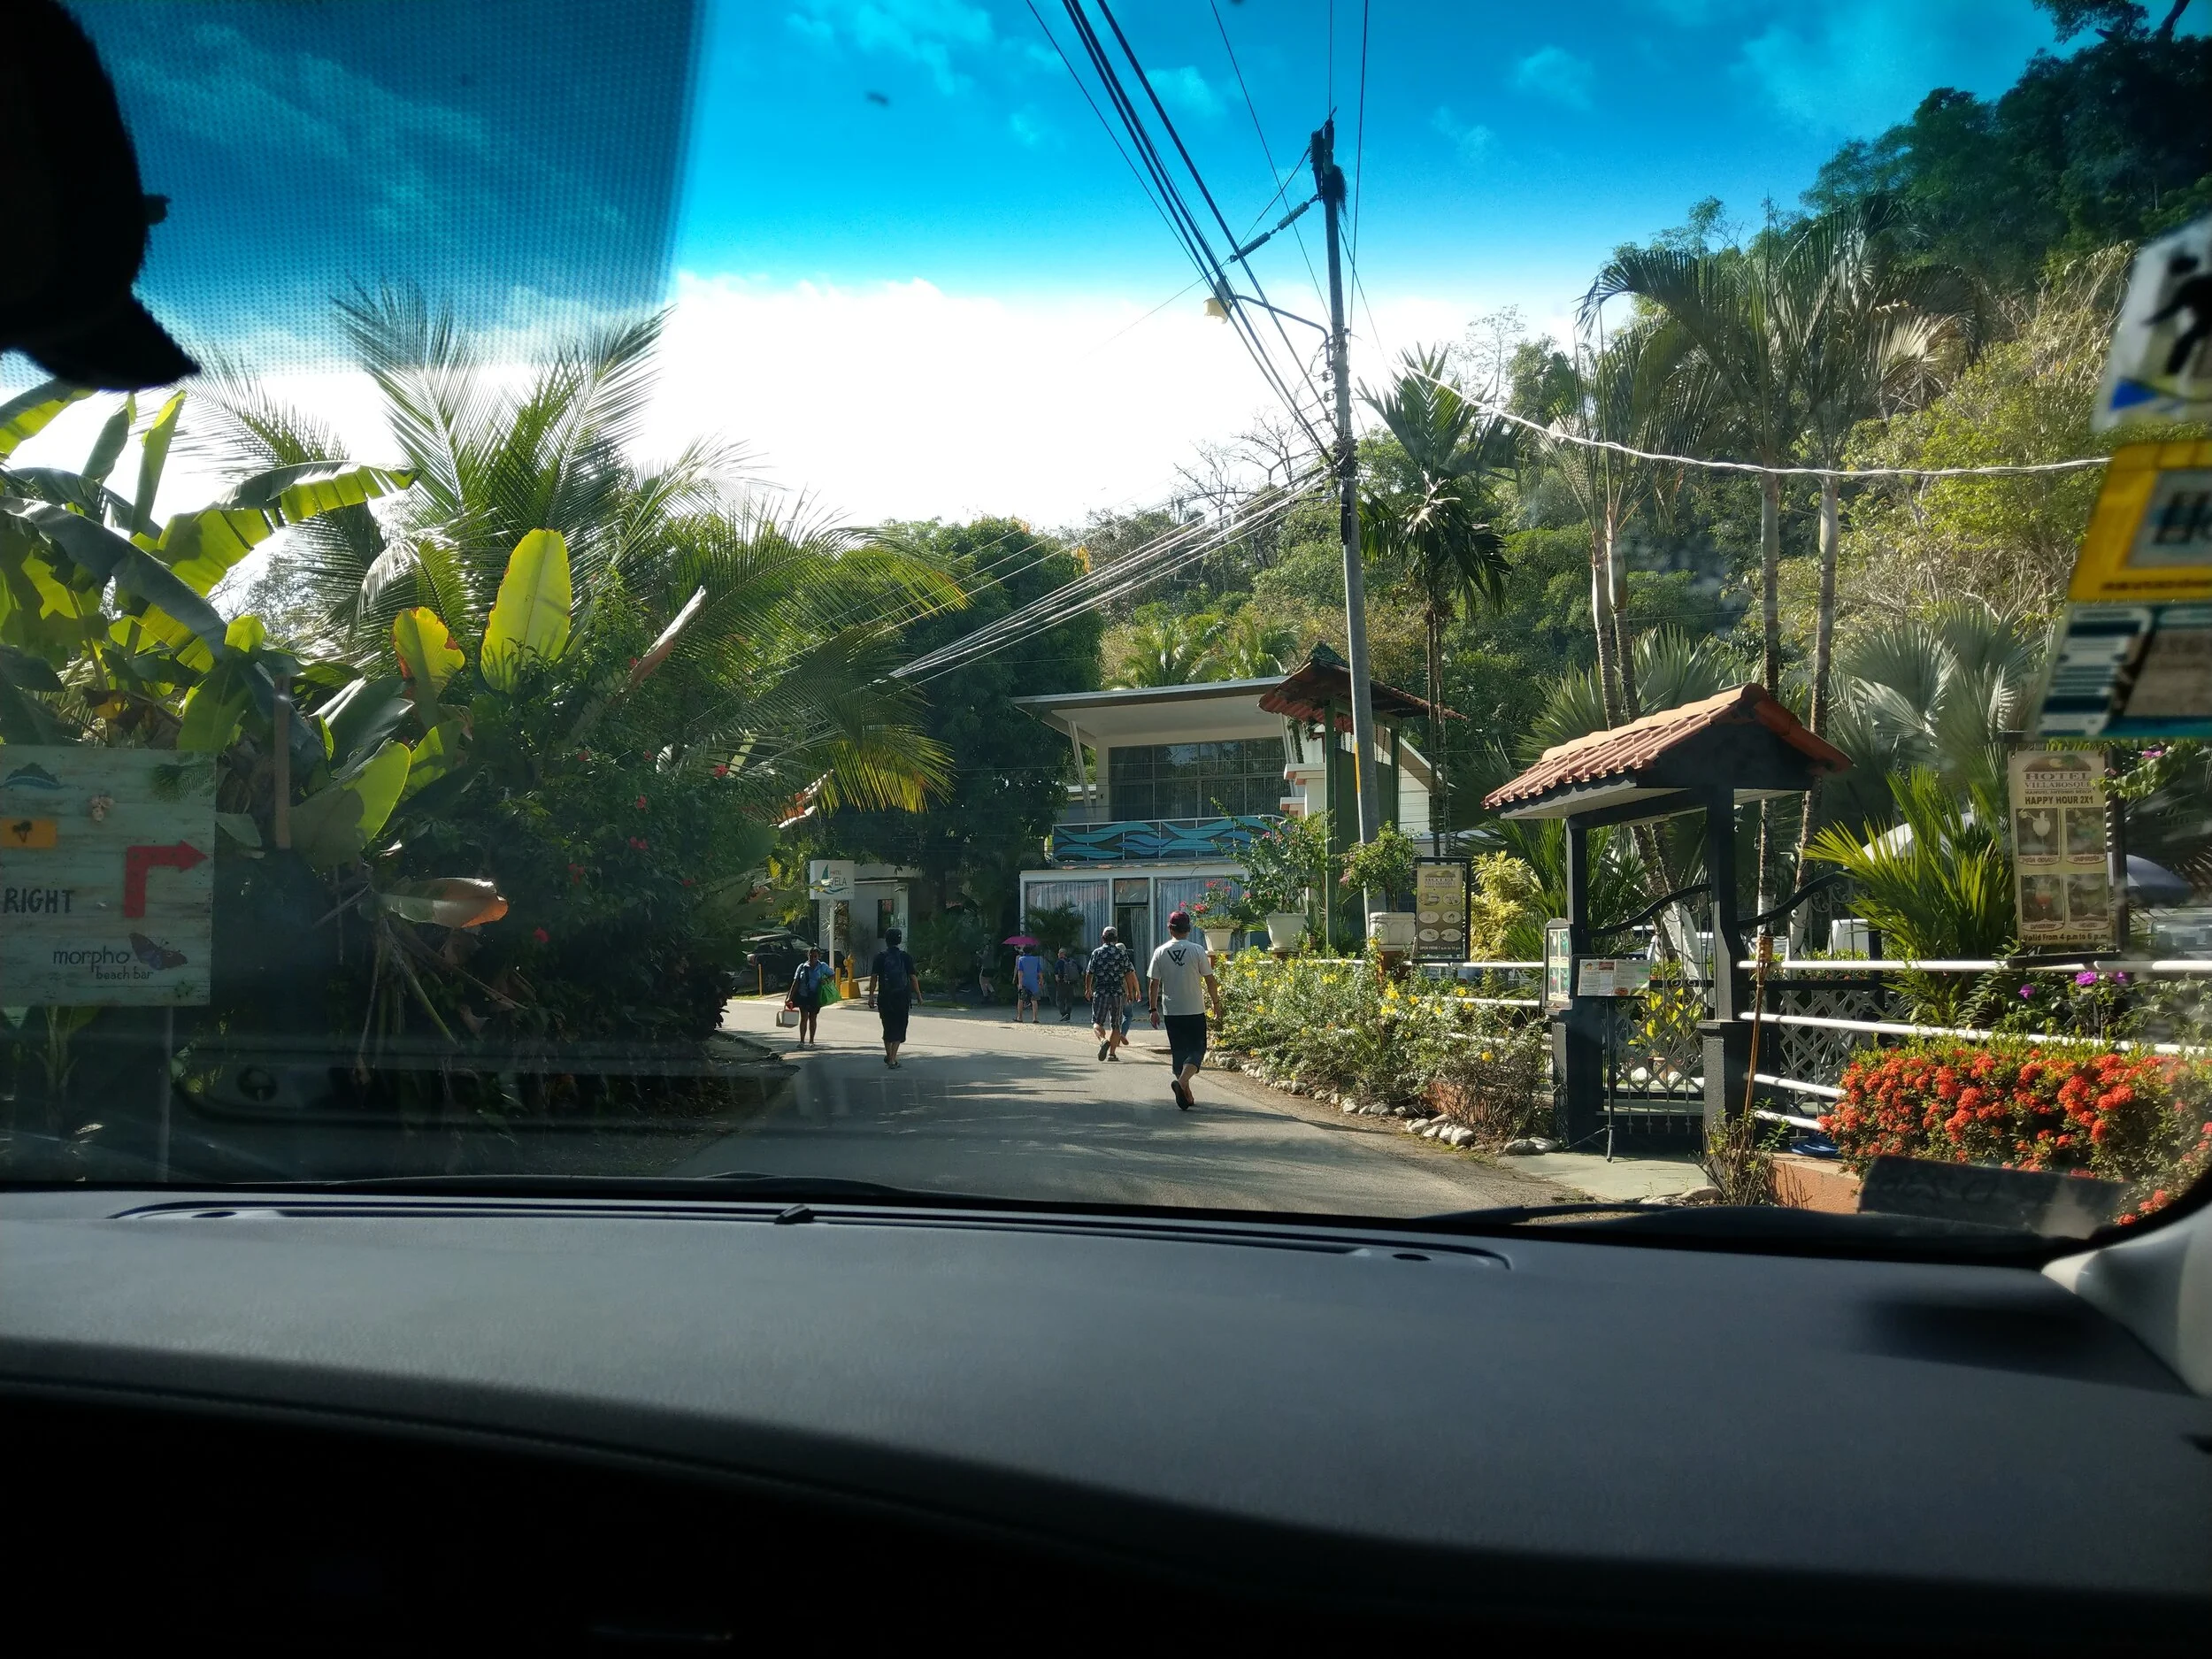
Intersections can get a little crazy. There are usually no traffic lights outside of the city and it’s kind of like a free for all. There really doesn’t seem to be any right of way. When people see an opportunity to go, they go. Not a lot of yielding or signaling going on, so really pay attention to what other drivers are doing and just expect people are going to pull out in front of you.
Keep your eye out for motorcycles. They’re all over, and they tend to weave in and out of traffic, between lanes, along the sides of the roads…
Always be on the lookout for pedestrians, and animals, crossing the road. They might not yield to you either.
Passing is very common in Costa Rica. Very common. If someone is tailgating you, don’t let it get to you…they’ll pass you when they find the opportunity. A lot of times, they take chances, too, passing in dangerous spots around turns or uphill, and often passing multiple cars at once. If you’re looking to pass, make sure no one has pulled out to pass you! It’s not uncommon from someone three cars behind to pass you.
Chances are, you’ll be stuck behind a slow tractor trailer several times. A lot of times, they will use their left blinker to signal to you that it’s safe for you to pass. Again, still make sure no one is already in the left lane passing, and only pass when you feel comfortable.
Try as hard as you can to avoid rush hour in San Jose. It’s C.R.A.Z.Y. After we got our rental car, we headed to the city to get groceries. Well, we quickly nixed that plan after we survived the most stressful and insane traffic circle of our lives. People were merging in from all different directions and passing us to weasel their way in…it was chaos. Even outside this merge, there were cars everywhere, motorcycles weaving in and out of everywhere, people walking out into traffic from all directions… I wish I was exaggerating when I say this, but we were really surprised we made it out of the city without getting into an accident or hitting anything.
Basically, when driving in Costa Rica, you really gotta be on your A game. You have to always be alert, anticipate other drivers’ action, be prepared to step on the breaks, be a little bit of an aggressive driver, and have patience.
A chaotic intersection in Quepos

Some other tips for driving in Costa Rica:
A lot of people think a 4x4 is necessary for Costa Rica, but it’s not. As Costa Rica develops its tourist infrastructure, there are a lot more paved roads. We got by with a regular 2WD car. There were some places in Uvita that had dirt roads, and going up to Bajos del Toro was a little interesting, but it was all doable in our car just taking it slow and reading the road. Always check with your accommodations the type of roads they’re located on. In Uvita, for example, some places are located down by the beach and are accessible with 2WD, but a lot of places are located further up into the mountains and absolutely require a 4x4. For this two week Costa Rica itinerary, the only place you would really need a 4x4 is to travel up to Monteverde from the North side. We didn’t make that drive, which is why we were fine with a 2WD car.
Download offline maps of Costa Rica before you go.
Don’t leave any valuables in the car. If you have to, leave them in the trunk out of sight.
Keep small cash (either colones or USD) on you for tolls driving in and out of San Jose…these are small and never more than $1.30, and for parking…you’ll often have to pay parking attendants a small tip for watching your car (usually 1,000-2,000 colones).
There is no self-service gas stations in Costa Rica.
If you’re driving in the rainy season, try to assess road conditions before attempting any mountainous 4x4 routes. These can becomes super dangerous and get washed out.
What to Pack for Costa Rica
Hiking sandals. We think this is the best kind of footwear to bring if you plan on adventuring in Costa Rica. They are sturdy enough to hike over rugged terrain in, but they can get wet. They’re way better than having deal with wet shoes and socks, or packing multiple types of shoes on an excursion. Examples of places they are most helpful in are for the Blue Falls Tour, where you’ll be hiking on rugged terrain but also crossing rivers, the boat rides to Drake Bay and Corocovado, where you’ll have wet landings and have to wade through the ocean a bit to get to land, and for an excursion like white water rafting.
Tons of sunscreen and a hat. You’ll want lots of sunscreen. In fact, it’s super hard to keep up with it. In Costa Rica’s dry season, it’s usually between 31-34 degrees Celsius with 60%+ humidity… you’ll wake up sweating, and basically stay that way all day, so you’ll have to keep reapplying. And the sun is super intense… it will get to you after a few days of playing on the beach and hiking. Make sure you bring a hat and sunglasses.
All your toiletries and some snacks. Making sure to bring everything you need for the whole time you’re there is key, because buying this stuff in Costa Rica is expensive.
Rain gear. Always expect rain, even in the dry season. You’ll be heading to the rainforests after all!
Bring mostly warm weather clothes, but also have a pair or two of long sleeves for the colder cloud forest climate.
Have a good pair of hiking pants for the Blue Falls Tour and Corcovado.
Have closed toed shoes for Corcovado and Mistico Hanging Bridges.
An early bird attitude. If you’re here for adventure, Costa Rica will require a lot of early wake up calls.
Some Spanish ability. It’s great to be able to speak Spanish in Costa Rica, because it will help you to get by in some places. It will help you read things like road signs, grocery labels, and the gas pumps. In some off the beaten path places, the tour guides may not know much English. Our tour guide for the Blue Falls spoke no English at all, so even my limited Spanish fluency was super helpful.
There you have it! We hope this helps you plan out your one or two weeks in Costa Rica! Let us know if you have any questions, we are happy to help!